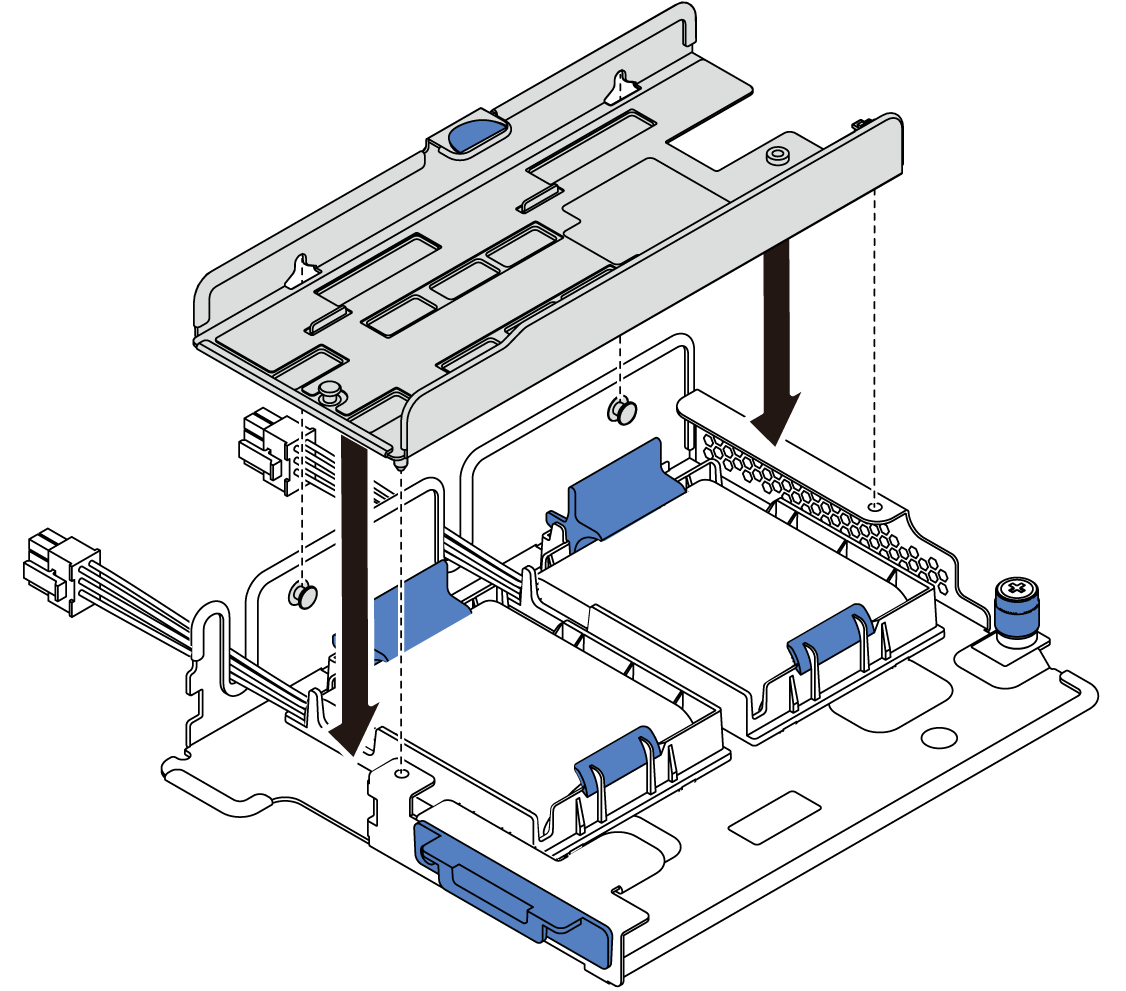
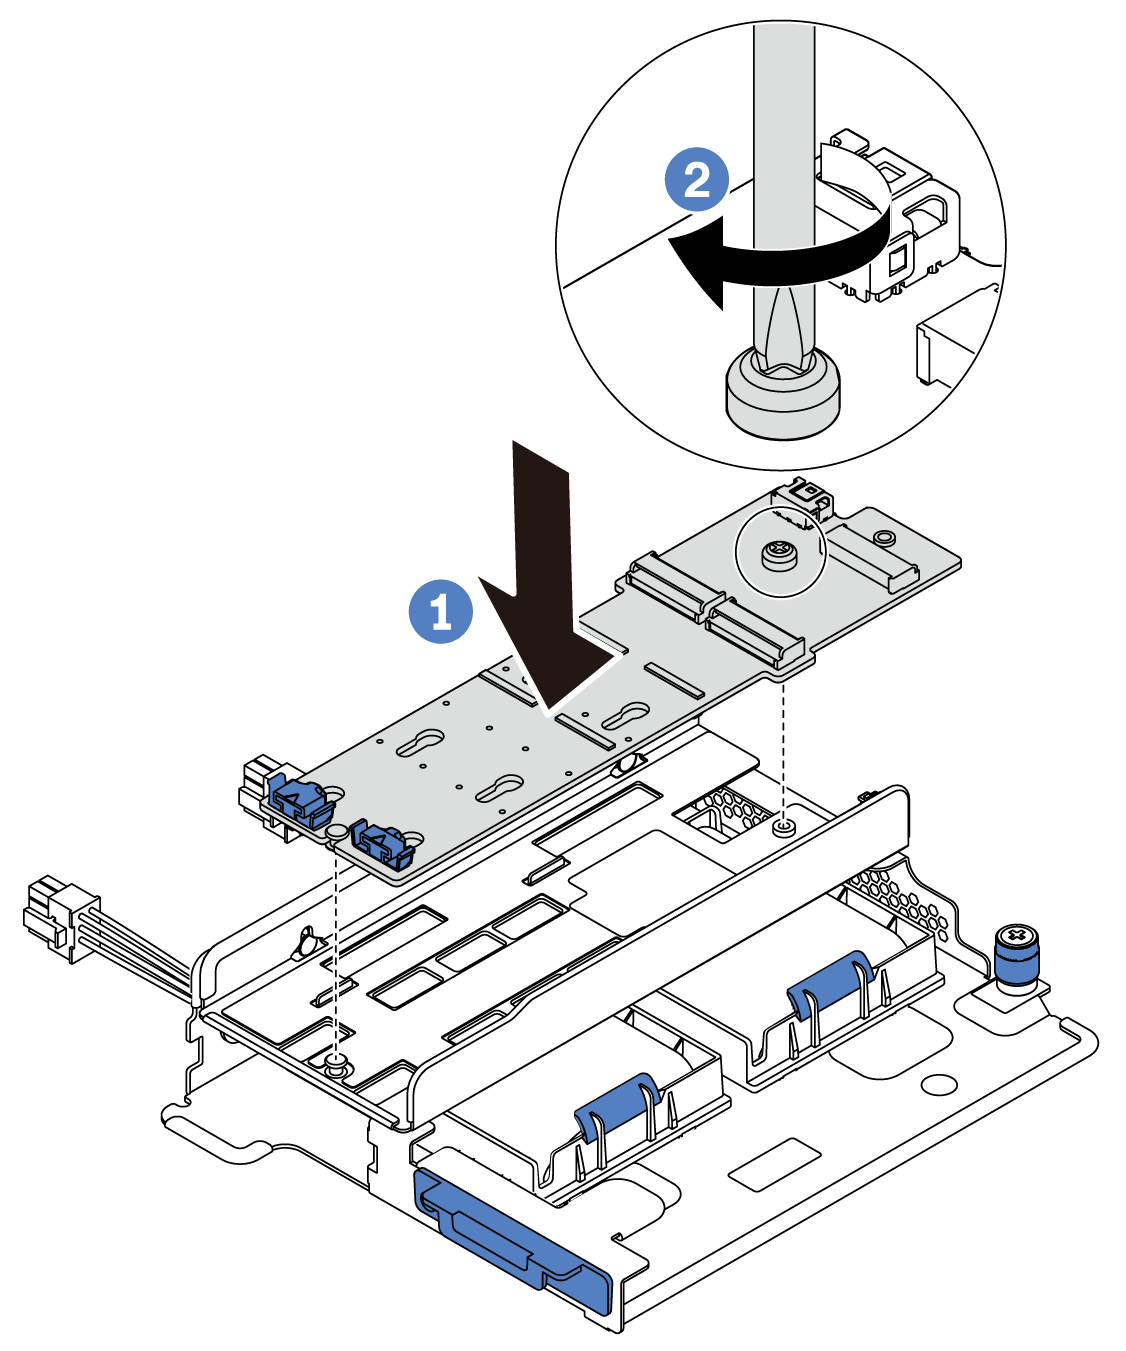
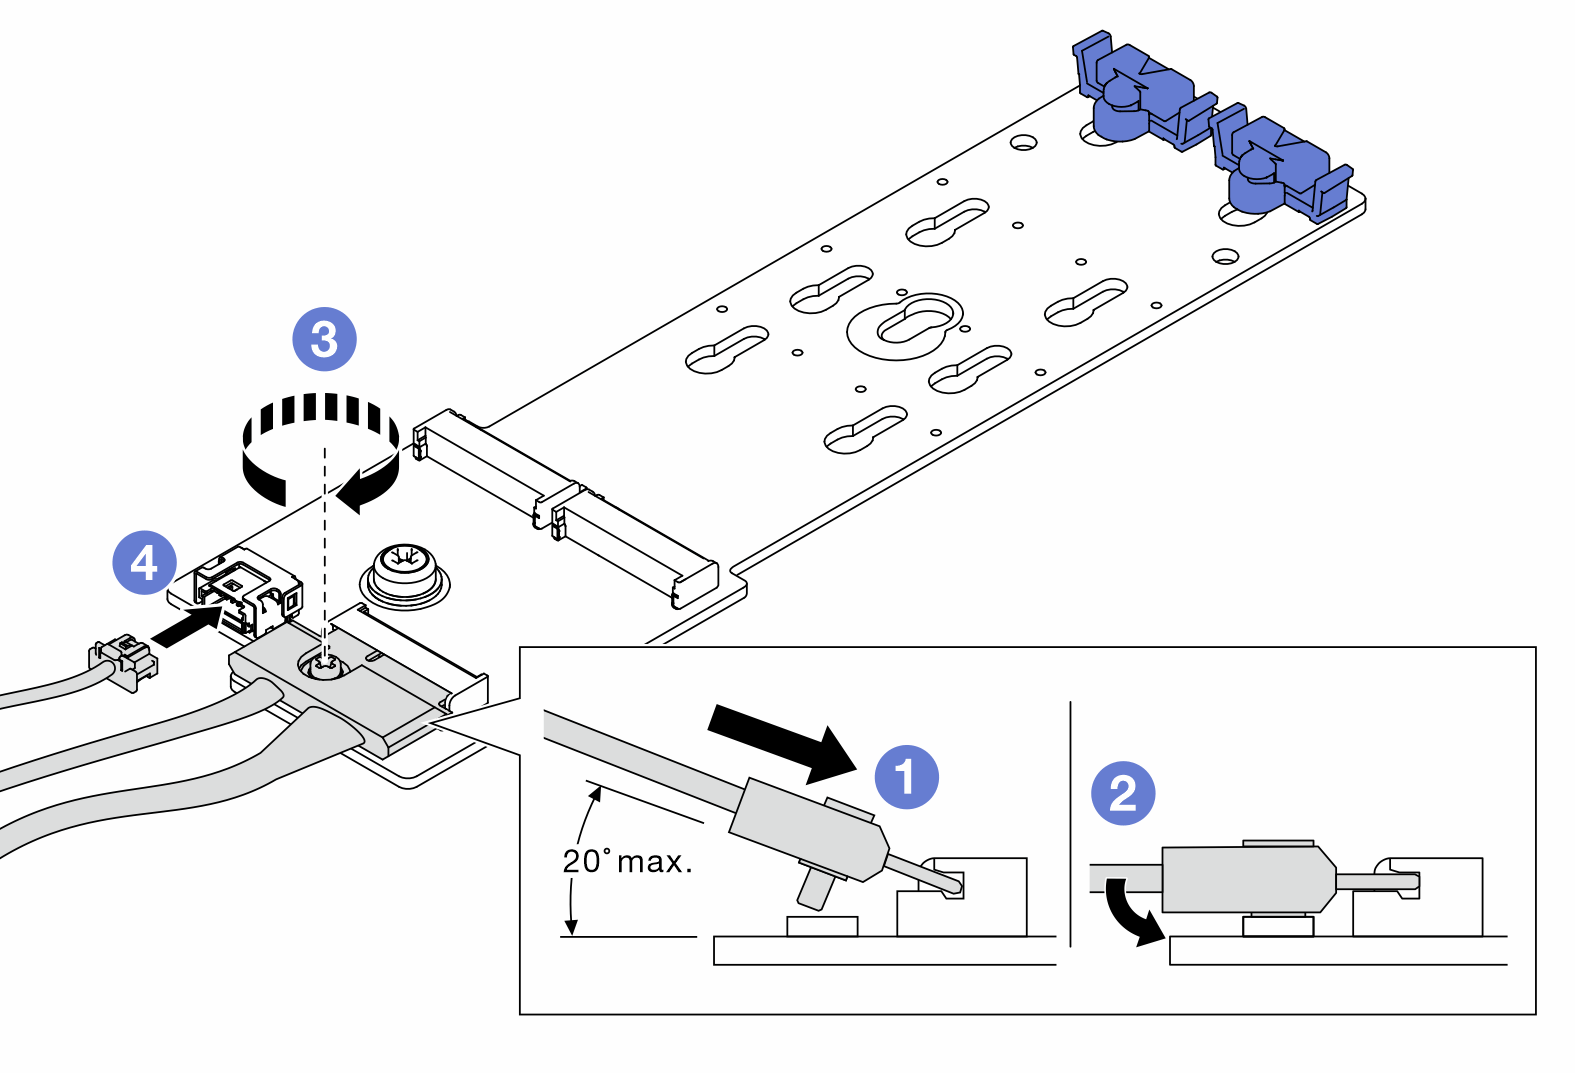
Install the M.2 adapter and M.2 drive
Use this information to install the M.2 adapter and M.2 drive.
Touch the static-protective package that contains the new M.2 adapter and M.2 drive to any unpainted surface on the outside of the server. Then, take the new M.2 adapter and M.2 drive out of the package and place them on a static-protective surface.
Adjust the retainer on the M.2 adapter to accommodate the particular size of the M.2 drive you wish to install. See Adjust the retainer on the M.2 adapter.
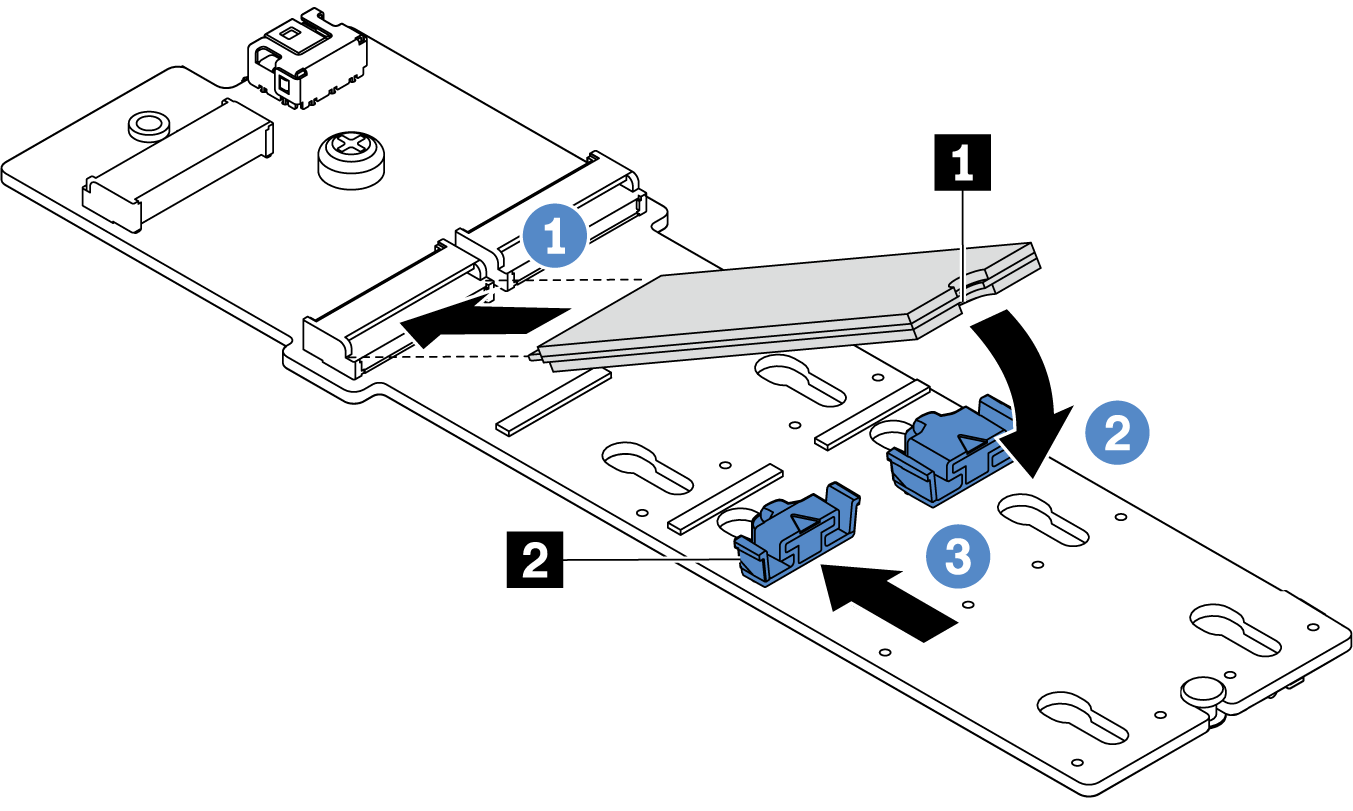
- Locate the M.2 drive slot on the M.2 adapter.Note
For some M.2 adapters that support two identical M.2 drives, install the M.2 drive in slot 0 first.
Figure 1. M.2 drive slot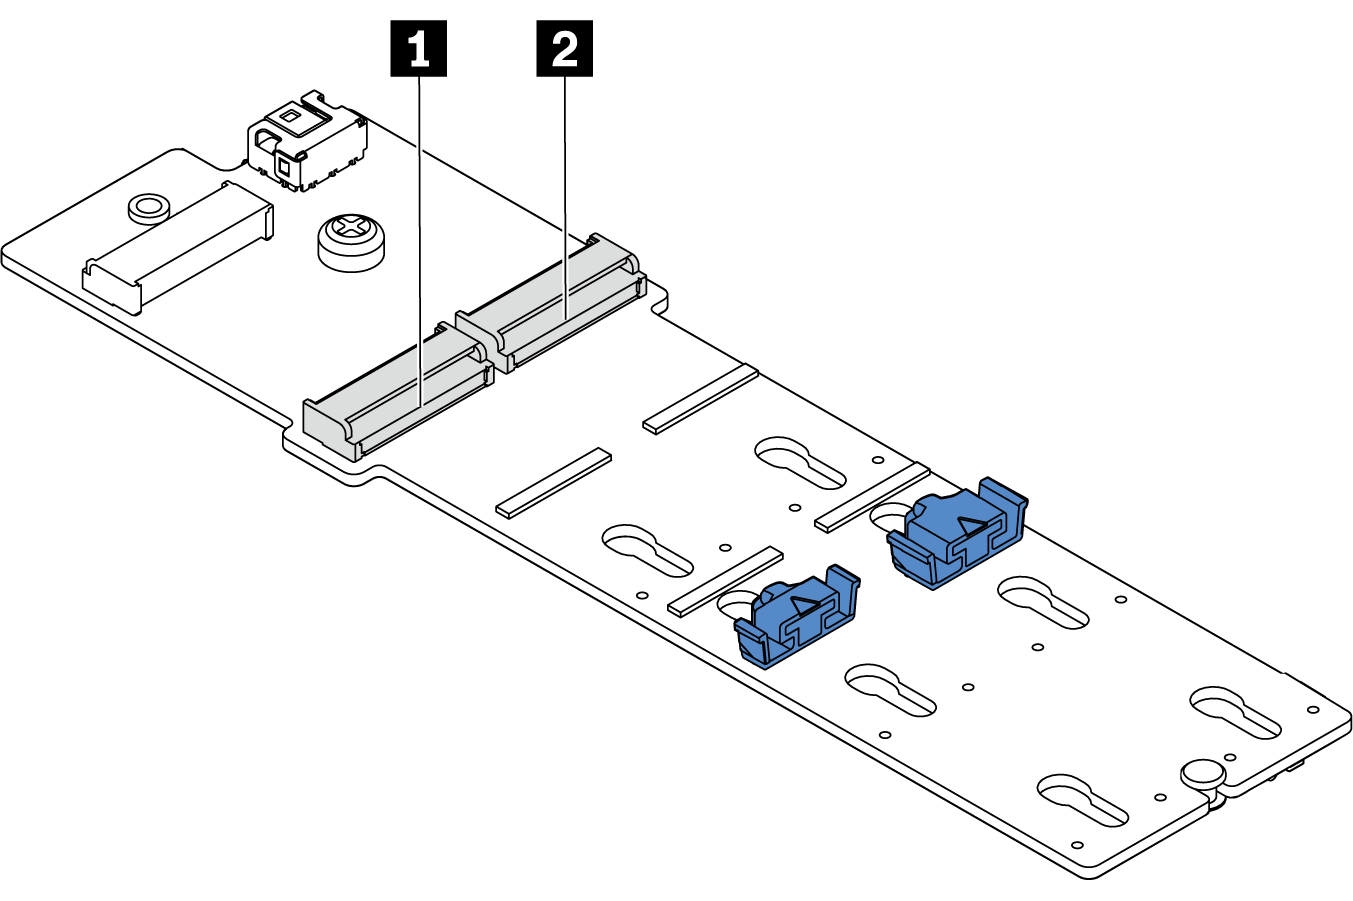
- 1 Slot 0
- 2 Slot 1
The M.2 adapter module is shipped with a loosen screw, but the screw is not necessarily used for the installation.
The M.2 adapter you want to install might be different from the following illustrations, but the installation method is the same.
Watch the procedure. A video of the installation and removal process is available at YouTube.
Complete the parts replacement. See Complete the parts replacement.
- Use the Lenovo XClarity Provisioning Manager to configure the RAID. For more information, see: Lenovo XClarity Provisioning Manager portal pageImportant
Lenovo XClarity Provisioning Manager (LXPM) supported version varies by product. All versions of Lenovo XClarity Provisioning Manager are referred to as Lenovo XClarity Provisioning Manager and LXPM in this document, unless specified otherwise. To see the LXPM version supported by your server, go to Lenovo XClarity Provisioning Manager portal page.
Demo video


