Install the system board

Use this information to install the system board.

About this task

S017
moving parts
CAUTION
Hazardous moving fan blades nearby. Keep fingers and other body parts away.
S012
hot surface
CAUTION
Hot surface nearby.
Attention
  • Read Installation Guidelines to ensure that you work safely.

  • Power off the server and disconnect all power cords for this task.

  • Prevent exposure to static electricity, which might lead to system halt and loss of data, by keeping static-sensitive components in their static-protective packages until installation, and handling these devices with an electrostatic-discharge wrist strap or other grounding system.

Procedure

  1. Touch the static-protective package that contains the new system board to any unpainted surface on the outside of the server. Then, take the new system board out of the package and place it on a static-protective surface.
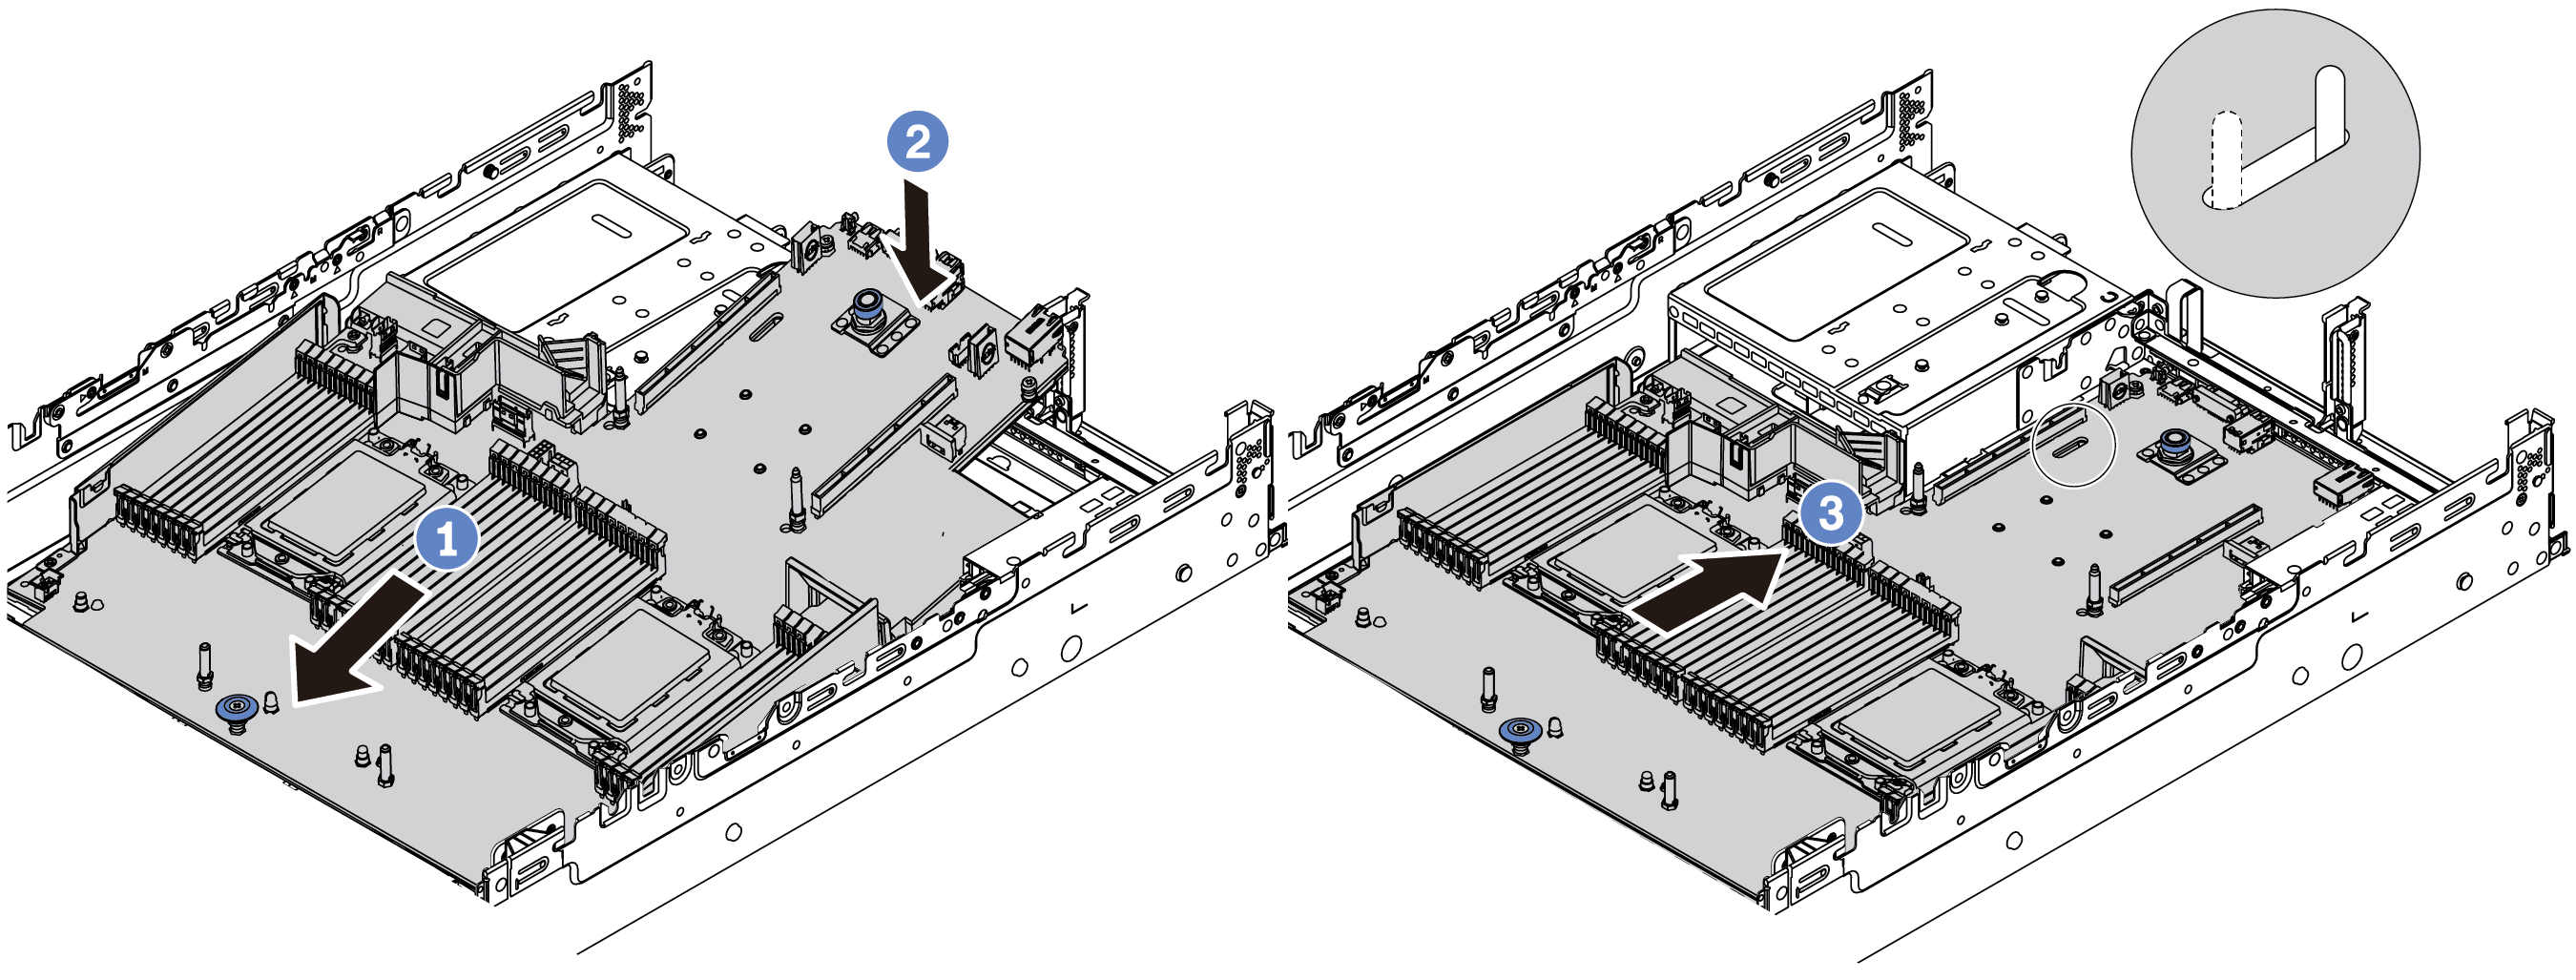
  2. Install the new system board to the server.
    Note
    The system board might look slightly different from your system board, but the installation procedure is the same.
    Figure 1. System board installation
    System board installation

    1. Insert the front end of the system board towards the front of the chassis until it stops.
    2. Lower the other end down into the chassis.
    3. Slide the system board towards the rear of the chassis until it clicks into place. Ensure that rear connectors on the new system board are inserted into the corresponding holes in the rear panel.
  3. A new system board comes with half-height cable holders by default. If the old system board is installed with full-height cable holders, remove them from the old system board and install them to the new system board. See Cable wall brackets replacement.

After you finish

  1. Properly route and secure the cables in the server. See Internal cable routing.

  2. Install the air baffle or a middle drive cage if you have removed it. See Install the air baffle or Install the middle drive cage.

  3. Install the top cover. See Install the top cover.

  4. Push the power supplies into the bays until they click into place.

  5. Connect power cords to the server and turn on the server.

  6. Update the server with the latest RAID firmware. See Firmware updates.

  7. Update the machine type and serial number of the system board. See Update the machine type and serial number.

  8. Enable TPM. See Enable TPM.

  9. Optionally, enable Secure Boot. See Enable UEFI Secure Boot.

Demo video
Watch the procedure on YouTube