Install a GPU adapter
Use this information to install a GPU adapter.
The server is equipped with a GPU adapter.
The UEFI firmware version is AFE128B or later.
About this task
Read Installation Guidelines to ensure that you work safely.
Power off the server and disconnect all power cords for this task.
Prevent exposure to static electricity, which might lead to system halt and loss of data, by keeping static-sensitive components in their static-protective packages until installation, and handling these devices with an electrostatic-discharge wrist strap or other grounding system.
GPU adapters are supported on some server models with thermal requirements. See Thermal rules to ensure that the server is under permitted ambient temperature and the correct air baffle, heat sink, and system fans are used. If needed, replace your heat sink or system fan first.
| Air baffle | Supported GPU adapter |
Figure 1. Standard air baffle 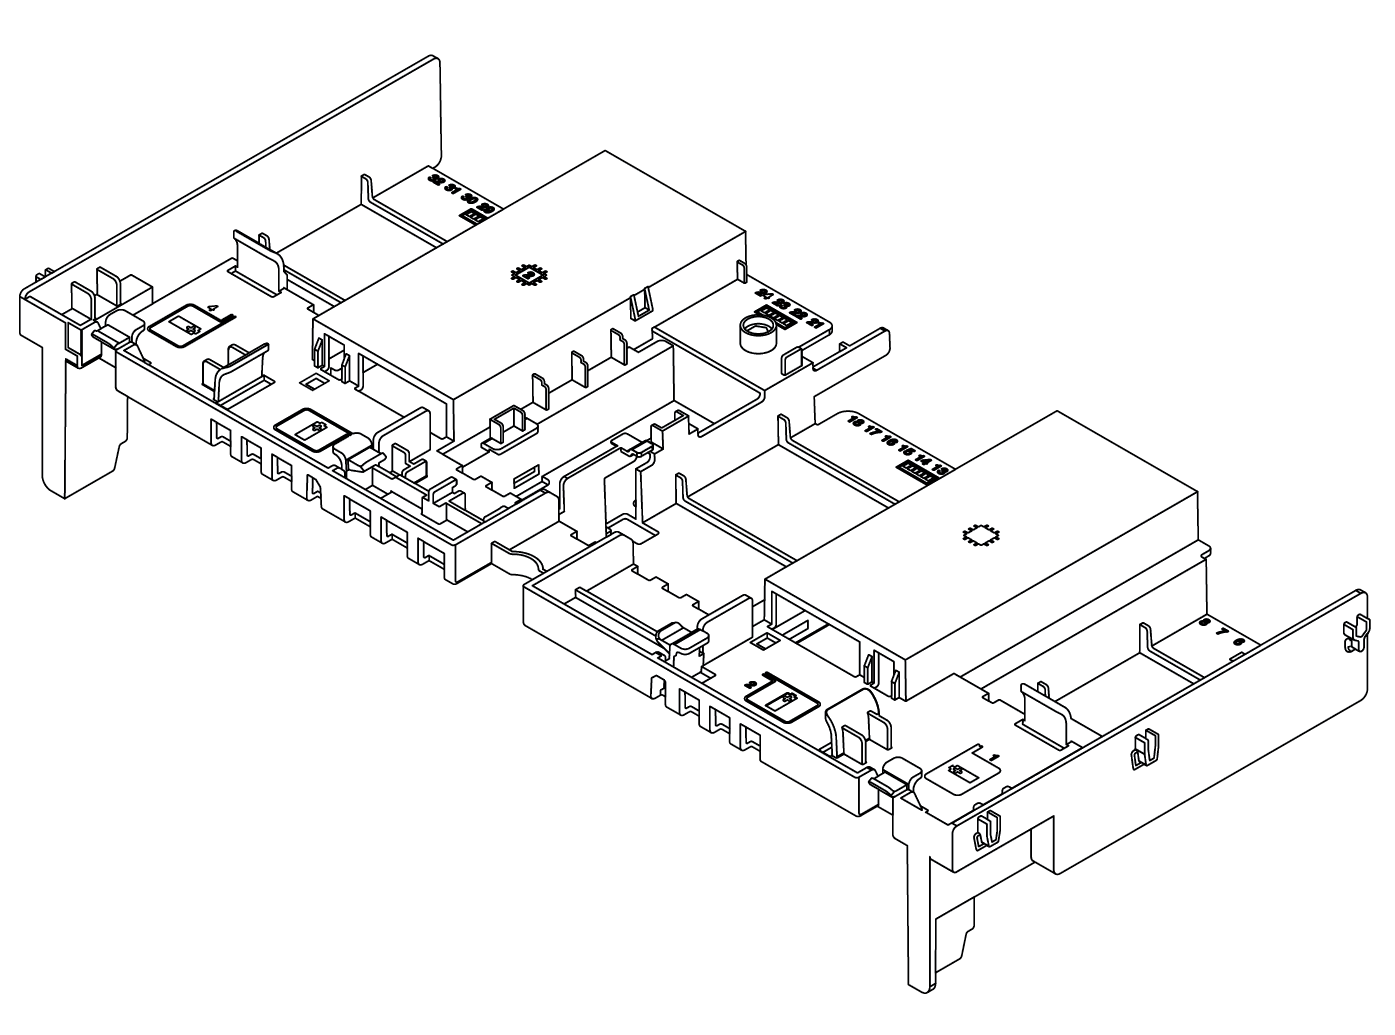 | Half length, low profile, single-wide:
|
Figure 2. GPU Air baffle  | Full length, full height, double-wide:
Full length, full height, single-wide: NVIDIA A10 |
All installed GPU adapters must be identical.
If a double-wide GPU adapter is installed in slot 5, 7 or 2, the adjacent slot 4, 8, or 1 respectively is not available.
If a single-wide 150W GPU adapter is installed on PCIe slot 1, 4, or 7, the adjacent slot 2, 5, or 8 respectively cannot be installed with an Ethernet adapter of 100GbE or higher.
For thermal rules for supported GPUs, see Thermal rules.
- A video of this procedure is available at YouTube.
Procedure
- Install the GPU adapter into the PCIe slot on the riser card. Figure 3. Installing the GPU adapter
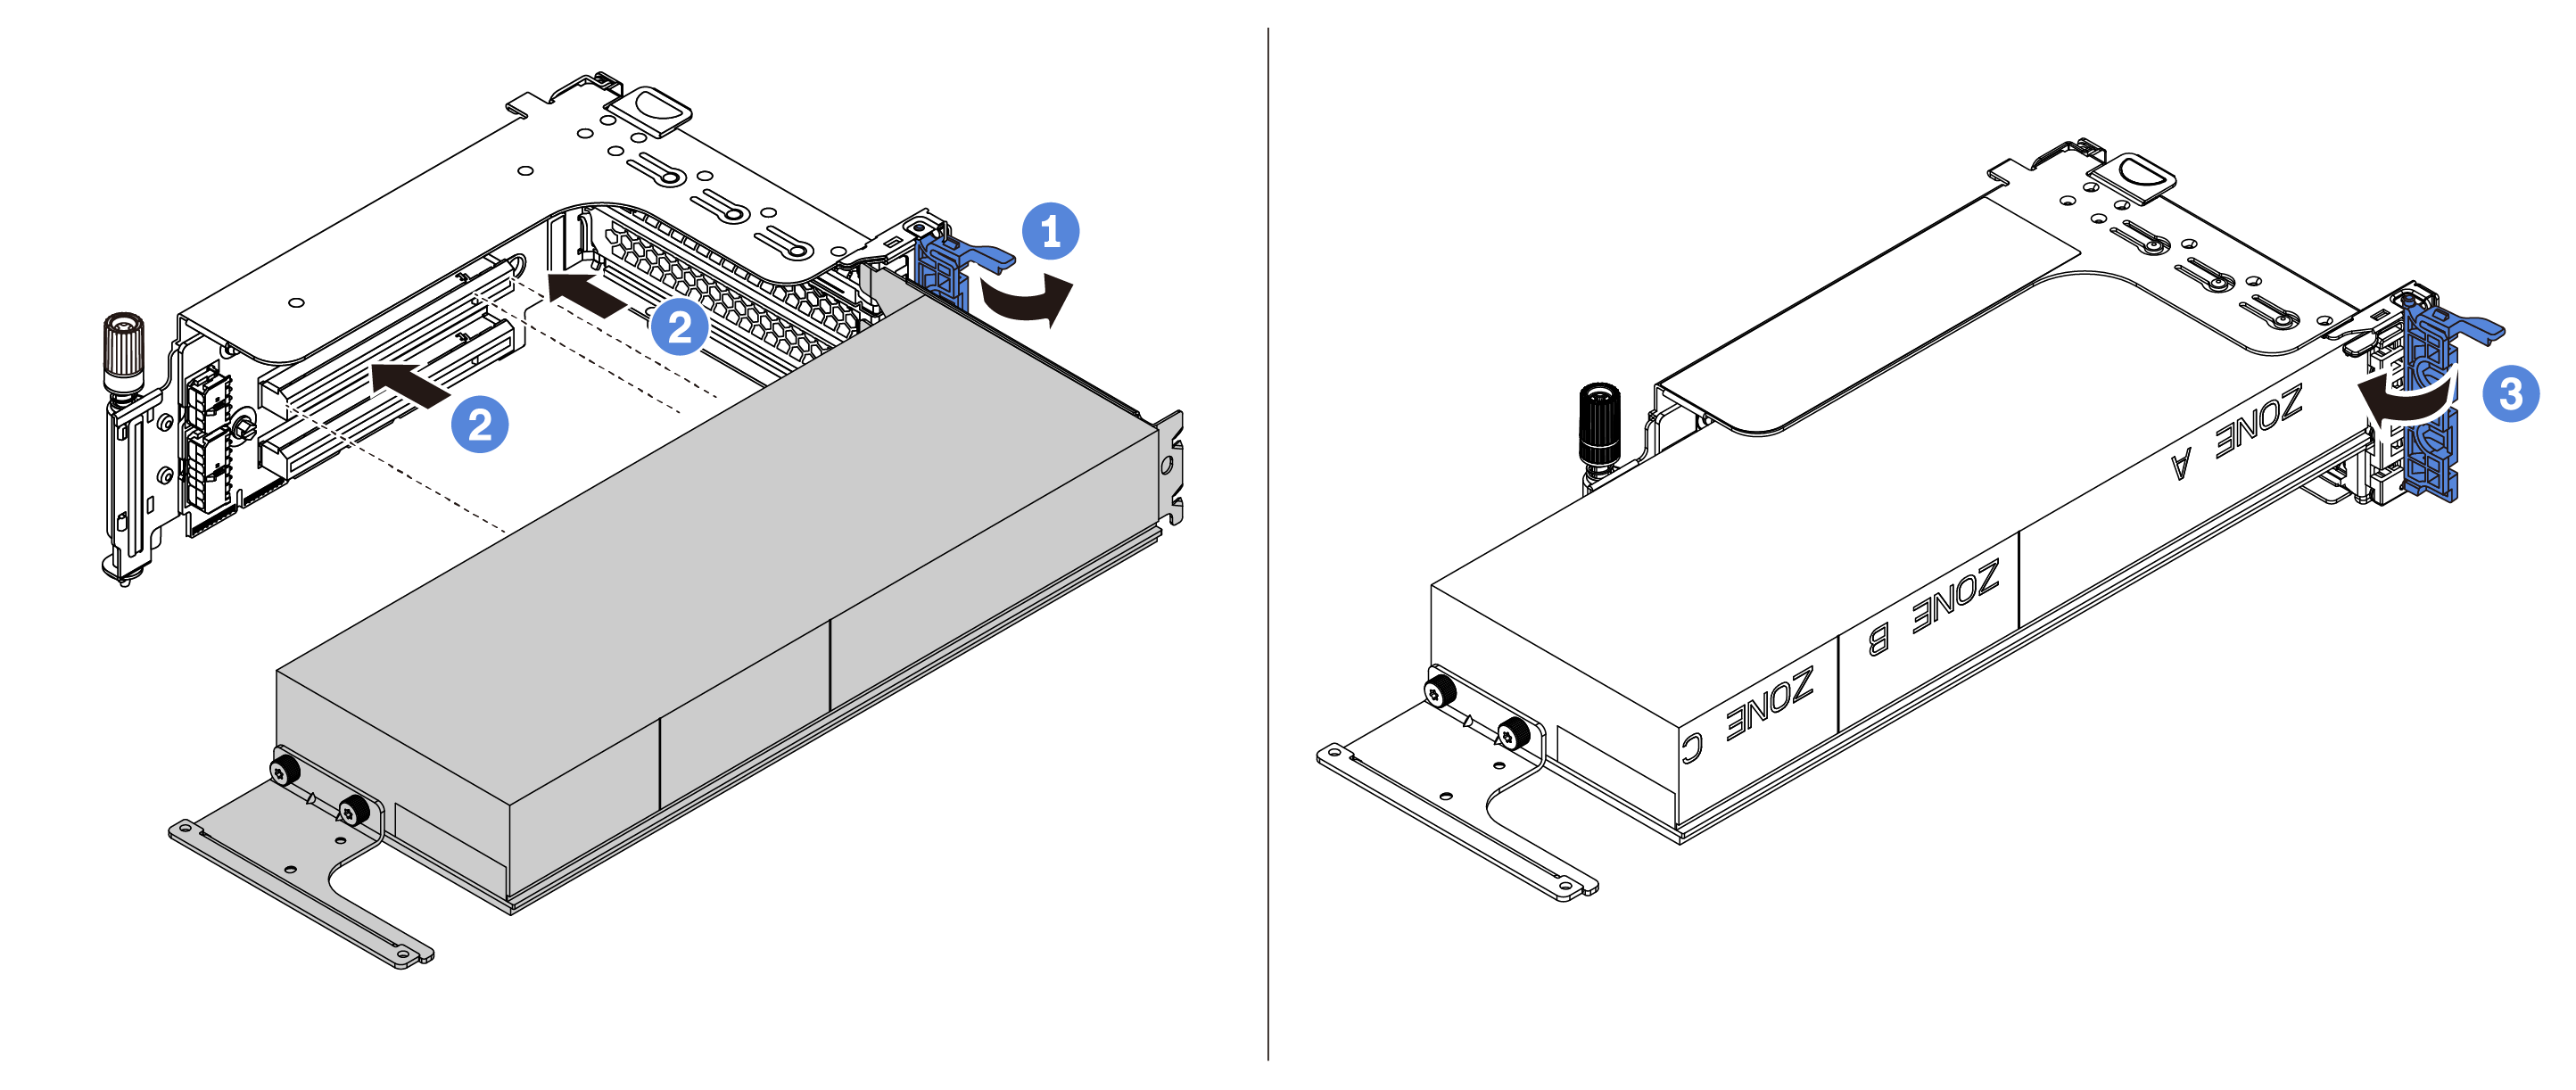
- Open the blue latch on the riser cage.
- Align the GPU adapter with the PCIe slot on the riser card. Then, carefully press the GPU adapter straight into the slot until it is securely seated.
- Close the blue latch.
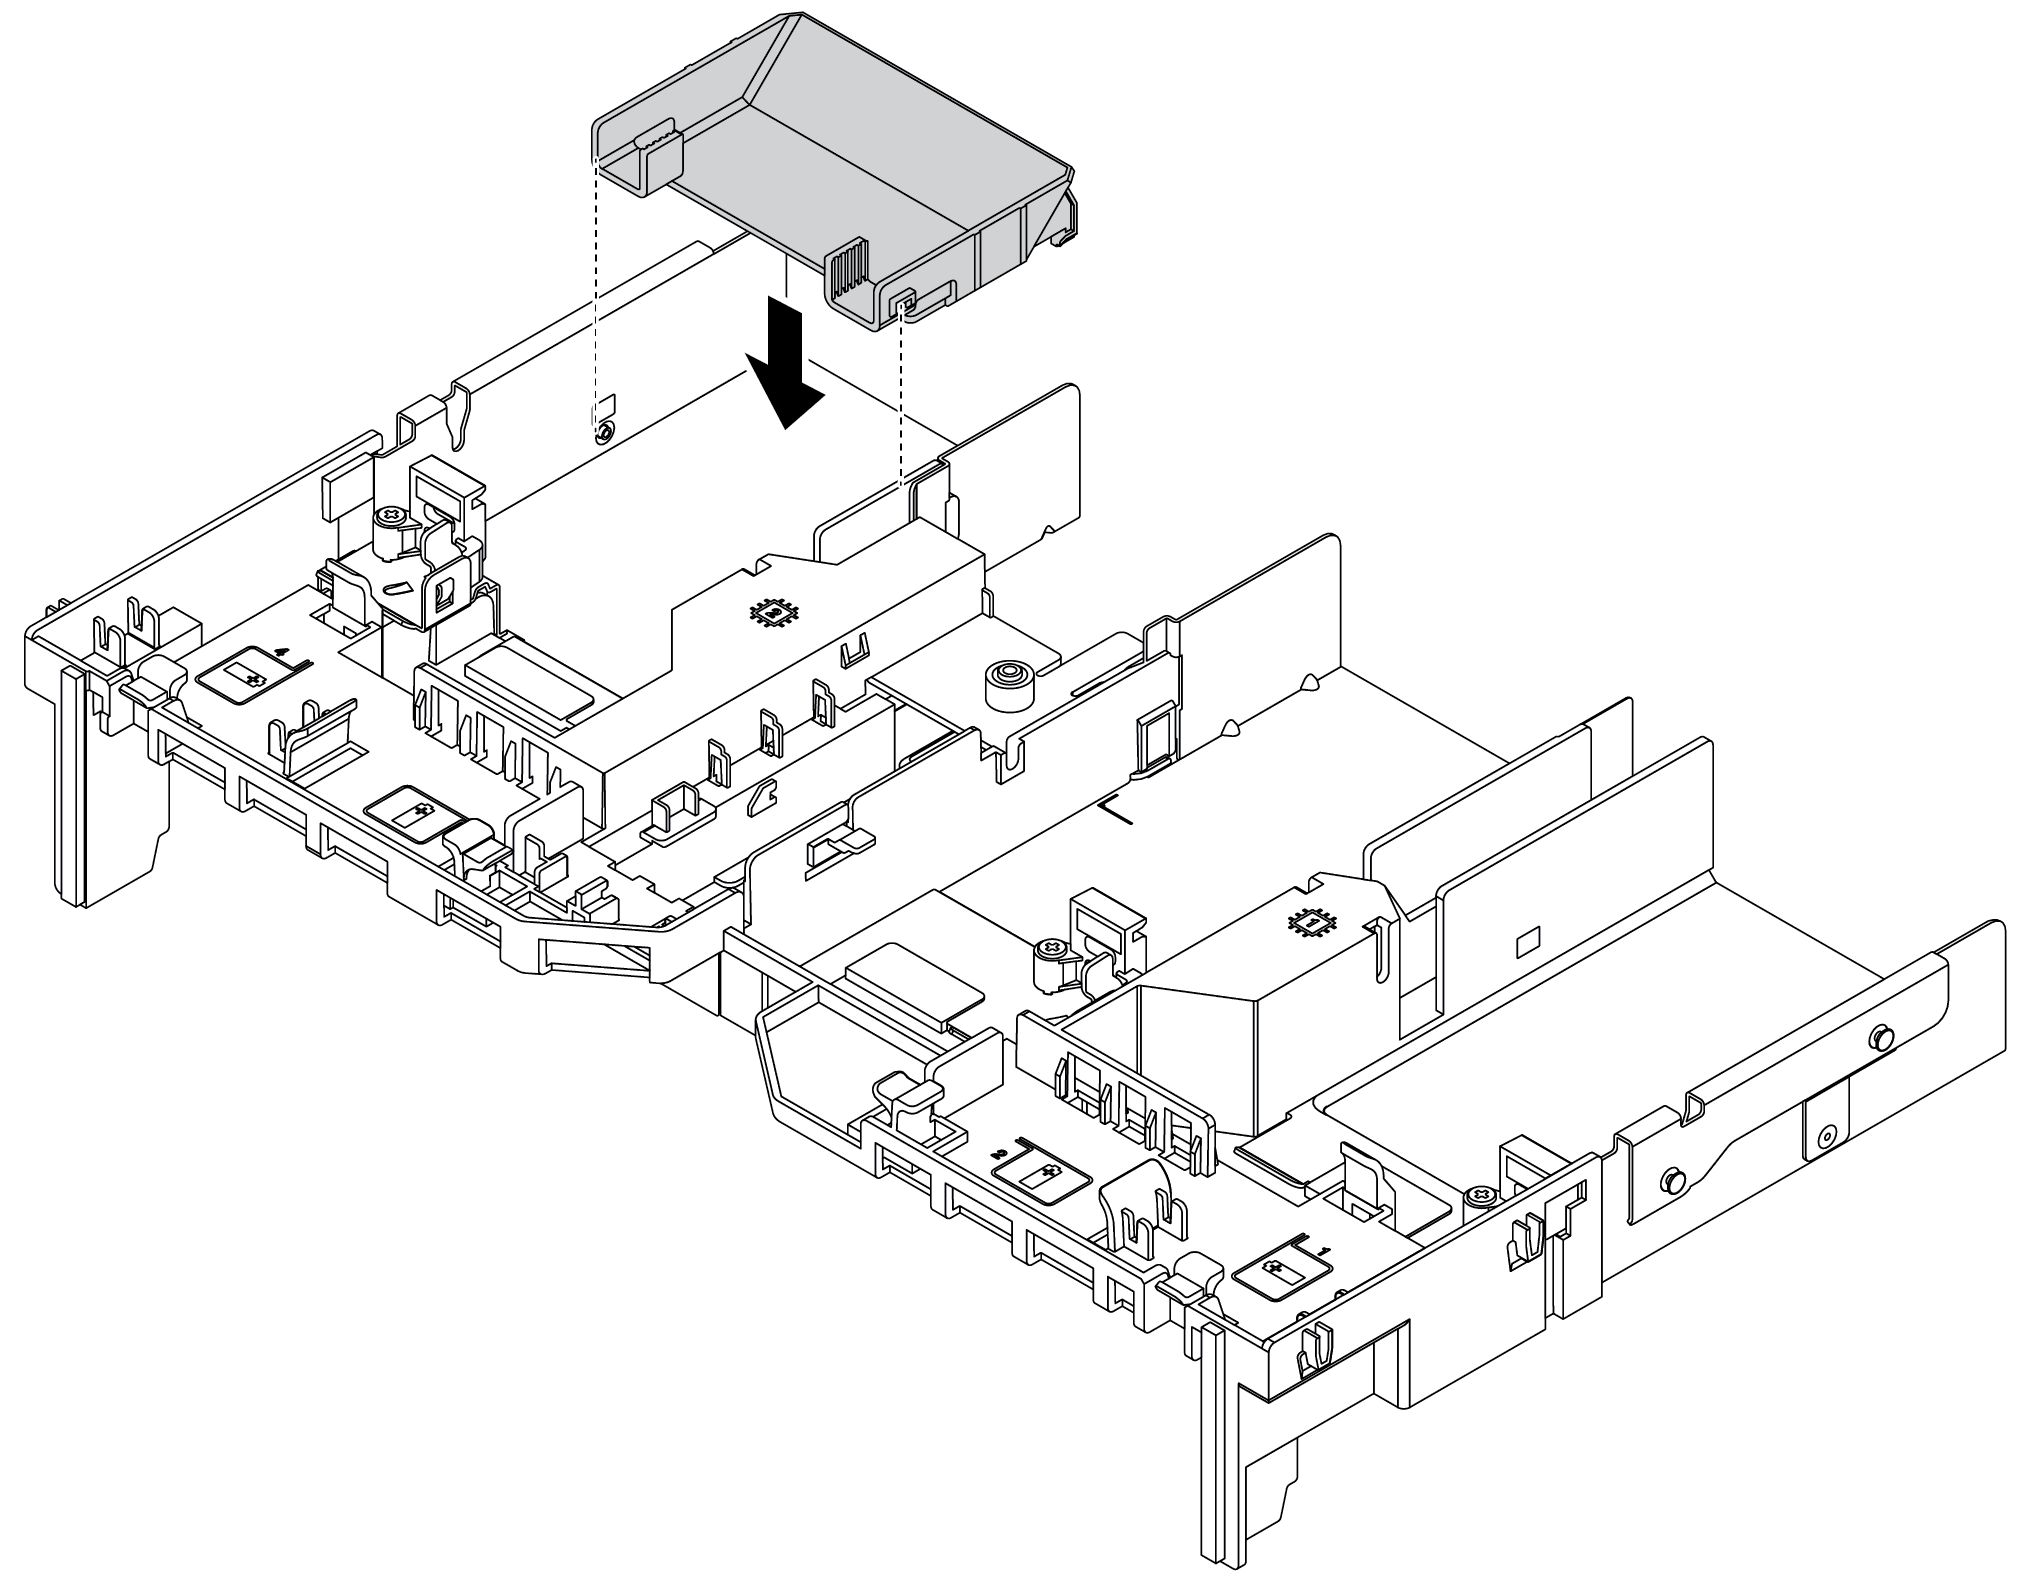
- Install the GPU air baffle. NoteIf a single-wide 150W GPU adapter (FHFL) is to be installed but the adjacent slot will be left empty or installed with a half-length adapter, install an add-on air baffle on the GPU air baffle first.Figure 4. Installing an add-on air baffle
- Install the riser assembly. Figure 5. Installing the riser assembly
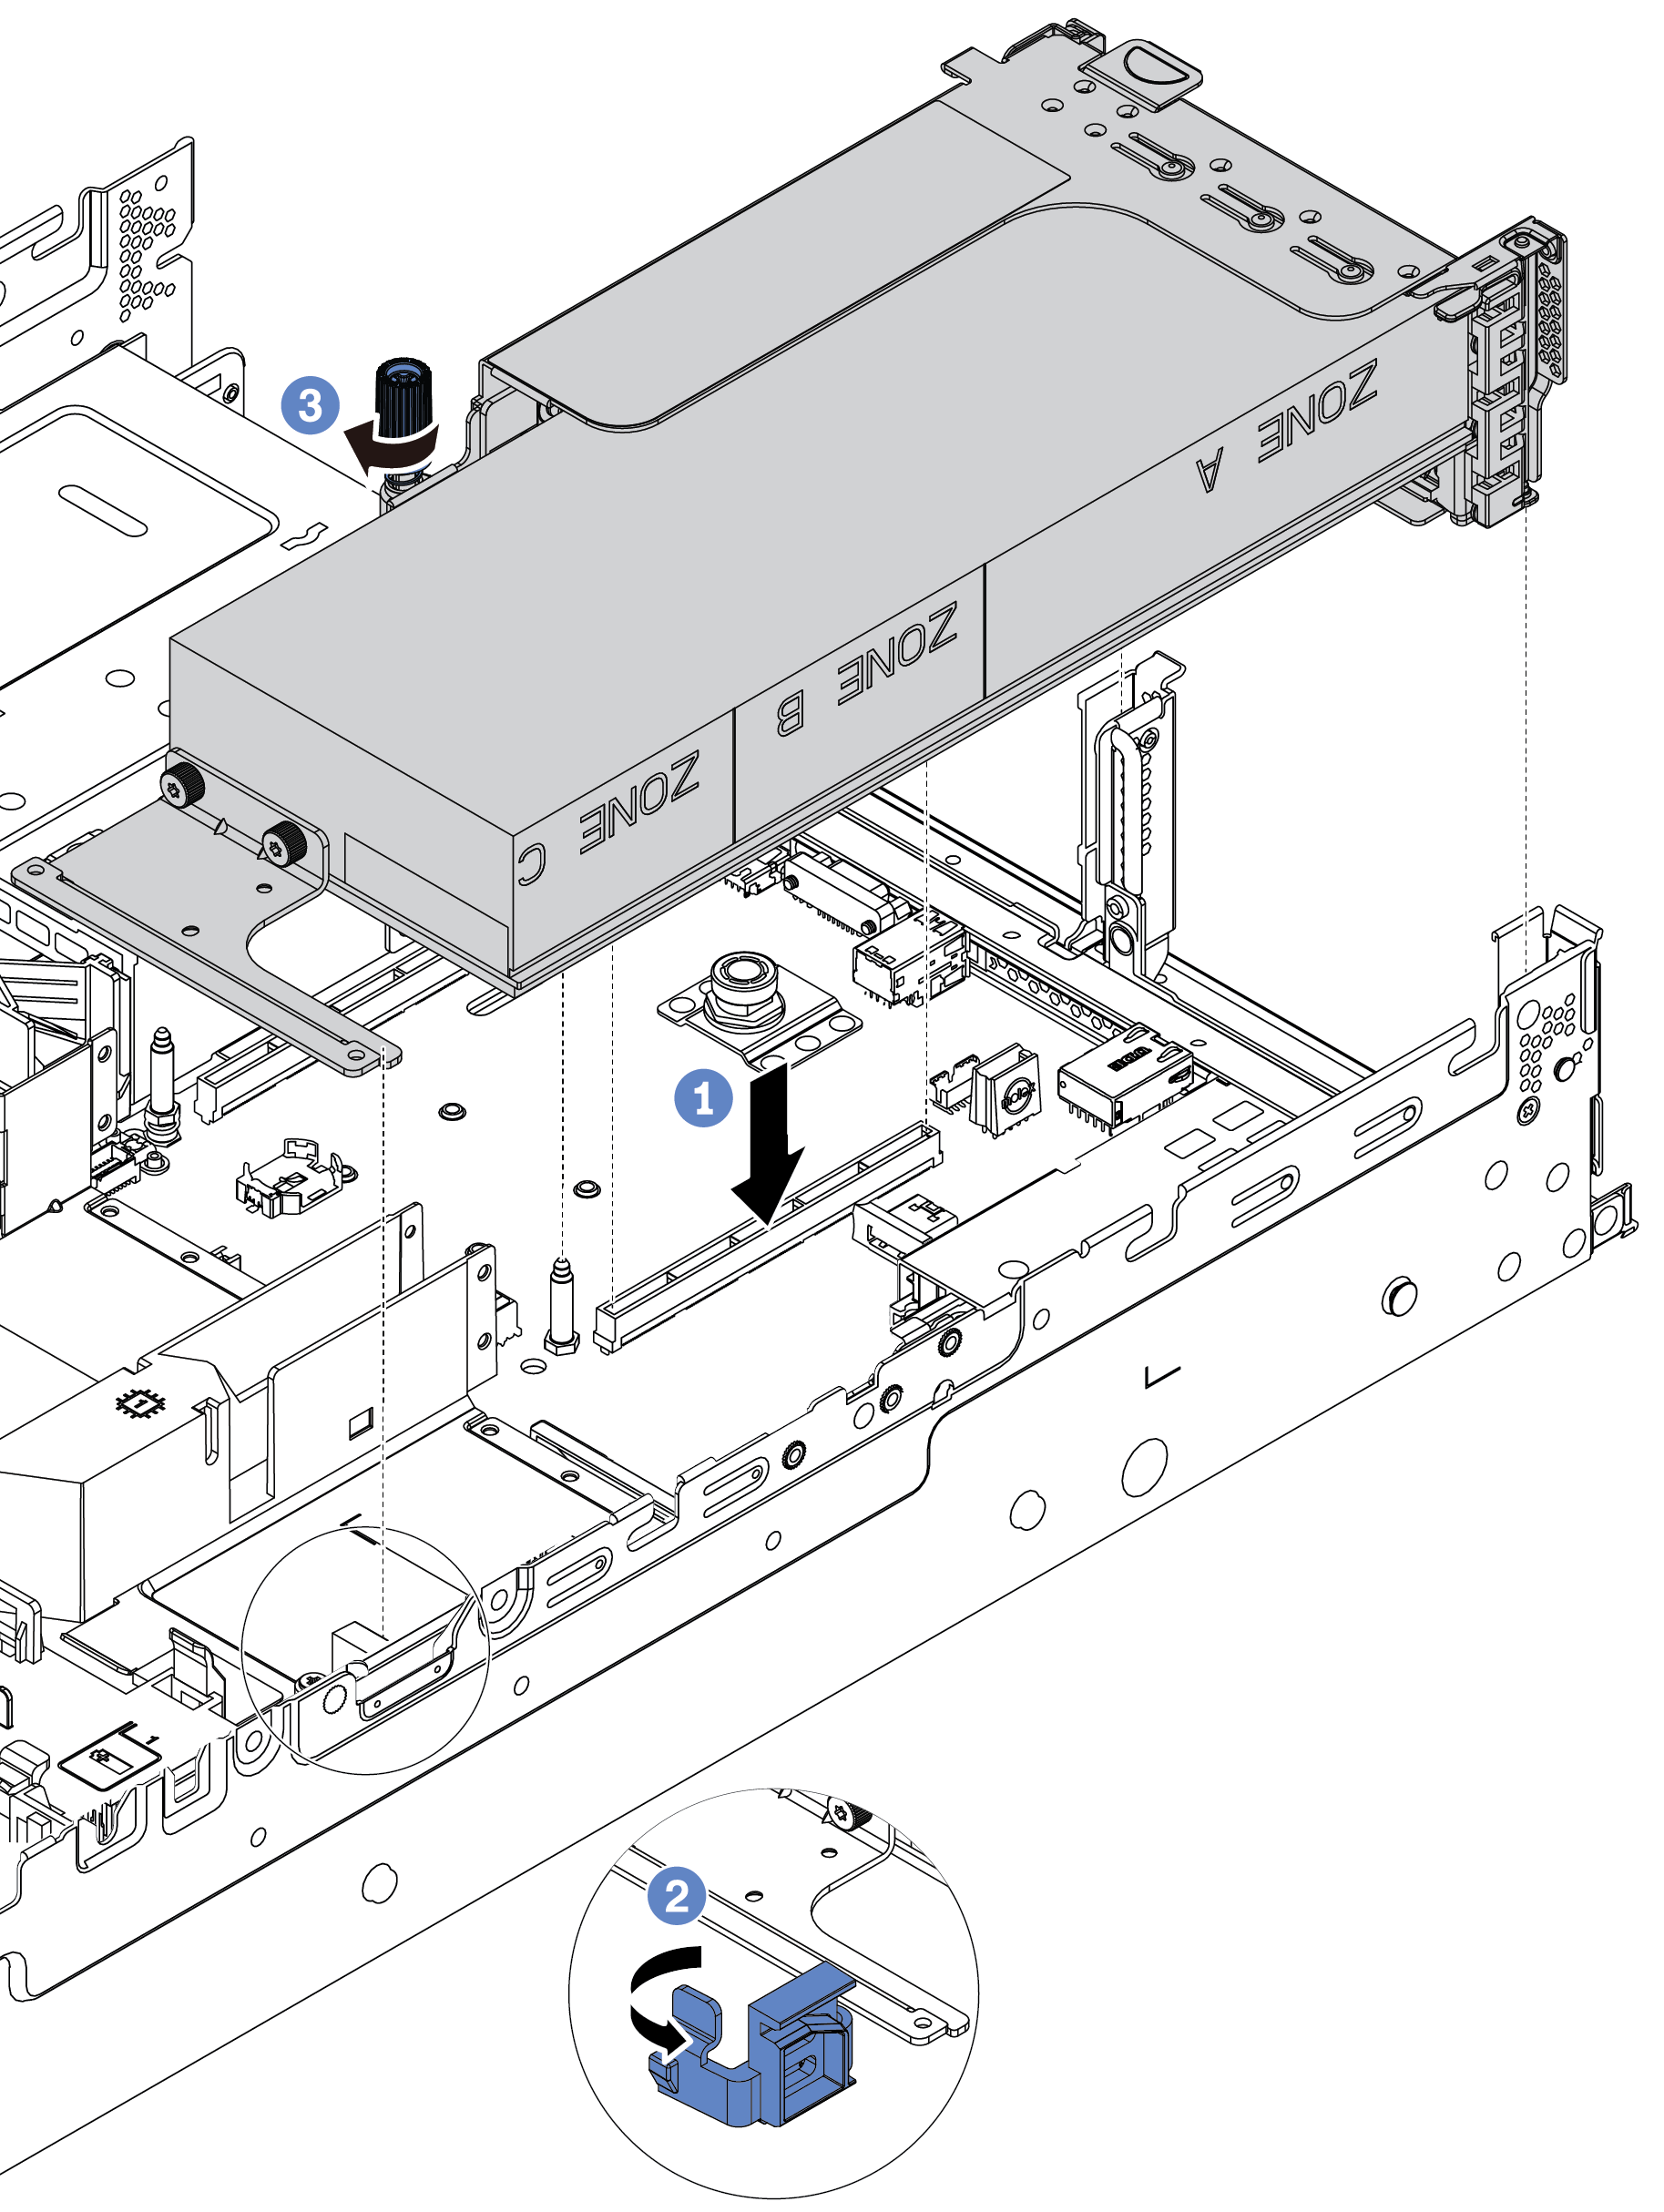
- Align the riser card with the PCIe slot on the system board. Carefully press the riser card straight into the slot until it is securely seated.
- If you are installing a full-length GPU adapter, open the blue latch on the GPU air baffle and fix the end of the GPU adapter. Then, close the blue latch.
- Tighten the screw to fix the riser cage.
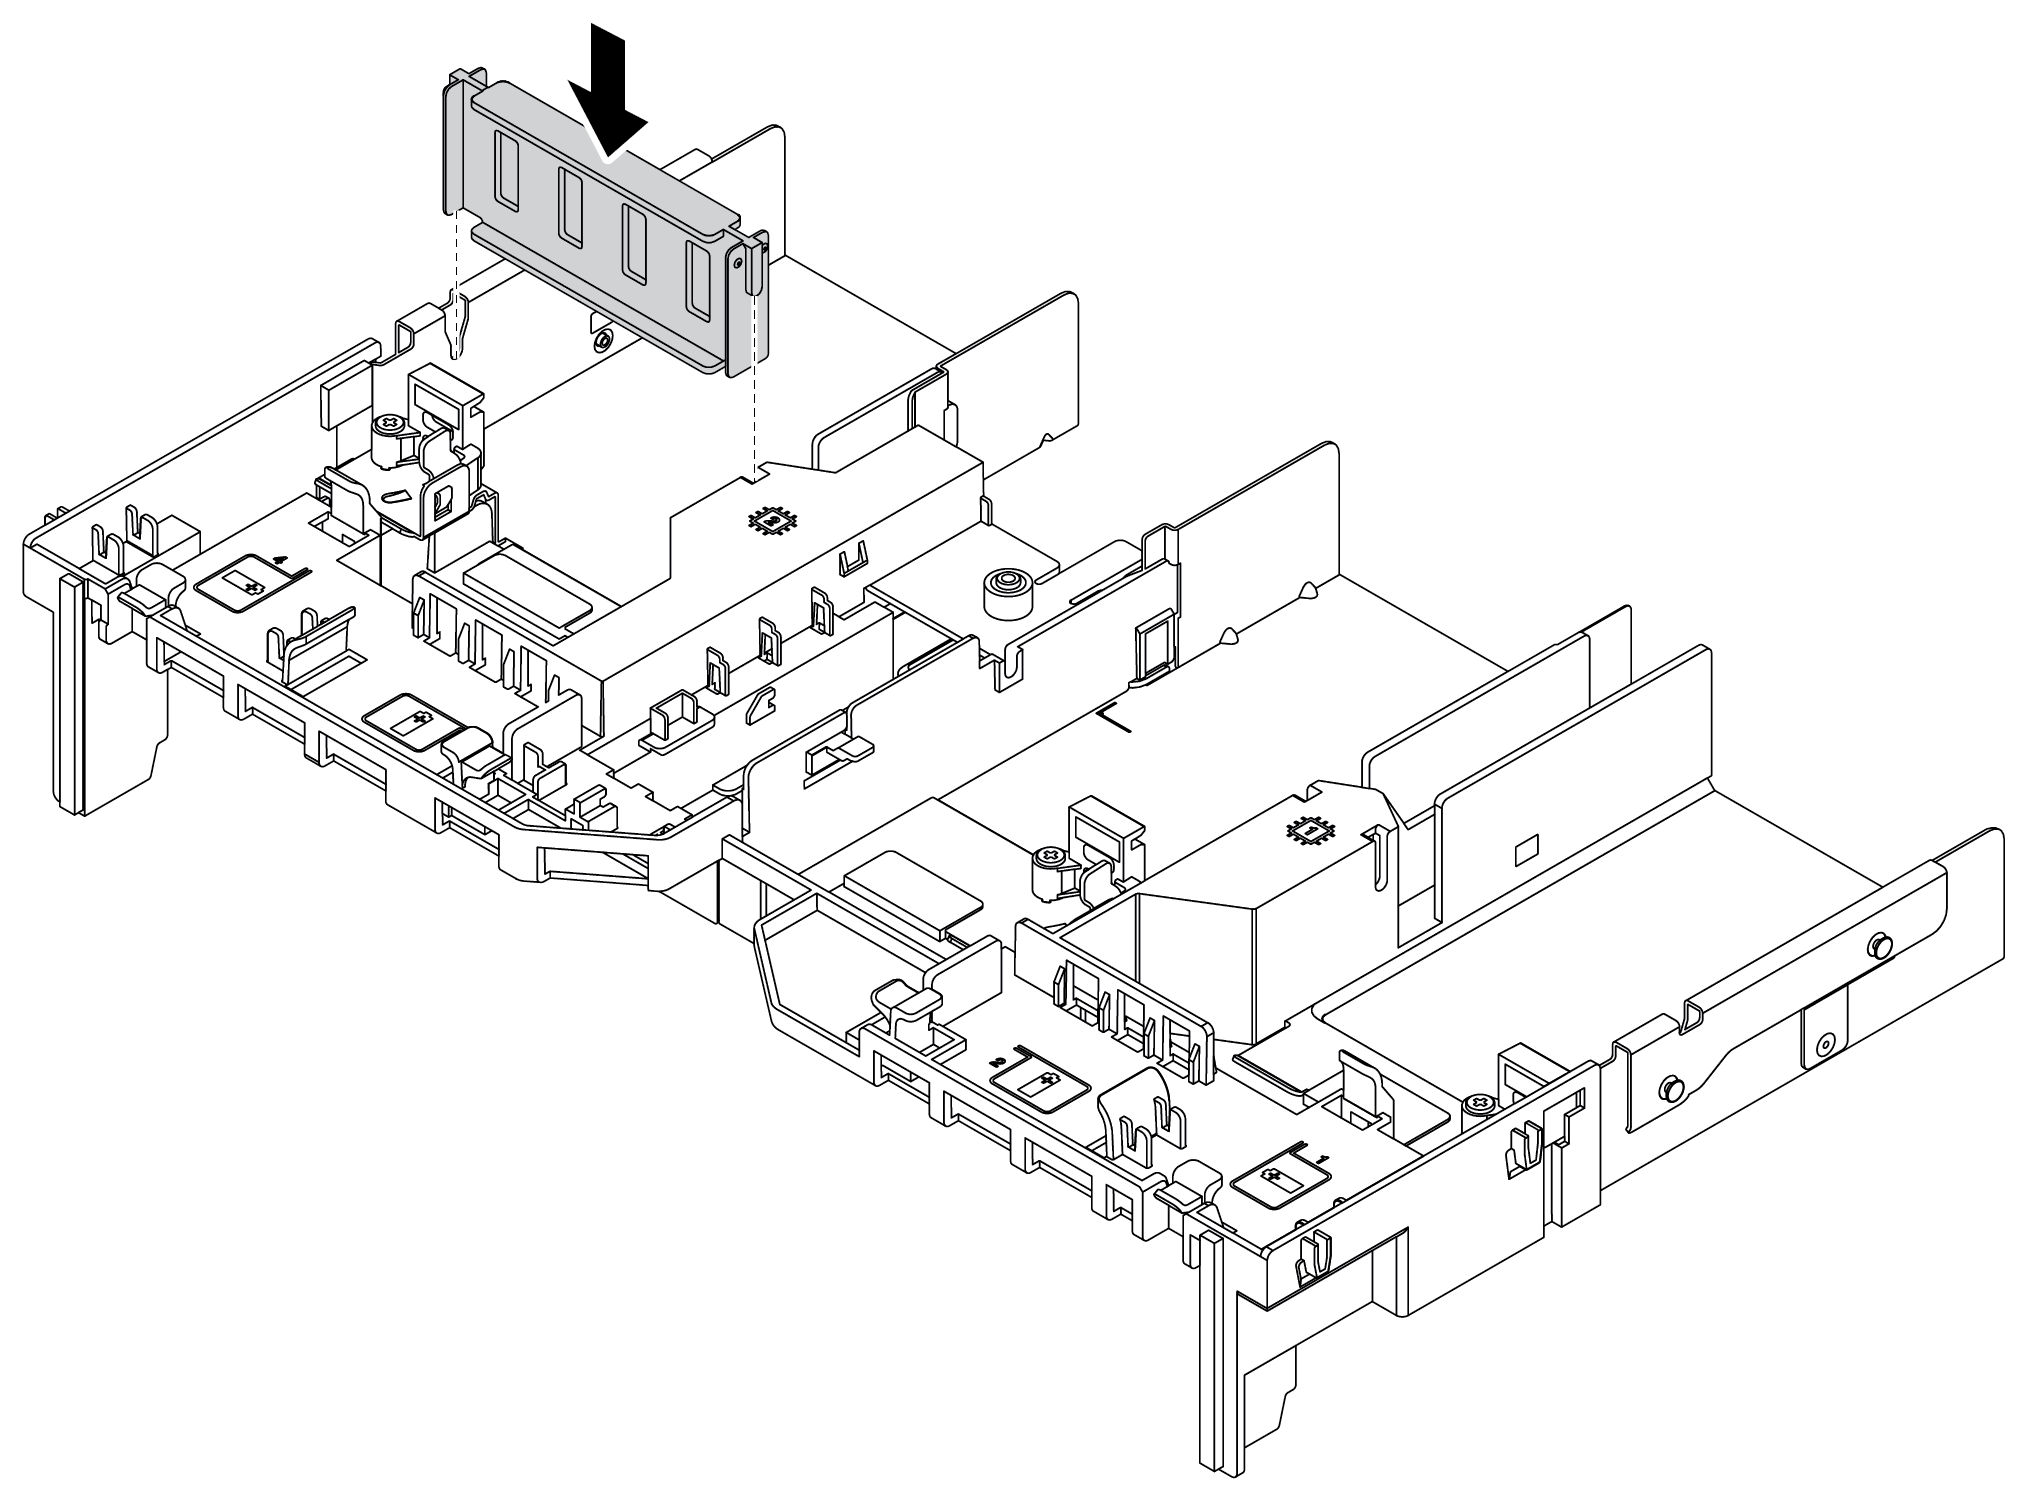
- (Optional) If a certain slot is not installed with a GPU adapter, install a filler on the GPU air baffle.Figure 6. Installing the GPU air baffle filler
Demo video