Install a PCIe adapter
Use the following information to install a PCIe adapter.


Depending on the specific type, your PCIe adapter, riser card, and riser bracket might look different from the illustration in this topic. The illustration shows how to install a PCIe adapter onto riser card 1 in riser 1 bracket. The installation procedure is similar for PCIe adapters on other riser cards in other riser brackets.
Use any documentation that comes with the PCIe adapter and follow those instructions in addition to the instructions in this topic.
Touch the static-protective package that contains the new PCIe adapter to any unpainted surface on the outside of the server. Then, take the new PCIe adapter out of the package and place it on a static-protective surface.
If you are going to install a RAID/HBA adapter, refer to Technical rules for HBA/RAID adapters.
If you are going to install an Ethernet adapter, refer to Technical rules for Ethernet adapters.
If you are going to install an OCP adapter, refer to Technical rules for OCP adapters.
If you are going to install a PCIe SSD adapter, refer to Technical rules for PCIe Flash storage adapters.
If you are going to install a GPU adapter, refer to Install a GPU adapter.
If you are going to insatll a PCIe network adapter, note that PCIe network adapter of 10 GbE or higher can not be installed in slot 3.
If the server is installed with a 280-watt processor, refer to Rules about 280-watt processor selection for PCIe adapter limitations.
Locate an appropriate PCIe slot. See Rear view to identify the PCIe slots of your server.
NoteThe following adapters require a full-height bracket and must be installed in a full-height slot:ThinkSystem Broadcom 57454 10/25GbE SFP28 4-port PCIe Ethernet Adapter
ThinkSystem Broadcom 57454 10/25GbE SFP28 4-port PCIe Ethernet Adapter_Refresh (V2)
To install a PCIe adapter, complete the following steps:
- Align the PCIe adapter with the PCIe slot on the riser card. Carefully press the PCIe adapter straight into the slot until it is securely seated and its bracket also is secured. Note
Carefully handle the PCIe adapter by its edges.
For PCIe adapters in riser 1 and riser 2 and ThinkSystem AMD X3522 10/25GbE DSFP28 2-port PCIe Ethernet Adapter, install the screw to secure the adapter before closing the retention latch if the server needs to be shipped.
Figure 1. PCIe adapter installation (1)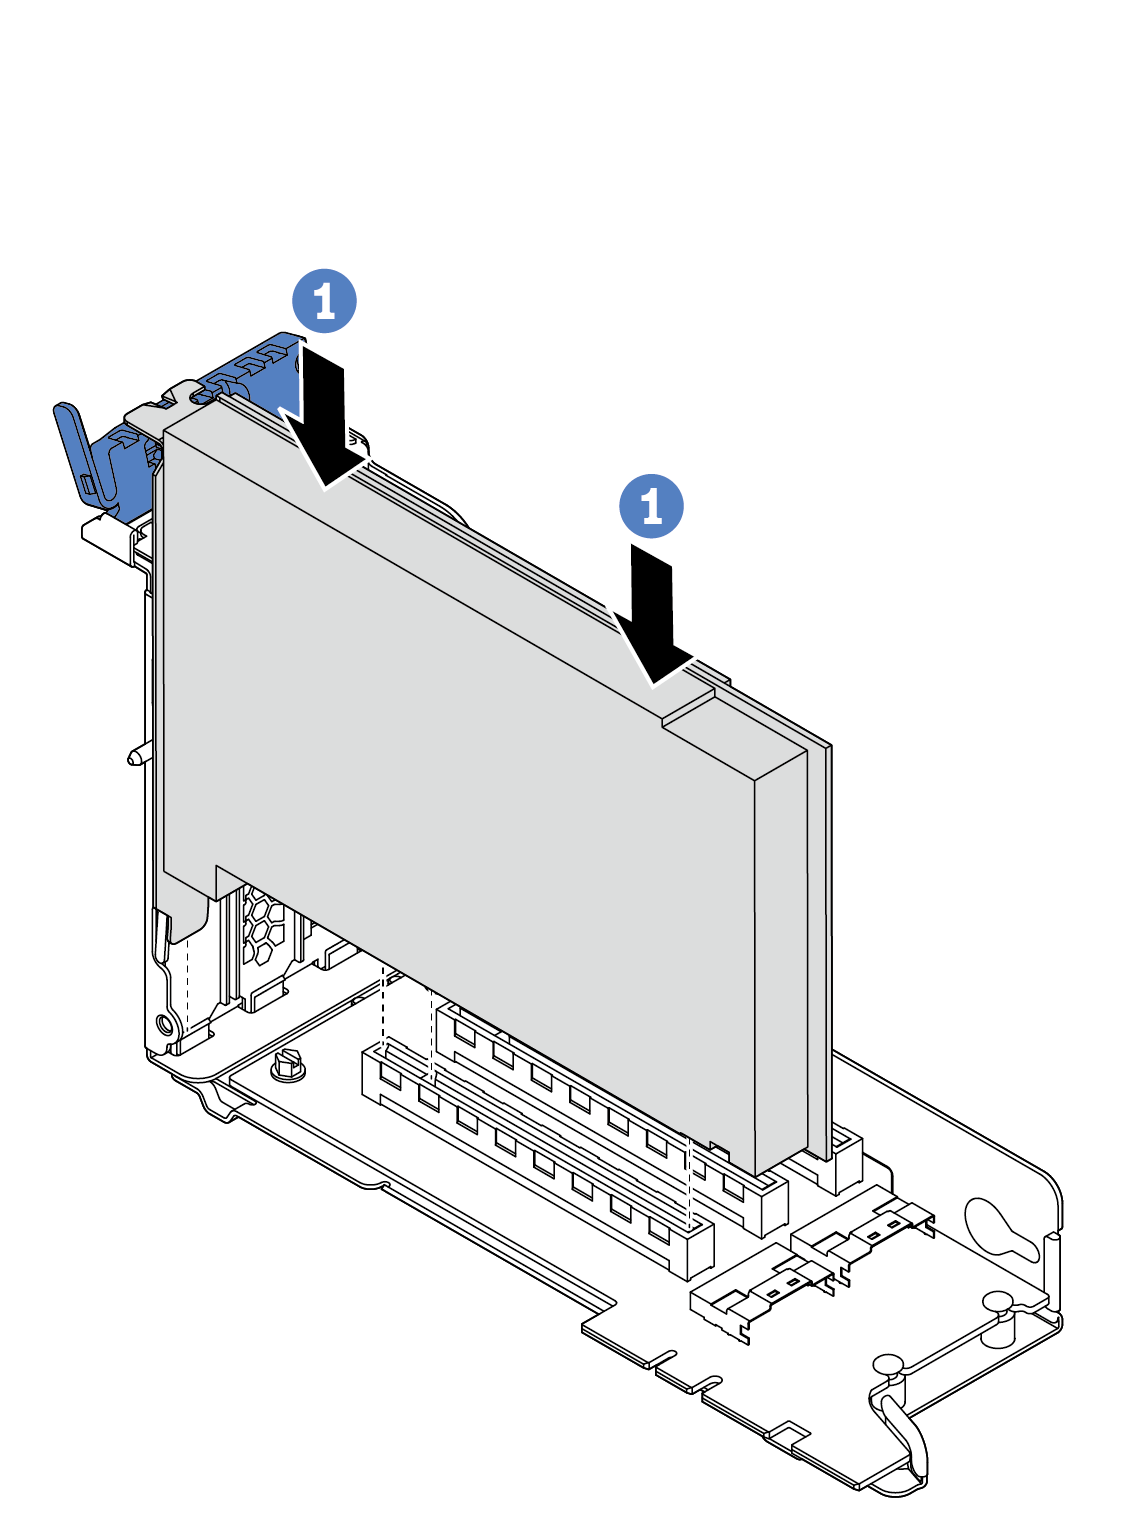
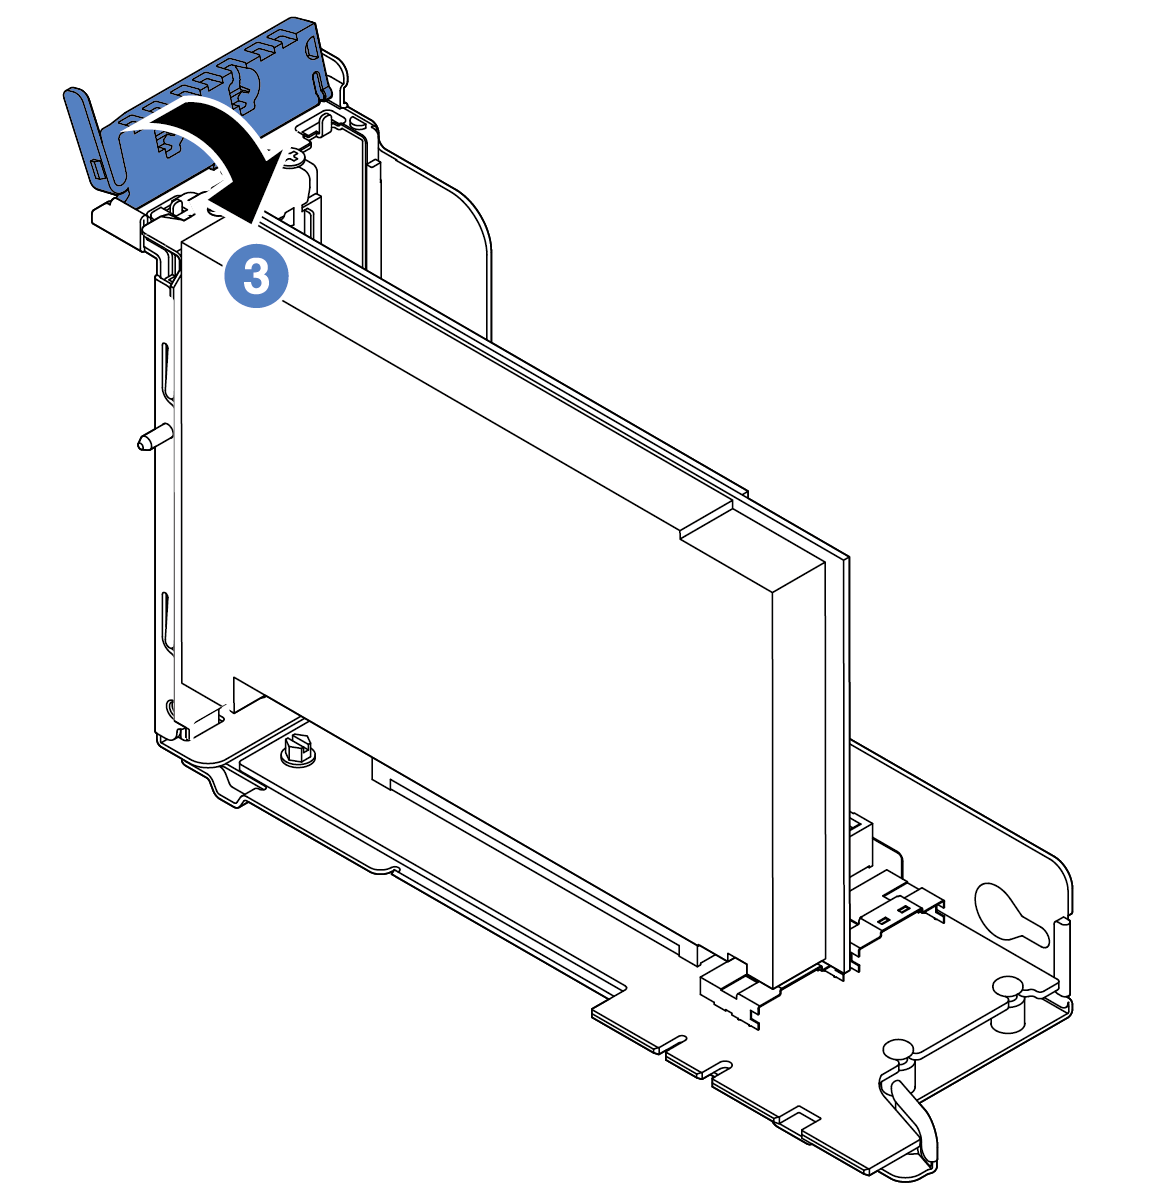
- Pivot the PCIe adapter retention latch to the closed position.Figure 2. PCIe adapter installation (3)
Refer to your record to reconnect the cables. See Riser cards.
Reinstall the riser bracket. See Riser card replacement.
Complete the parts replacement. See Complete the parts replacement.
Demo video