Install a rear hot-swap fan
Follow instructions in this section to install a rear hot-swap fan.
About this task
Attention
- Read Installation Guidelines and Safety inspection checklist to ensure that you work safely.
- Make sure to replace a defective fan with another unit of the exact same type.
- Touch the static-protective package that contains the component to any unpainted metal surface on the server; then, remove it from the package and place it on a static-protective surface.
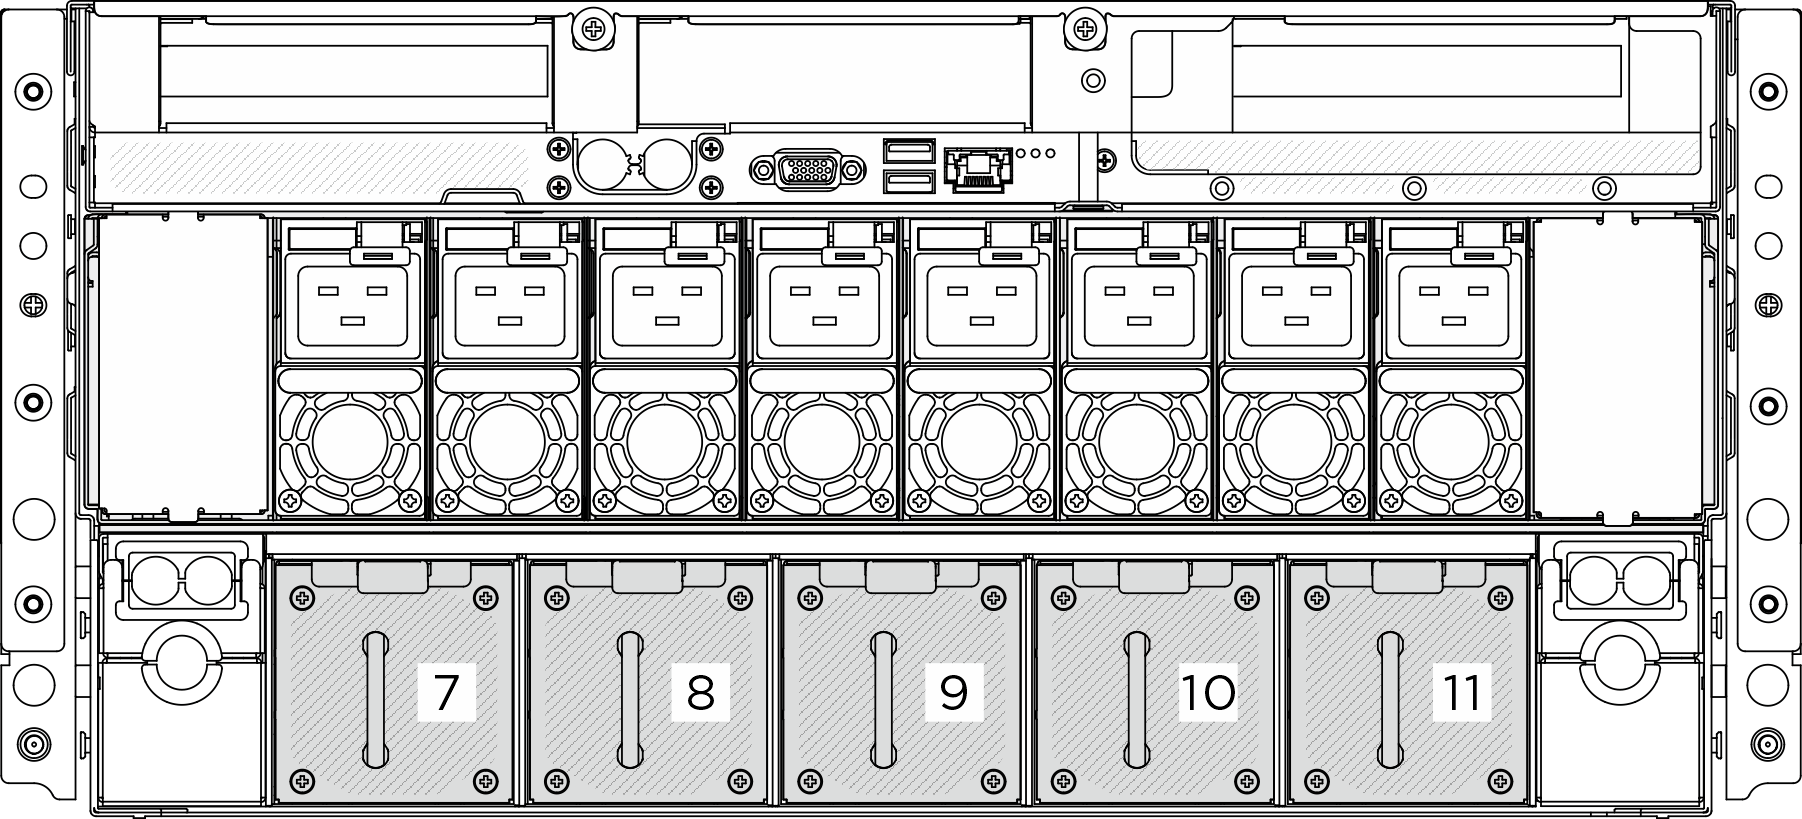
- The following illustrations show the rear fan numbering:Figure 1. Rear fan numbering
Procedure
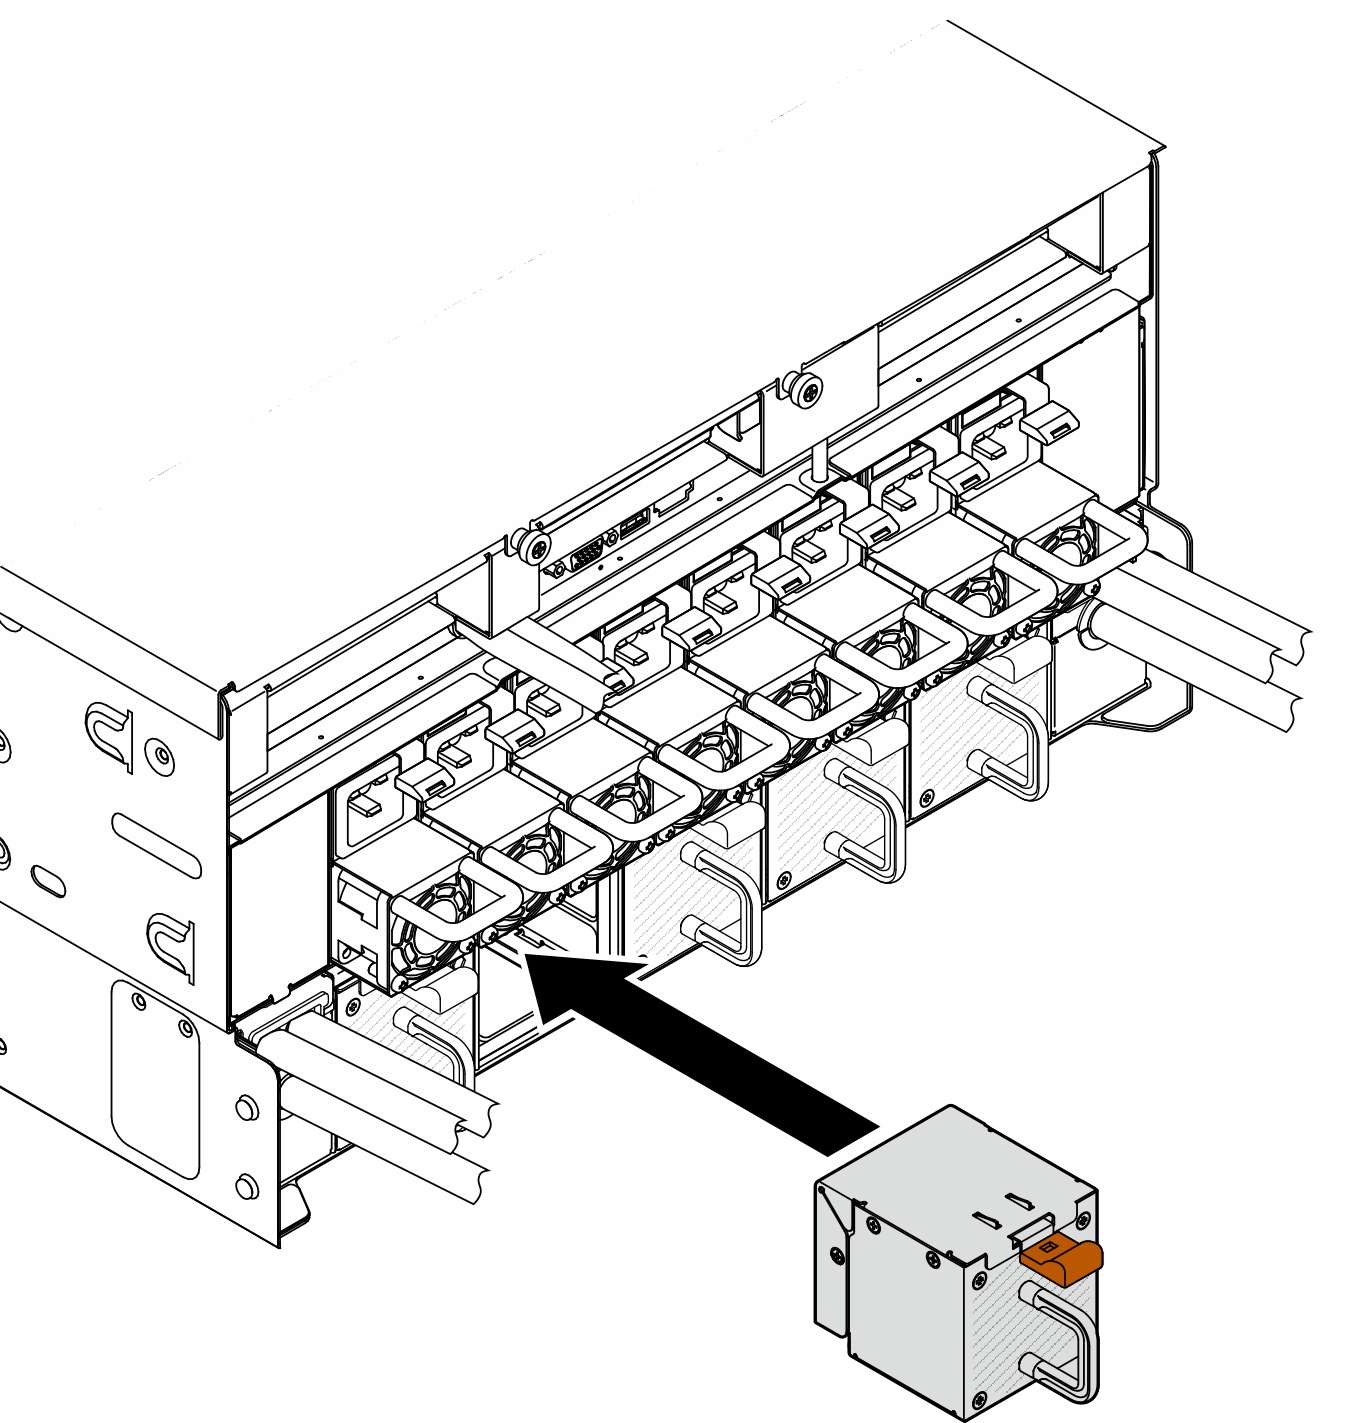
- Press and hold the orange latch; then, slide the fan into the socket until it clicks into place.Figure 2. Rear fan installation
After you finish
If you are instructed to return the component or optional device, follow all packaging instructions, and use any packaging materials for shipping that are supplied to you.
Give documentation feedback