Install the fan cage (trained technician only)
Follow the instructions in this section to install the fan cage. The procedure must be executed by a trained technician.
About this task
S002

CAUTION
The power-control button on the device and the power switch on the power supply do not turn off the electrical current supplied to the device. The device also might have more than one power cord. To remove all electrical current from the device, ensure that all power cords are disconnected from the power source.
S017

CAUTION
Hazardous moving fan blades nearby. Keep fingers and other body parts away.
Attention
- Read Installation Guidelines and Safety inspection checklist to ensure that you work safely.
- Power off the server and peripheral devices and disconnect the power cords and all external cables. See Power off the server.
- Install the fan cage.
 Connect the power cable to the front fan control board.
 Fasten the two screws to secure the connector bracket to the fan cage.
 Align the fan cage with the slots on both sides of the chassis; then, lower it into the chassis.
 Fasten the six M3 screws (PH2, 6 x M3, 0.5 newton-meters, 4.3 inch-pounds) to secure the fan cage to the chassis.
NoteEnsure the fan numbering label faces the front of the server.Figure 1. Installing fan cage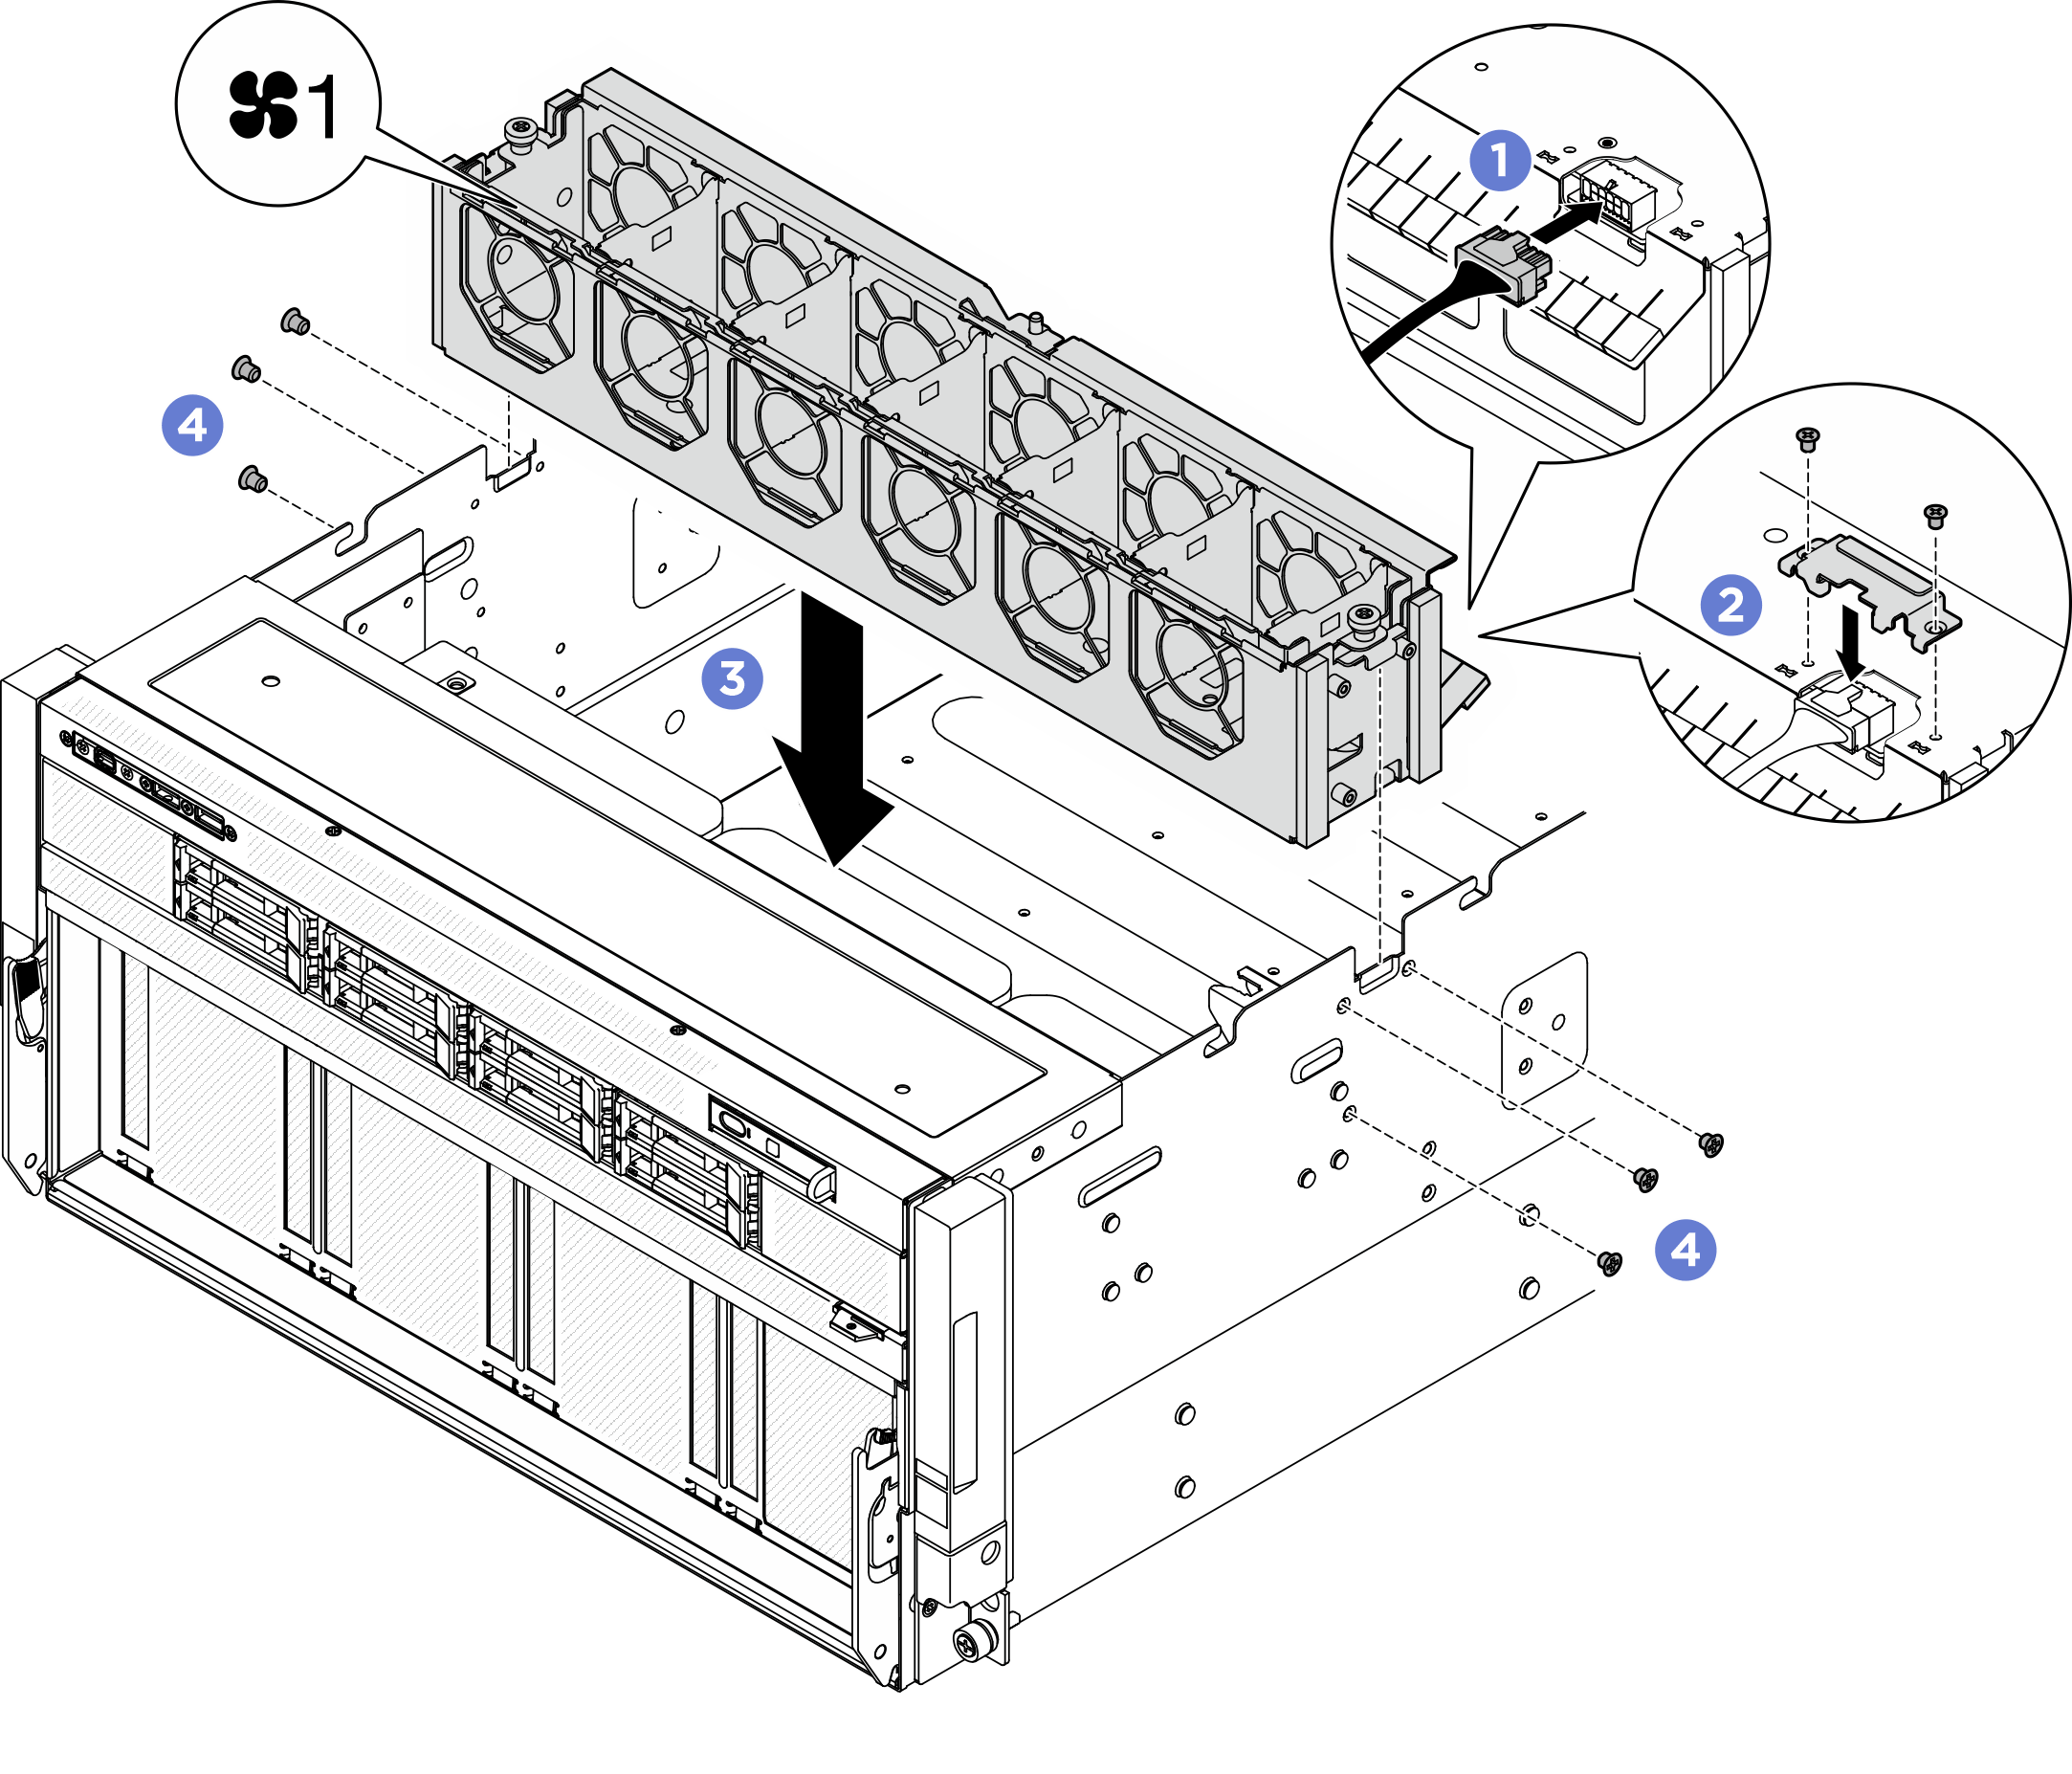
- If necessary, attach the labels to both ends of the power cable.
- Attach the white space portion of the label to one end of the cable.
- Wrap the label around the cable and attach it to the white space portion.
- Repeat to attach the other label to the opposite end of the cable.
Figure 2. Label application NoteSee the table below to identify the corresponding labels for the cable.
From To Label Front fan control board: Power connector Power distribution board: Front fan control board power connector (FRONT FAN PWR) - F-Fan PWR
- F-Fan PWR
After you finish
- Reinstall all the front fans. See Install a front fan.
- Reinstall the front top cover. See Install the front top cover.
- Complete the parts replacement. See Complete the parts replacement.
Give documentation feedback