Remove a PCIe adapter
Follow the instructions in this section to remove a PCIe adapter.
About this task
Read Installation Guidelines and Safety inspection checklist to ensure that you work safely.
Power off the server and peripheral devices and disconnect the power cords and all external cables. See Power off the server.
Prevent exposure to static electricity, which might lead to system halt and loss of data, by keeping static-sensitive components in their static-protective packages until installation, and handling these devices with an electrostatic-discharge wrist strap or other grounding system.
If the server is installed in a rack, slide the server out on its rack slide rails to gain access to the top covers, or remove the server from the rack. See Remove the server from rails.
For a list of the supported PCIe adapters, see Lenovo ServerProven website.
Ensure that you observe the installation rules and sequence order in PCIe riser and adapter installation rules and order.
For instructions on how to remove and install a double-wide GPU adapter, see GPU adapter link bridge and double-wide GPU adapter replacement.
For more details on the different types of risers, see Rear view.
- To prevent potential thermal issues, change the Misc setting in the BIOS from Option3 (default value) to Option1 if the following two conditions are met:
The server is equipped with a GPU adapter.
The UEFI firmware version is RSE110I or later.
- See Remove PCIe adapter from two slot FH riser for the following risers:
- x8/x8 PCIe G4 Riser 1/3 FHHL
- 7mm/x8/x8 PCIe G4 Riser 3 FHHL
- See Remove PCIe adapter from six slot FH riser for the following risers:
- 3 x16 & 3 x8 PCIe G4 Riser 1/3 FHFL
- 2 x16 & 3 x8 + 7mm PCIe G4 Riser 3 FHFL
- 4 x16 & 1 x8 PCIe G5 Riser 1/3 FHFL
- 3 x16 & 1 x8 + 7mm PCIe G5 Riser 3 FHFL
- See Remove PCIe adapter from six slot HH riser for the following risers:
- 6 x8 PCIe G4 Riser 2 HHHL
- 6 x8 PCIe G5 Riser 2 HHHL
Remove PCIe adapter from two slot FH riser
Procedure
- Remove the PCIe adapter.Figure 1. Removing PCIe adapter from riser
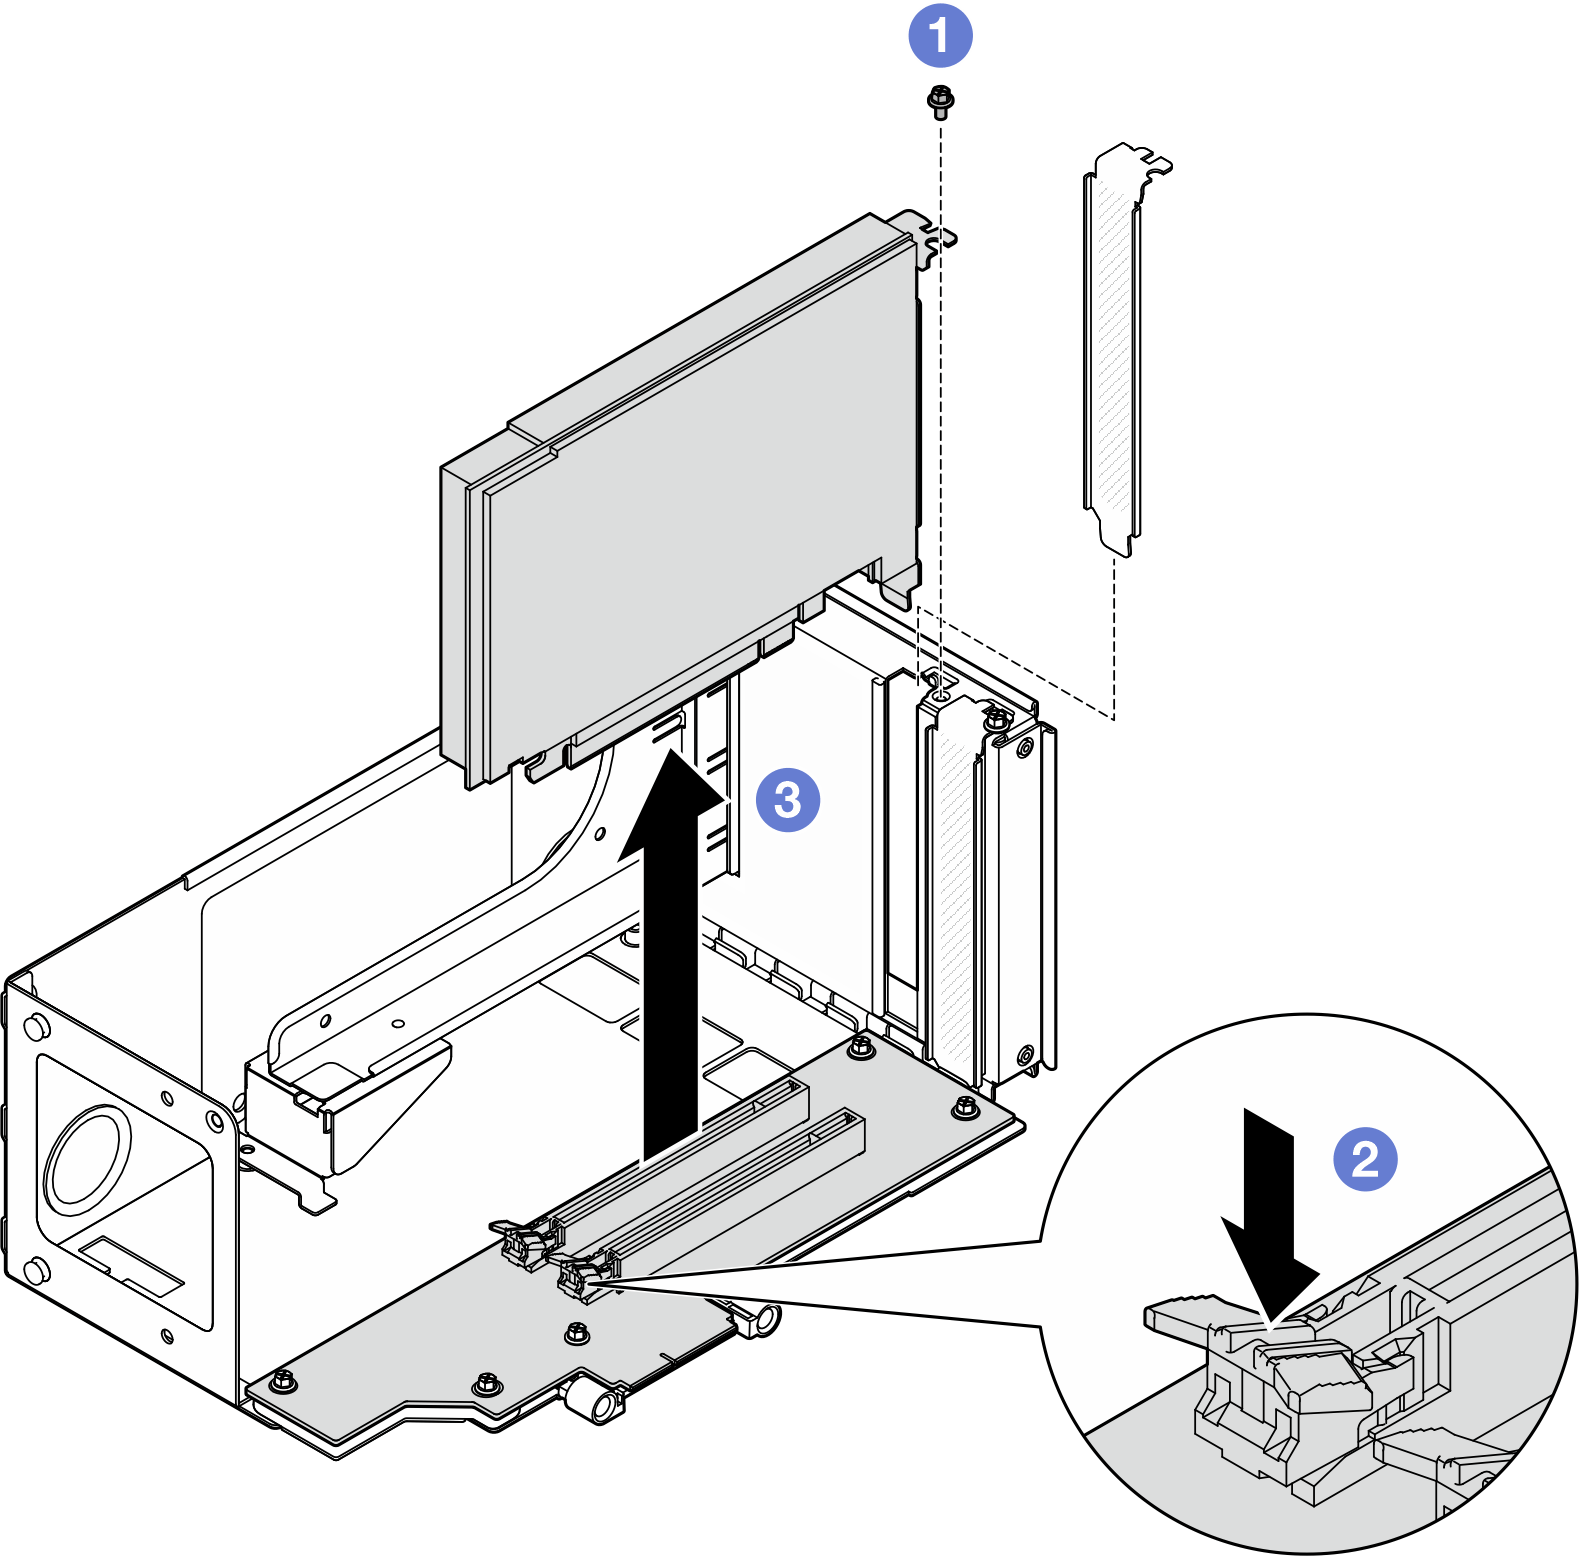
 Remove the screw that secures the adapter to the PCIe riser.
 Press on the latch to disengage the adapter from the PCIe riser.
 Grasp the PCIe adapter by its edges and carefully pull it out of the PCIe slot.
Remove PCIe adapter from six slot FH riser
Procedure
- Remove the PCIe adapter.Figure 2. Removing PCIe adapter from riser
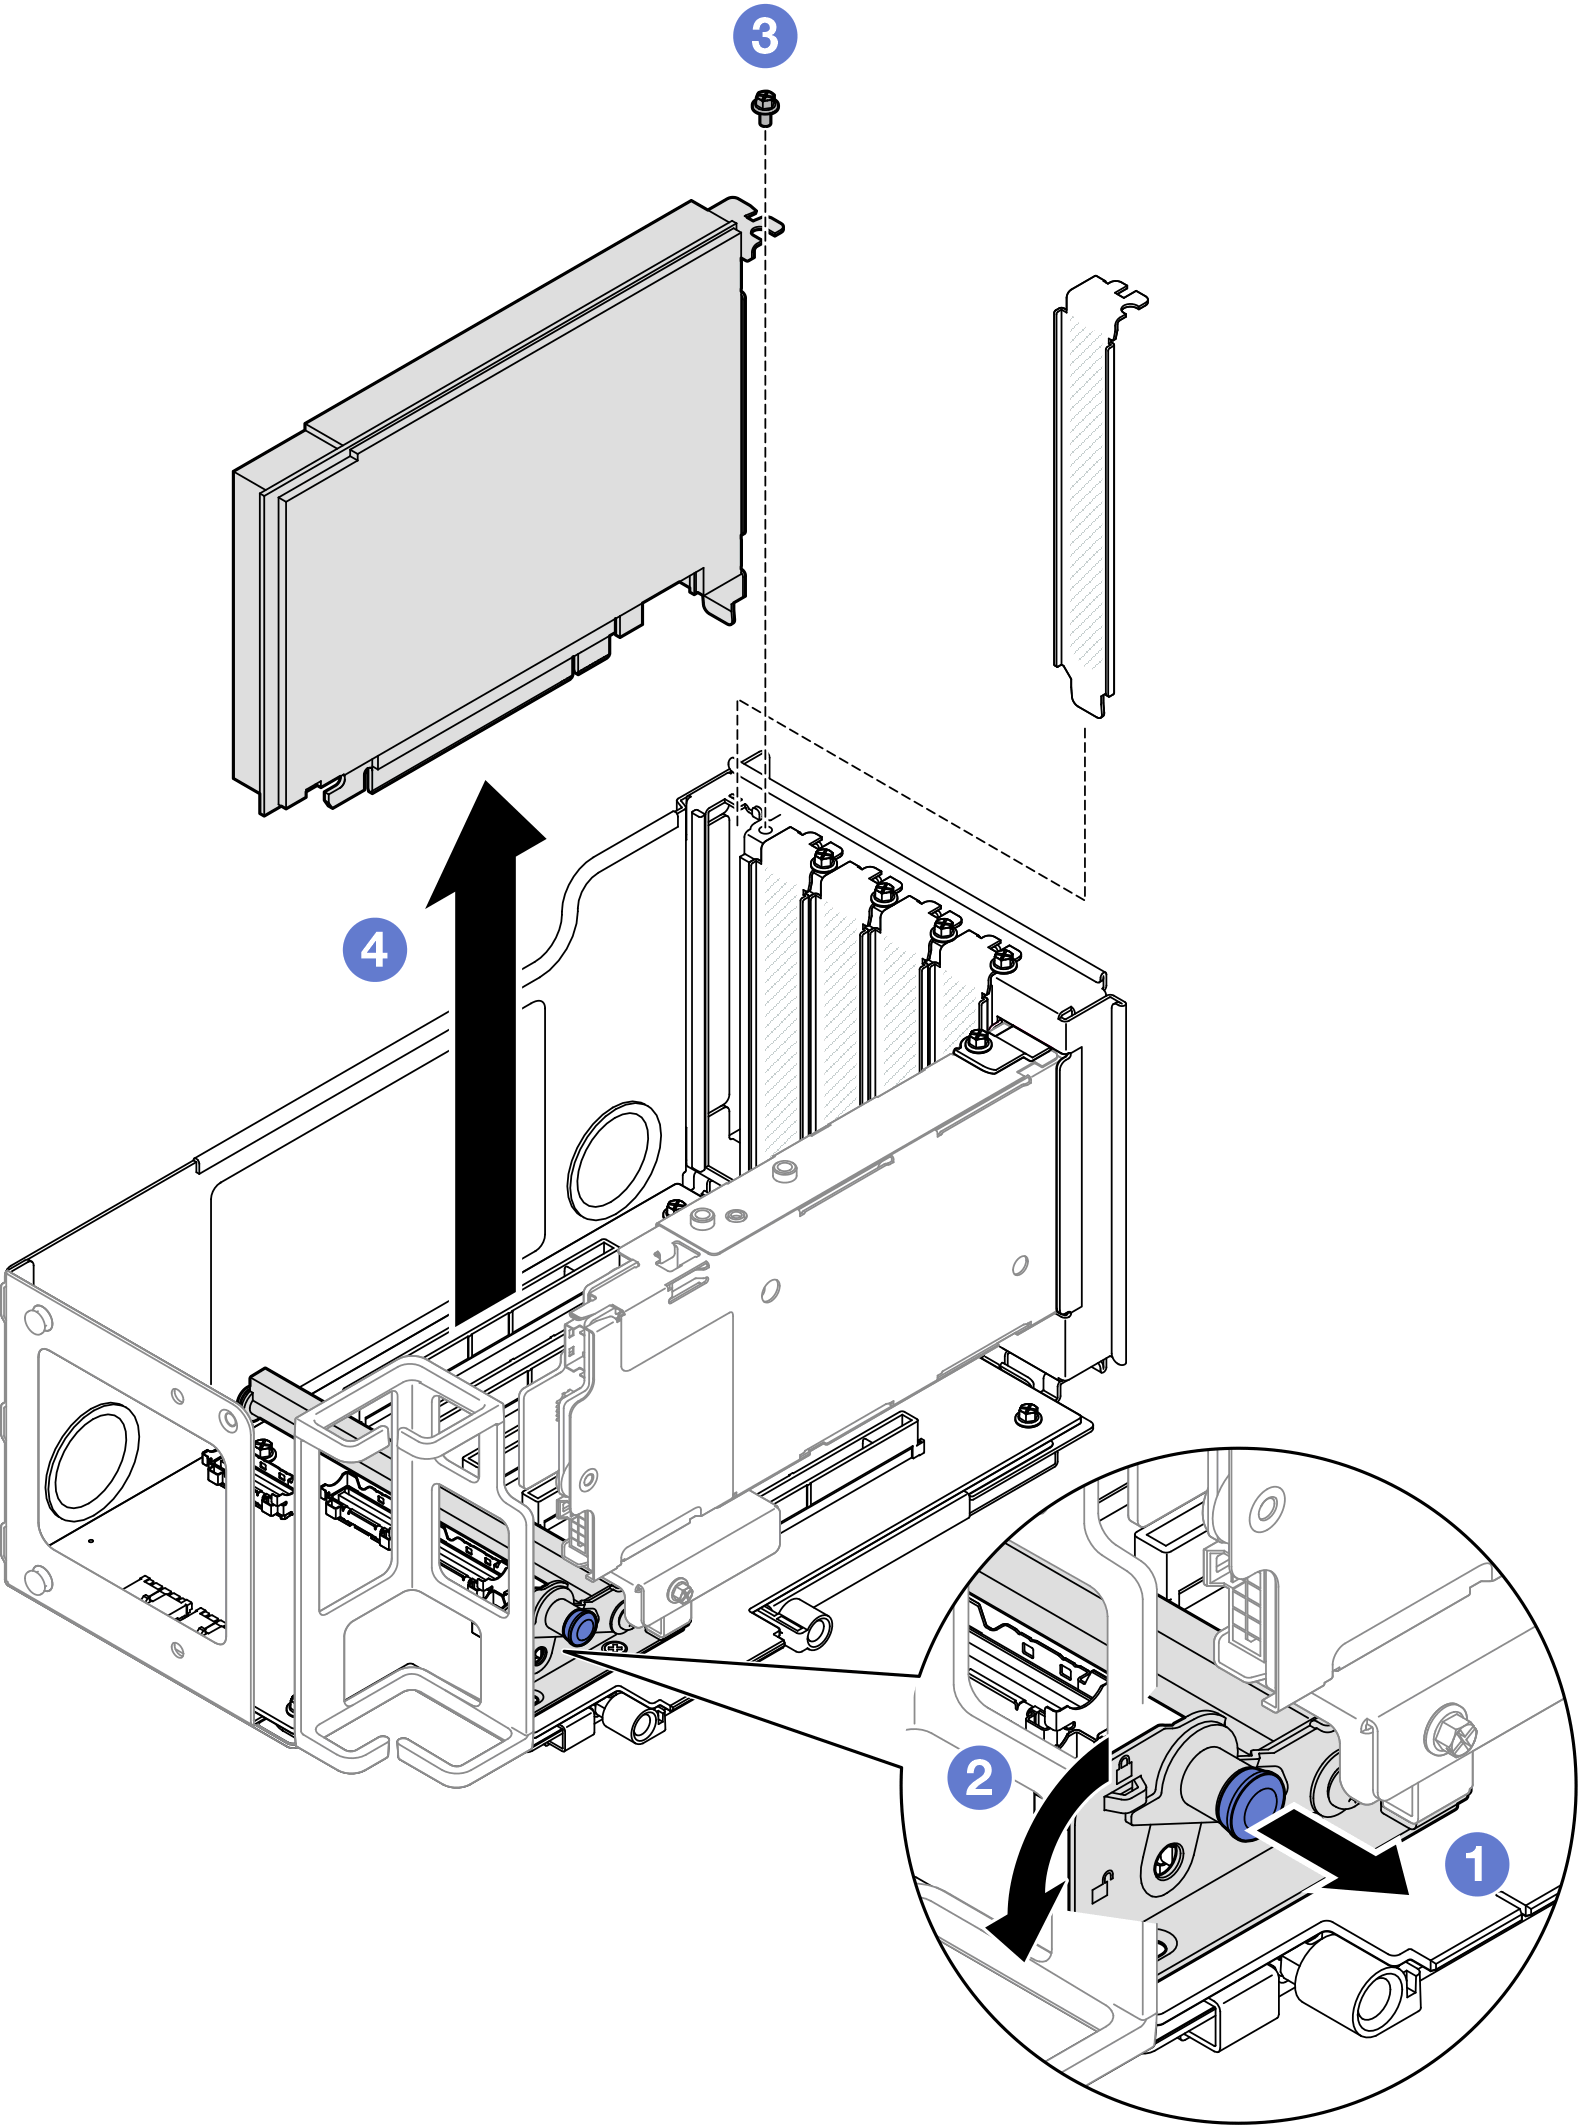
- Pull the plunger that secures the PCIe adapter retainer.
- Open the PCIe adapter retainer to the unlocked position.
- Remove the screw that secures the adapter to the PCIe riser.
 Grasp the PCIe adapter by its edges and carefully pull it out of the PCIe slot.
Remove PCIe adapter from six slot HH riser
Procedure
- Remove the PCIe adapter.Figure 3. Removing PCIe adapter from riser
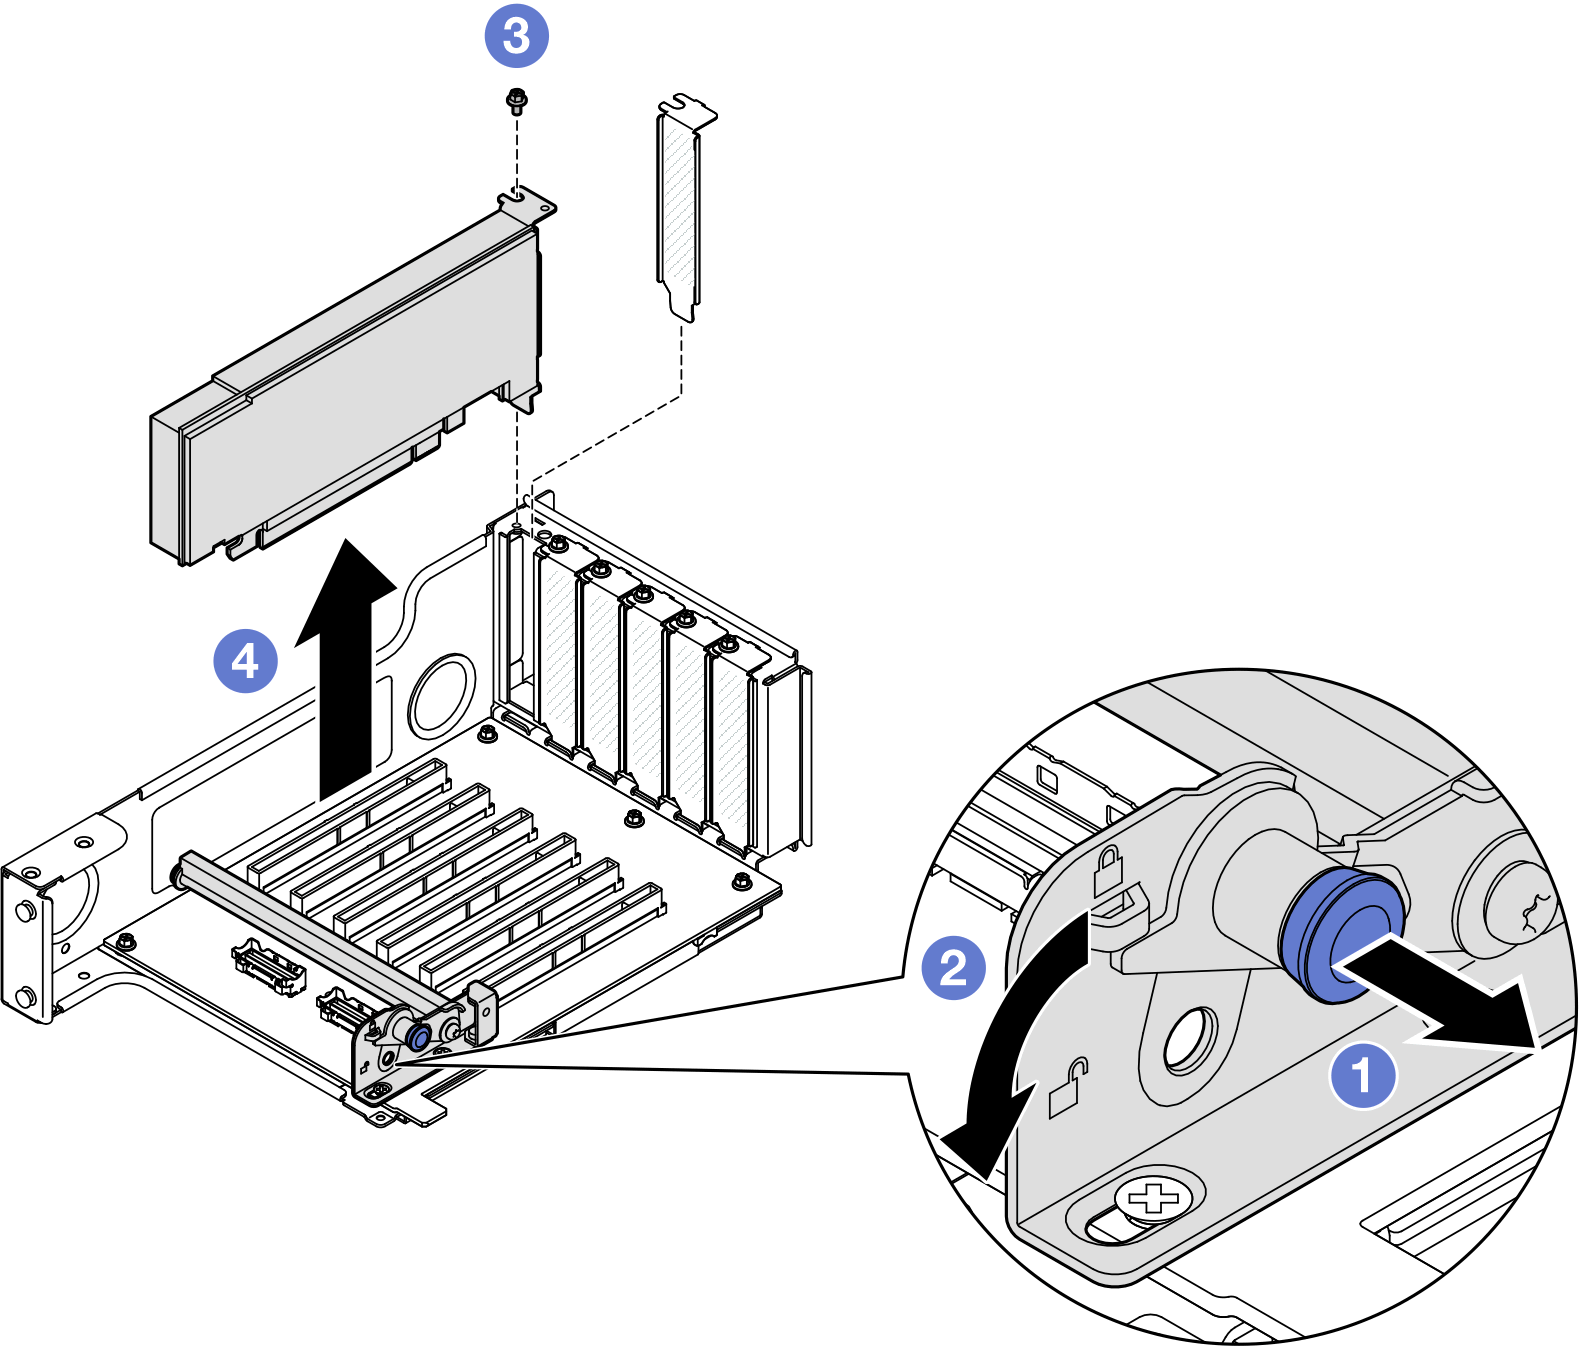
- Pull the plunger that secures the PCIe adapter retainer.
- Open the PCIe adapter retainer to the unlocked position.
- Remove the screw that secures the adapter to the PCIe riser.
- Grasp the PCIe adapter by its edges and carefully pull it out of the PCIe slot.
After you finish
Install a replacement unit or filler. See Install a PCIe adapter.
If you are instructed to return the component or optional device, follow all packaging instructions, and use any packaging materials for shipping that are supplied to you.
Demo video