Remove the rear air baffle
Follow the instructions in this section to remove the rear air baffle.
About this task
Read Installation Guidelines and Safety inspection checklist to ensure that you work safely.
Power off the server and peripheral devices and disconnect the power cords and all external cables. See Power off the server.
If the server is installed in a rack, slide the server out on its rack slide rails to gain access to the top covers, or remove the server from the rack. See Remove the server from rails.
If you intend to install memory modules in the server, you must first remove the air baffle from the server.
Procedure
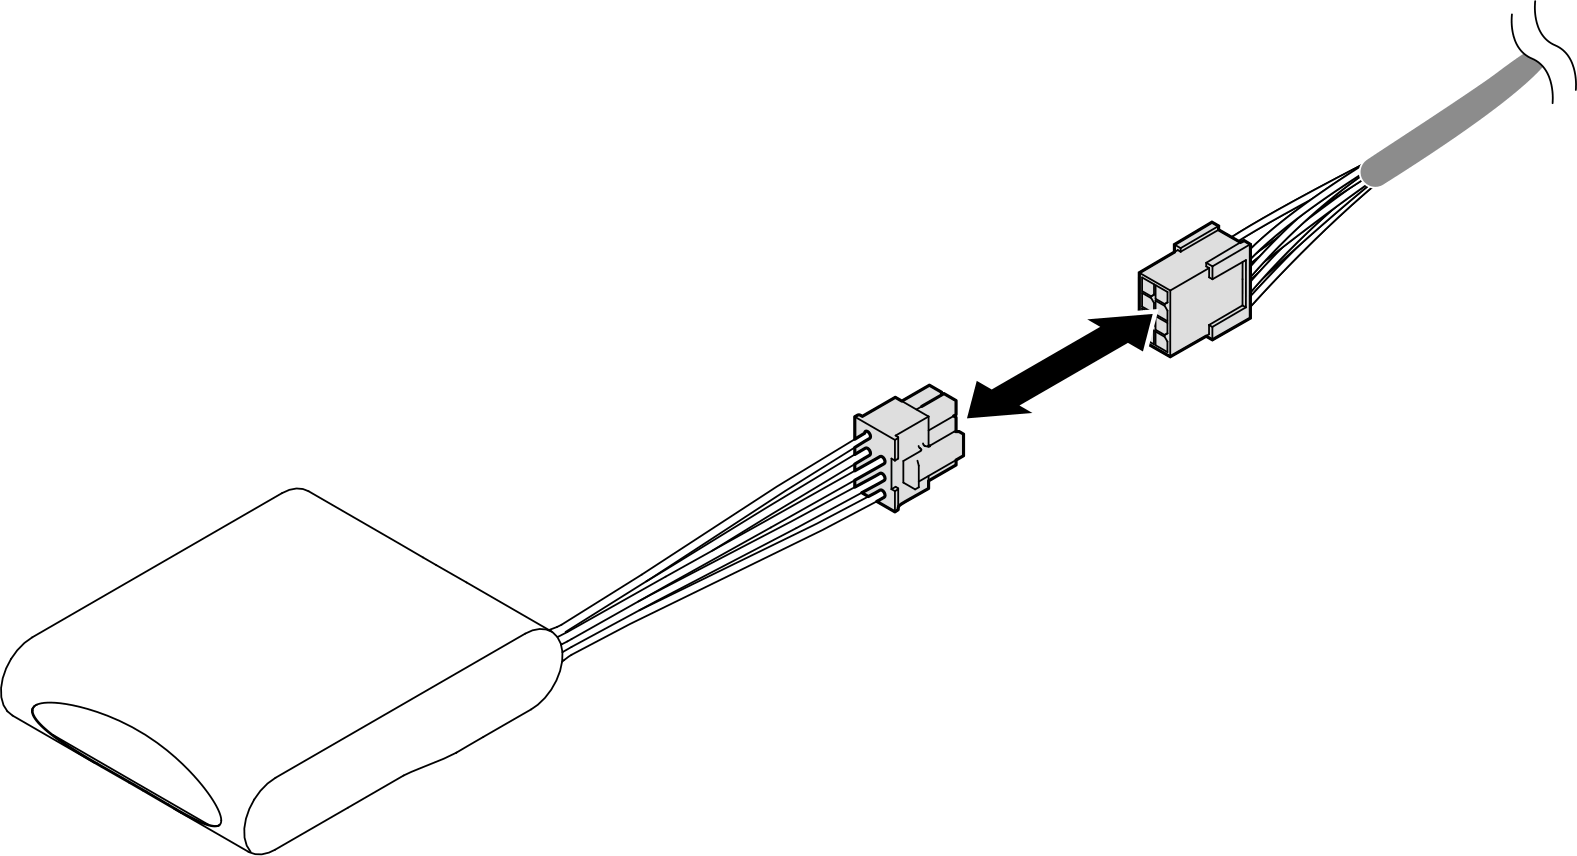
- If a flash power module is installed, disconnect the cable of the RAID flash power module from the extension cable.Figure 1. Disconnecting cable from flash power module
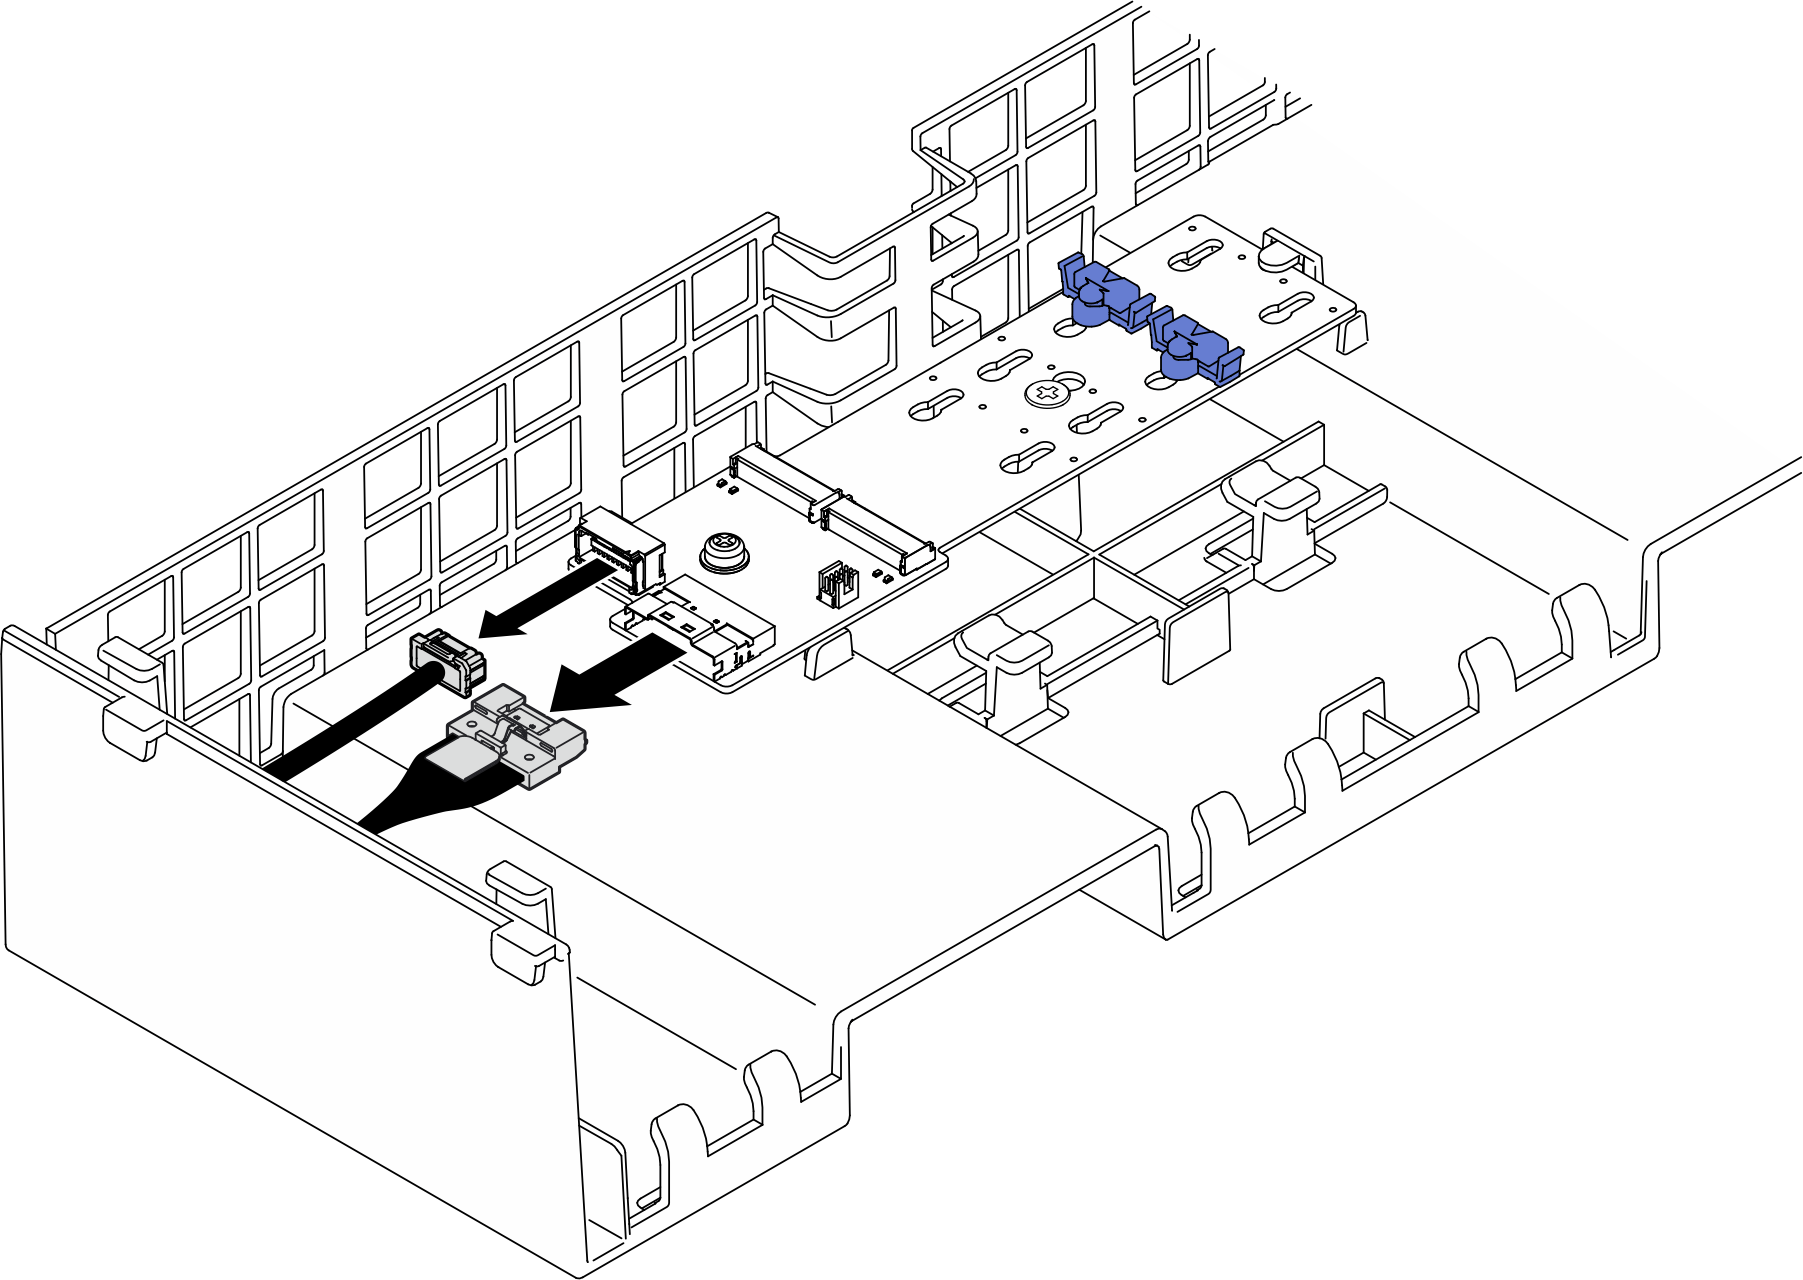
- If an M.2 boot adapter is installed, disconnect the cables from the M.2 boot adapter on the front air baffle.SATA/x4 NVMe M.2 boot adapterFigure 2. Disconnecting cable from SATA/x4 NVMe M.2 boot adapter
 SATA/NVMe or NVMe M.2 boot adapterFigure 3. Disconnecting cable from SATA/NVMe or NVMe M.2 boot adapter
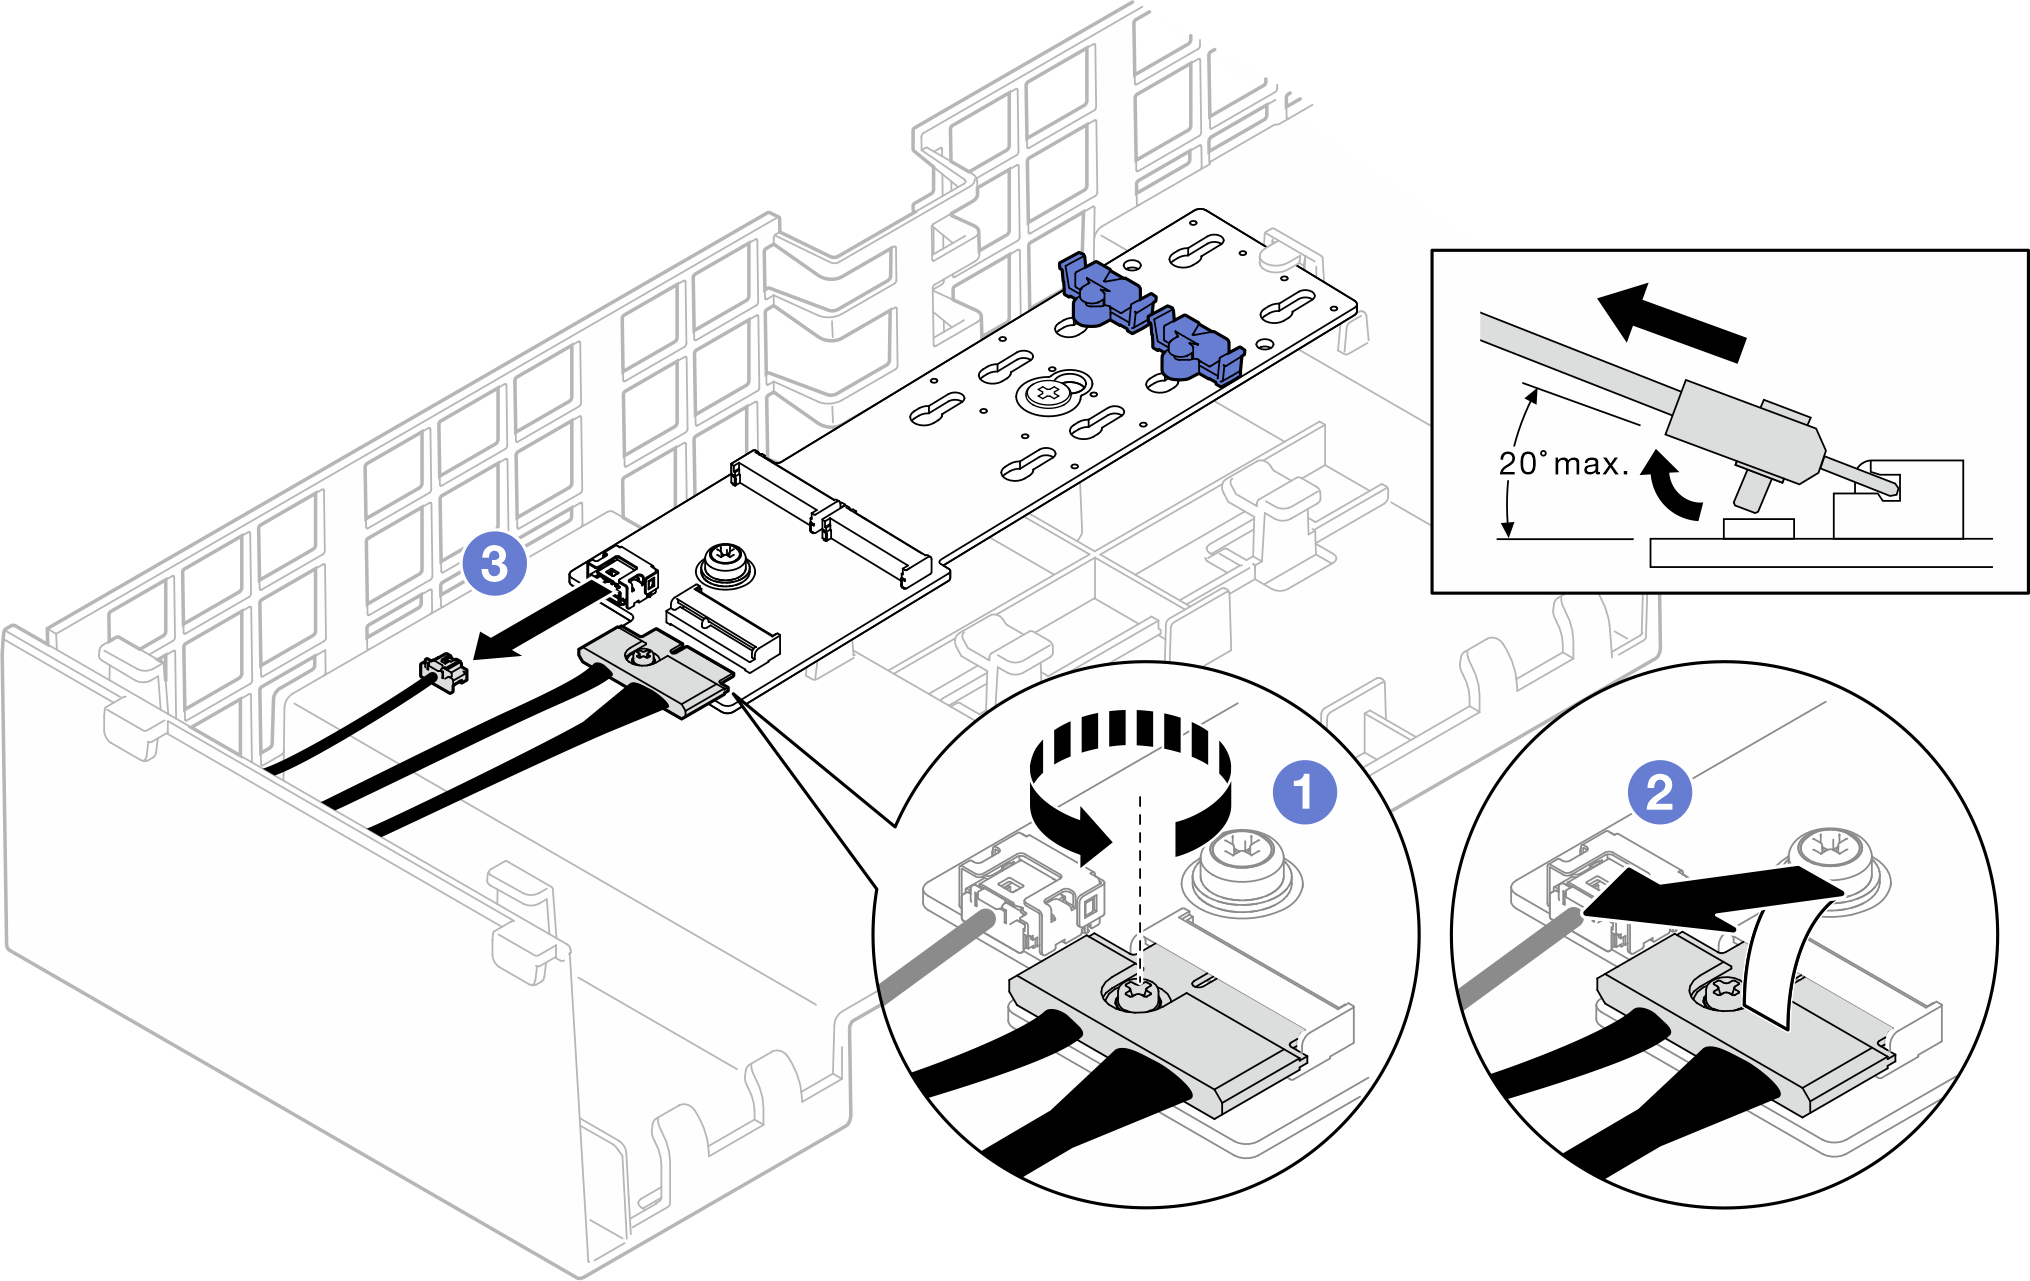
 Loosen the screw on the signal cable.
 Tilt the connector and remove it.
 Remove the power cable.
RAID SATA/NVMe M.2 boot adapterFigure 4. Disconnecting cable from RAID SATA/NVMe M.2 boot adapter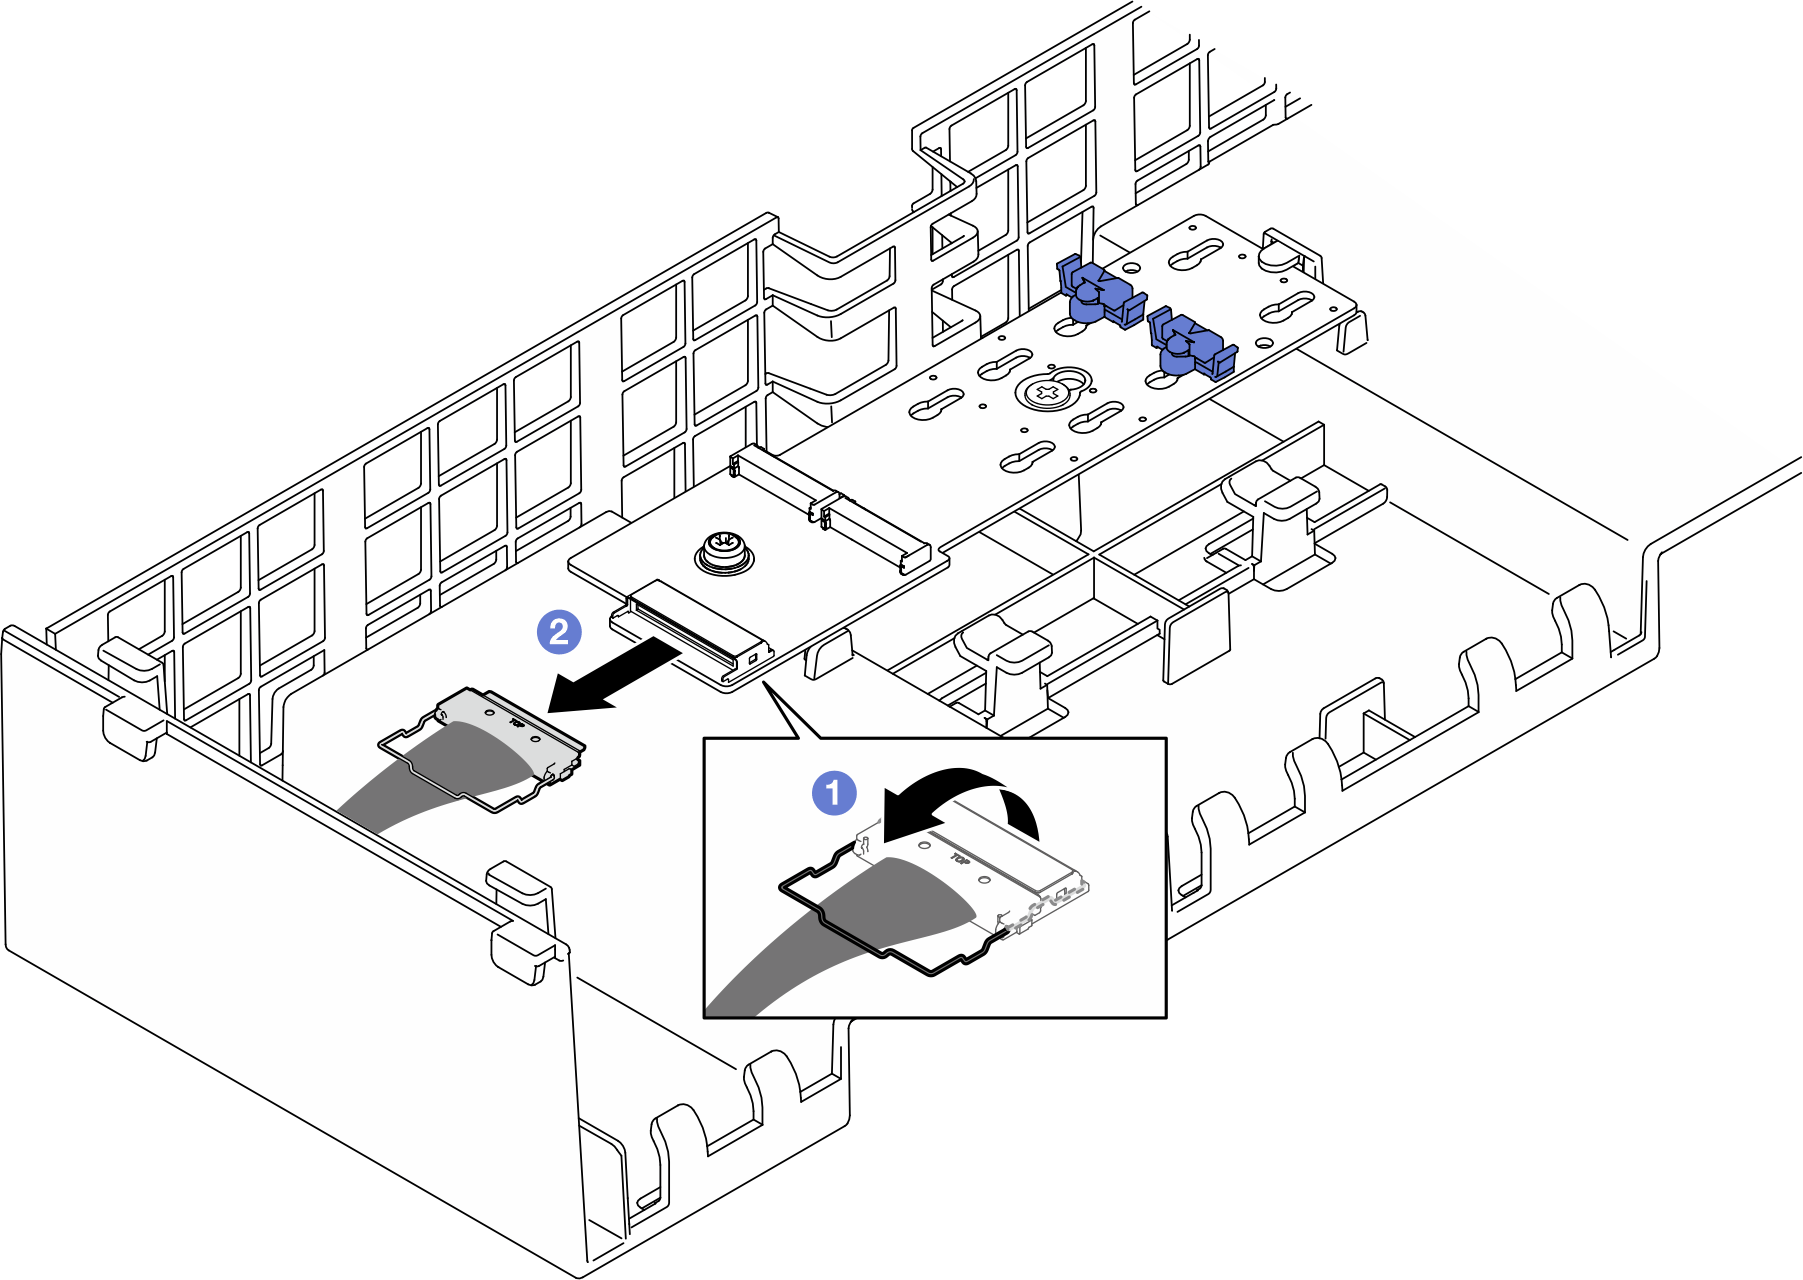
- Unhook the wire bail on the cable from the connector.
- Disconnect the cables from the M.2 boot adapter.
- Lift the cables routed through the rear air baffle and set them aside.Figure 5. Lifting cable out of rear air baffle
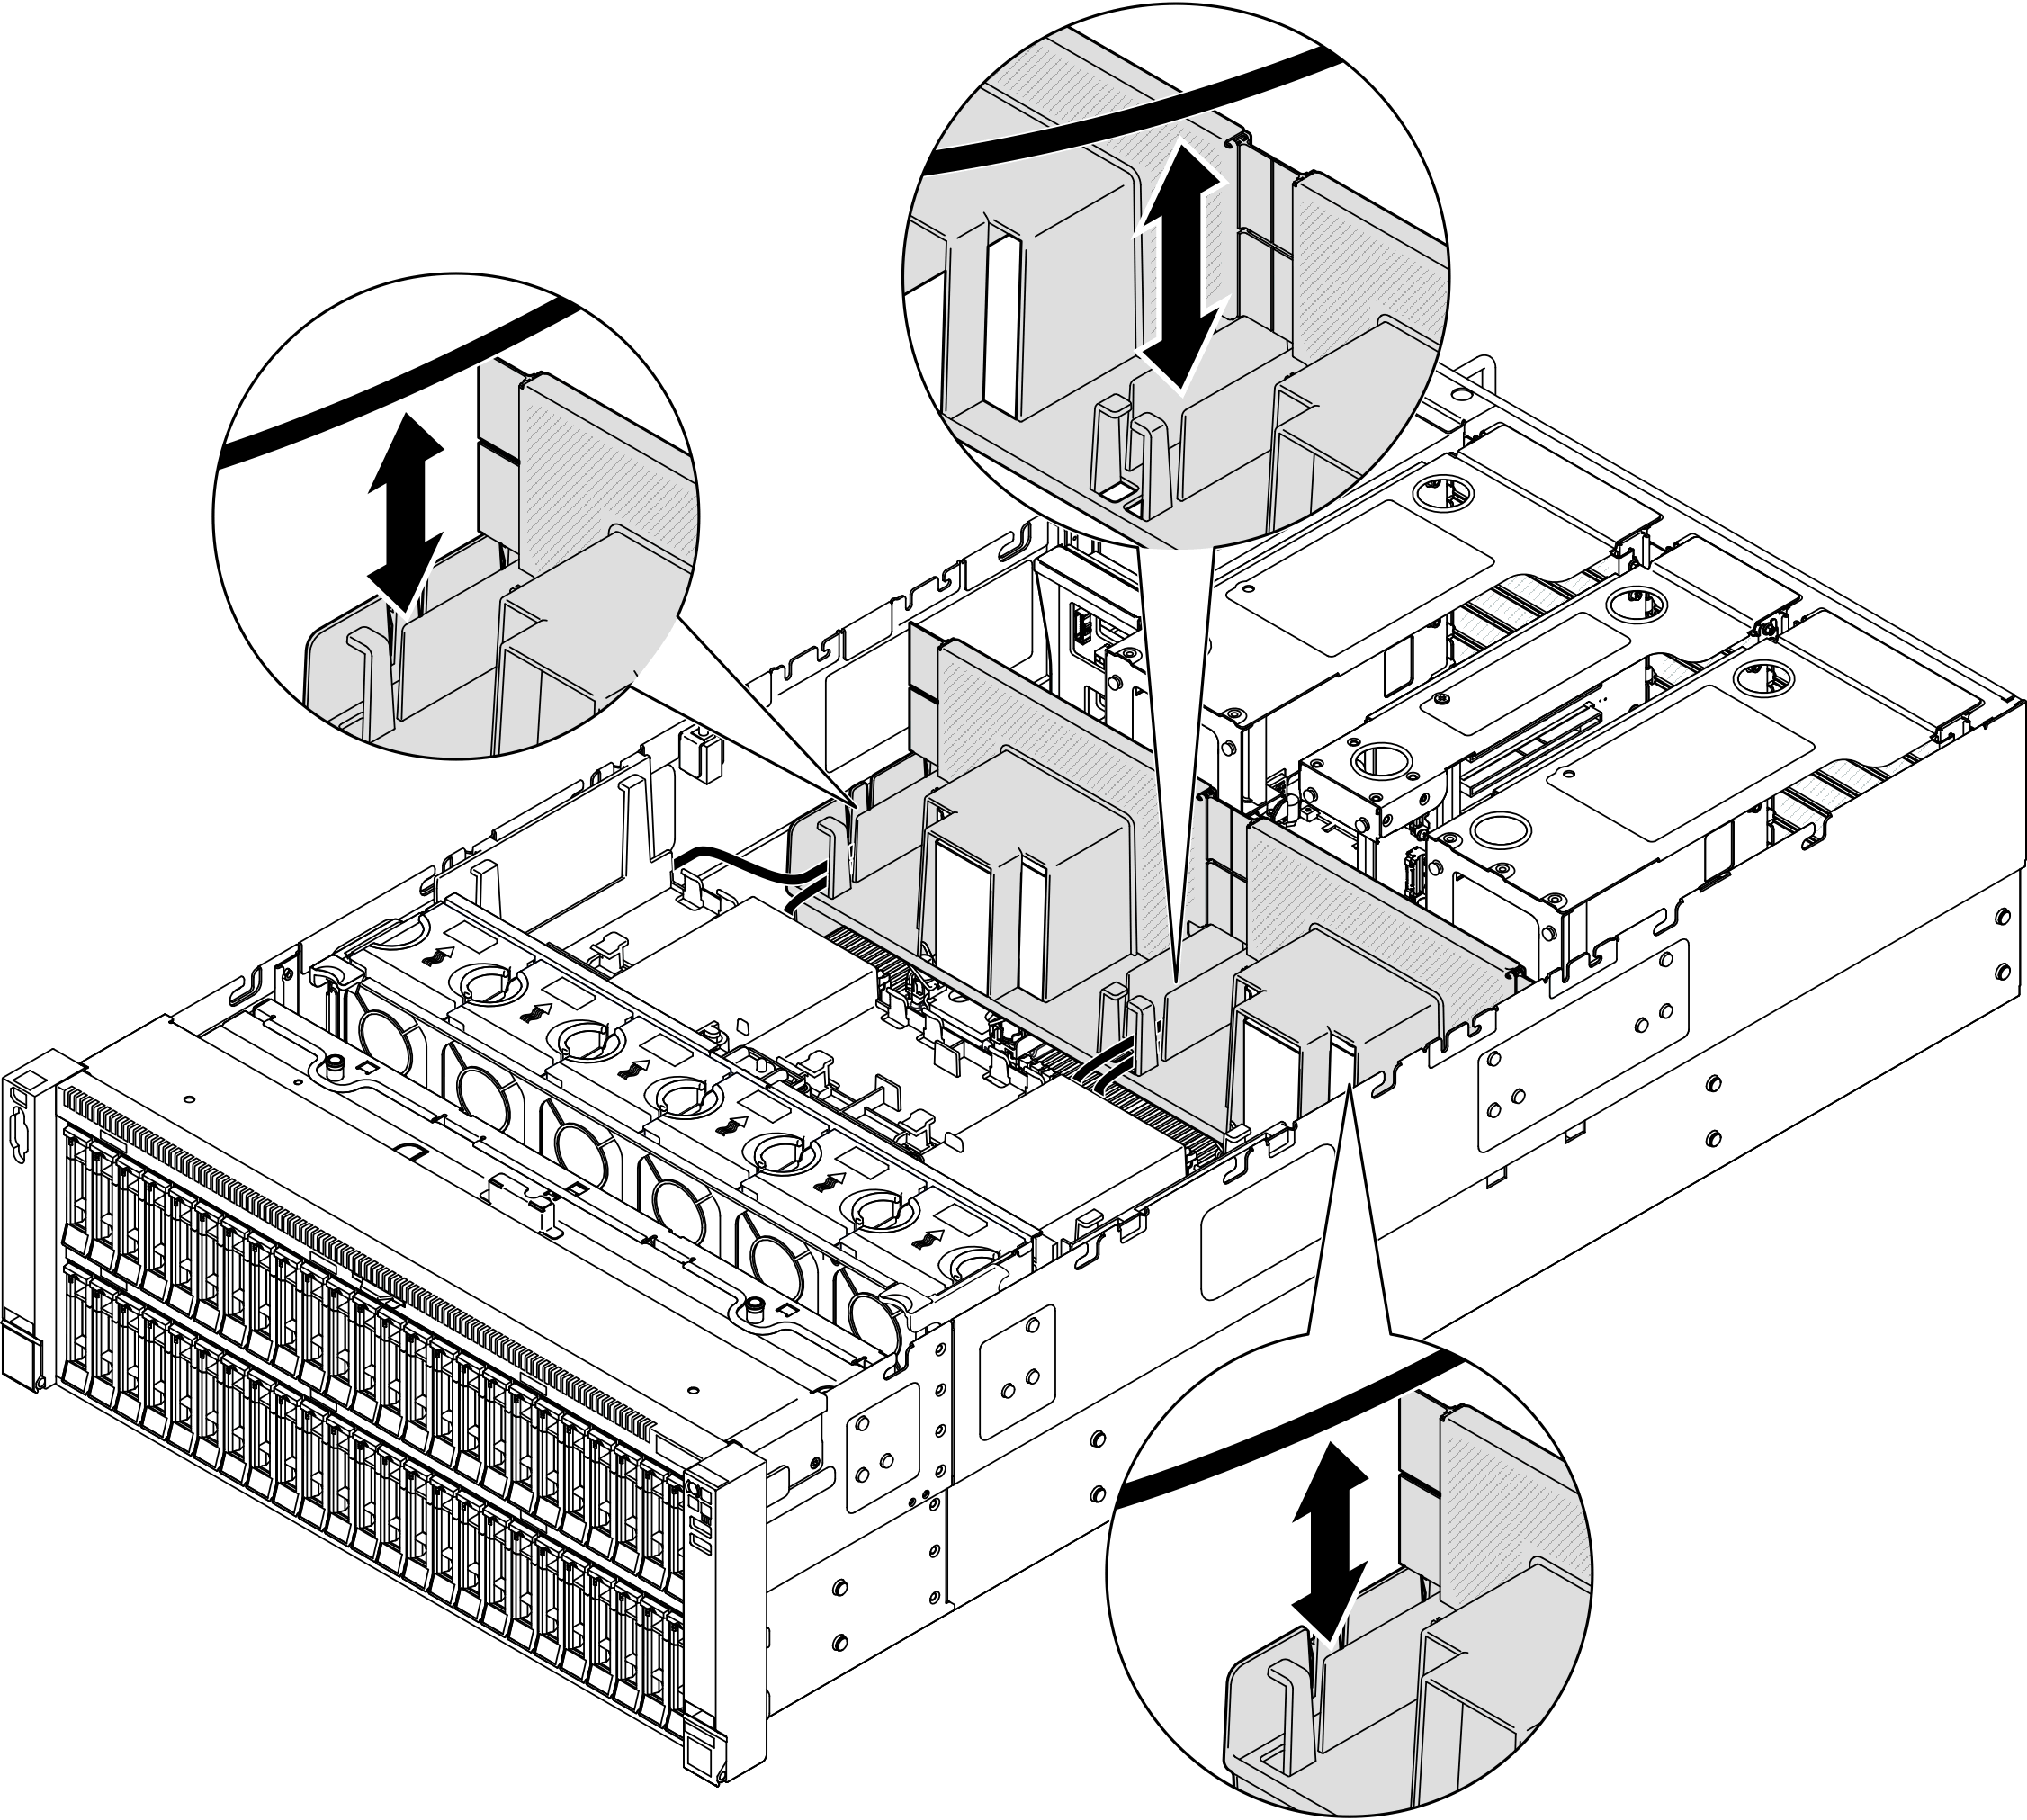
- Grasp the rear air baffle and carefully lift it out of the chassis.NoteFor proper cooling and airflow, reinstall the front and rear air baffles before you turn on the server. Operating the server with the air baffle removed might damage server components.Figure 6. Removing rear air baffle for 3U standard PHM
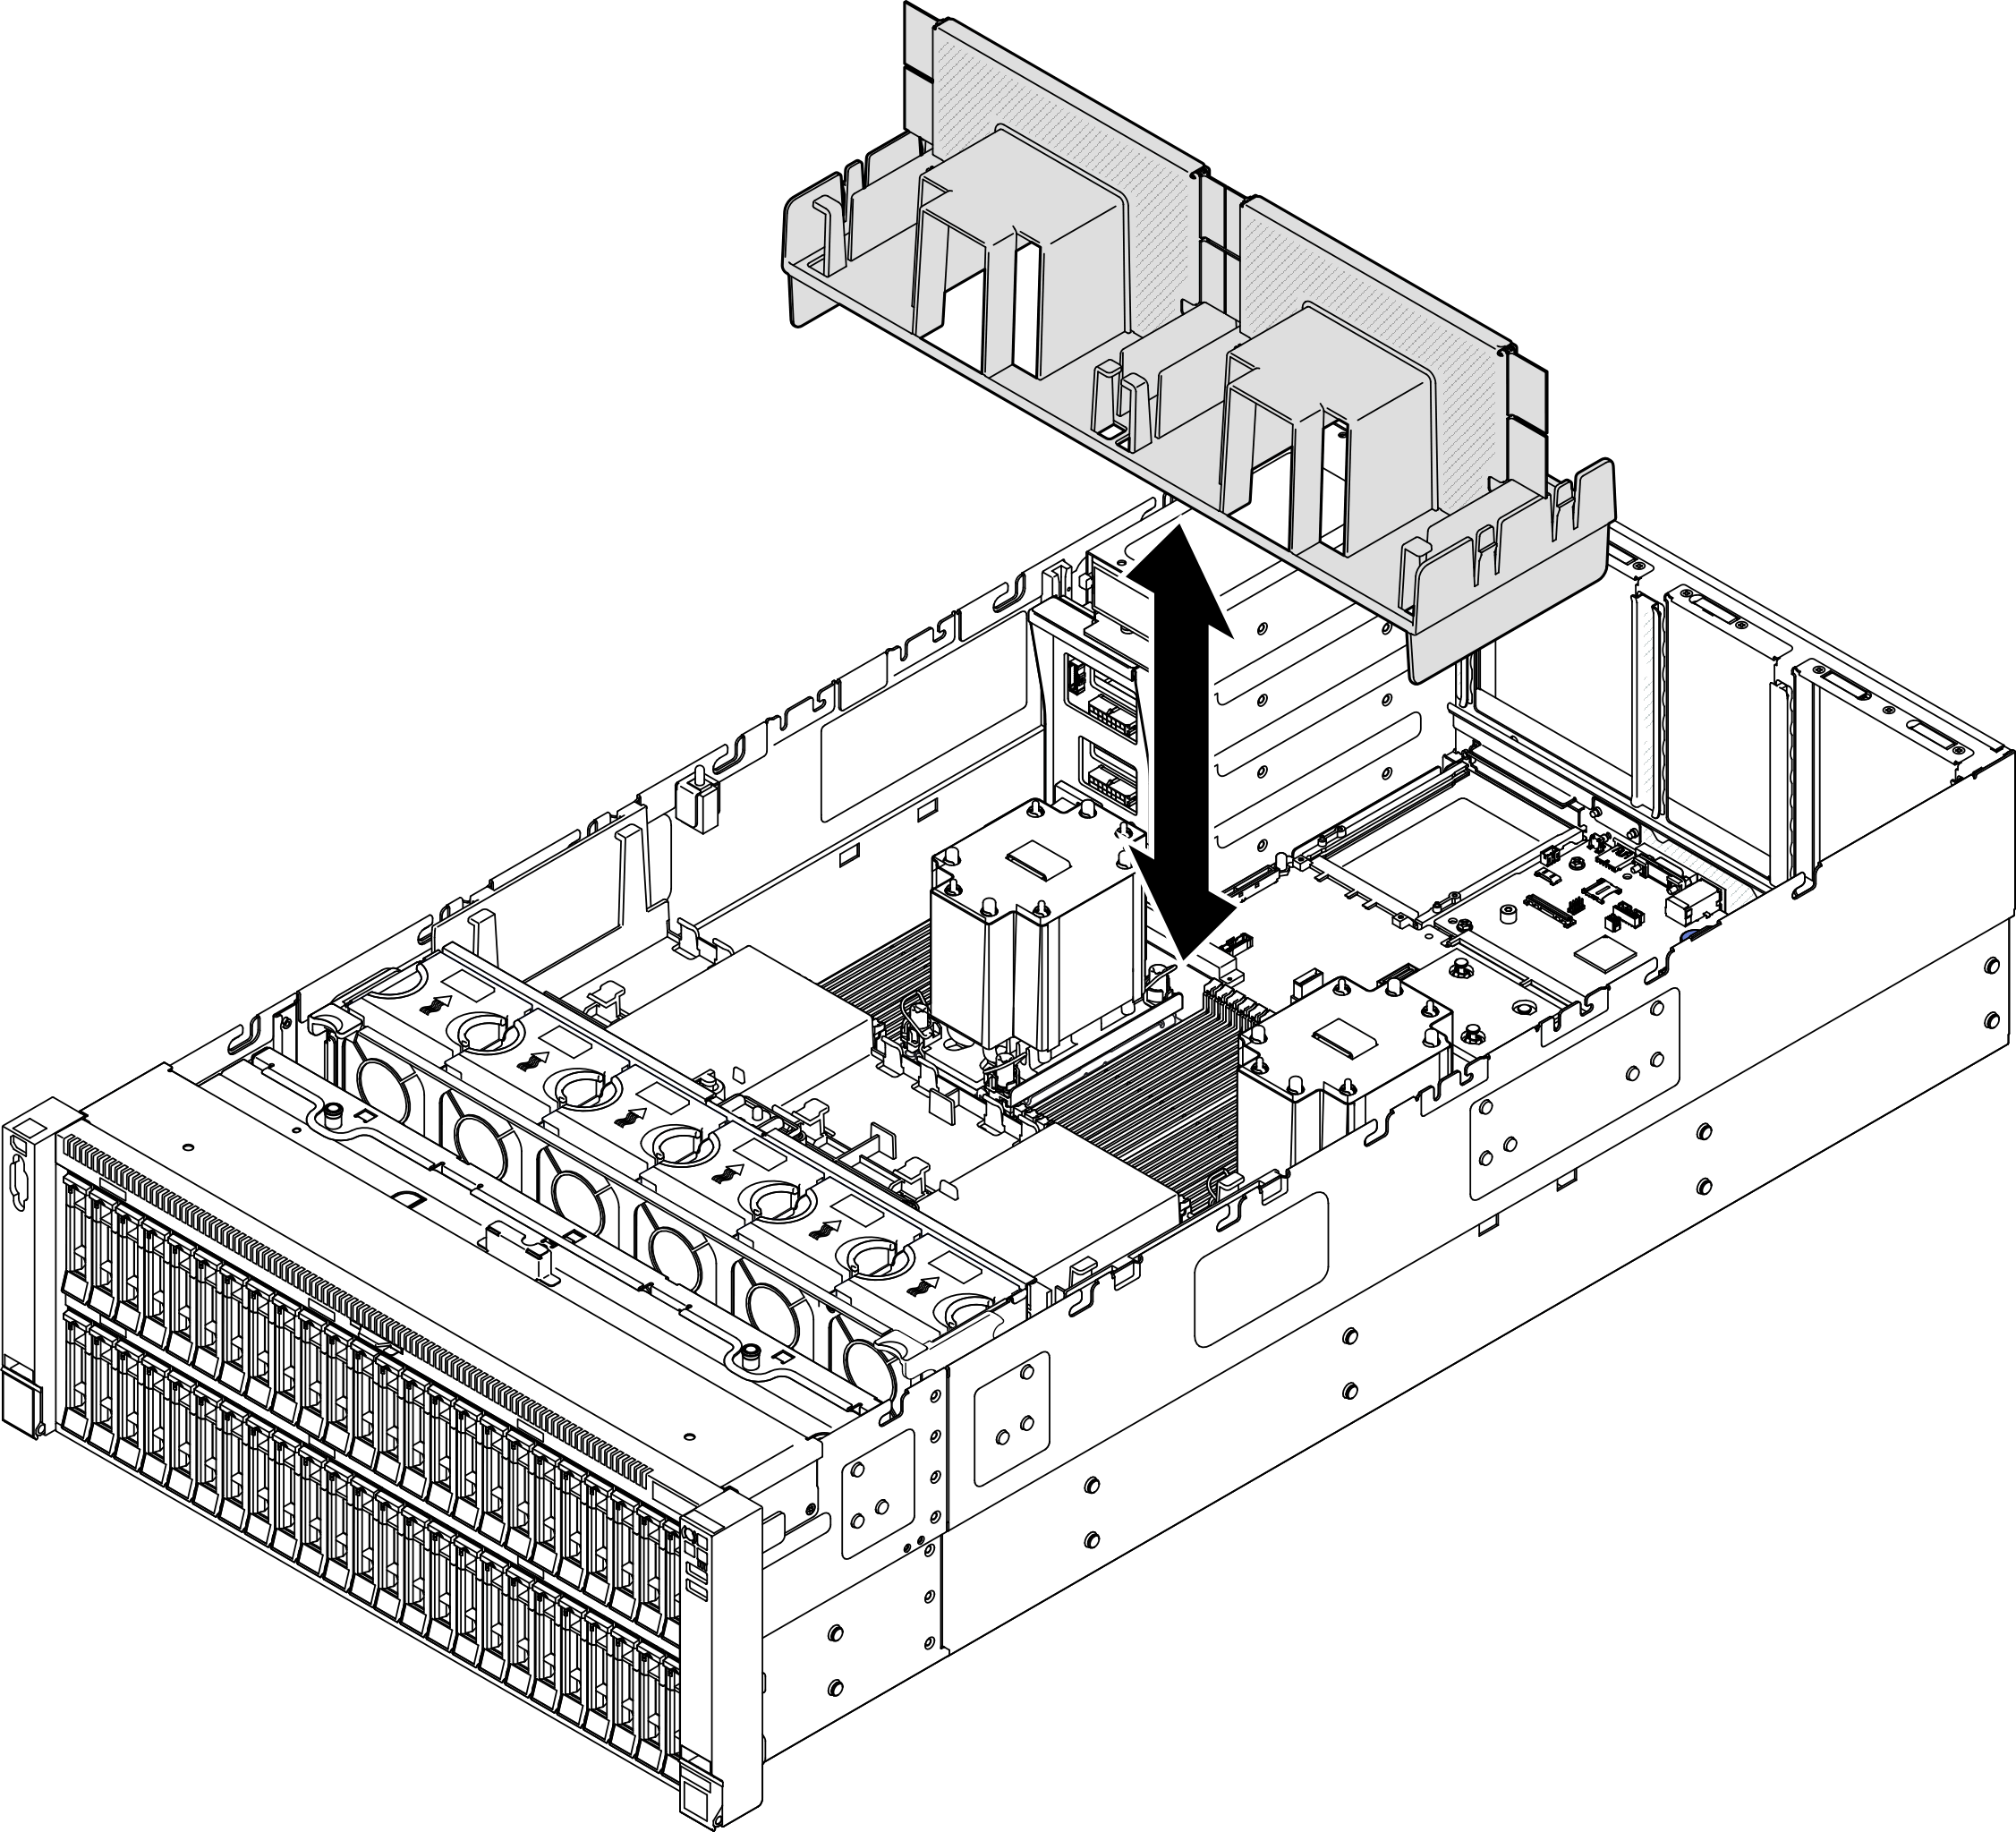 Figure 7. Removing rear air baffle for 2U performance PHM
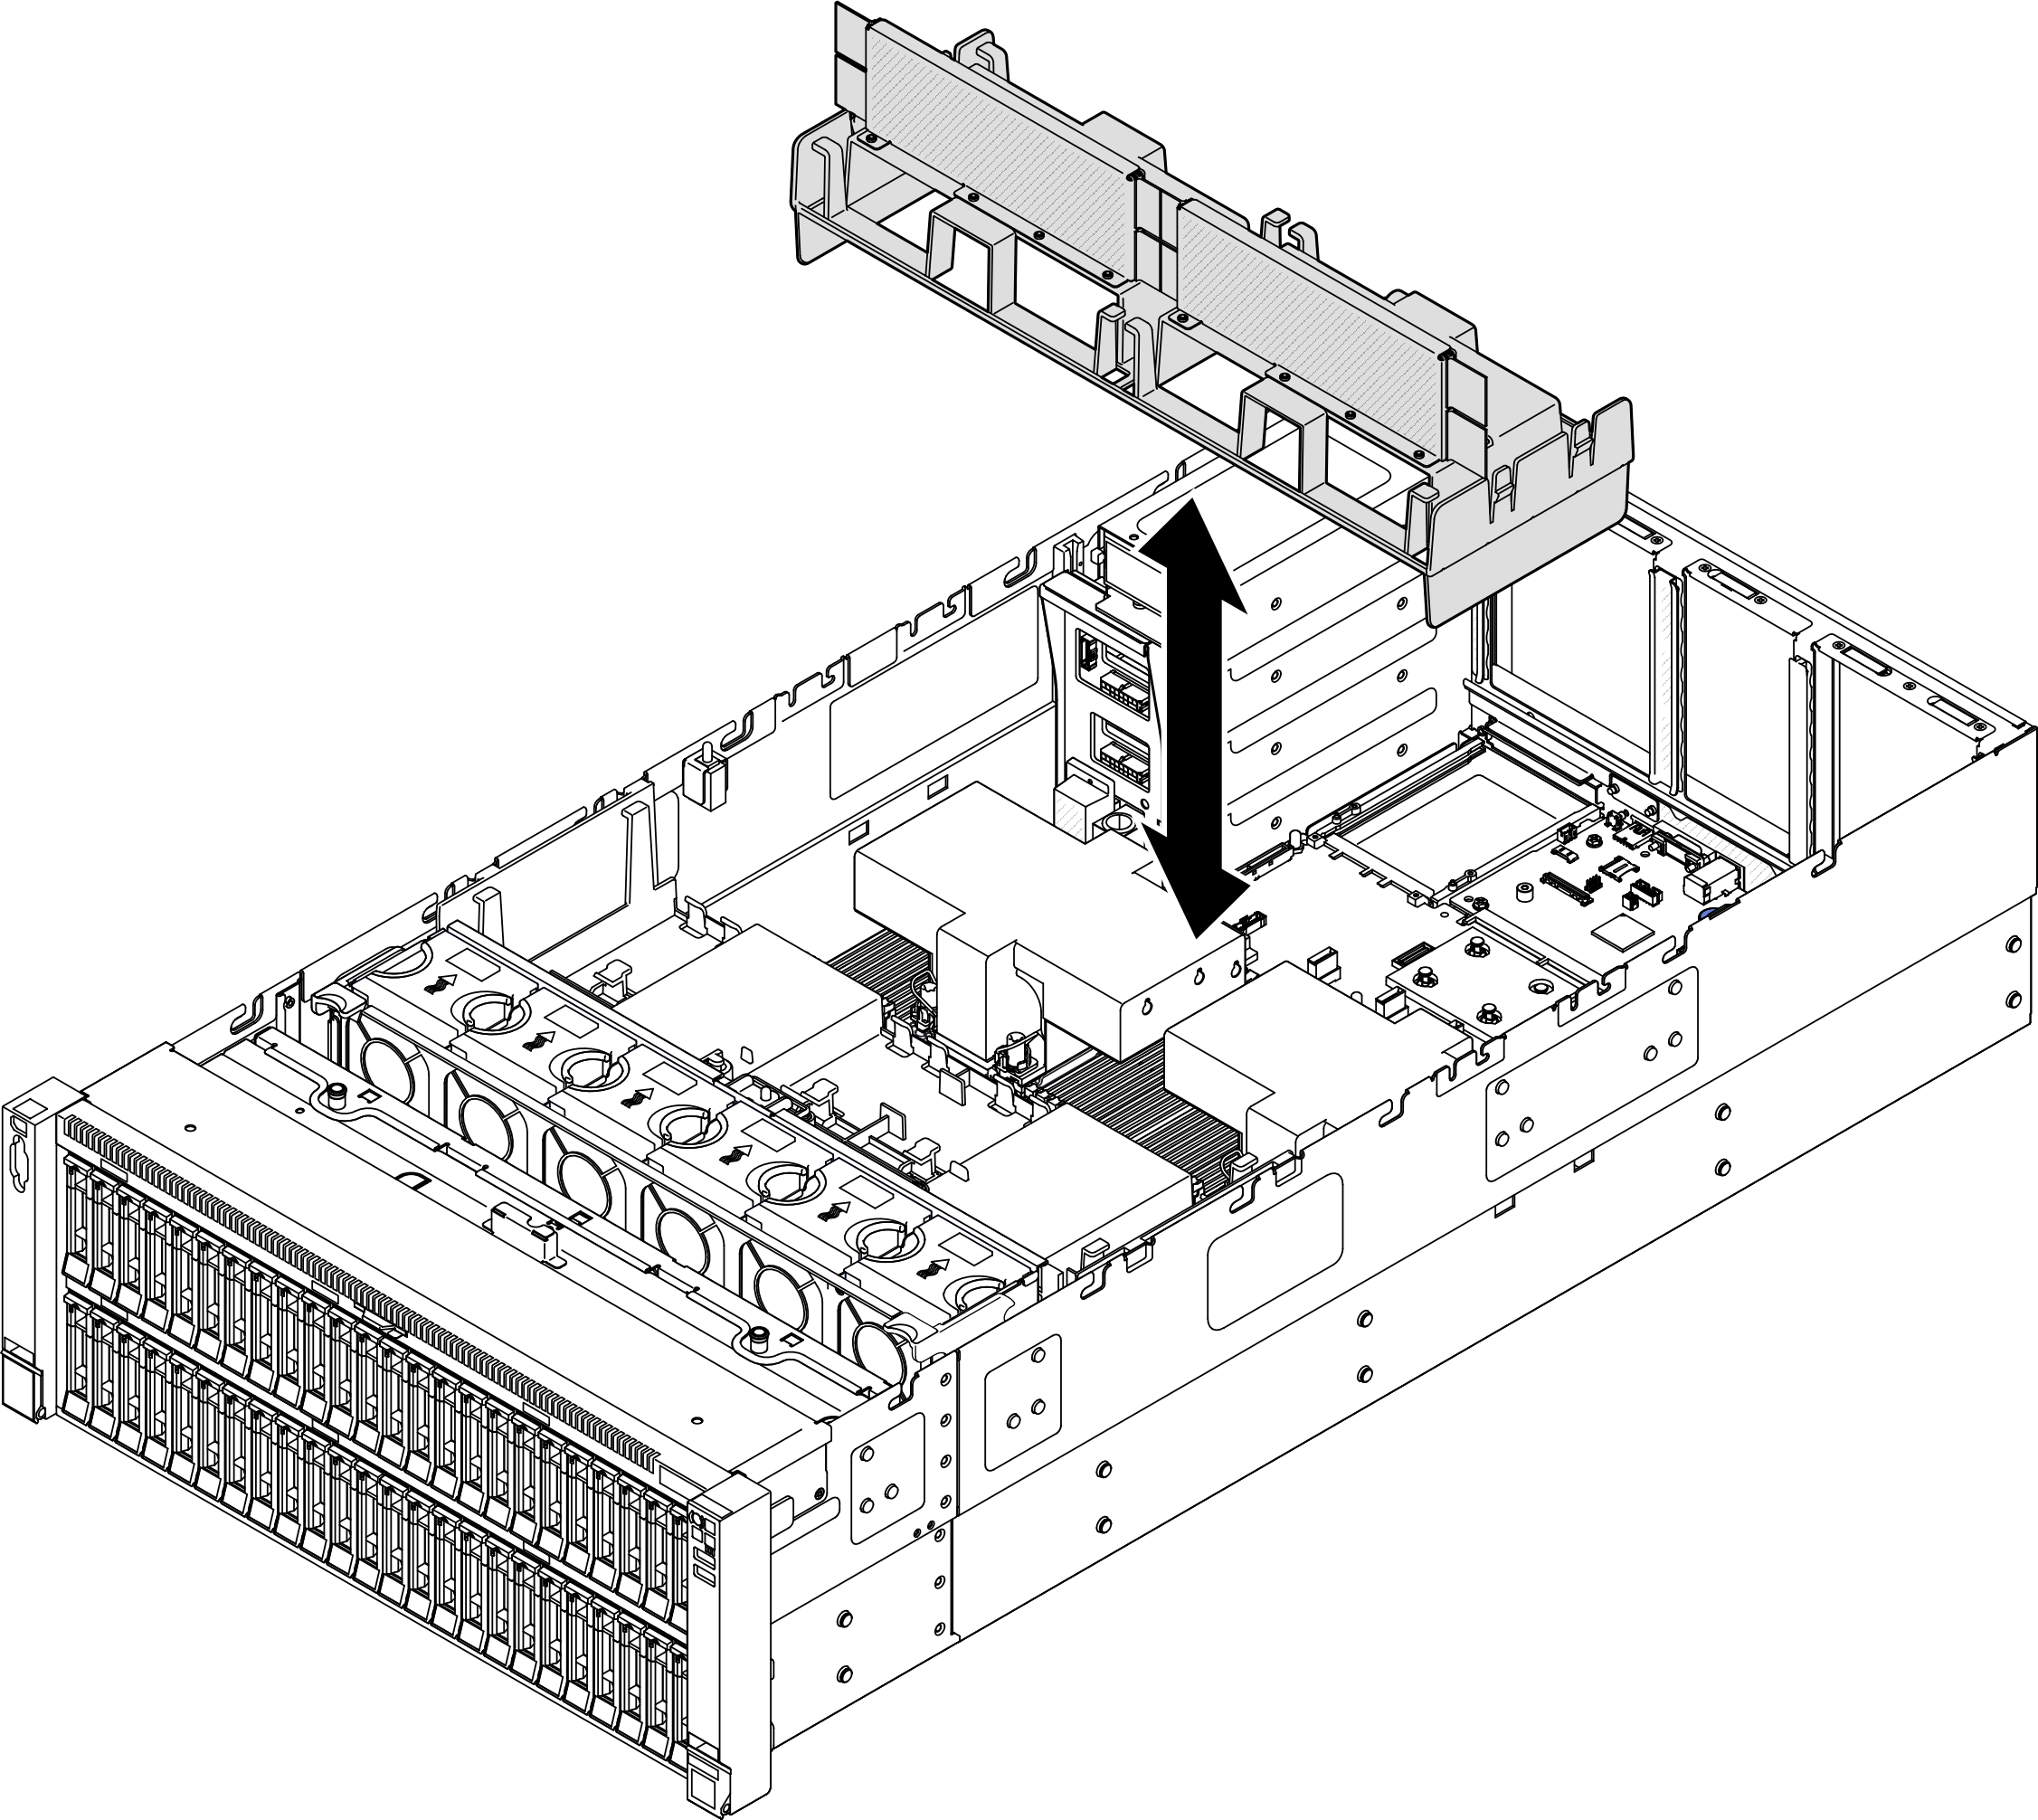
After you finish
Install a replacement unit. See Install the rear air baffle.
If you are instructed to return the component or optional device, follow all packaging instructions, and use any packaging materials for shipping that are supplied to you.
Demo video