Install an M.2 drive
The M.2 drives are in the I/O tray that is accessed from the rear of the server. After removing the I/O tray and the M.2 backplane, insert the M.2 drives in the backplane and lock them in place with the drive retainer.


Before you install an M.2 drive, make sure that the retainer on the M.2 backplane is in the correct keyhole to accommodate the size of the M.2 drive you are installing. See M.2 backplane retainer adjustment.
Complete the following steps to install an M.2 drive in the M.2 backplane.

- Insert the M.2 drive.Figure 1. Inserting the M.2 drives
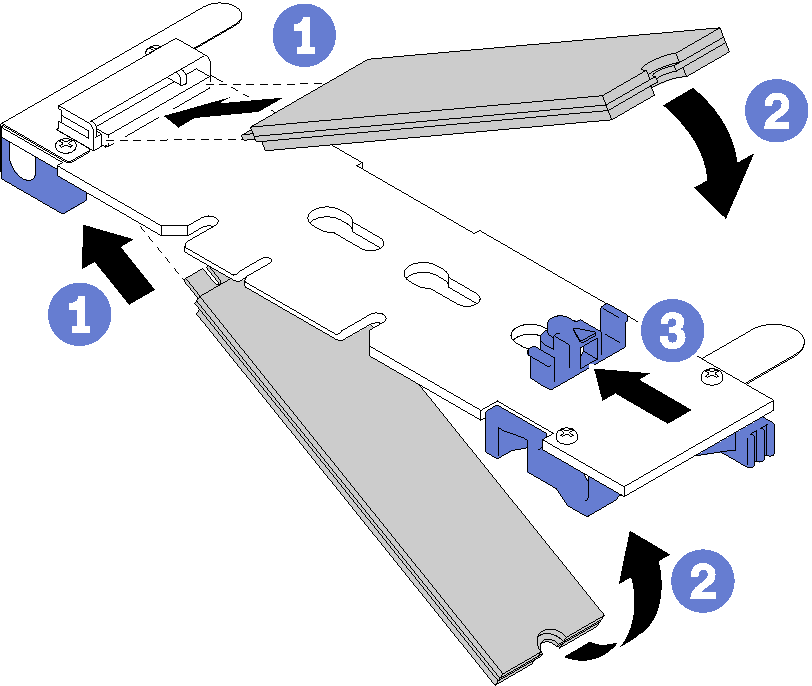
Insert the M.2 drive at an angle (approximately 30 degrees) into the connector and rotate it until the notch catches on the lip of the retainer
NoteWhen installing two drives, align and support both drives before sliding the retainer forward to secure the drives.
When only one drive is installed, it must be in slot 0.
Figure 2. M.2 drive slots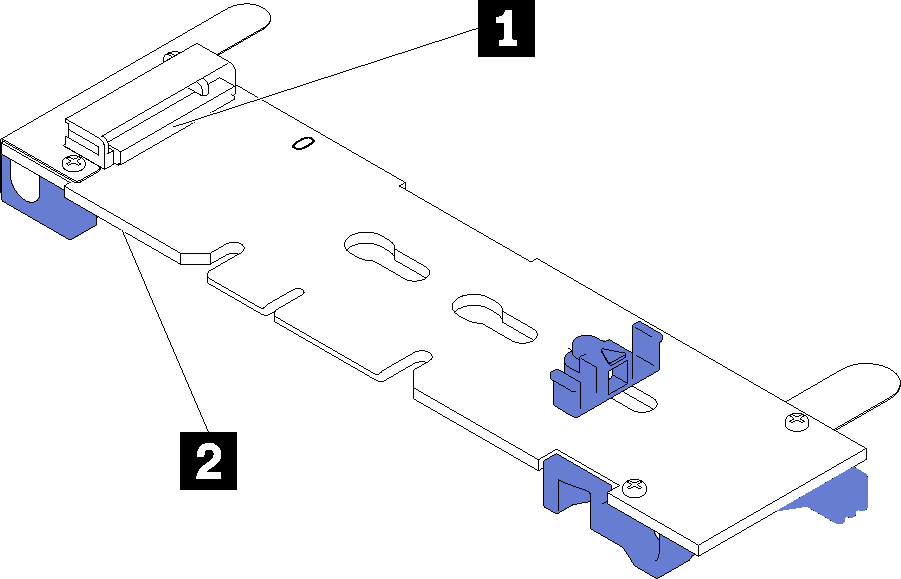
Table 1. M.2 drive slots 1 Slot 0 2 Slot 1
- Secure the M.2 drives in the backplane.Figure 3. Securing the M.2 drives
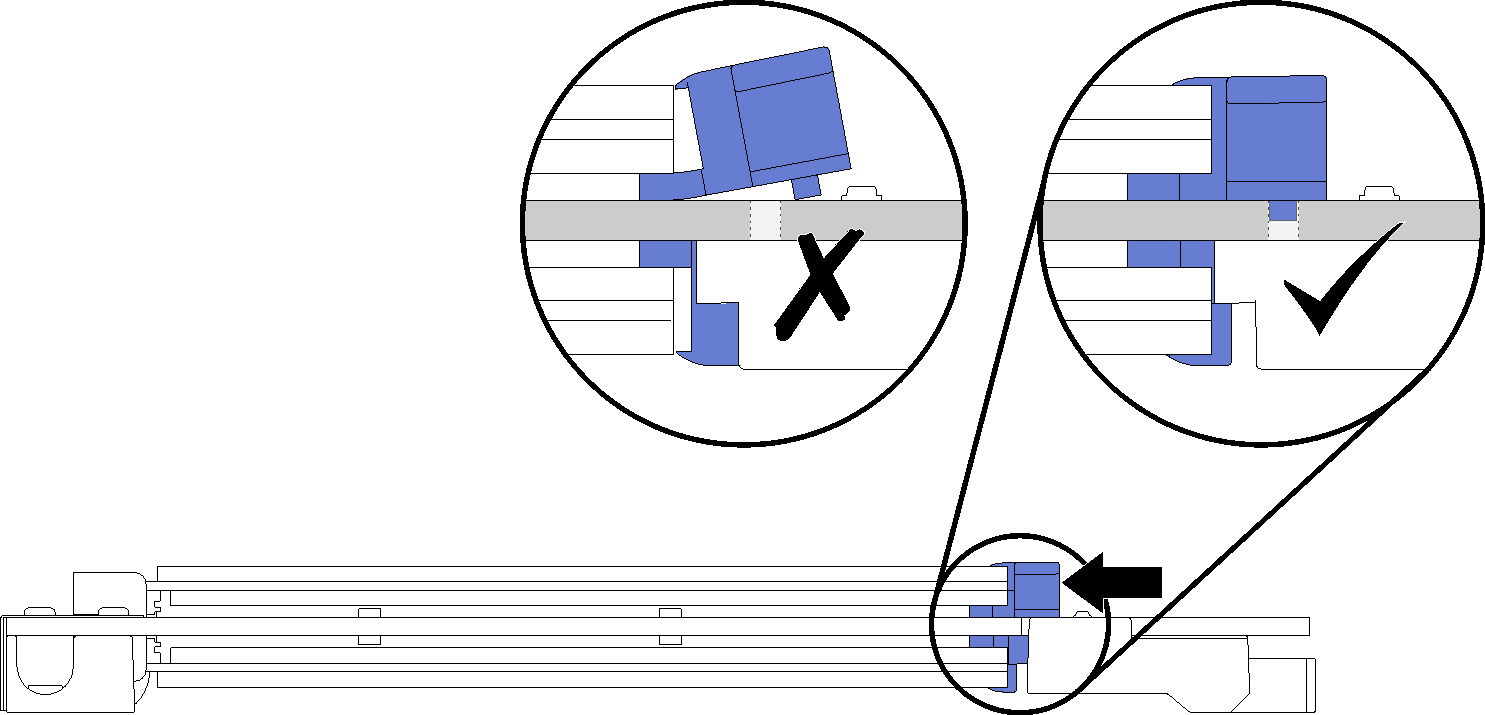 AttentionMake sure the two nubs on the retainer are in the small holes on the M.2 backplane when the retainer is slid forward.
Slide the retainer forward (toward the connector) until you hear a soft “click” sound.
After installing an M.2 drive:
Install the M.2 backplane. See Install the M.2 backplane.
Install the riser that you removed to access the M.2 backplane. See Install the riser for slot 10 to 15 (riser 2) or Install the riser for slot 16 to 17 (riser 3).
Install the I/O tray and connect all cables. See Install the I/O tray.
Demo video