Remove an M.2 drive
The M.2 drive is in the I/O tray that is accessed from the rear of the server. After removing the I/O tray and the M.2 backplane, slide open the drive retainer and rotate the M.2 drive from the backplane.


Disconnect and label all cables connected to adapters in the I/O tray; then, remove the I/O tray. See Remove the I/O tray.
Remove the riser for slot 10 to 15 (riser 2) or the riser for slot 16 to 17 to access the M.2 backplane. See Remove the riser for slot 10 to 15 (riser 2) or Remove the riser for slot 16 to 17 (riser 3).
Remove the M.2 backplane from your system. See Remove the M.2 backplane.
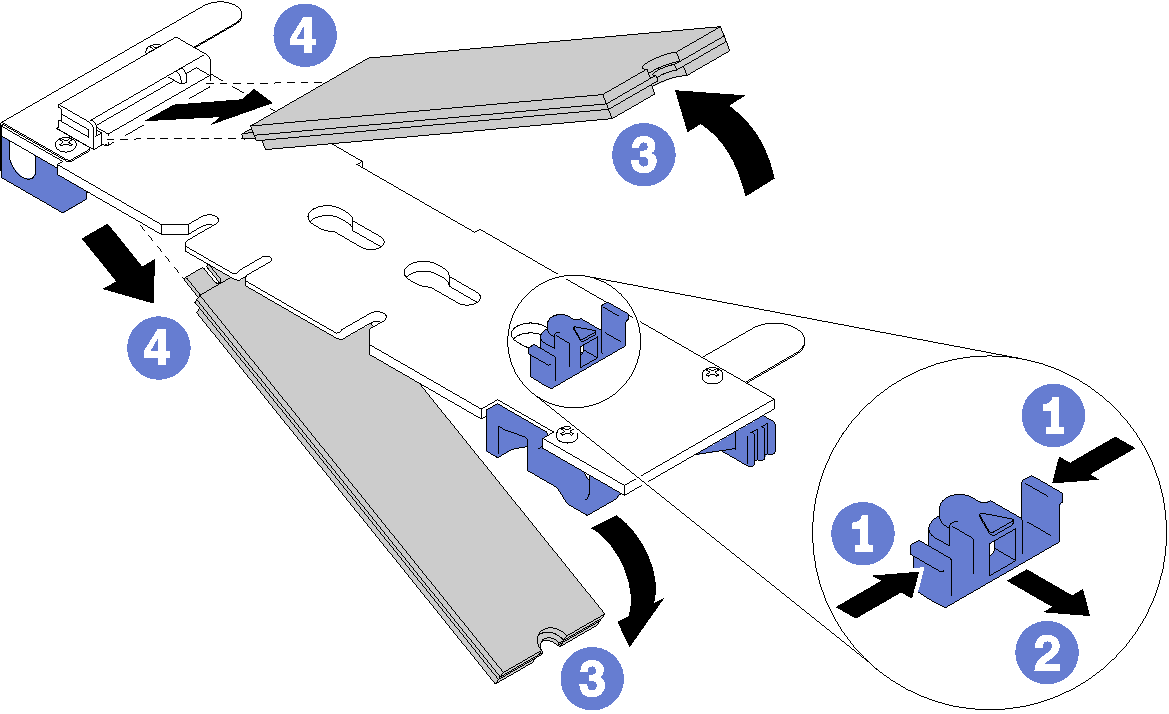
Complete the following steps to remove an M.2 drive.
After removing the M.2 drive, if you are removing the M.2 backplane and drives and not installing a replacement:
Install the riser that you removed to access the M.2 backplane. See Install the riser for slot 10 to 15 (riser 2) or Install the riser for slot 16 to 17 (riser 3).
Install the I/O tray and connect all cables. See Install the I/O tray.
If you are instructed to return an M.2 drive, follow all packaging instructions, and use any packaging materials for shipping that are supplied to you.
Demo video