Install the M.2 backplane
The M.2 backplane is in the I/O tray that is accessed from the rear of the server. After removing the I/O tray and one of the risers to gain access to the M.2 backplane, install the M.2 drives in the backplane; then, insert the backplane in the I/O tray and press it in place.
S002

CAUTION
The power-control button on the device and the power switch on the power supply do not turn off the electrical current supplied to the device. The device also might have more than one power cord. To remove all electrical current from the device, ensure that all power cords are disconnected from the power source.


Before you install the M.2 backplane, install the M.2 drives. See Install an M.2 drive.
Complete the following steps to install the M.2 backplane.
Figure 1. M.2 backplane installation
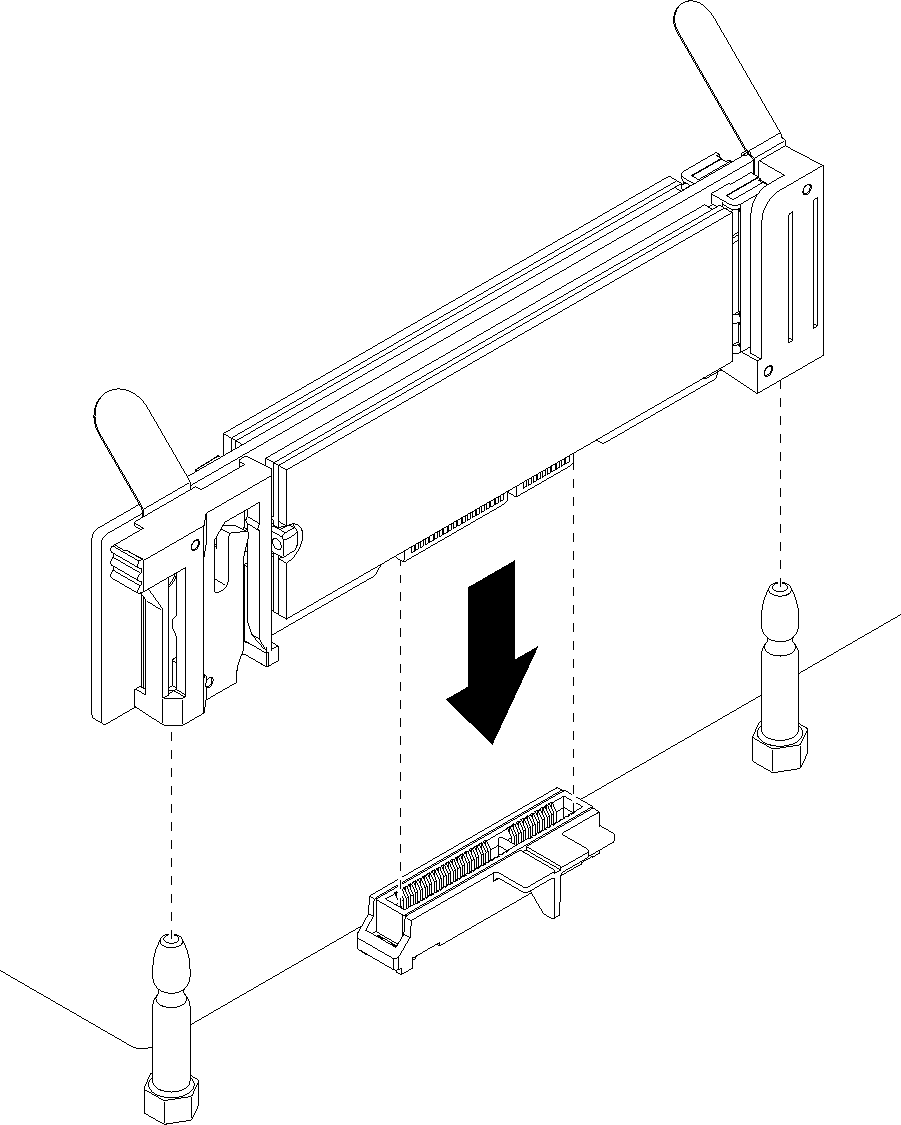
- Align the openings in the plastic supports at each end of the M.2 backplane with the guide pins on the system board; then, insert the backplane in the system-board connector.
- Press down on the M.2 backplane to fully seat it.
After you install the M.2 backplane, complete the following steps:
Install the riser that you removed to access the M.2 backplane. See Install the riser for slot 10 to 15 (riser 2) or Install the riser for slot 16 to 17 (riser 3).
Install the I/O tray and connect all cables. See Install the I/O tray.
- See the documentation that comes with the M.2 backplane for device-driver and configuration information to complete the installation.
Demo video
Give documentation feedback