Install the M.2 drive
Use this information to install the M.2 drive.
About this task
To avoid potential danger, read and follow the following safety statements.
- S002
 CAUTIONThe power-control button on the device and the power switch on the power supply do not turn off the electrical current supplied to the device. The device also might have more than one power cord. To remove all electrical current from the device, ensure that all power cords are disconnected from the power source.
Attention
Read the Installation guidelines to ensure that you work safely.
Touch the static-protective package that contains the component to any unpainted metal surface on the server; then, remove it from the package and place it on a static-protective surface.
Procedure
- Locate the M.2 drive slot on the M.2 boot adapter.NoteAs
ThinkSystem ST250 V2 supports two M.2 drives, install your M.2 drive in slot 0 first. Figure 1. M.2 drive slots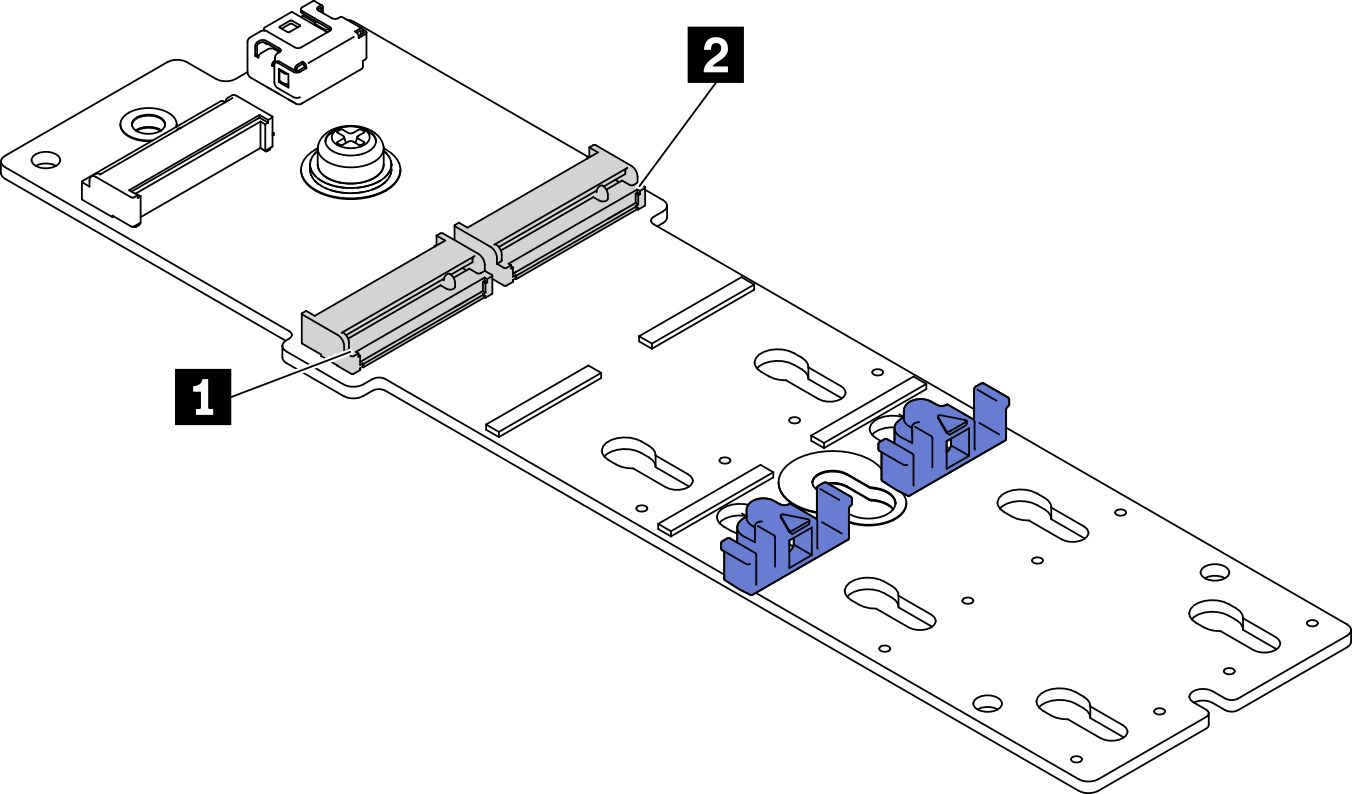
Table 1. M.2 drive slot locations on M.2 boot adapter 1 M.2 drive slot 0 2 M.2 drive slot 1 - Install an M.2 drive.
 Insert the M.2 drive at an angle into the connector.
 Pivot the M.2 drive down until the notch catches on the lip of the retainer.
 Slide the retainer forward (towards the connector) to secure the M.2 drive into place.
Figure 2. Installing an M.2 drive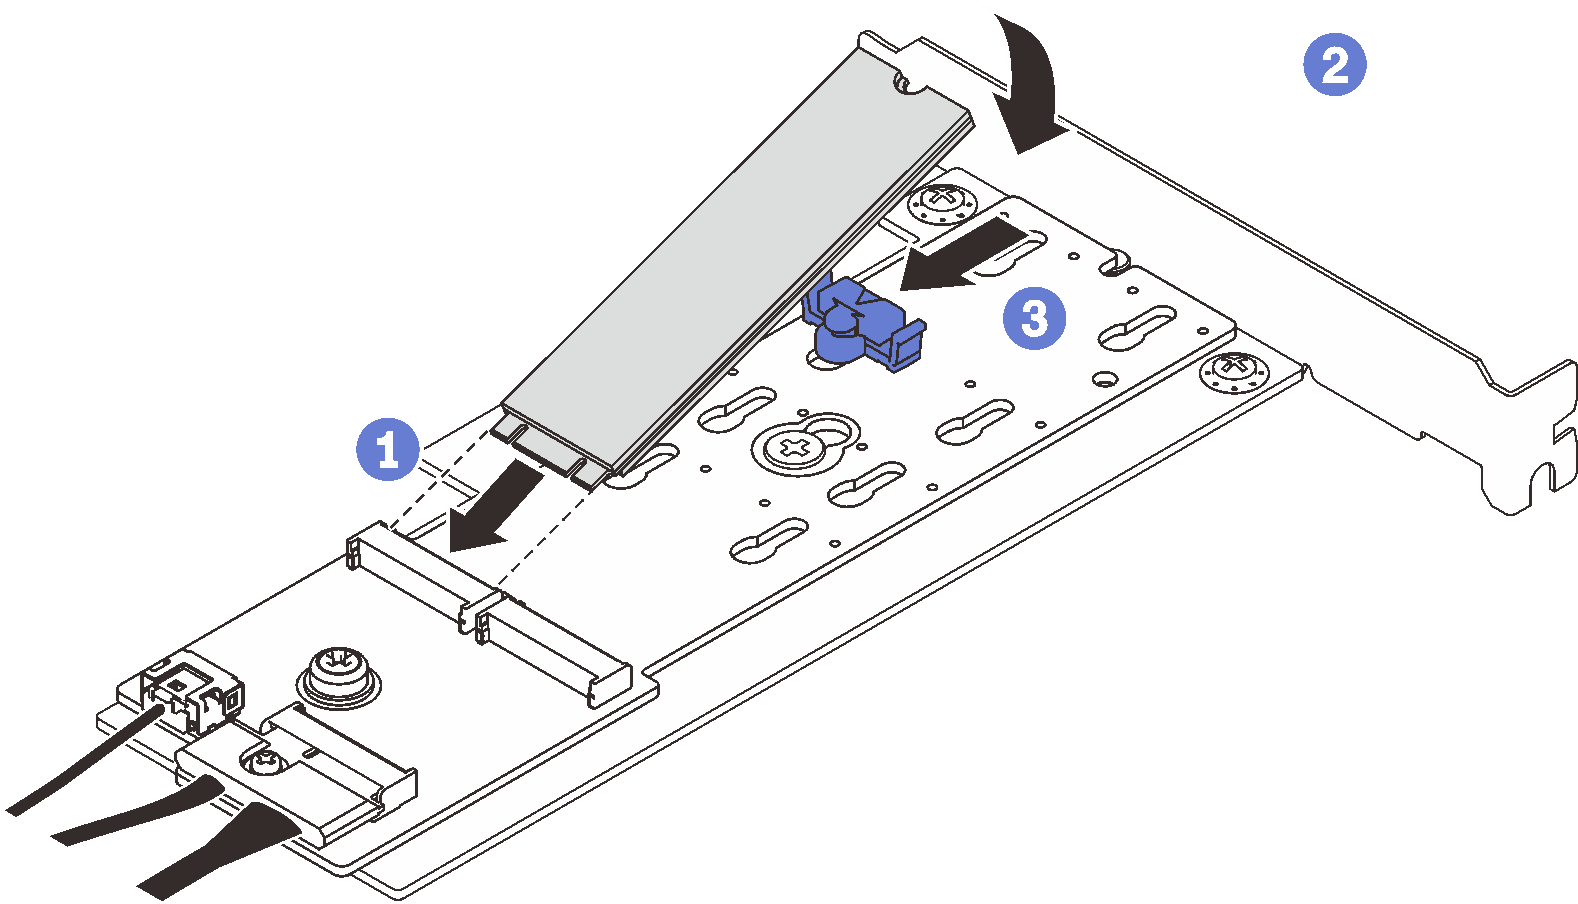
After installing the M.2 drive, use the Lenovo XClarity Provisioning Manager to configure the RAID. For more information, see: https://pubs.lenovo.com/lxpm/RAID_setup
Give documentation feedback