Remove the server from the rack
Follow the instructions in this section to remove the server from the rails of the rack and, optionally, remove the tower-to-rack conversion kit.
S002
CAUTION
The power-control button on the device and the power switch on the power supply do not turn off the electrical current supplied to the device. The device also might have more than one power cord. To remove all electrical current from the device, ensure that all power cords are disconnected from the power source.
R006
CAUTION
Do not place any object on top of a rack-mounted device unless that rack-mounted device is intended for use as a shelf.
About this task
Attention
- Read Installation Guidelines and Safety inspection checklist to ensure that you work safely.
- Power off the server and disconnect all power cords for this task. See Power off the server.
Procedure
- Loosen the captive screws.Figure 1. Removal of the tower server from the rails
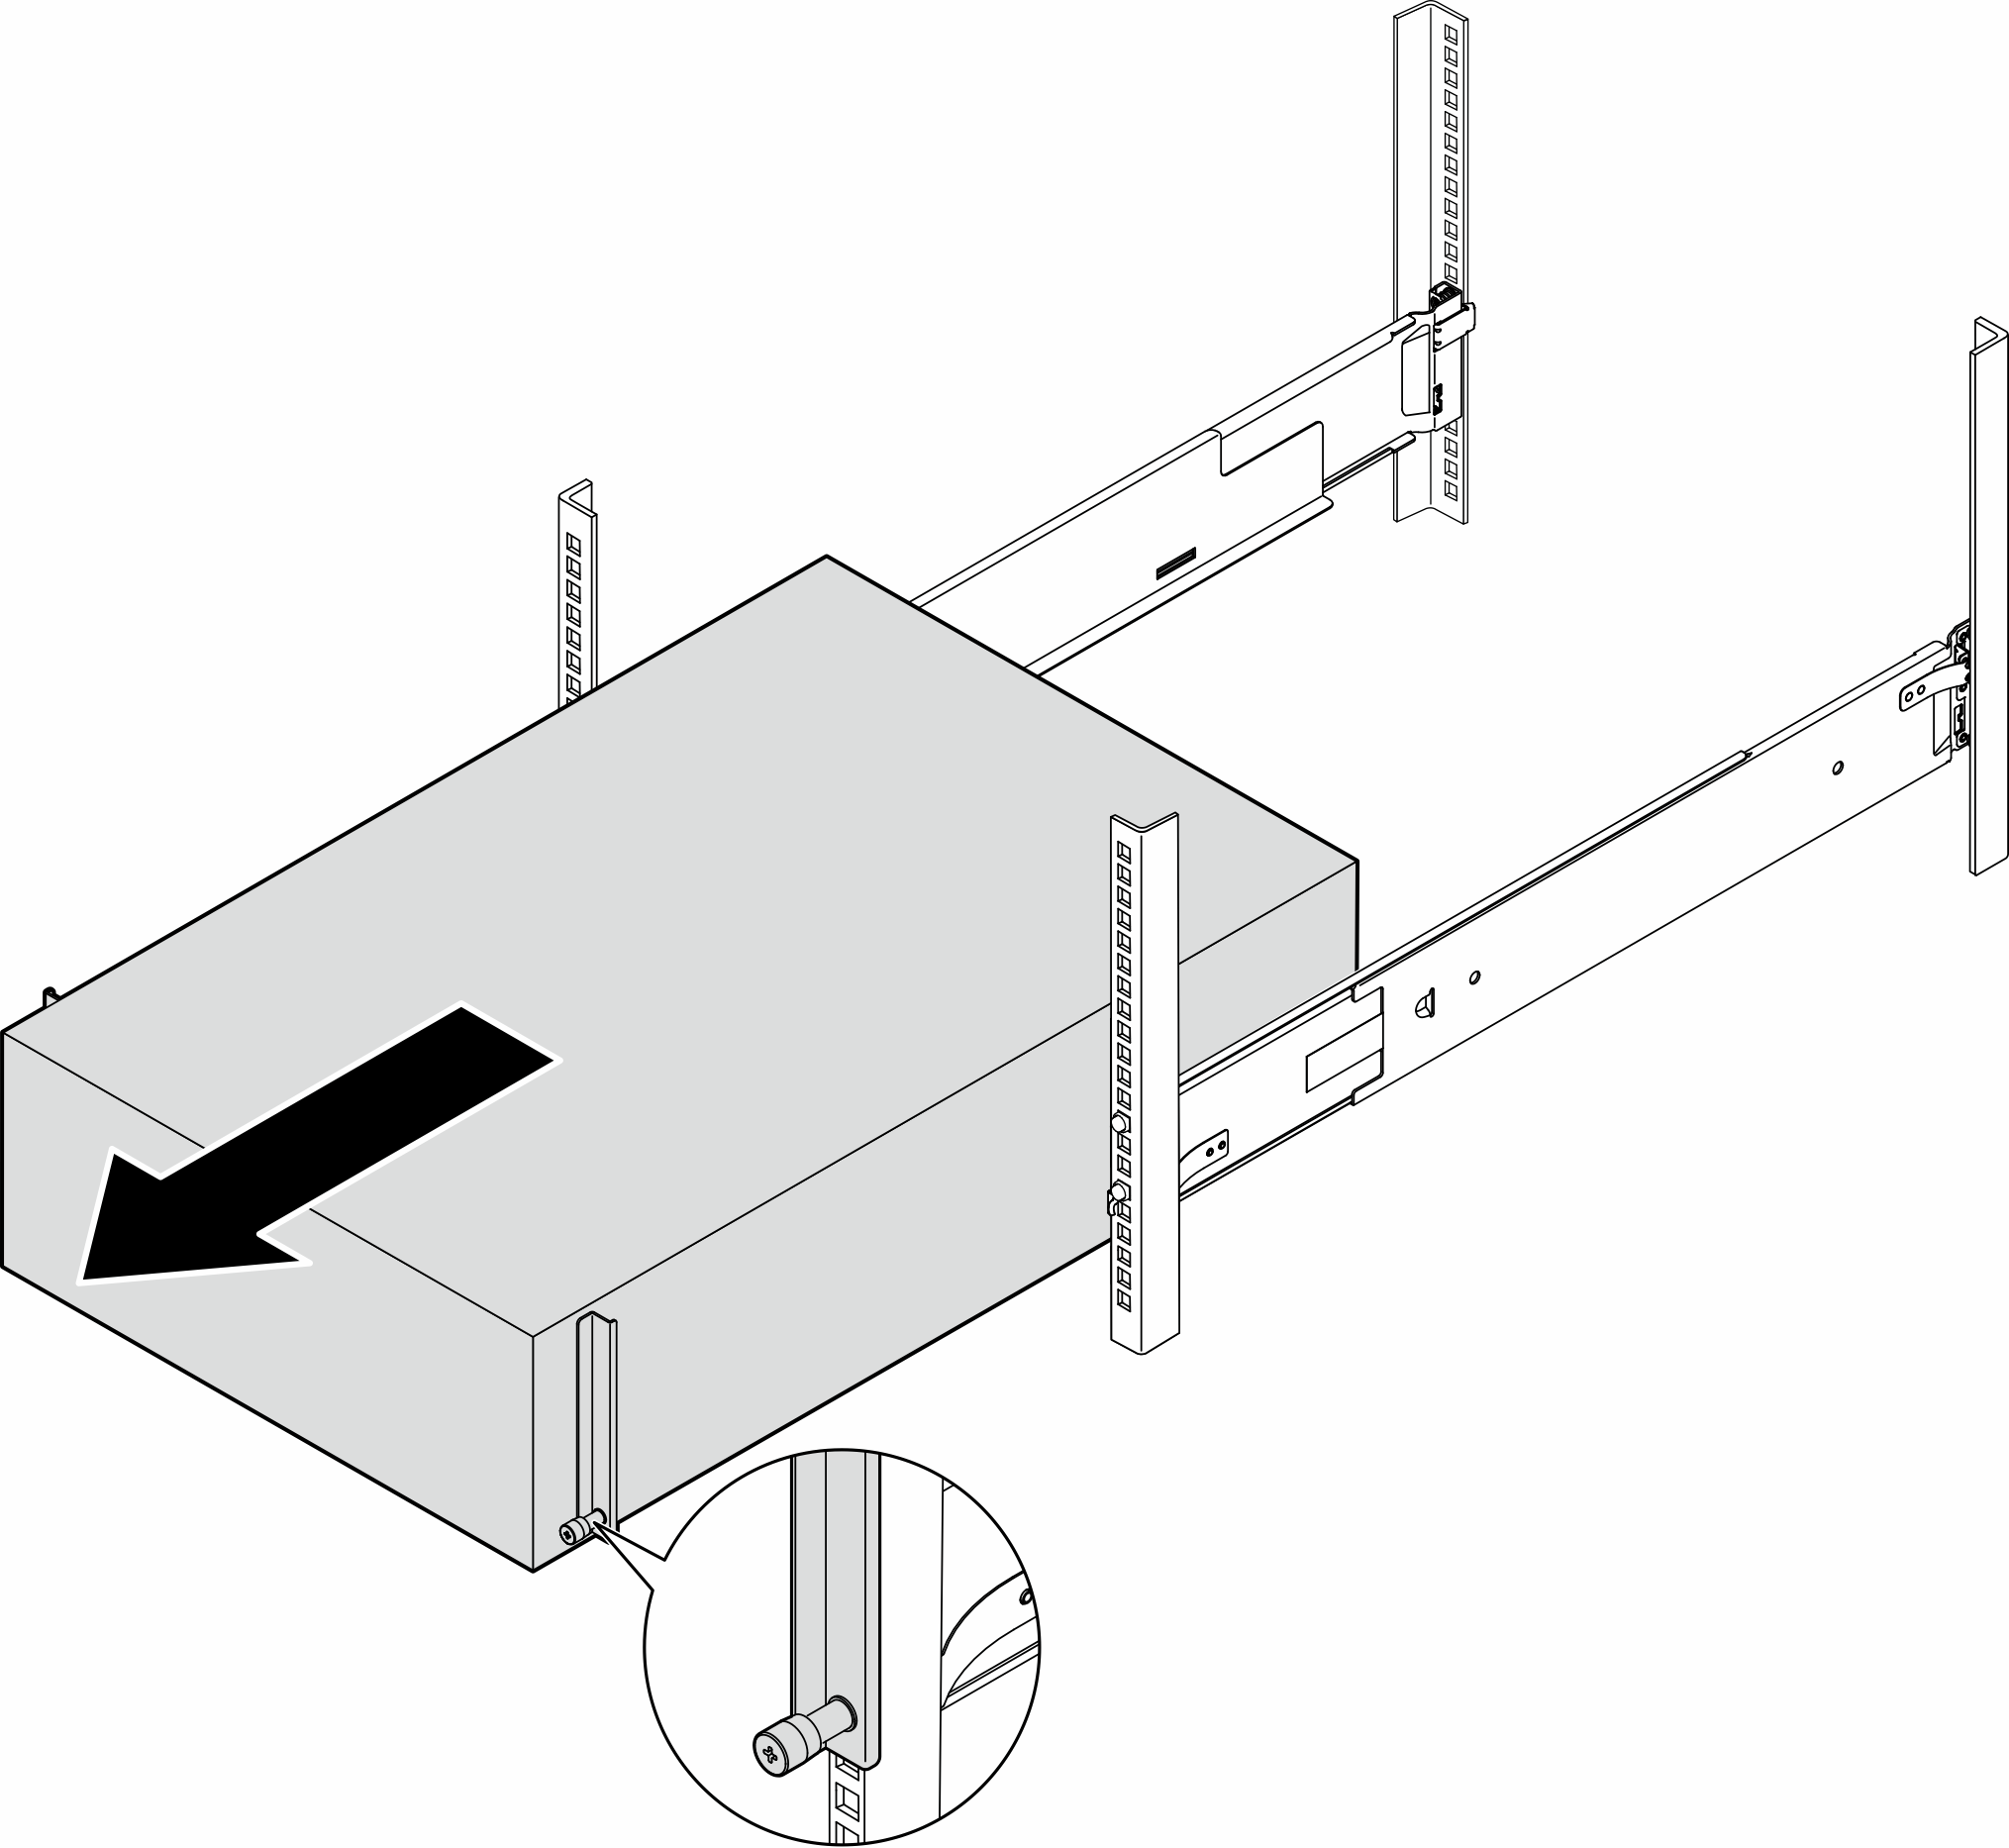
 CAUTIONDrop hazard.
 CAUTIONFor tower server removal, use safe practices when lifting.
 - (Optional) If necessary, remove the tower-to-rack conversion kit (the EIA brackets) from the chassis.
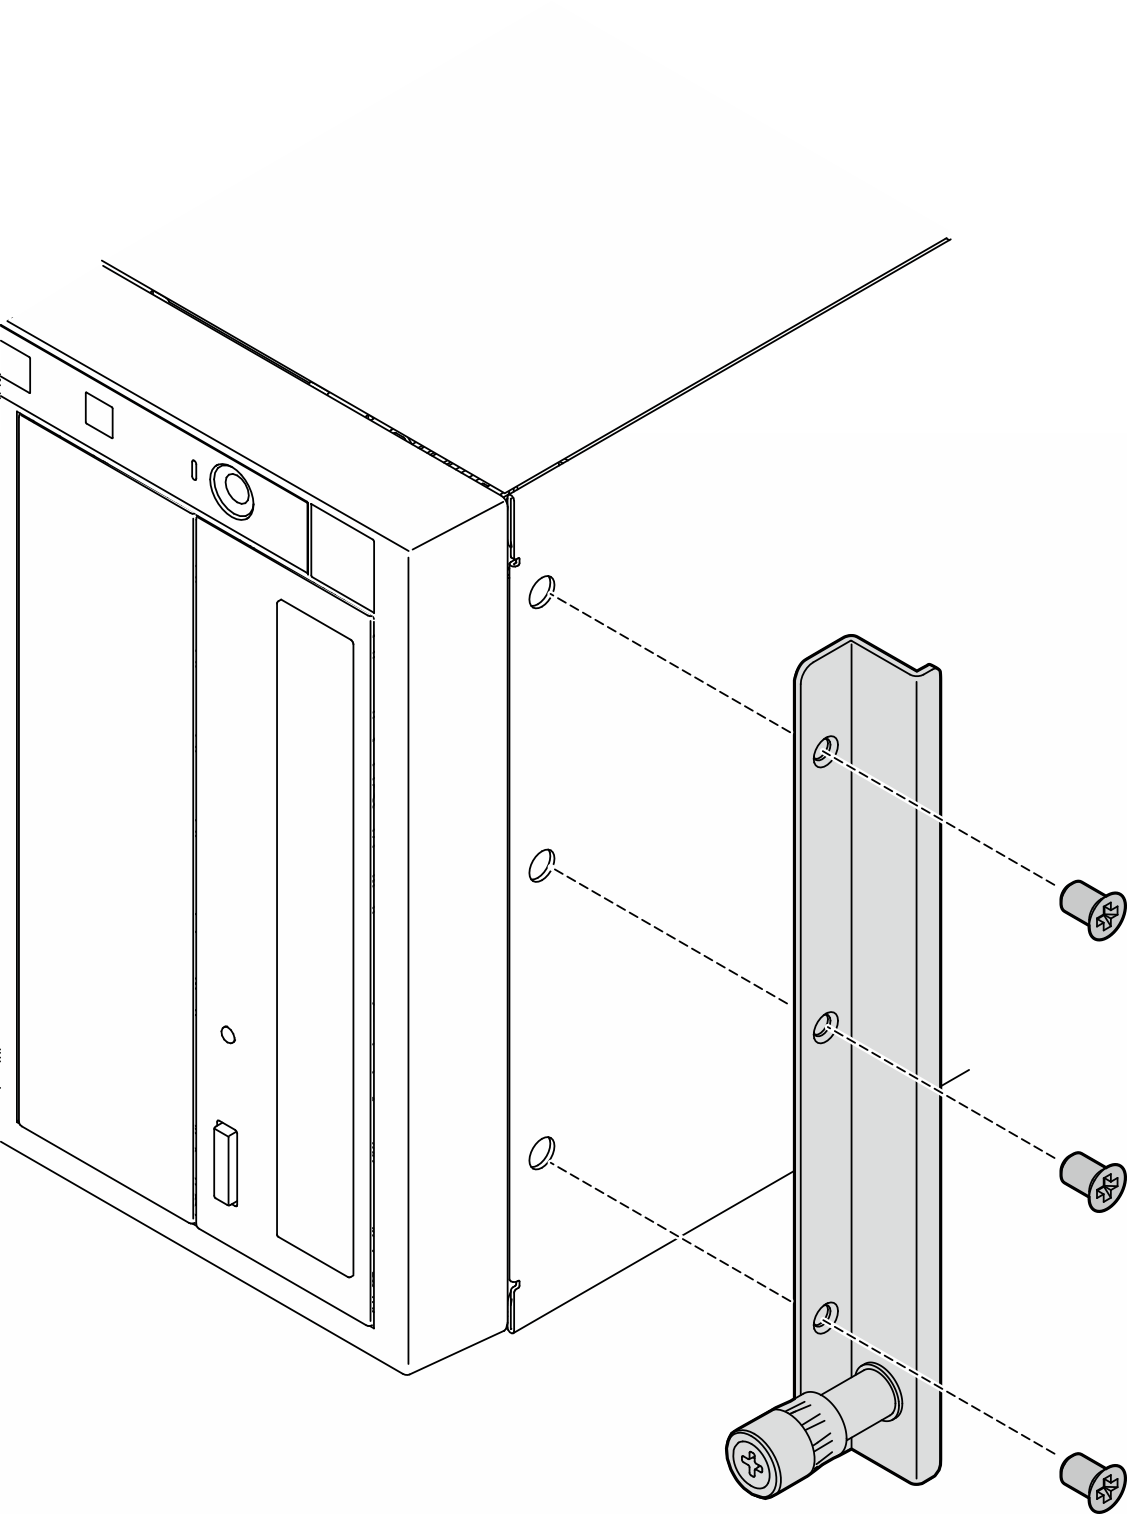
- Loosen the three screws at sides to remove the right EIA bracket.Figure 2. Removal of the right EIA bracket
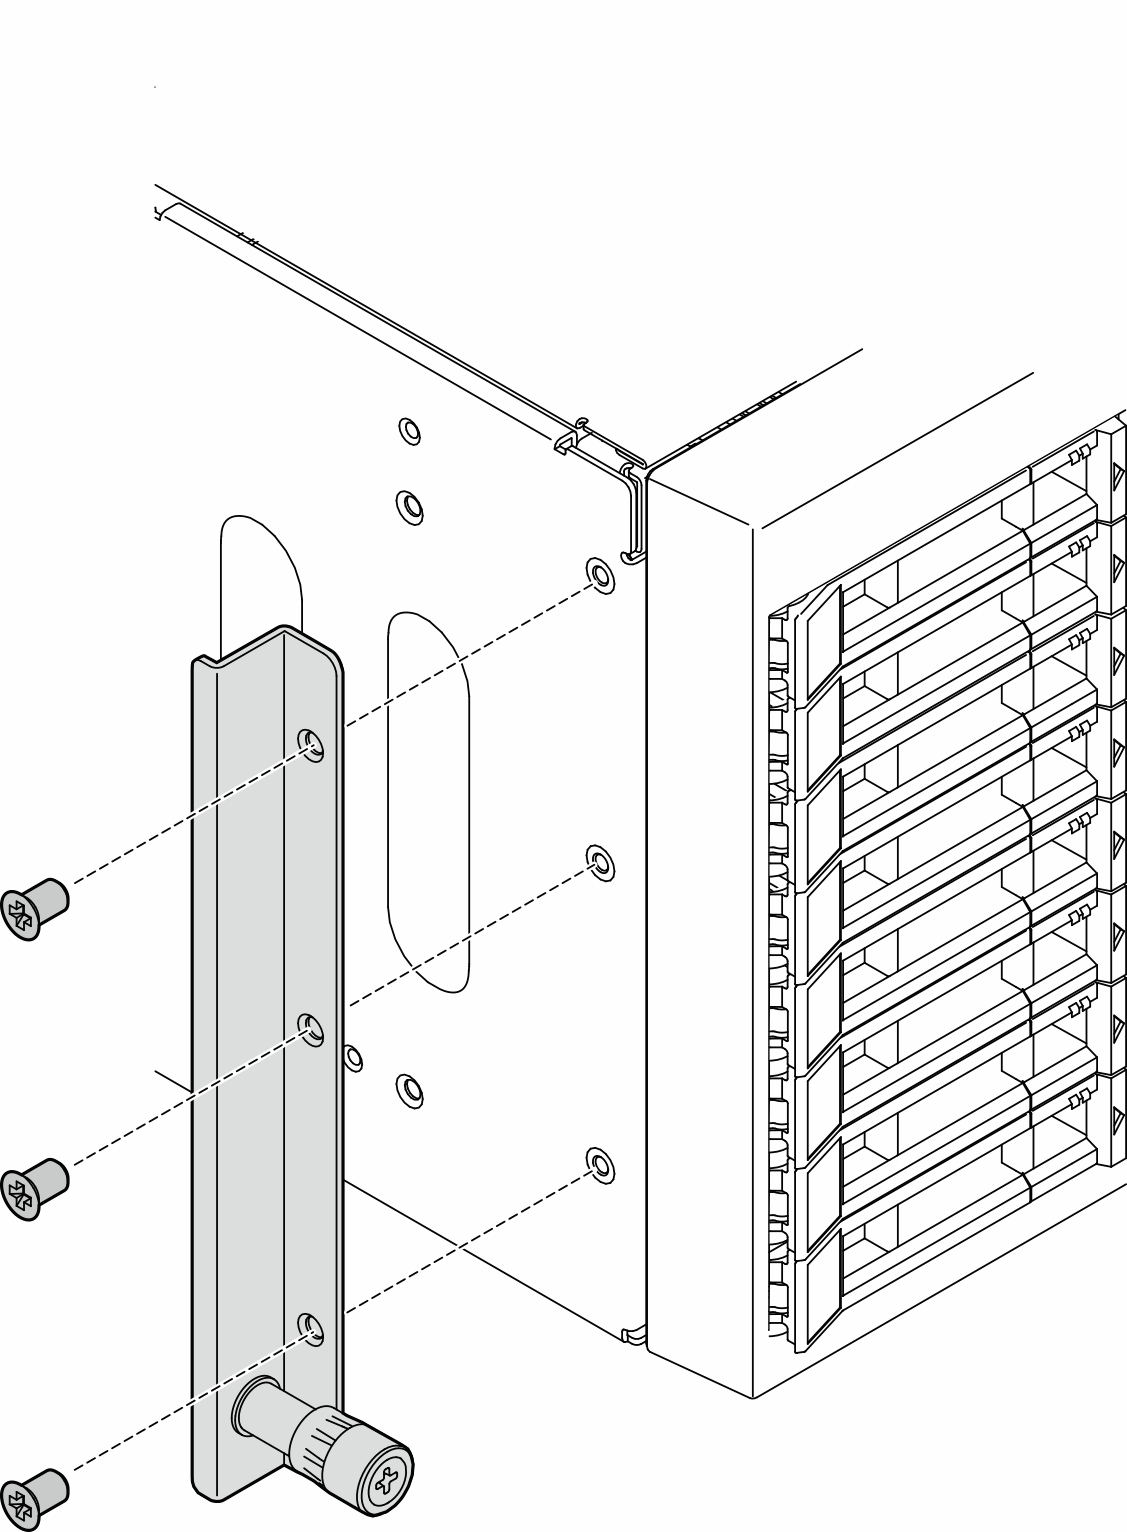
- Use a screwdriver to remove the three screws that secure the left EIA bracket; then, remove the left EIA bracket.Figure 3. Removal of the left EIA bracket
- Loosen the three screws at sides to remove the right EIA bracket.
- (Optional) If necessary, remove the rails from the rack.NoteFor tower server installation, the edges on the rails or the friction caused by the installation might scratch or damage the chassis coating. Applying rail and latch covers can help reduce scratching when installing the server into a rack.
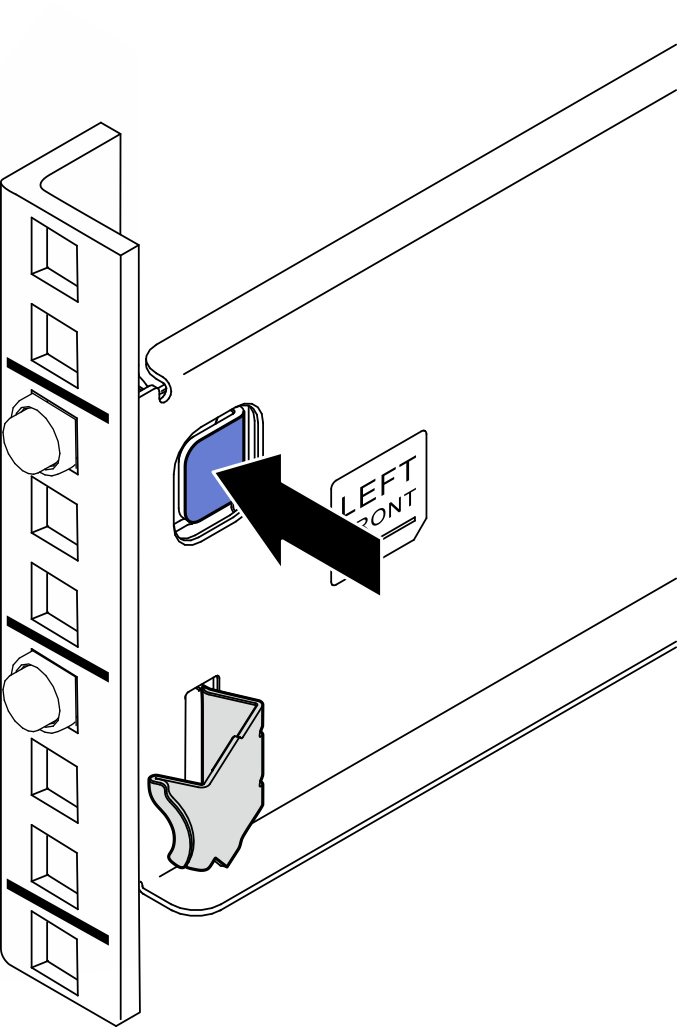
- Press and hold the blue button on the front end of the rail to release the front latch gripping the rack flange; then, slightly push the rail towards the rear until the pins disengage from the holes in the EIA flange.Figure 4. Releasing rail from front mounting flange
- Hold the rail with one hand and pull the rear latch with your other hand to release the rail from the rear mounting flange; then, remove the rail from the rack.Figure 5. Releasing rail from rear mounting flange

- Press and hold the blue button on the front end of the rail to release the front latch gripping the rack flange; then, slightly push the rail towards the rear until the pins disengage from the holes in the EIA flange.
- (Optional) If necessary, remove the latch covers and rail cover strips from the rails.
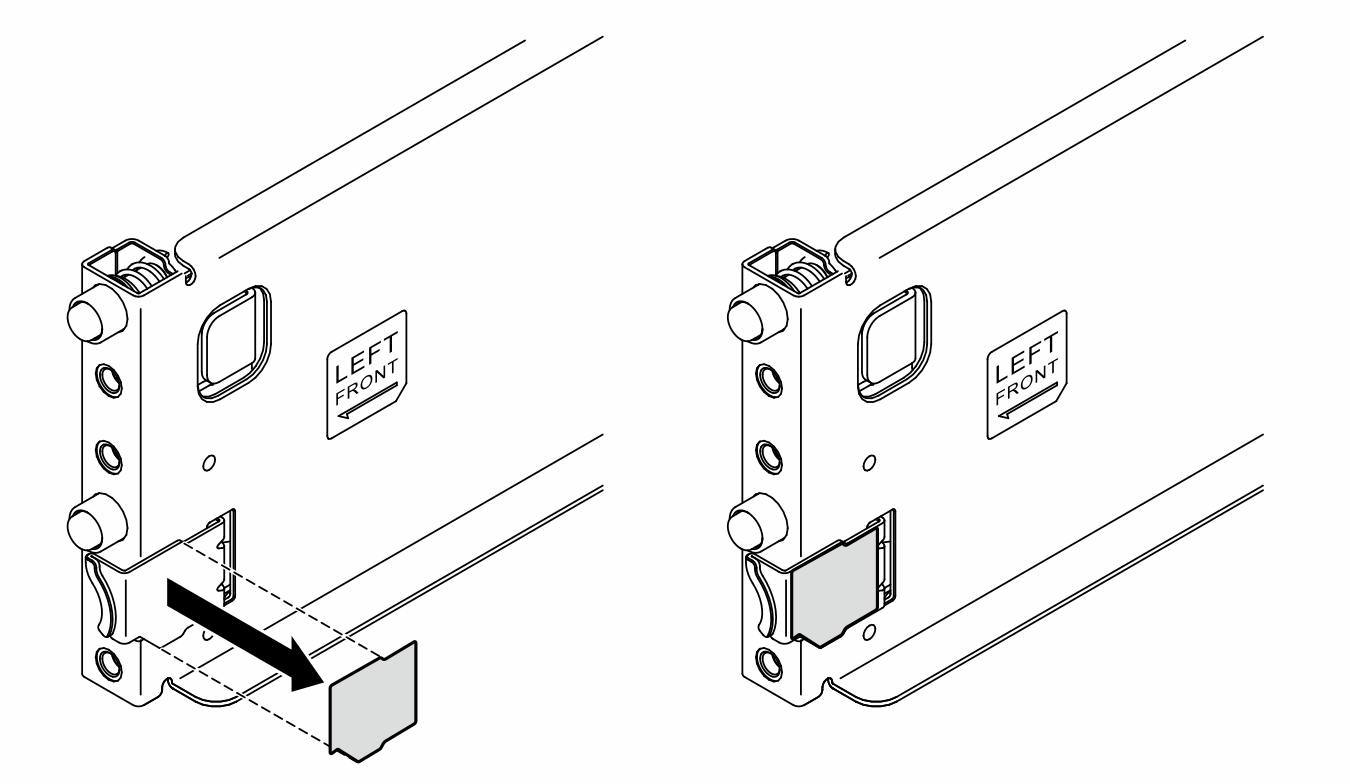
- Remove the left latch cover from the front latch of the left rail.Figure 6. Removal of the left latch cover
- Remove the rail cover strip from the bottom surface of the left rail.Figure 7. Removal of the left rail cover strip
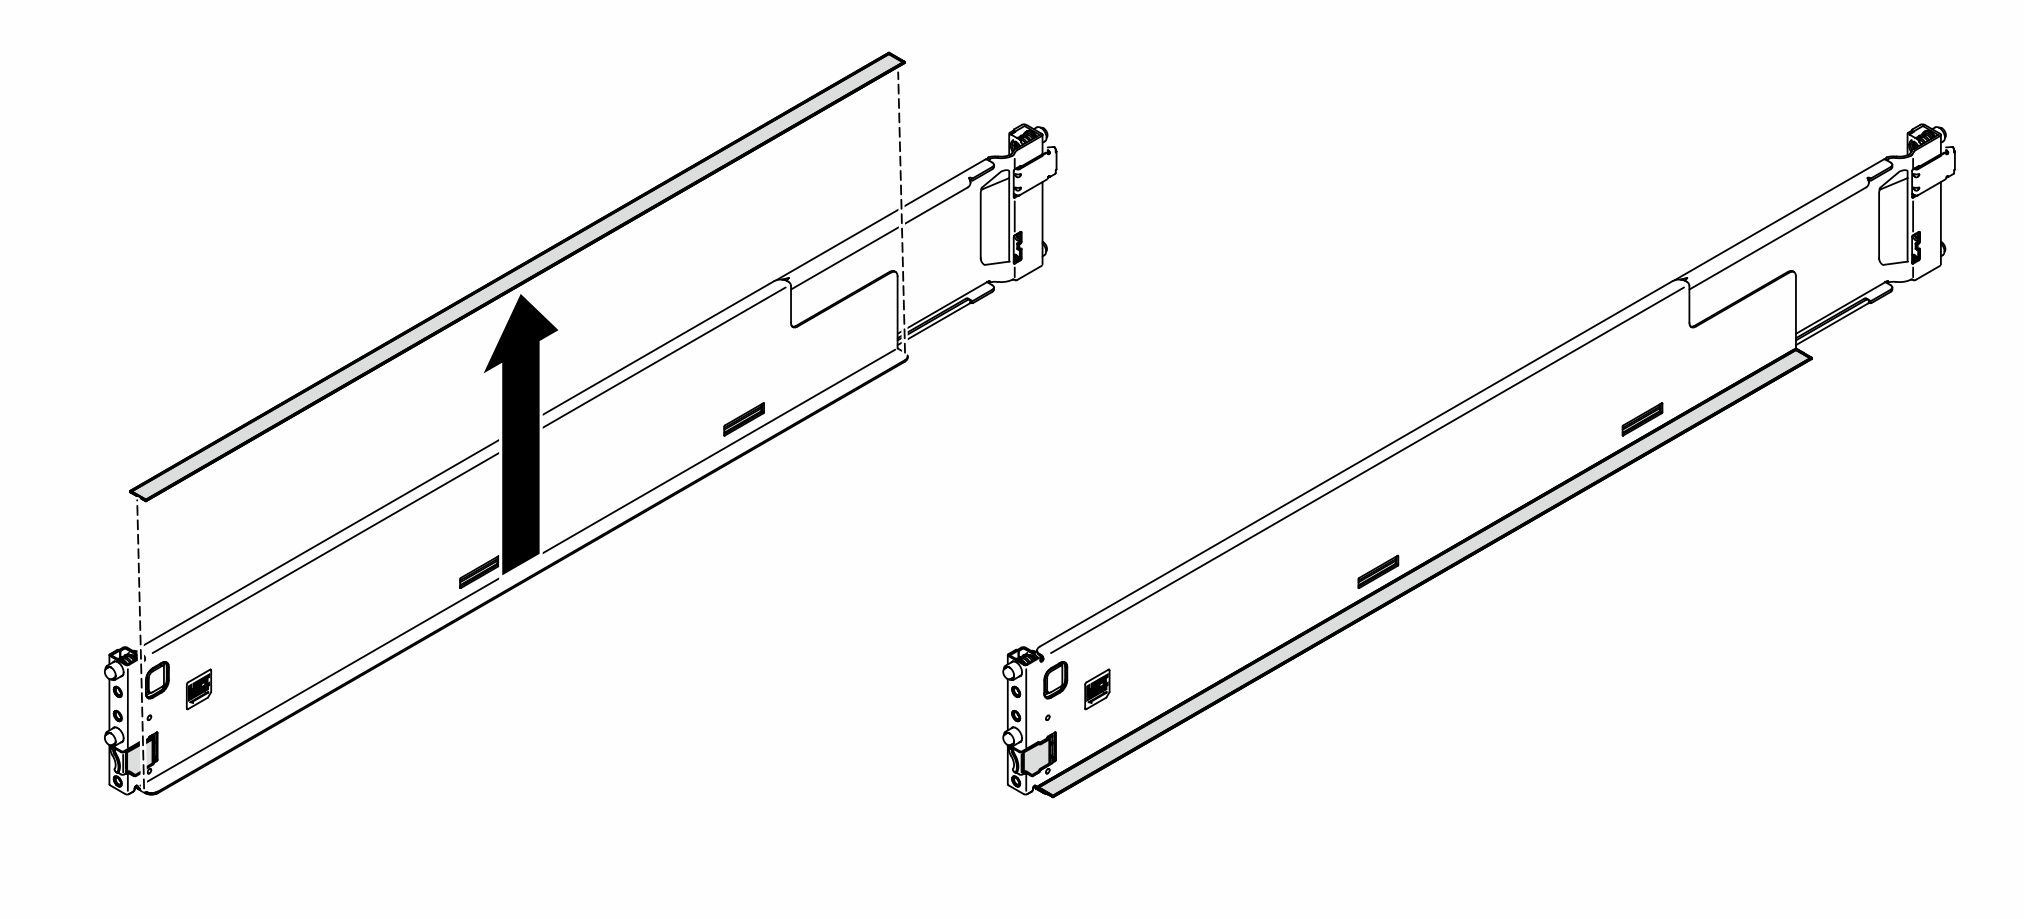
- Remove the left latch cover from the front latch of the left rail.
After this task is completed
Carefully lay the server on a flat, static-protective surface.
If you are instructed to return the component or optional device, follow all packaging instructions, and use any packaging materials for shipping that are supplied to you.
To convert the server to the tower form factor, install the foot stands. See Install the foot stands.
Give documentation feedback