Modify a user
Follow these steps to modify users of the ThinkAgile CP Metering Manager.
- In the top navigation menu, click Users.Figure 1. Users menu

- On the Users and Group Administration page, click Change next to Users.
- On the Select User to Change page, select the user you want to modify.
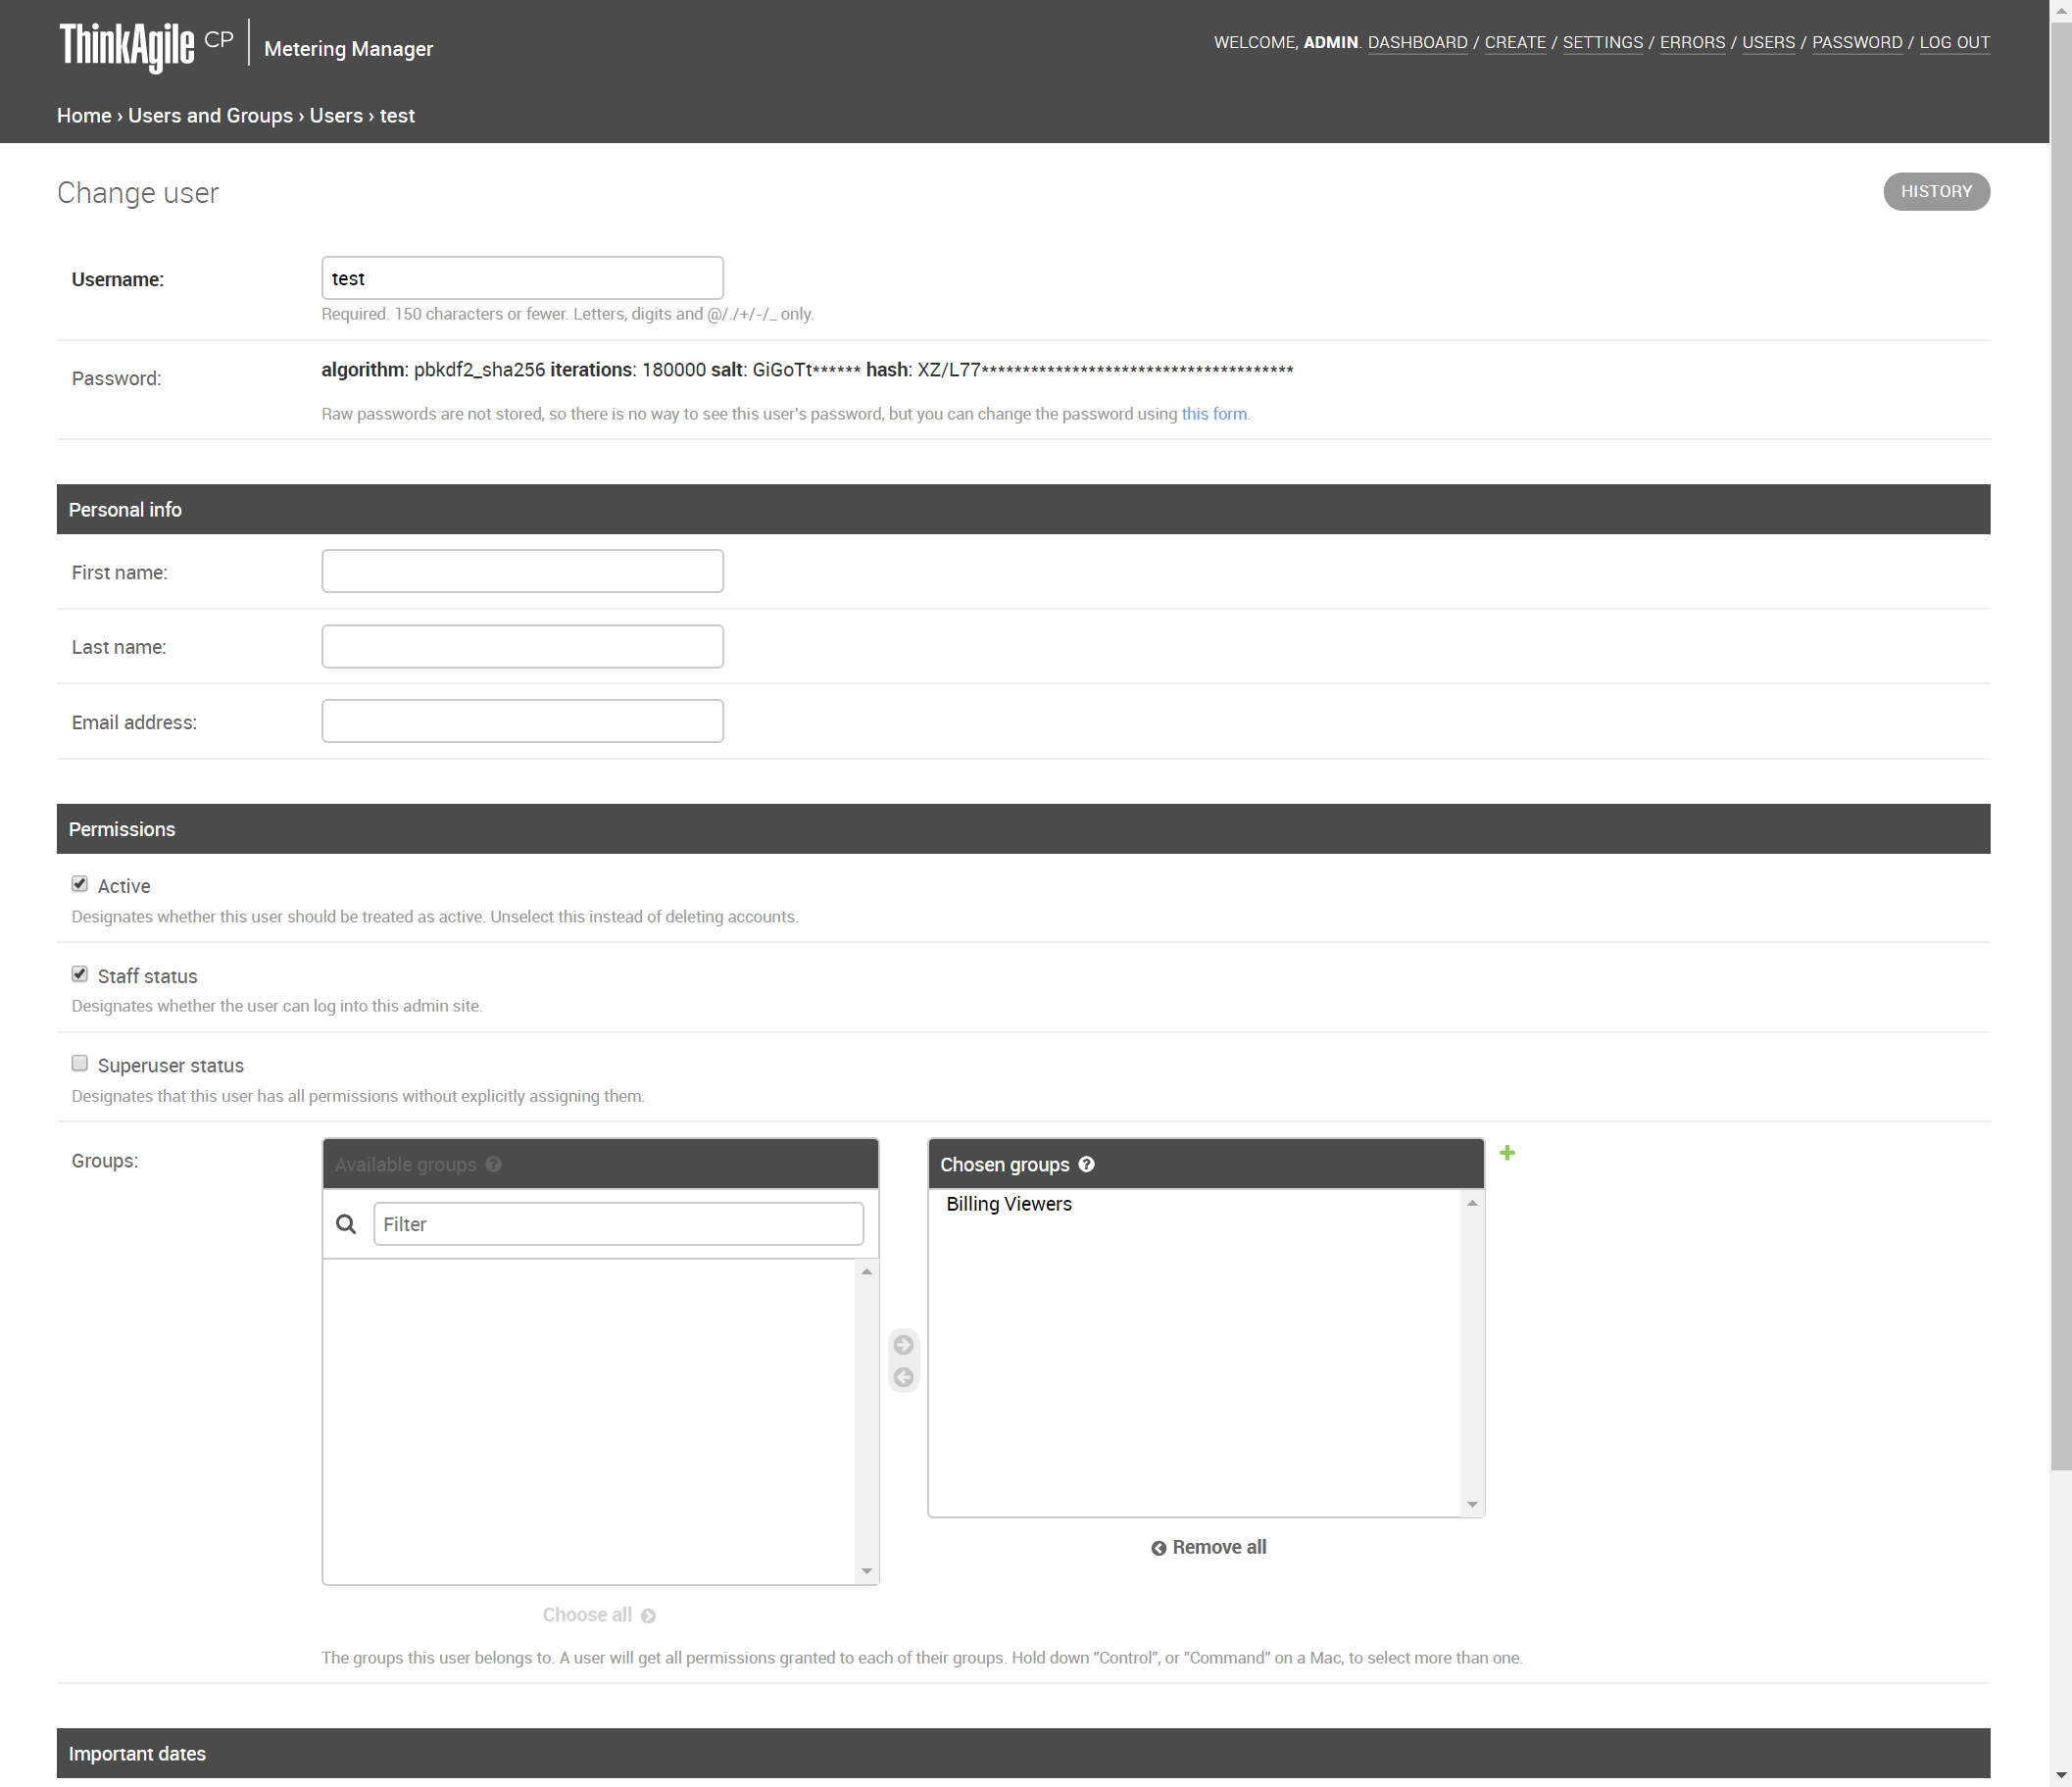
The Change User page opens.
Figure 2. Change User page
- To change the user name, enter a new user name in the Username field.
- To change the user password, click the Change Password Form link. Note
Raw passwords are not stored, so there is no way to see this user's password, but you can change the password using the link provided.
- Enter a new password and confirm the new password. Keep the following in mind when entering a password.Note
The password can't be too similar to the user’s other personal information.
The password must contain at least 8 characters.
The password can't be a commonly used password.
The password can't be entirely numeric.
- If needed, enter the following personal information: First Name, Last Name, and Email address.
- Under Permissions, you can define permissions and assign groups for the user as needed.
Select Active to designate if this is an active user. Clear this checkbox to deactivate the user.
Select Staff Status to designate whether the user can log in to the admin site.
Select Superuser Status to designate that the user has all permissions to the site.
Next to Groups, double-click the group(s) in the Available Groups column to which you want to assign the user.
To remove the user from the group(s), double-click the group(s) in the Chosen Groups column from which you want to remove the user.
- Click Save or click Save and Add Another to add another user.