Setting up automatic problem notification to a preferred service provider
You can create a service forwarder that automatically sends service data to your preferred service provider using SFTP when certain serviceable events, such as an unrecoverable memory error, are received from specific managed devices so that the issue can be addressed.
Before you begin
Ensure that all ports that are required by XClarity Administrator (including ports that are required for call home) are available before you setup a service forwarder. For more information about ports, see Port availability.
Ensure that a connection exists to the Internet addresses that are required by the service provider.
If you choose to use Lenovo Support, ensure that a connection exists to the Internet addresses that are required by Call Home. For information about firewalls, see Firewalls and proxy servers.
If XClarity Administrator accesses the Internet through an HTTP proxy, ensure that the proxy server is set up as a non-terminating proxy. For more information about setting up the proxy, see Configuring network access.
About this task
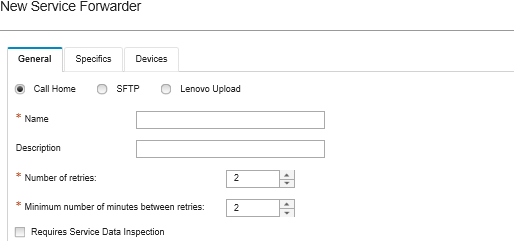
A service forwarder defines information about where to send the service data files when a serviceable event occurs. You can define up to 50 service forwarders
For each service forwarder, you can choose to automatically transfer service data to Lenovo Support (called Call Home), to the Lenovo Upload Facility, or to another service provider using SFTP. For information about setting up a service forwarder for Call Home, see Setting up automatic problem notification. For information about setting up a service forwarder for the Lenovo Upload Facility, see Setting up automatic problem notification to the Lenovo Upload Facility.
If a service forwarder is configured and enabled for SFTP, XClarity Administrator automatically transfers collects service data and transfers service files to the specified SFTP site for your preferred service provider.
- Service file. (.zip) This file contains service information and inventory in an easily readable format. This file is automatically sent to your preferred service provider when a serviceable event occurs.
- Debug file. (.tzz) The file contains all service information, inventory, and the debug logs for use by Lenovo Support. You can manually send this file to Lenovo Support if additional information is needed to resolve an issue.
For other devices, XClarity Administrator saves service data (including service information, inventory, and debug logs) in a single service file in the repository. This file is sent to your preferred service provider when a serviceable event occurs.
Procedure
Complete the following steps to define and enable a service forwarder.
After you finish
- If Requires Service Data Inspection is selected and a serviceable event was received from one of the managed devices that is associated with the service forwarder, you must inspect and service files before the files are forwarded to the service provider. For more information, see Inspecting service files.
- Modify the service-forwarder information by clicking Service Forwarders in the left navigation and clicking the Edit Service Forwarder icon (
 ).
). - Enable or disable a service provider by clicking Service Forwarders and selecting Enable or Disable in the Status column.
- Delete the service provider by clicking Service Forwarders and clicking the Delete Service Forwarder icon (
 ).
). - Define the support contact and location information for a specific managed device by clicking Endpoint Actions in the left navigation, selecting the device, and then clicking the Create Contact Profile icon (
 ) or Edit Contact Profile icon (
 ).
).The contact and location information for the managed device is included in the problem record that call home creates in the Lenovo Support Center. If unique contact and location information is specified for a managed device, that information is included in the problem record. Otherwise, general information that is specified for the XClarity Administrator call-home configuration (on the Call Home Configuration page or Service Forwarders page) is used. For more information, see Defining the support contacts for specific devices.
- Collect service data for a specific device by clicking Endpoint Actions, selecting the device, and then clicking the Collect Service Data icon (
 ). For more information, see Collecting and downloading service data for a device.
For more information about these service and support tasks, see Working with service and support.
