Install a 2.5''/3.5'' hot-swap drive
Use this information to install a 2.5''/3.5'' hot-swap drive.
About this task
Read Installation Guidelines and Safety inspection checklist to ensure that you work safely.
Prevent exposure to static electricity, which might lead to system halt and loss of data, by keeping static-sensitive components in their static-protective packages until installation, and handling these devices with an electrostatic-discharge wrist strap or other grounding system.
Procedure
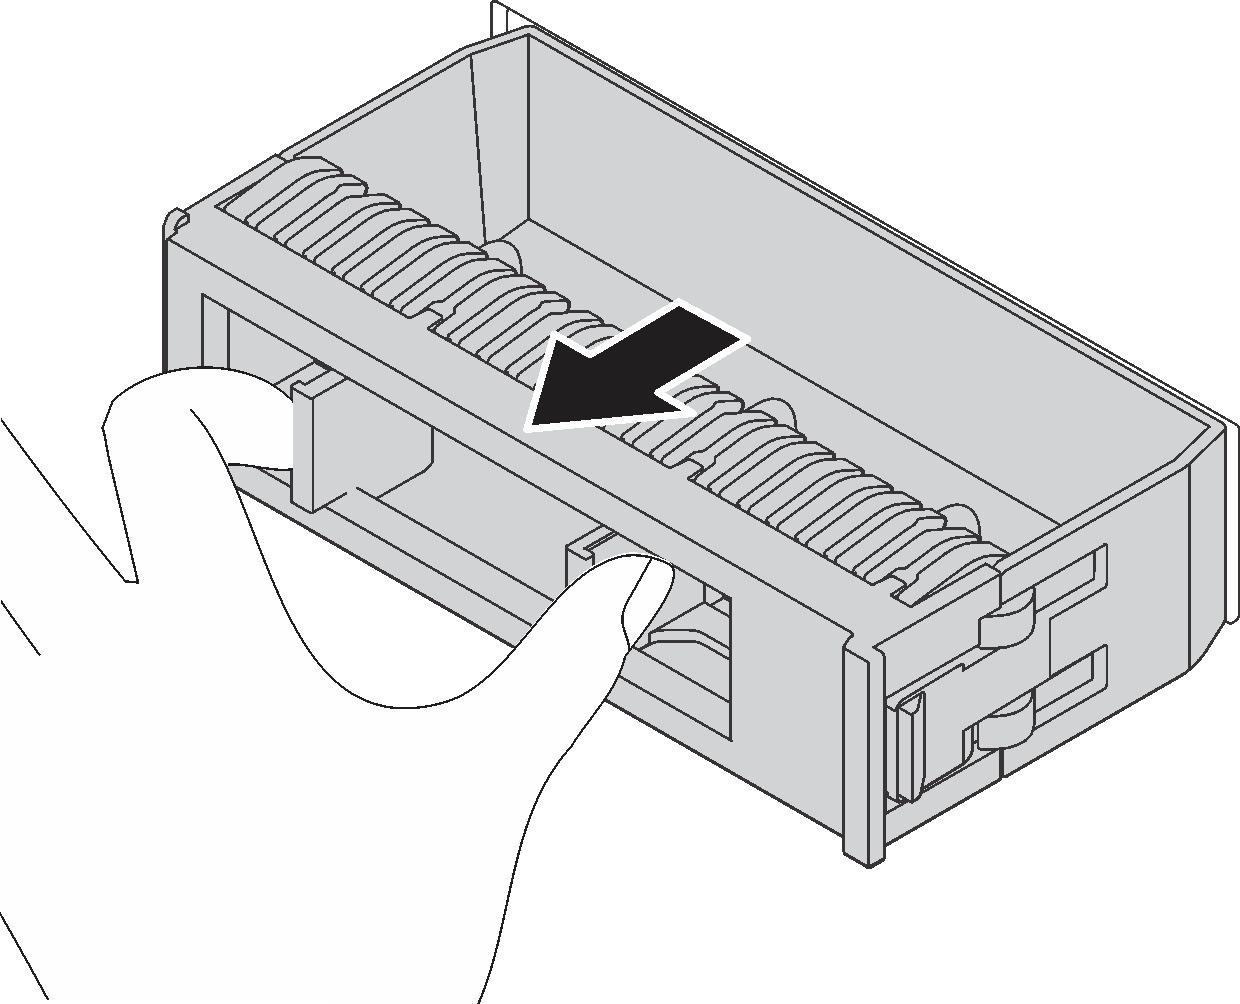
- Remove the drive filler from the drive bay and keep the drive filler in a safe place.NoteThe removal steps vary with drive filler types.Figure 1. Drive filler removal
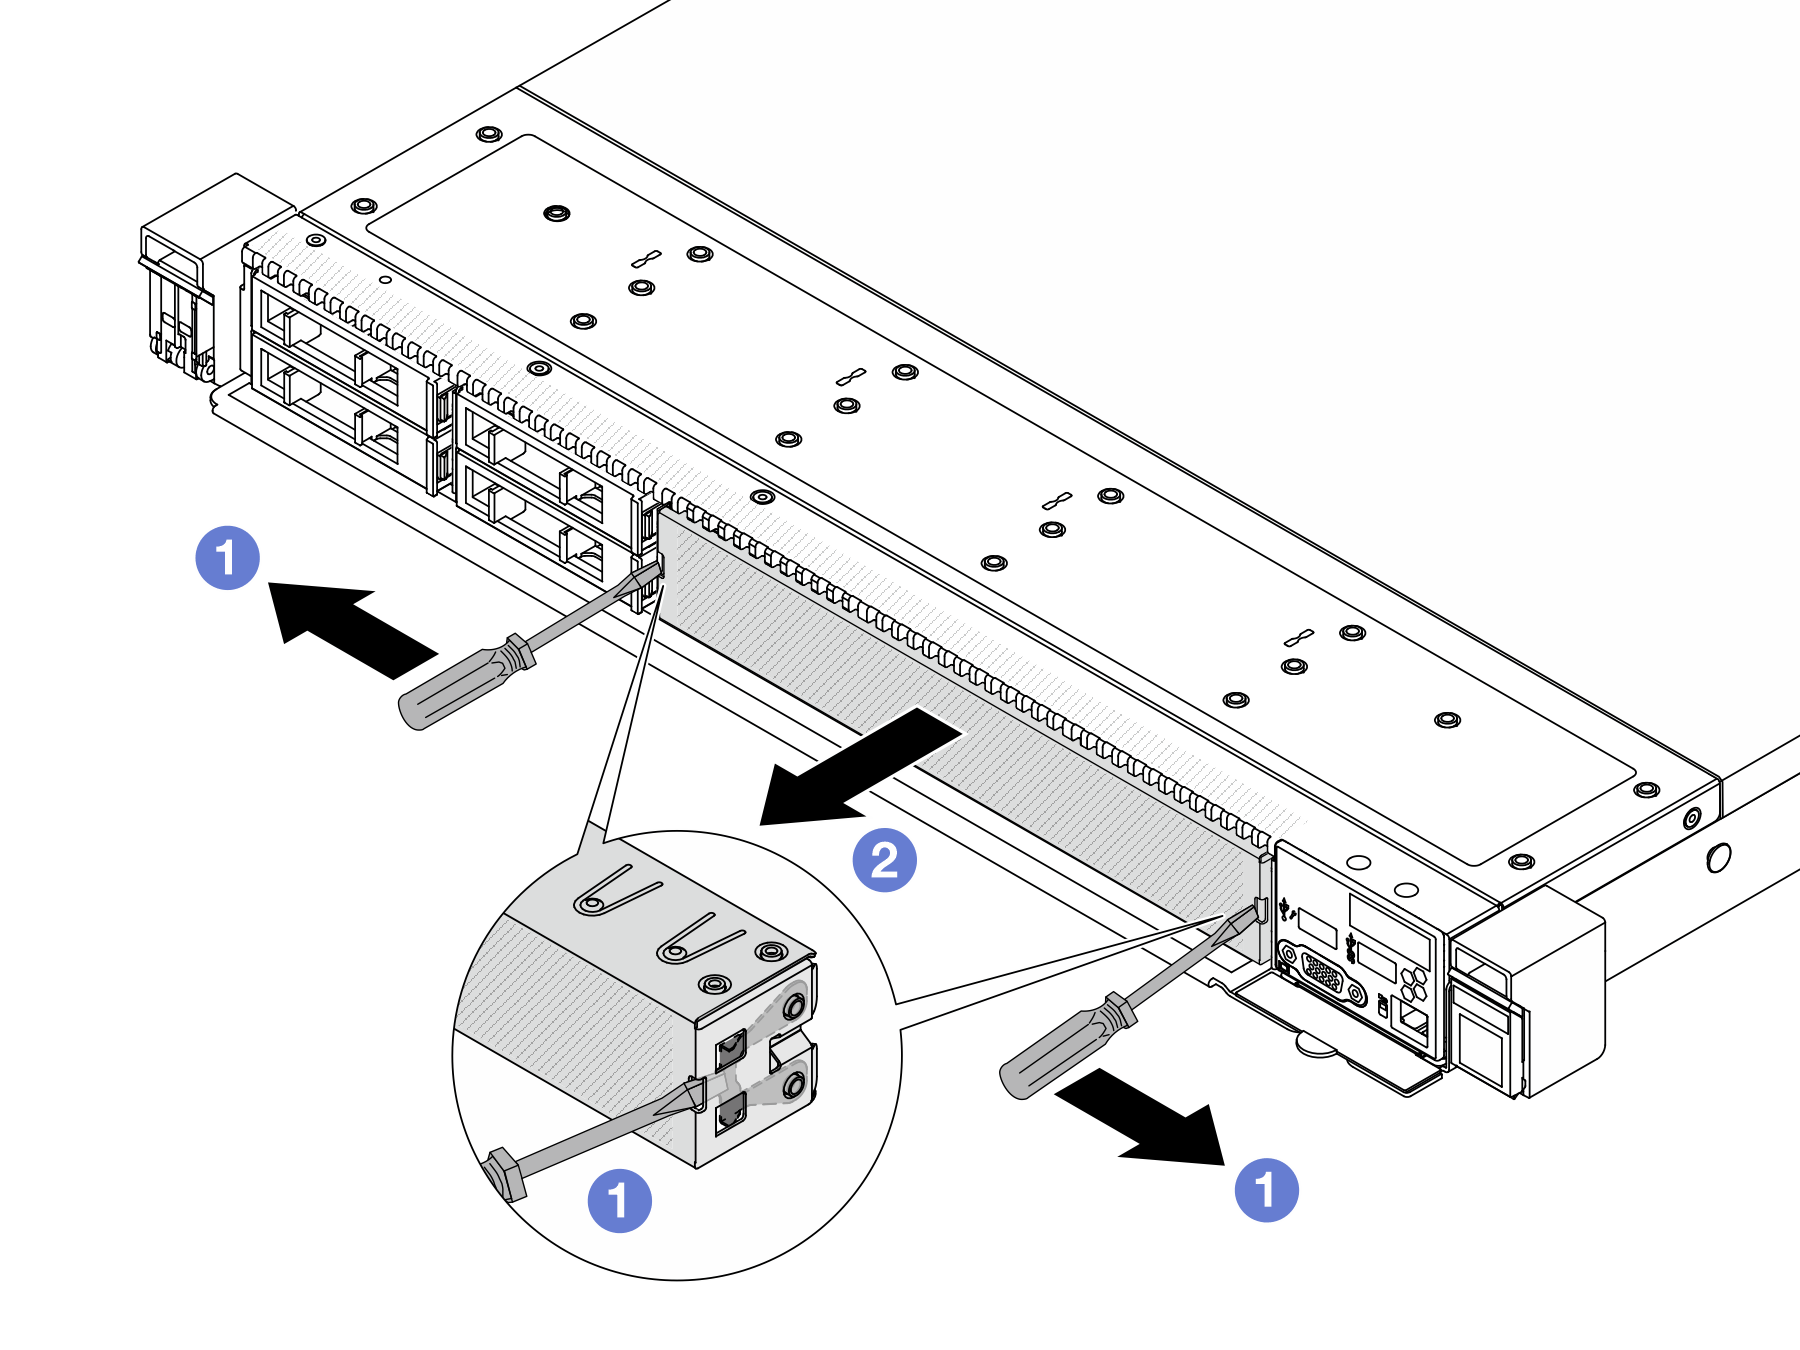
 Insert a flat-blade screwdriver through the notch on both sides.
 Pry outward with the flat-blade screwdrivers on both sides simultaneously to remove the driver filler.
- Install the drive in the drive bay.Figure 2. Hot-swap drive installation
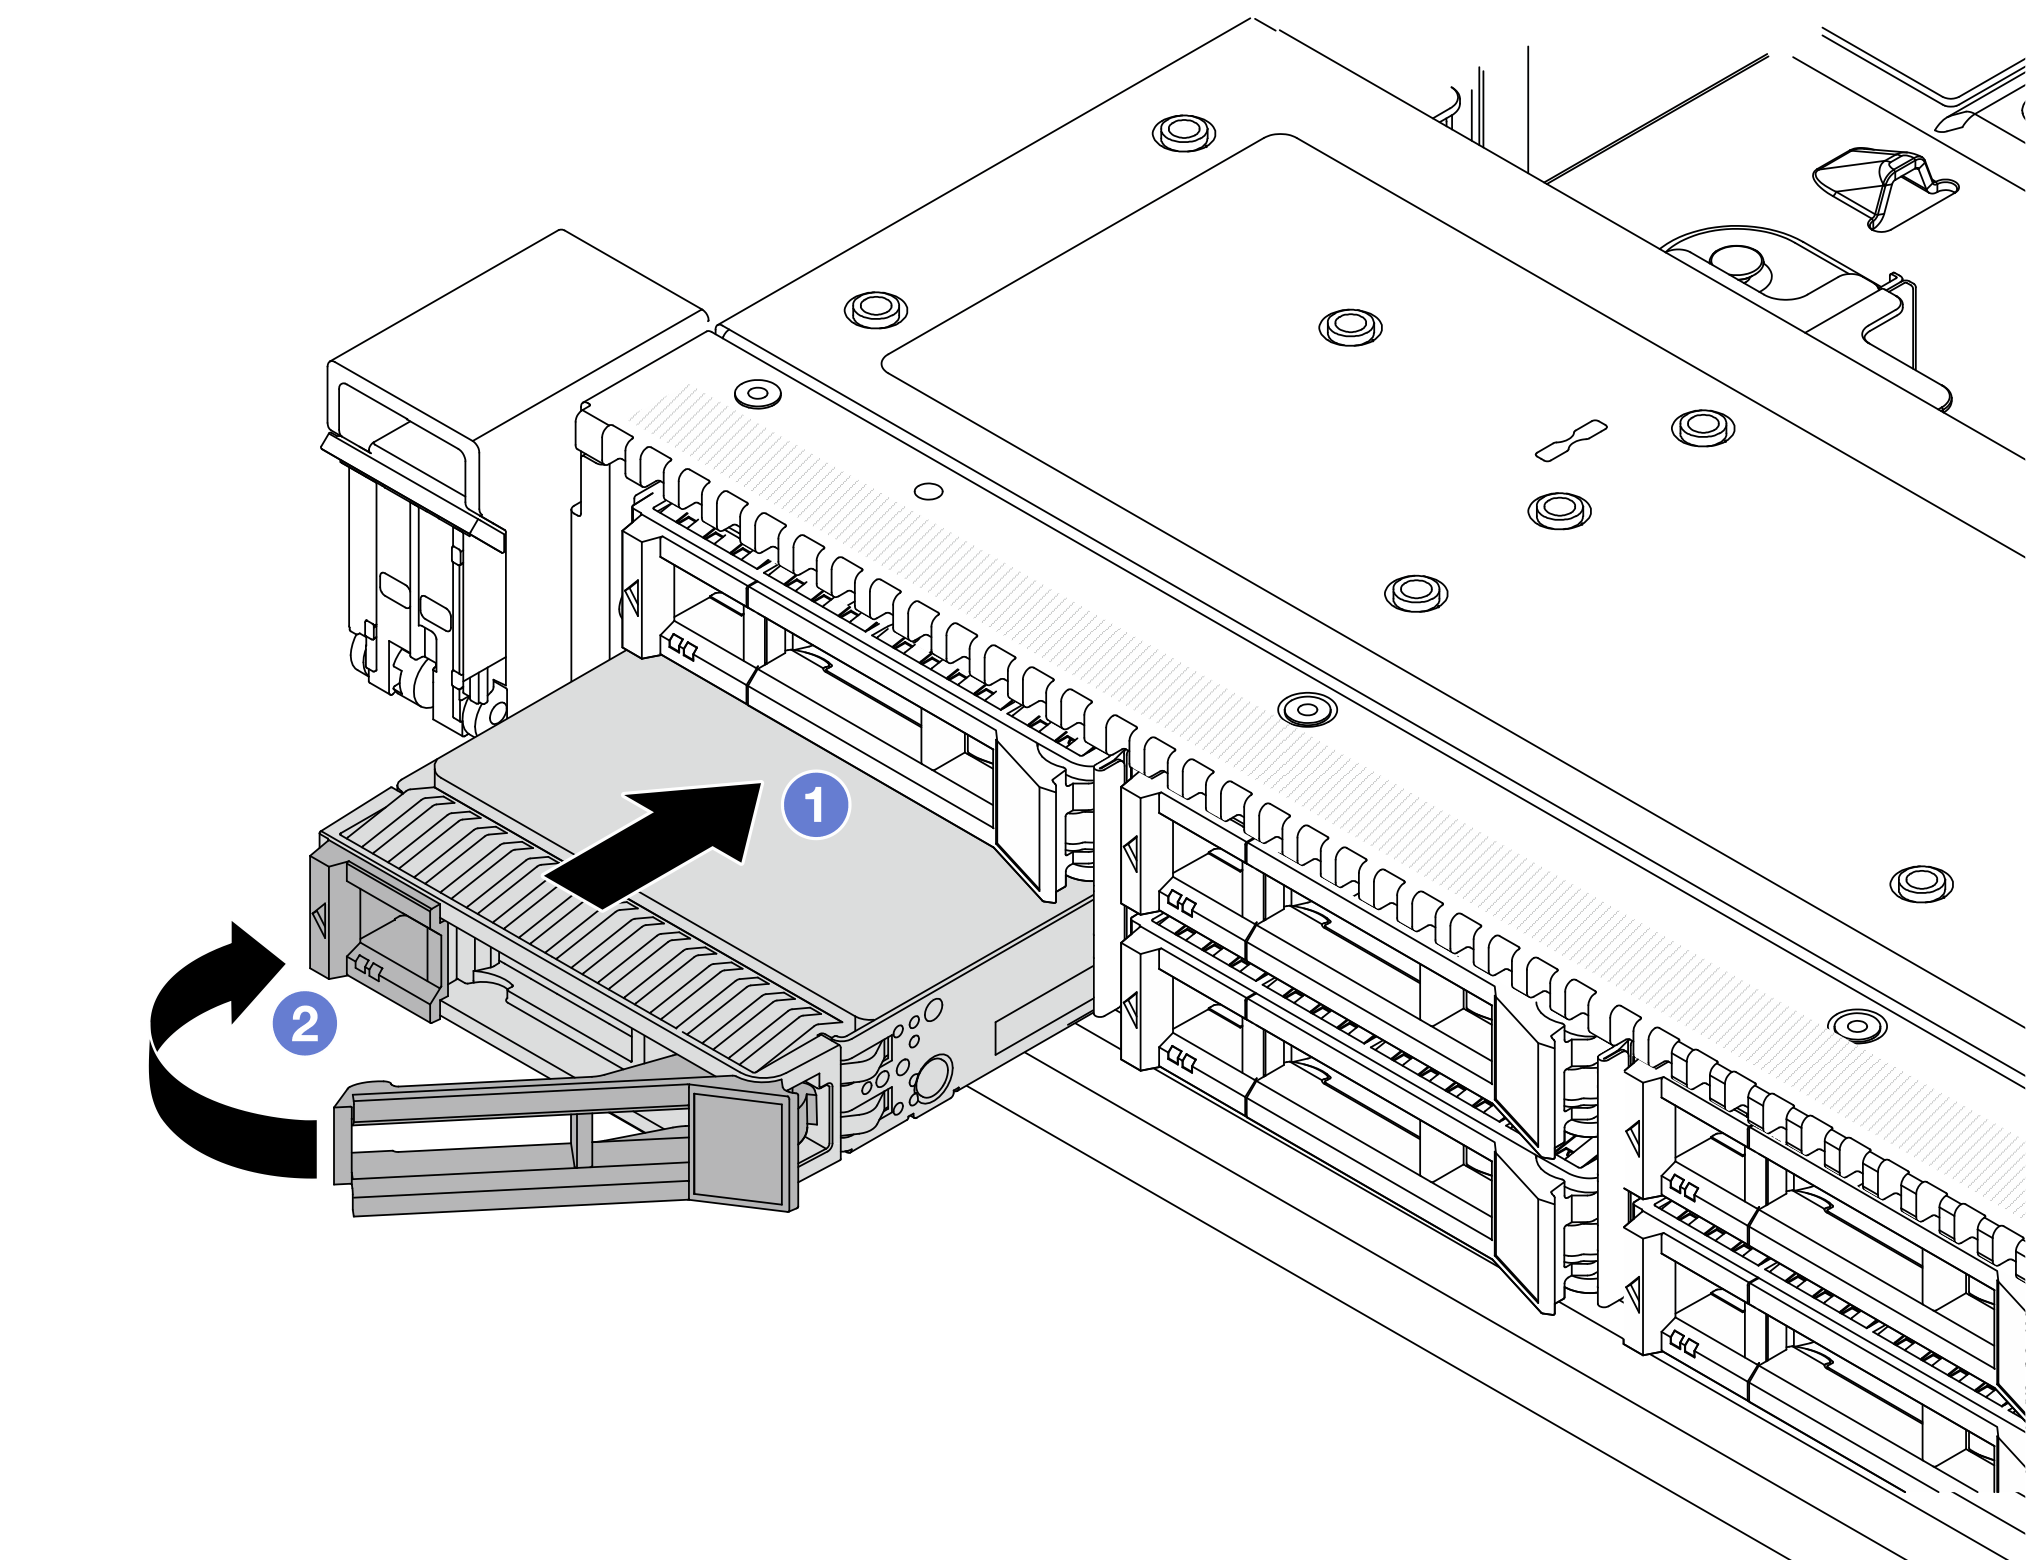
- Ensure that the drive tray handle is in the open position. Slide the drive into the drive bay until it snaps into position.
- Close the drive tray handle to lock the drive in place.
After you finish
Reinstall the security bezel if you removed it. See Install the security bezel.
Use the Lenovo XClarity Provisioning Manager to configure the RAID if necessary. For more information, see: Lenovo XClarity Provisioning Manager portal page
Demo video