Install the front 3.5-inch-drive backplane
Use this information to install the front 3.5-inch-drive backplane.


Note
The procedure is based on the scenario that you want to install the backplane for up to twelve 3.5-inch drives. The procedure is similar for the backplane for up to eight 3.5-inch drives.
Before installing the 3.5-inch-drive backplane, touch the static-protective package that contains the new backplane to any unpainted surface on the outside of the server. Then, take the new backplane out of the package and place it on a static-protective surface.
To install the 3.5-inch-drive backplane, complete the following steps:
Figure 1. 3.5-inch-drive backplane installation
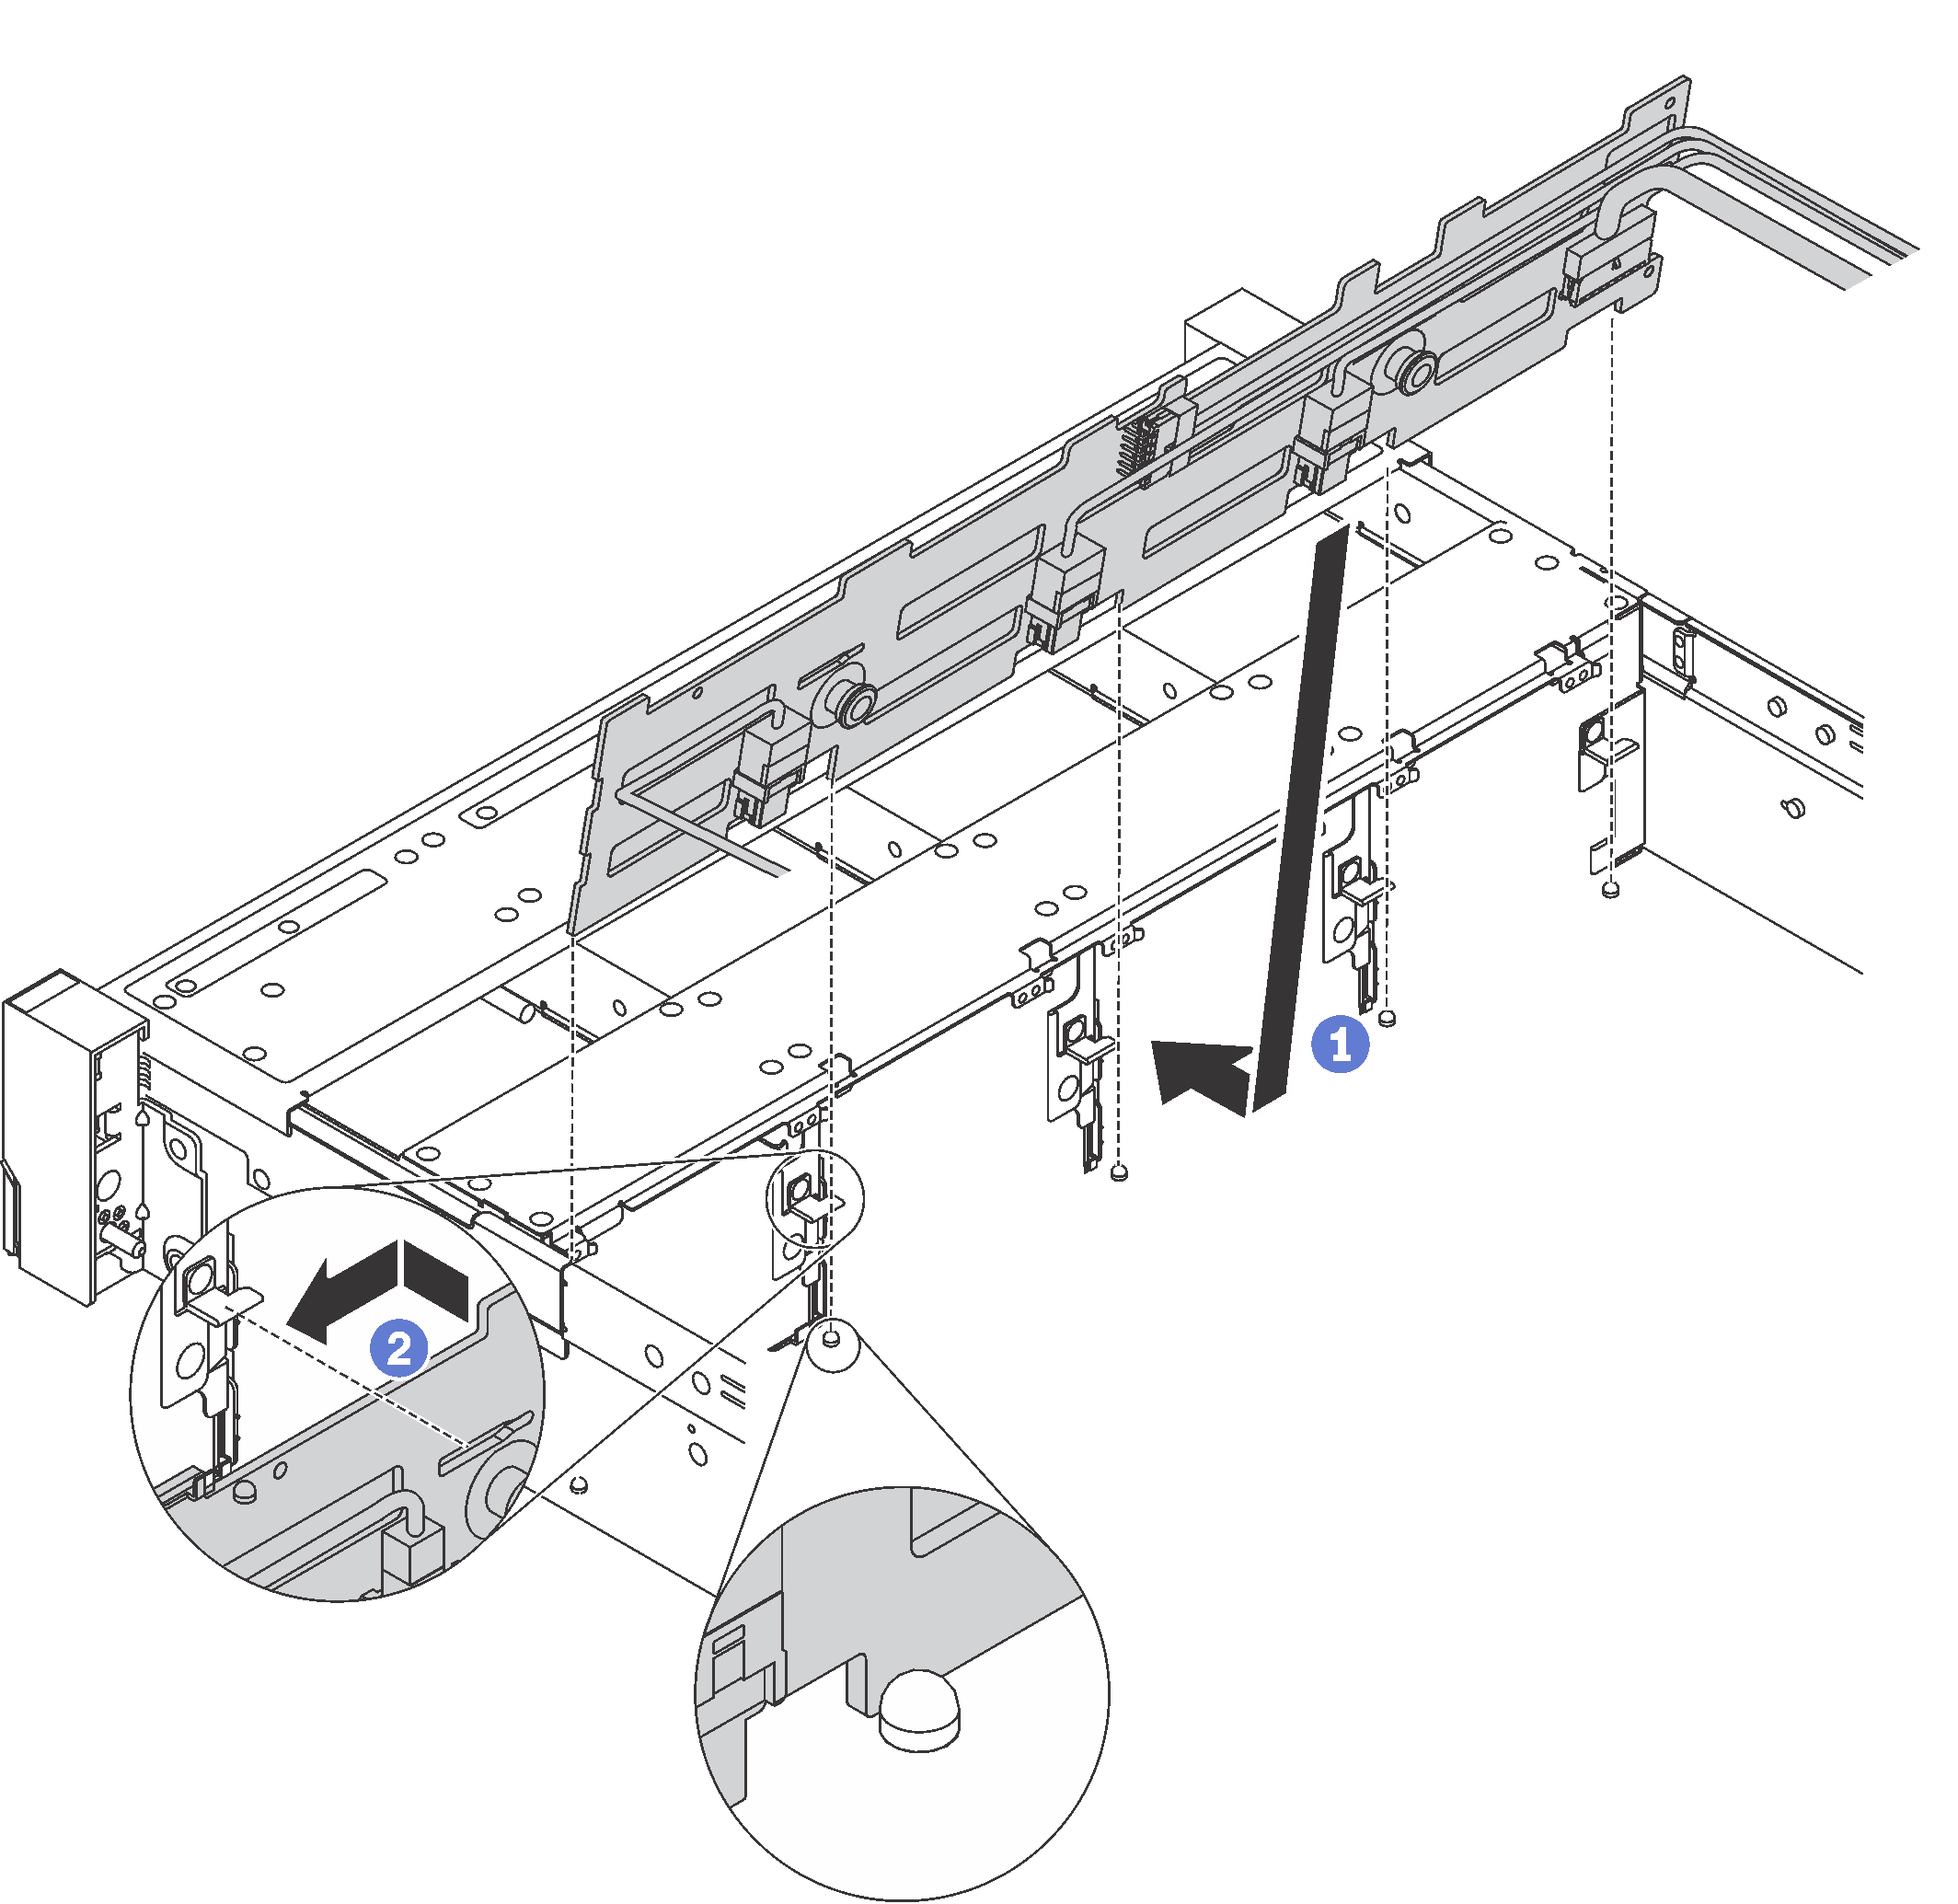
- Connect the cables to the backplane. See Backplanes.
- Align the backplane with the chassis and lower it into the chassis. Then, put the backplane into place with it leaning backward slightly.
- Rotate the backplane to vertical position to ensure that the four hooks on the chassis pass through the corresponding holes in the backplane. Then, slide the new backplane as shown until it is secured into place.
Demo video
Give documentation feedback