Install the rear 3.5-inch drive cage

Use this information to install the rear 3.5-inch drive cage.

Note
The rear drive cage kit comes with required riser brackets, rear wall bracket, and performance system fans (speed of 29000 RPM). Before installing the rear drive cage:
  1. Install the rear wall bracket.
    Figure 1. Installing rear wall bracket for the rear 3.5-inch drive cage
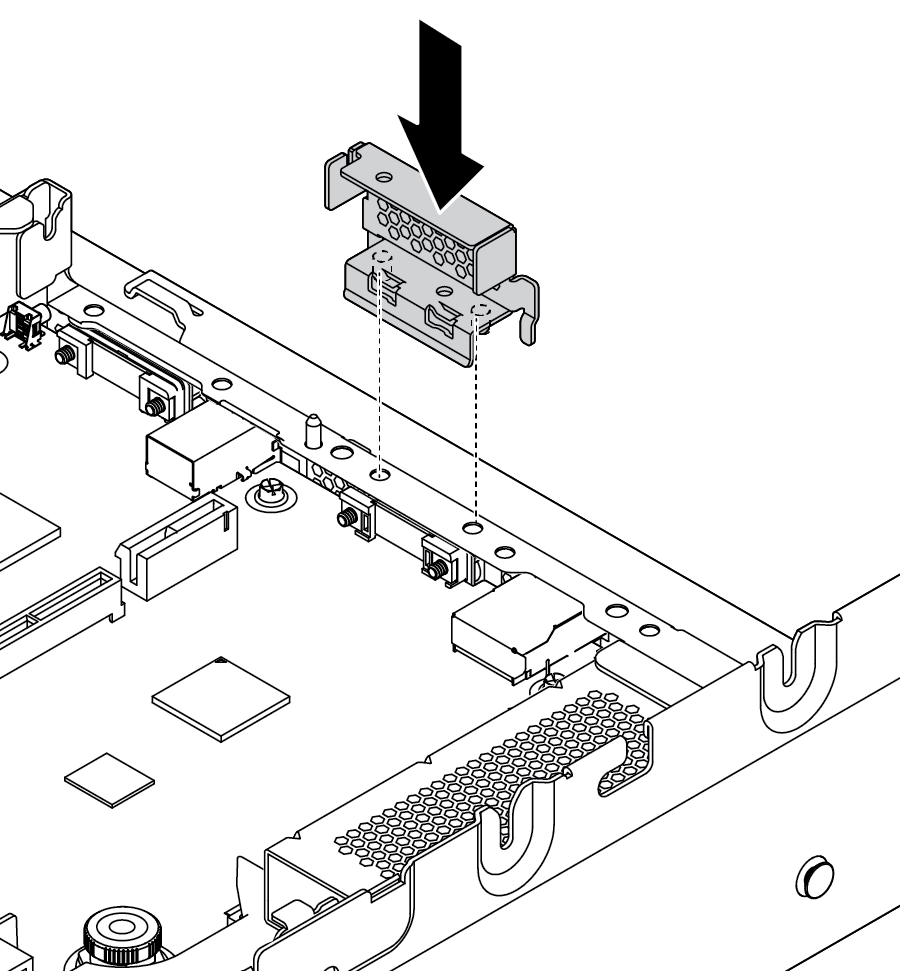
    Installing rear wall bracket for the rear 3.5-inch drive cage

  2. Install the required riser assemblies. See Install a PCIe adapter and riser assembly.

  3. Install the performance system fans. See Install a system fan.

To install the rear drive cage, complete the following steps:

  1. Connect cables to the backplane.
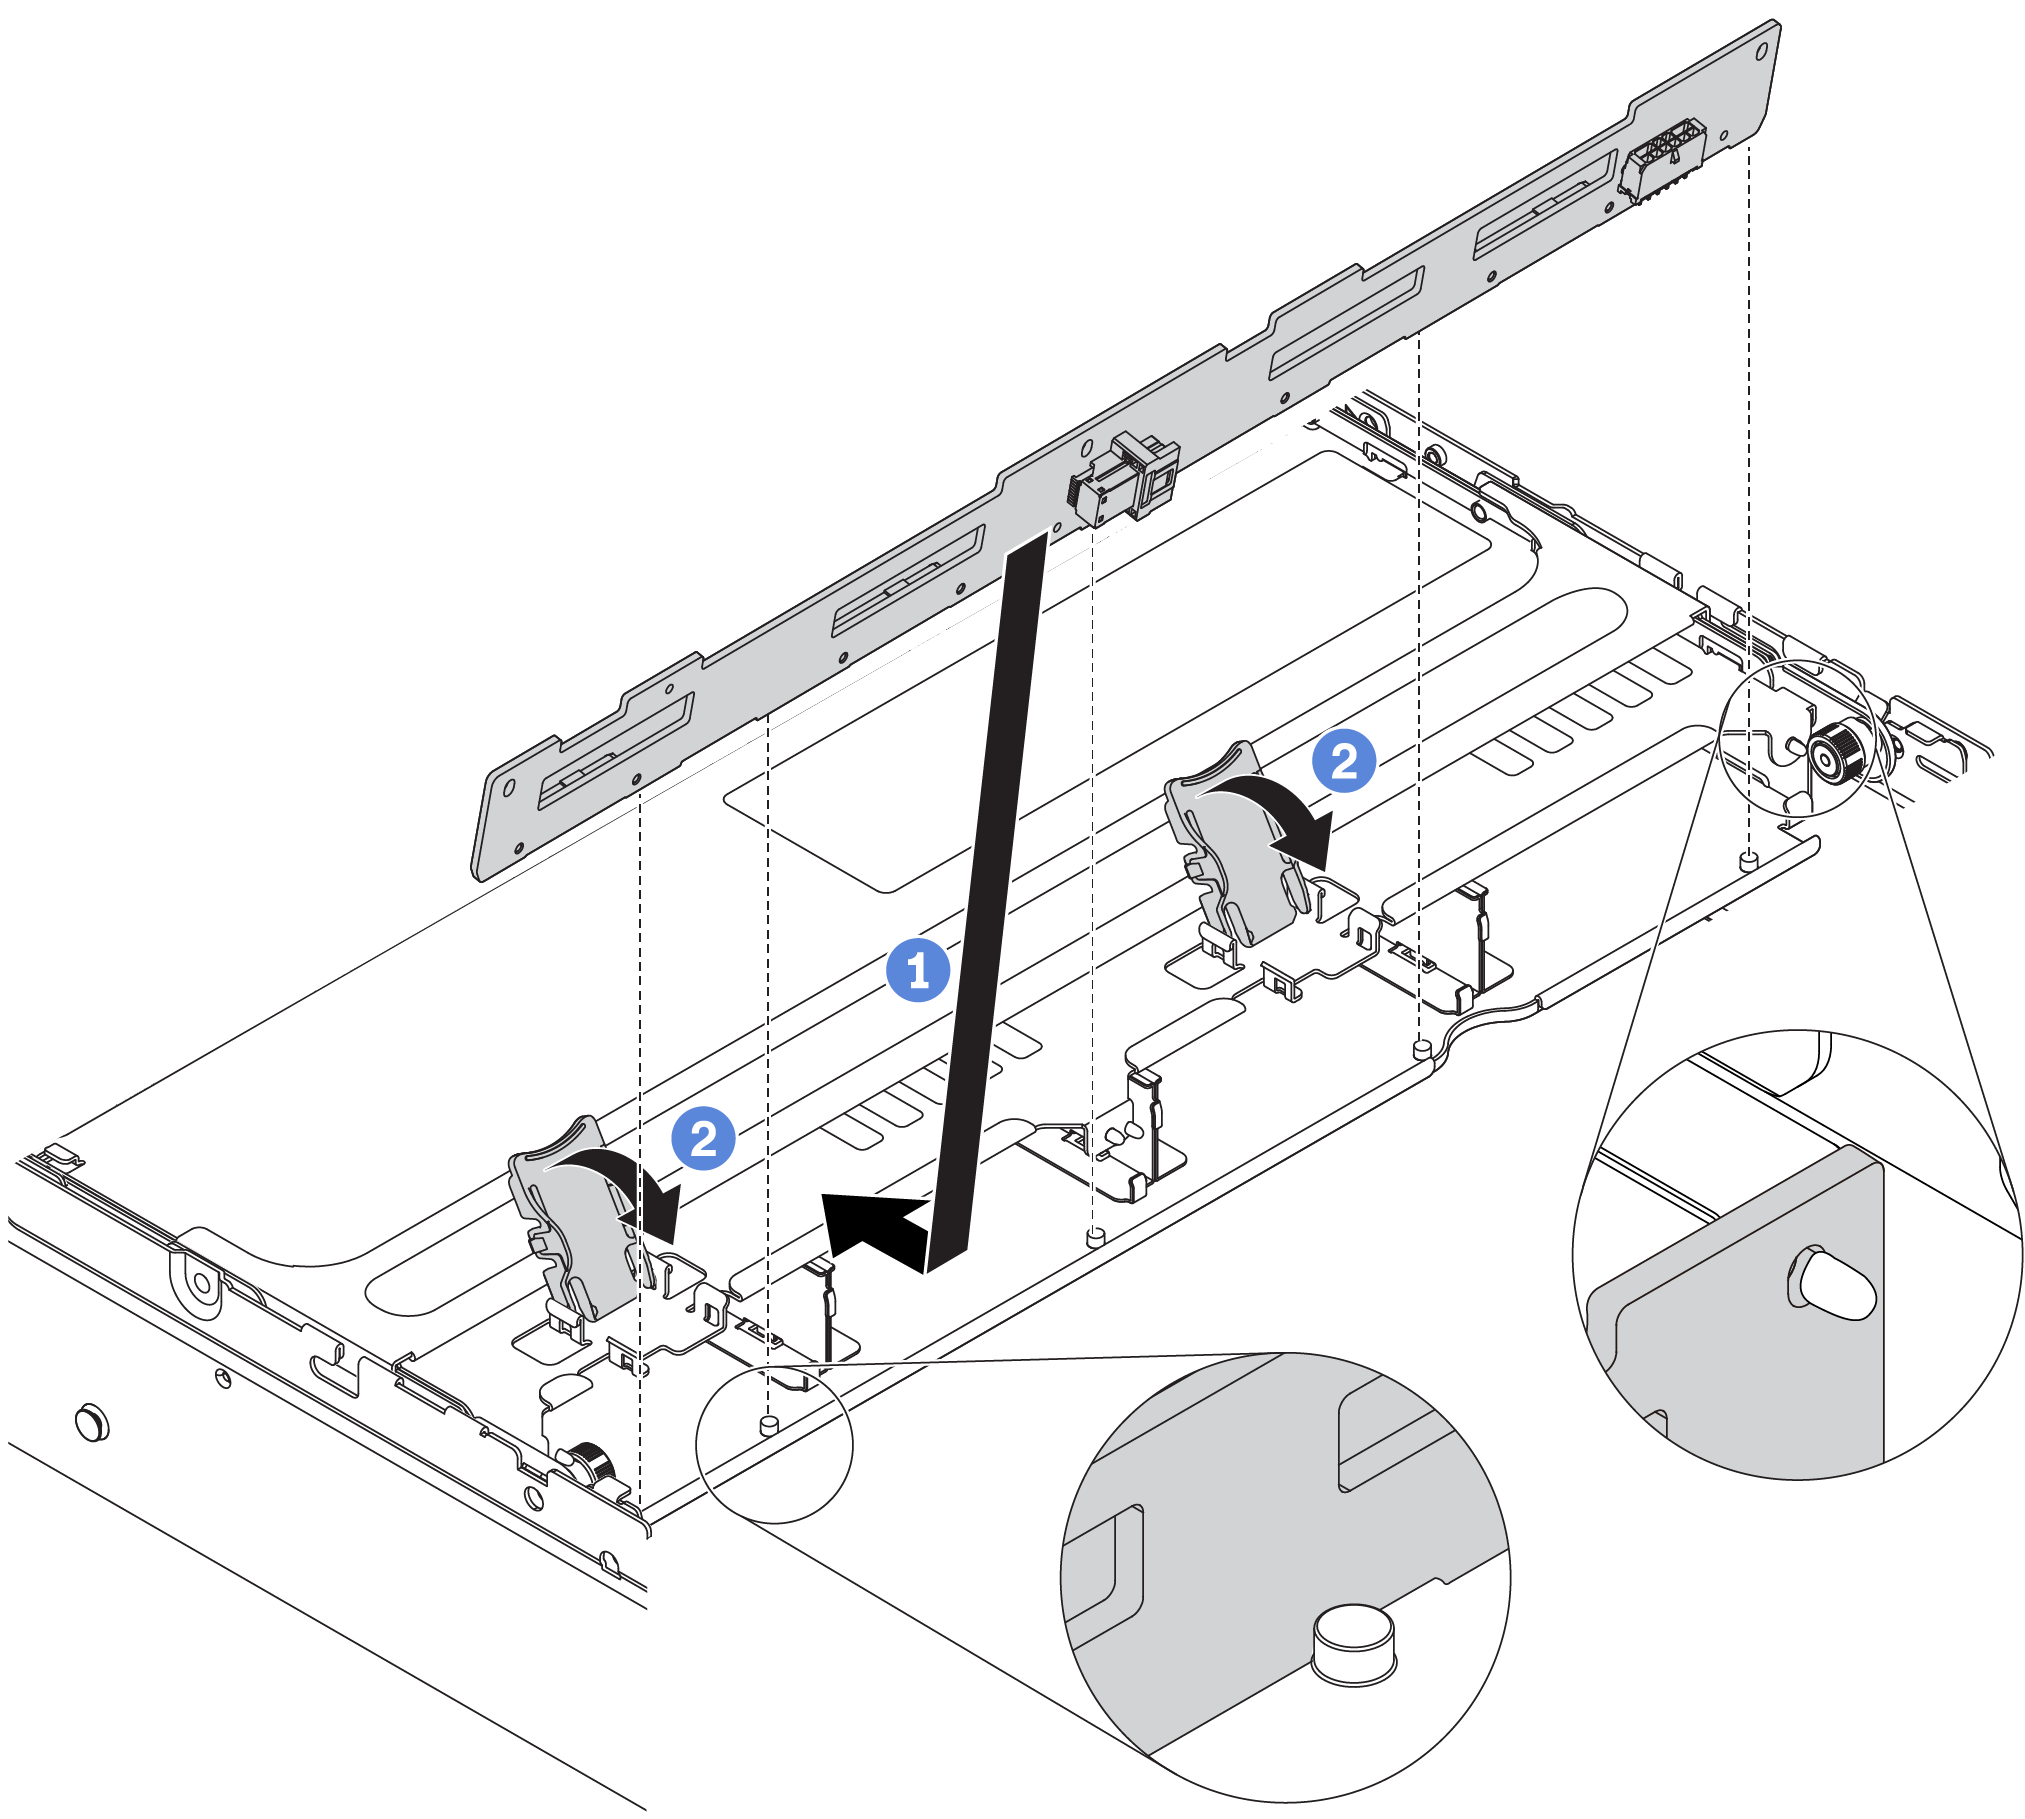
  2. Install the backplane on the rear drive cage.
    1. Align the bottom of the backplane with the studs at the bottom of the drive cage. Rotate the backplane to vertical position so that the holes in the backplane pass through the pins on the drive cage.
    2. Close the release latches to secure the backplane in place.
    Note

    The illustration shows installing a backplane to the middle drive cage. It is the same for installing the backplane to the rear drive cage.

    Figure 2. Installing the backplane
    Installing the backplane

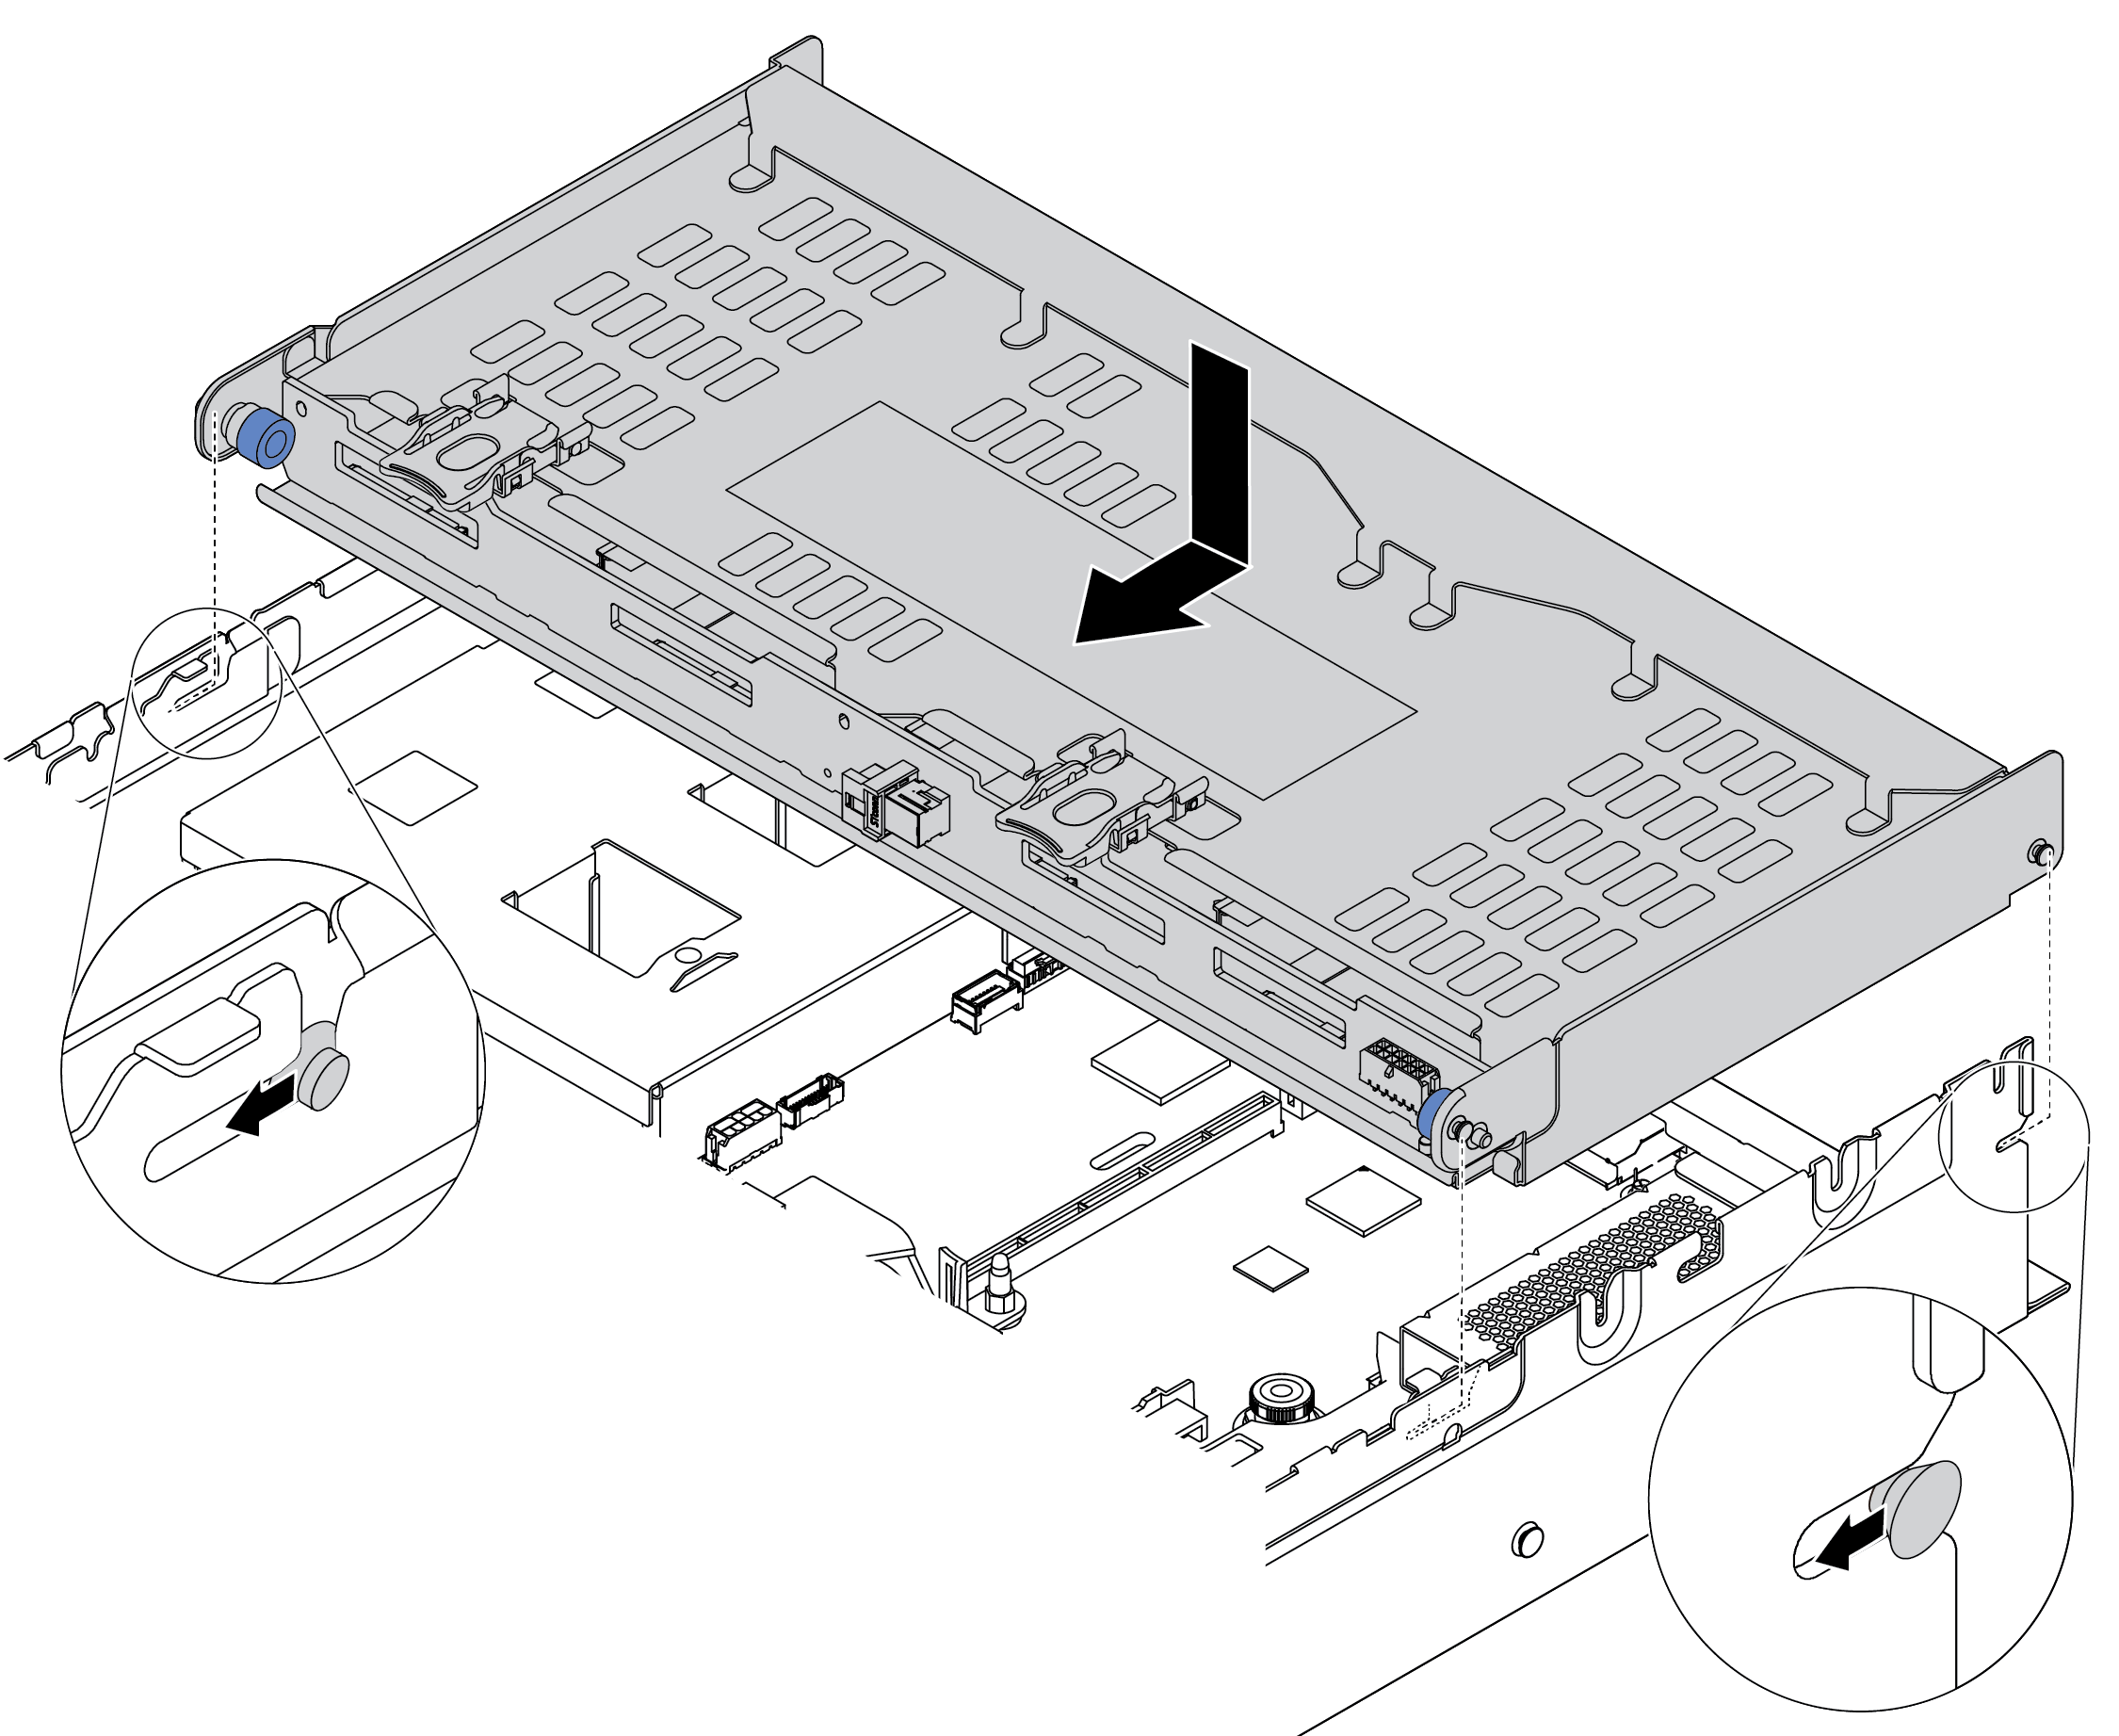
  3. Install the rear drive cage into the chassis.
    1. Align the rear drive cage with the chassis, and lower the drive cage into the chassis.
    2. Move the rear drive cage forward until it clicks into position. Ensure that the blue plunger is latched into place to secure the rear drive cage.
    Figure 3. Installing the rear 3.5-inch drive cage
    Installing the rear 3.5-inch drive cage

  4. Install drives into the drive cage. See Install a hot-swap drive.
  5. Connect cables from the backplane to a RAID/HBA adapter. See Internal cable routing.