Install the drive cage (bay 3)
Follow this procedure to install the drive cage to bay 3.
S002
CAUTION
The power-control button on the device and the power switch on the power supply do not turn off the electrical current supplied to the device. The device also might have more than one power cord. To remove all electrical current from the device, ensure that all power cords are disconnected from the power source.
About this task
Attention
Read Safety inspection checklist and Installation guidelines to ensure that you work safely.
Touch the static-protective package that contains the component to any unpainted metal surface on the server; then, remove it from the package and place it on a static-protective surface.
Watch the procedure
- A video of this procedure is available at YouTube.
Procedure
- (Optional) Install the EMI shielding included in the component packaging to the chassis.NoteInstalling the EMI shielding is required when the original shielding slot on the chassis is vacant.
 Insert the tabs on the left end of the EMI shielding into the shield slot on the chassis.
 Push the EMI shielding into the chassis until it snaps into place.Figure 1. Installing the EMI shielding
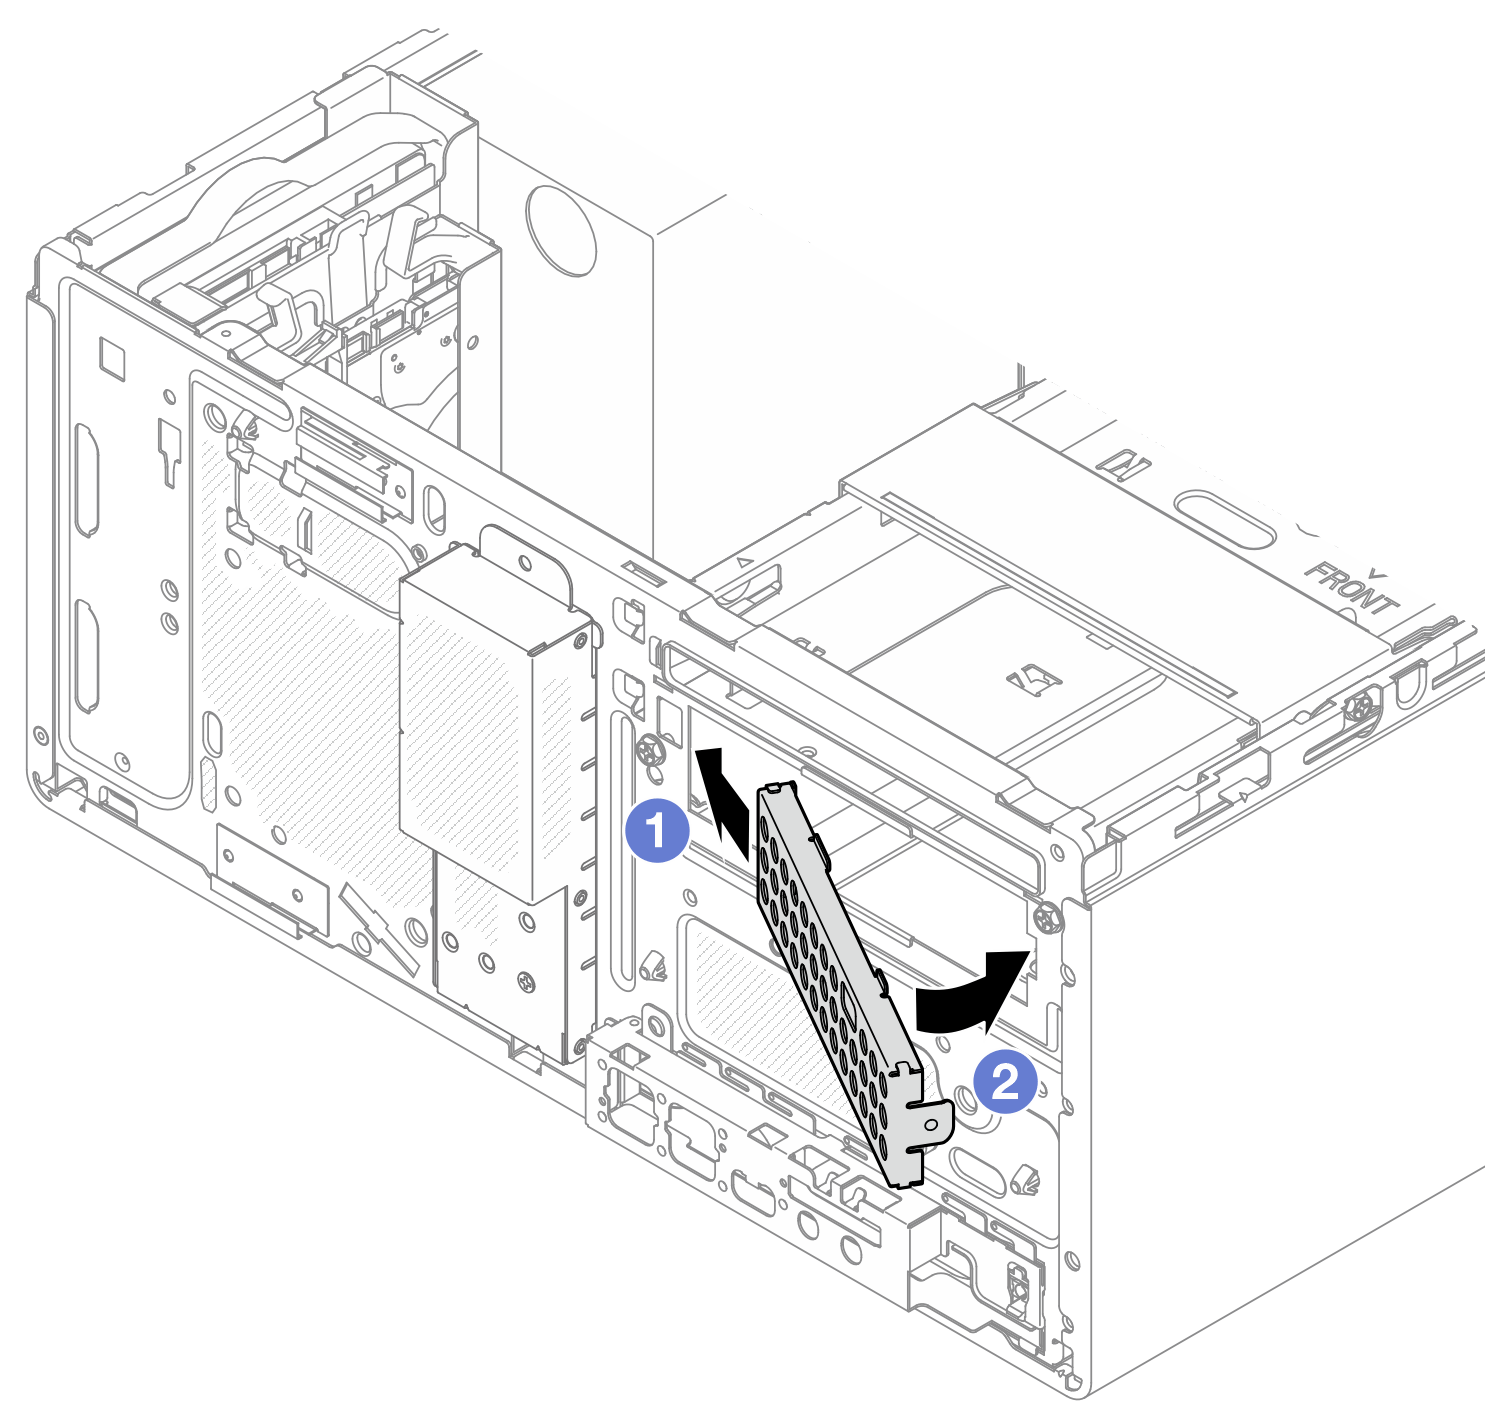
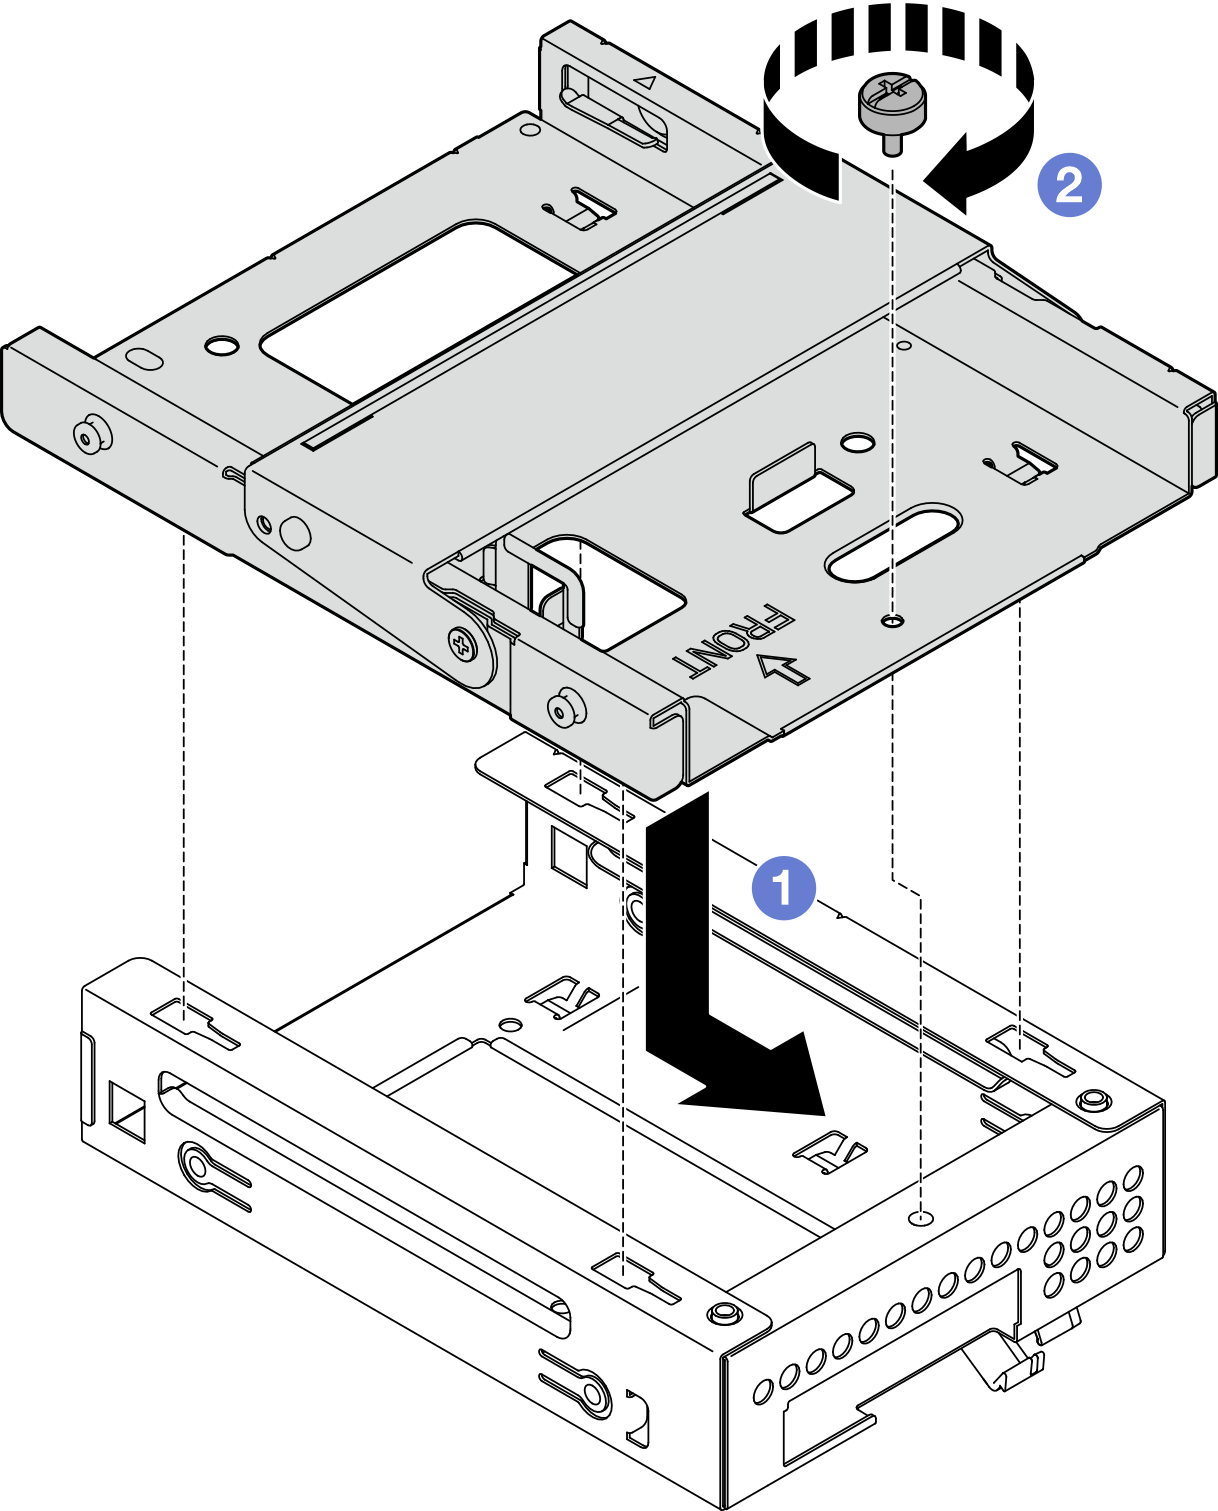
- Make sure there is no optical drive installed on the optical drive cage. Then, istall the 3.5-inch drive cage to the optical drive cage.
- Align the four hooks on the optical drive cage with the corresponding hooks on the 3.5-inch drive cage; then, lower the optical drive cage onto the 3.5-inch drive cage, and slide the optical drive forward until it secures into place.NoteMake sure the four hooks on both drive cages are fully engaged.
- Fasten the captive screw to secure the two drive cages together.Figure 2. Installing the 3.5-inch drive cage to the optical drive cage
After you finish
Reinstall the optical drive cage, see Install the optical drive cage.
Complete the parts replacement, see Complete the parts replacement.
Give documentation feedback