Infrastructure admin users and VDC manager users can import a VM in several formats: VMDK, .VHD, .VHDx, .IMG, .OVA, .QCOW2, .QED, .or RAW files for import. The VM files must be located on an NFS or CIFS share.
Imported VMs are saved as templates in ThinkAgile CP.
For more information about setting up a share so that a VM can be imported, see the following topic:
Allow share access for importing a VM
Complete the following steps to create a new application template by importing a VM:
- Log in to the ThinkAgile CP Cloud Controller as an infrastructure admin or VDC manager user.
- In the ThinkAgile CP Cloud Controller left-side menu, perform one of the following steps, depending on your user role:
- Expand Applications and click All Instances. On the top right of the Application Instances page, click .
- Expand Applications and click Organization Templates. AT the top right of the Organization Templates page, click Import VM.
- Under a selected virtual datacenter, click VDC Instances At the top right of the page, click .
- Under a selected virtual datacenter, click VDC Templates. At the top right of the page, click Import VM.
- Fill in the details on the Import VM page.
Figure 1. Import VM page 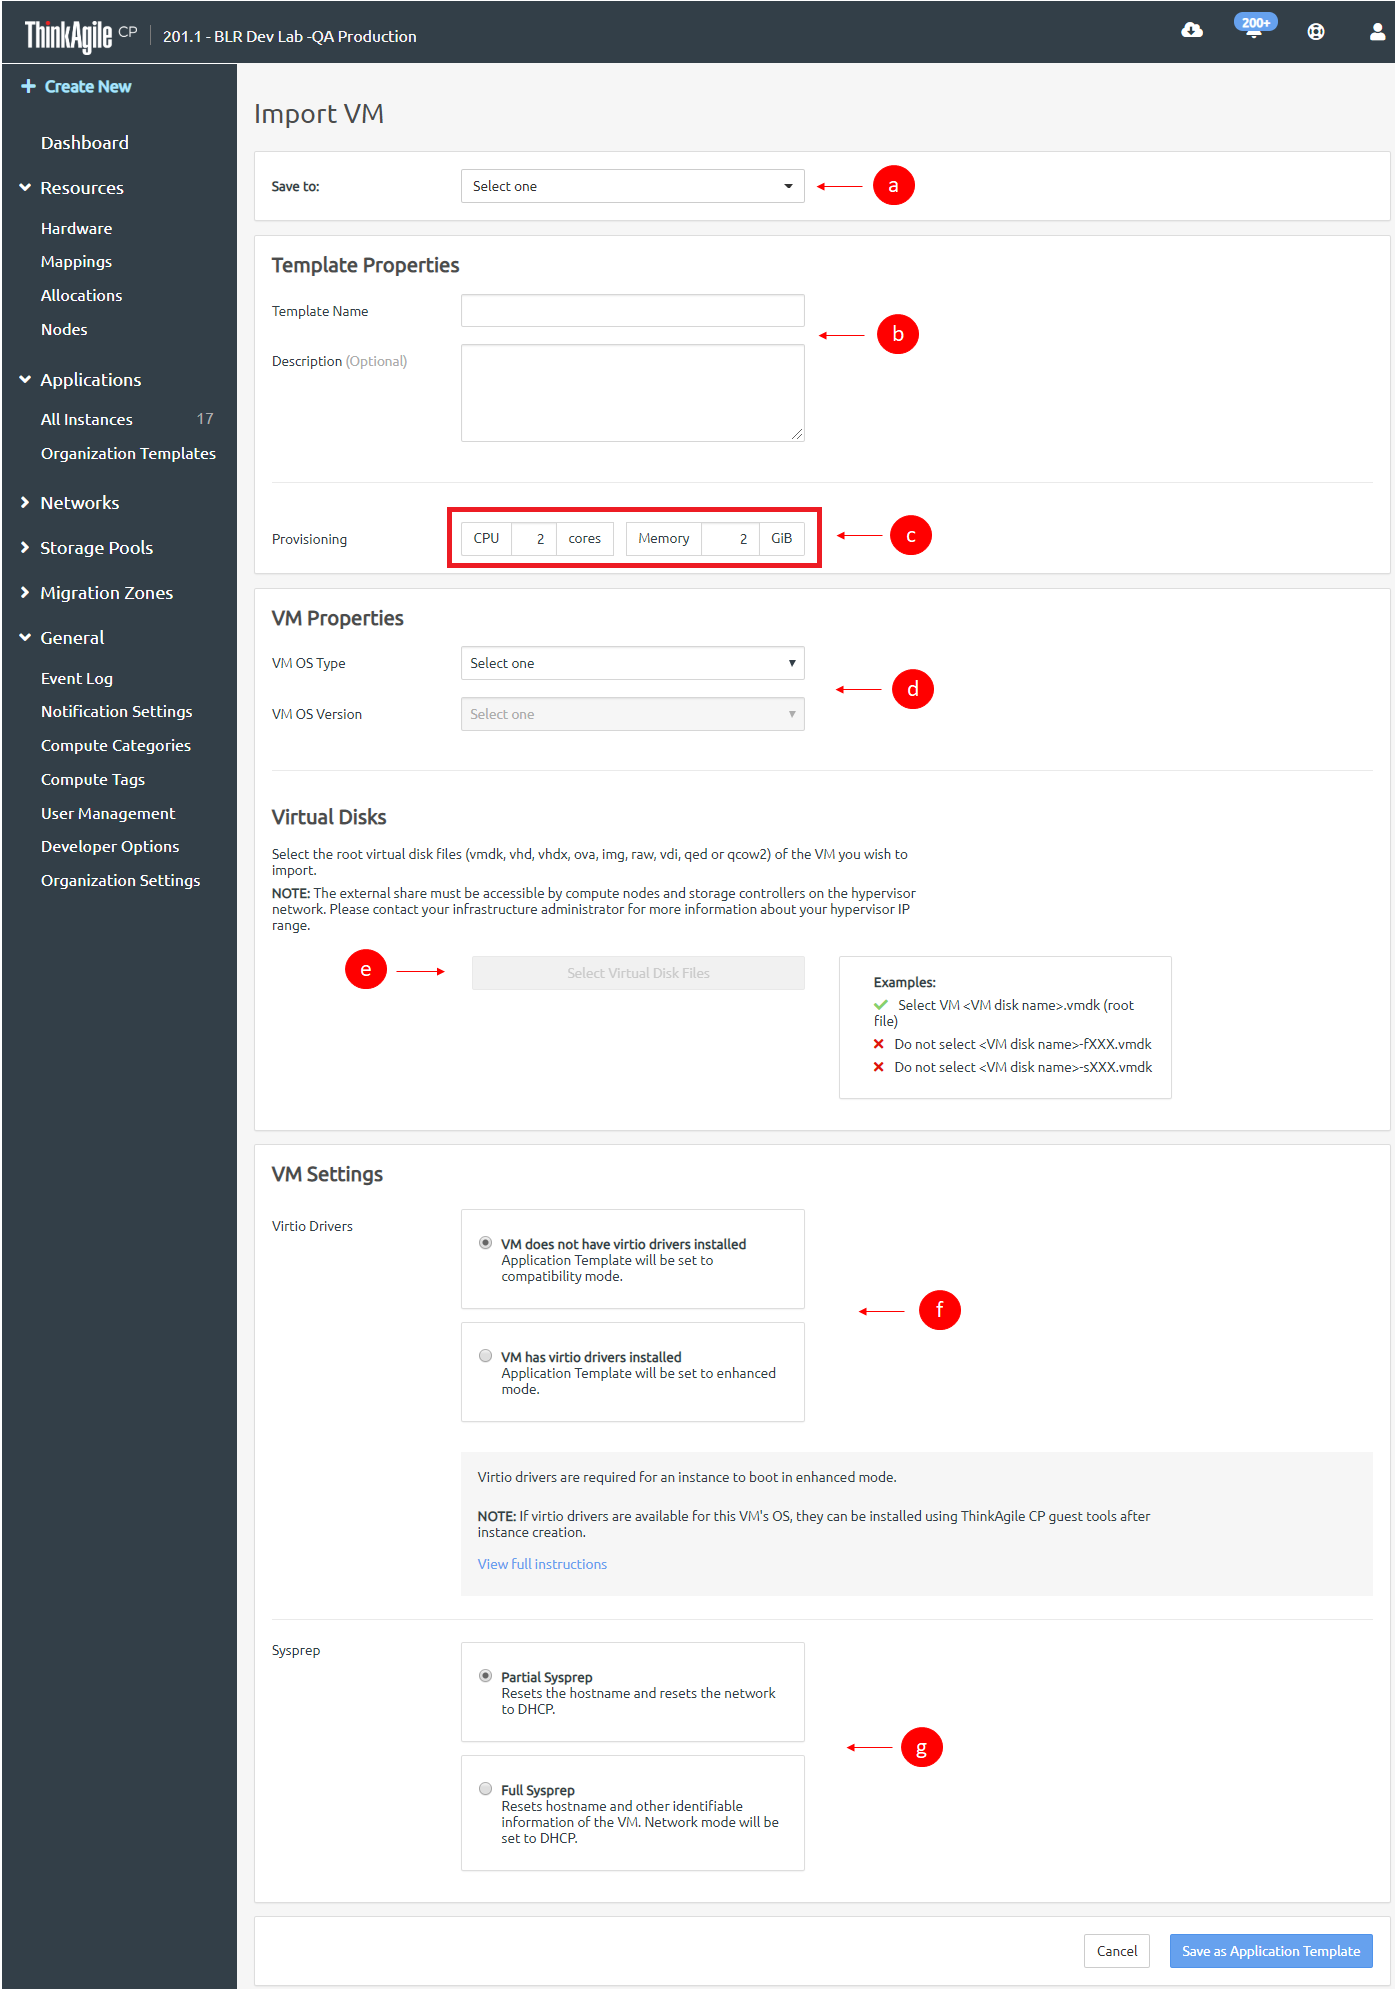
- From the drop-down list, select the location to which to save the template. You can select Organization Templates or a virtual datacenter template store to which you have access.
- Enter a name for this new template. You can also enter an optional description.
- Enter the number of CPU cores and the amount of memory in GB to allocate to this template.
- Select the operating system for the VM, as well as the version and edition as required.
- You can select the VM OS Type as either BSD, Linux, Other, or Windows.
- For BSD VM OS type, choose FreeBSD 10.3 or Other for VM OS Version.
- For Linux VM OS type, choose Enterprise Linux 6/7, Ubuntu 16.04, or Other.
- For Other VM OS type, choose FreeNAS 9.10, Netscaler, or Other.
- For Windows VM OS type, choose Other, Windows 7, Windows 8, Windows 8.1, Windows 10, Windows Server 2008R2, Windows Server 2012, Windows Server 2012R2, Windows Server 2016, or Windows Server 2019 for the VM OS Version
- Click Select Virtual Disk Files to select the root virtual disk files (vmdk, vhd, vhdx, ova, img, raw, vdi, qed or qcow2) of the VM you want to import.
- In the Select Virtual Disk Files dialog box, select NFS or CIFS, as appropriate, enter the required information so that ThinkAgile CP Cloud Controller can connect to the external store where the VMs are located, and click Connect. A list of files at this location will be displayed.
Figure 2. Select Virtual Disk Files page 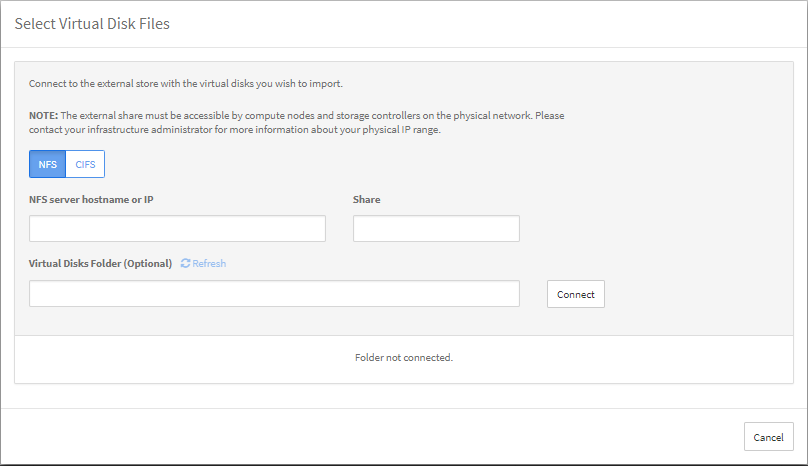
- Select the root disk files to import; then click Add Selected.
- Under VM Settings, select one of the following options to configure virtio drivers.
- Select one of the following options to configure sysprep.
- Click Save As Application Template to create an application template from the imported file. Select the template store where the template is to be made available (Organization template or VDC template store).
After the application template is created, you can view it in your list of templates in the selected template store. To create an application instance from the template, see the following topic:
Create an instance from a template
When creating an instance from a VMDK template, the machine name, domain membership, and drive mapping might change.