Create an instance from an installer
Infrastructure admin users and VDC manager users can create an application instance from an ISO image.
Complete the following steps to create an application instance from an ISO image:
- Fill in the information for properties, VDC, and resources in the New instance from installer dialog. Figure 1. New instance from installer dialog - Properties, Virtual Datacenter settings, Resource settings

- Add a vDisk or modify vDisk settings as needed. Click Edit vDisk to display the Edit vDisk dialog.
For more information about adding a vDisk to an instance, see the following topic:
Figure 2. Edit vDisk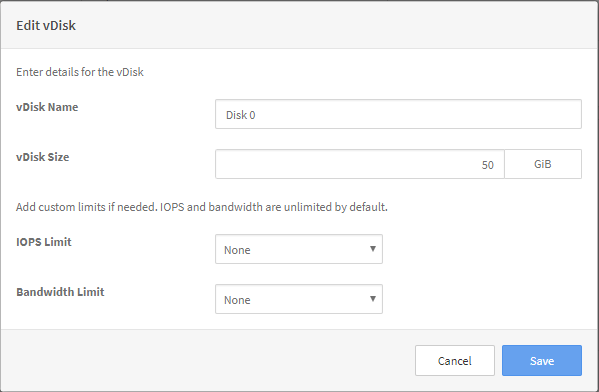 In the Edit vDisk dialog, modify the vDisk name if needed, and enter a size in GiB. Optionally, set the IOPS and bandwidth limits:
- In the IOPS Limit drop-down, click Custom, and then enter a value for IO per sec. (The minimum value is 50.)
In the Bandwidth Limit drop-down, click Custom, and then enter a value for MBps. (The minimum value is 5.)
NoteSetting these limits is useful for Quality of Service (QoS) monitoring and maintaining performance predictability of running workloads. (IOPS and bandwidth limits are unlimited by default.) Storage QoS limits ensure that the application instance does not consume more than the specified limit of IOPS or bandwidth. Other factors, including your specific workload and other workloads running on the storage block, may prevent your application instance from reaching these limits.
- Add a vDisk or modify vDisk settings as needed. Click Edit vDisk to display the Edit vDisk dialog.
- In the Installer section, complete the following steps:Figure 3. New Instance from Installer page - Installer settings
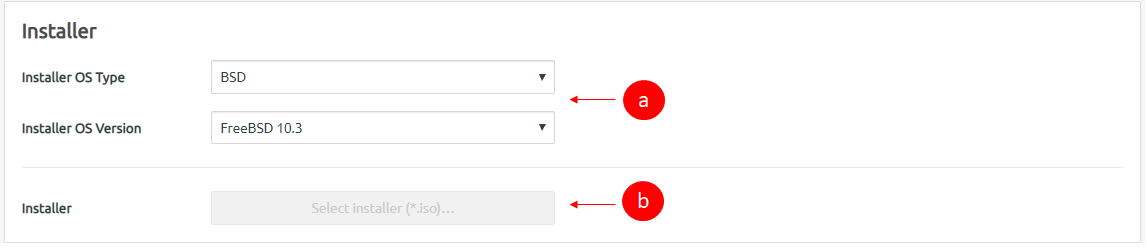
- Click Select Installer. In the Select Installer dialog, set up an NFS or CIFS share and copy the ISO to it. The share must be accessible by the compute nodes.Figure 4. Select Installer dialog box
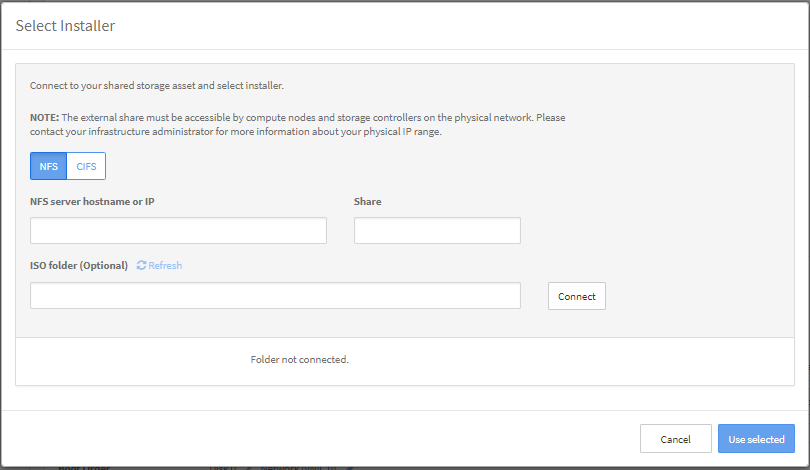 Note
NoteShares with special characters in the name are not currently supported. On the Nodes page, the compute node IPs will be listed. Since the compute node IPs are assigned via DHCP, and not statically, they are subject to change. If only those IPs are given access to the share, or if they change, additional access will have to be granted. Because of this, ThinkAgile CP recommends granting the whole subnet access to the share. On the Hardware page, you can click Show Network Settings. The IP range under Router Physical Network is the range of IPs that could be assigned to the compute nodes. Granting access to the share from this range will allow consistent access to the share from ThinkAgile CP Cloud Controller.
For more information about making a share accessible, see the following topic:
- Click Select Installer. In the Select Installer dialog, set up an NFS or CIFS share and copy the ISO to it. The share must be accessible by the compute nodes.
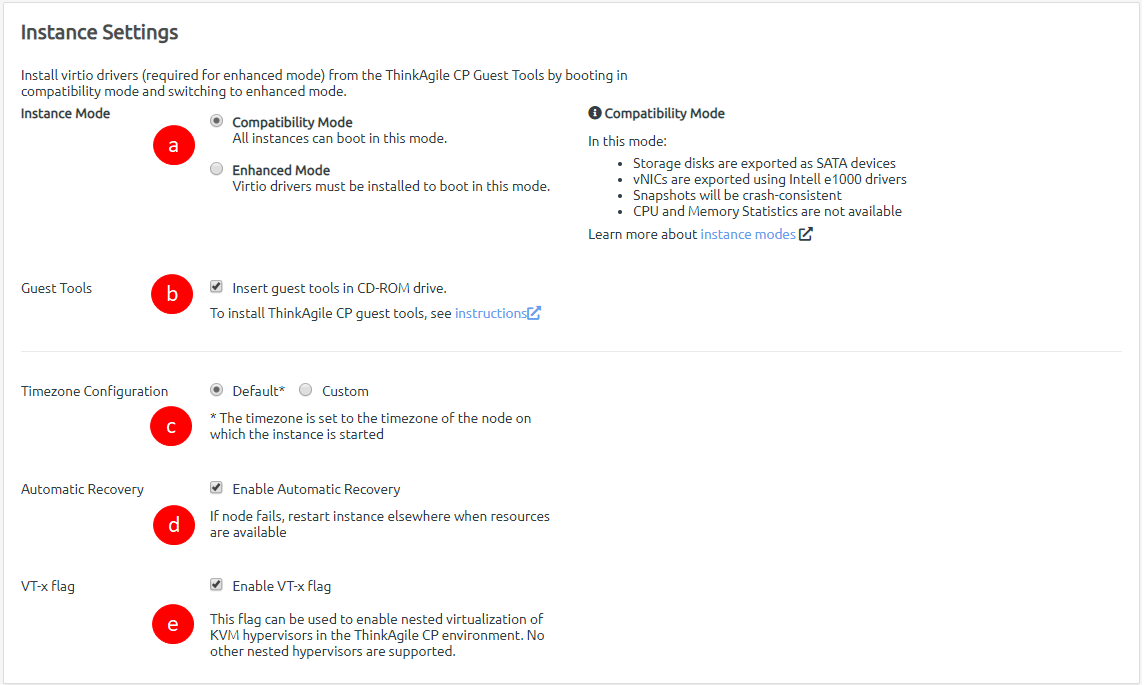
- In the Instance Settings section, configure the settings to be used for the instance.Figure 5. New instance from installer page - Instance settings