Manage application instances
VDC manager users can manage the application instances in the virtual datacenters to which they have access. Infrastructure admin users can manage all application instances.
Complete the following steps to manage an application instance:
- In the ThinkAgile CP Cloud Controller left-side menu, perform one of the following steps:
- Expand Applications and click All Instances. On the Application Instances page, go to the row for the instance, and click the Actions menu (
 ).
). - Expand the virtual datacenter where the instance is located and click VDC Instances. On the VDC Instances page, go to the row for the instance, and click the Actions menu ().
Figure 1. Application instance Actions menu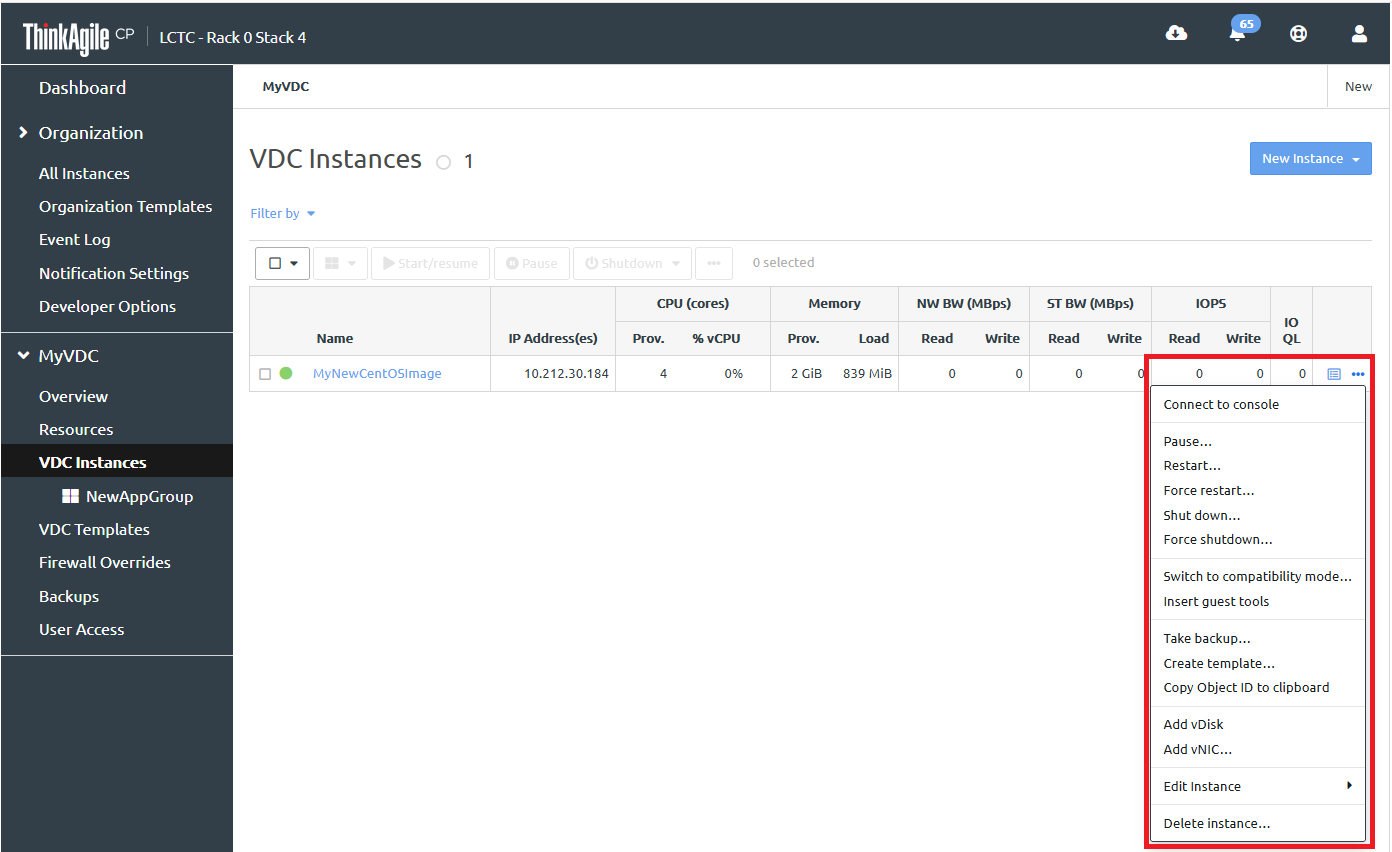 You can perform the following actions for a application instance:
Action Description Connect to console
Click Connect to console to establish a session with the application instance console.
The Cloud Controller will create a secure VNC connection to the instance and open the console in a new window. For the console to open, the firewall must allow incoming connections from the internal network to the compute node's (Router physical network) through ports TCP 1024-49151, inclusive.
Pause
Click Pause to stop an instance from running temporarily.
In the Pause confirmation dialog, click Pause instance.
NoteThis can also be done as a bulk-action by selecting multiple instances from the Application Instances page, and clicking Pause at the top of the table.
Resume
Click Resume to resume an instance that had been paused previously.
NoteThis can also be done as a bulk-action by selecting multiple instances from the Application Instances page, and clicking Start/Resume at the top of the table.
Start
Click Start to start an instance.
NoteThis can also be done as a bulk-action by selecting multiple instances from the Application Instances page, and clicking Start/Resume at the top of the table.
Restart
Click Restart to stop and then restart an instance.
In the Restart Instance confirmation dialog, click Restart Instance.
NoteThis can also be done as a bulk-action by selecting multiple instances from the Application Instances page, clicking Shutdown at the top of the table, and then clicking Restart.
Force restart
Click Force Restart to forcibly stop and then restart an instance.
In the Force Restart Instance confirmation dialog, click Force Restart Instance.
NoteThis can also be done as a bulk-action by selecting multiple instances from the Application Instances page, clicking Shutdown at the top of the table, and then clicking Force restart.
Shut down
Click Shut down to stop an instance.
In the Shut down confirmation dialog, click Shut Down Instance.
NoteThis can also be done as a bulk-action by selecting multiple instances from the Application Instances page, clicking Shutdown at the top of the table.
Force shutdown
Click Shut down to forcible stop an instance.
In the Force shut down confirmation dialog, click Force Shut Down Instance.
NoteThis can also be done as a bulk-action by selecting multiple instances from the Application Instances page, clicking Shutdown at the top of the table and then clicking Force Shutdown
Switch to compatibility mode
Click Switch to compatibility mode to toggle the instance mode from enhanced mode to compatibility mode.
In the Switch to Compatibility Mode dialog, click Switch Mode.
NoteThe application instance must be shut down before switching the mode.For more information about application instance modes, see the following topic:
Switch to enhanced mode
Click Switch to enhanced mode to toggle the instance mode from enhanced mode to compatibility mode.
In the Switch to Enhanced Mode dialog, click Switch Mode.
NoteThe application instance must be shut down before switching the mode.For more information about application instance modes, see the following topic:
Insert guest tools
Click Insert guest tools to install the Guest Agent.
For more information about guest tools, see the following topic:
Eject guest tools
Click Eject guest tools to install the Guest Agent.
For more information about guest tools, see the following topic:
Take backup
Click Take backup to create a local backup of the instance.
For more information about local backups, see the following topic:
Create template
Click Create template to create a template from the application instance.
For more information about creating a template from an instance, see the following topic:
Copy Object ID to clipboard
Click Copy Object ID to clipboard to make a copy of the object ID, which can be used with the ThinkAgile CP Web Services API.
For more information about the ThinkAgile CP Web Services API, see the following topic:
Add vDisk
Click Add vDisk to add a virtual disk.
In the New vDisk dialog, enter the name and size. You can also enter limits for IOPS and bandwidth, if necessary.
Click Add vDisk to add the vDisk.
For more information about working with vDisks, see the following topic:
Watch and learn
Add vNIC
Click Add vNIC to add a virtual NIC.
In the New vNIC dialog, enter the name, networking mode (VNET or VLAN), and network details.
Click Add vNIC to add the vNIC.
NoteThe application instance must be shut down before adding a vNIC.Watch and learn
Edit instance
Click Edit instance to make changes to the details for an instance. You can choose to edit the following information: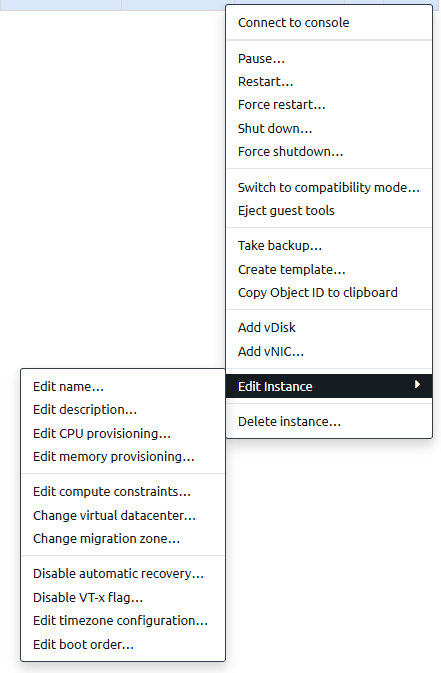
For more information about the meaning of these attributes, see the following topic:
Delete instance
Click Delete instance to delete the application instance.
In the Delete instance confirmation dialog, decide whether you want to delete the instance and all backups, or delete the instance and retain the replicated backups (quick DR backups and external backups).
Click Delete Instance
For example, assume that you want to delete the instance External Backup - Ubuntu-19.04.1. The instance has quick DR backups and external backups:
Figure 2. Resources section of the Backups page In the Delete Application Instance confirmation dialog, you click Maintain replicated backups and then click Delete Application Instance.Figure 3. Delete application instance dialog
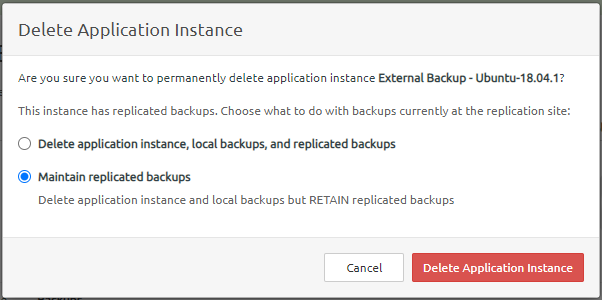
The application instance is removed from the VDC instances page, but it remains in the Resources section of the Backups page. If you click the application instance in the Resources section, you see the following:
Figure 4. Deleted application instance details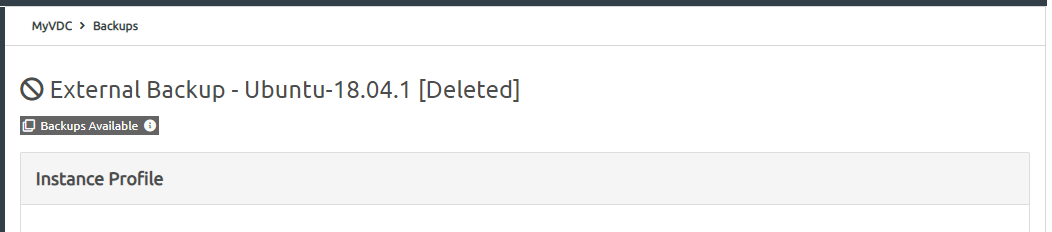
If you scroll down to the Backups section, you can choose to create a new instance from one of the backups:
Figure 5. Deleted application instance details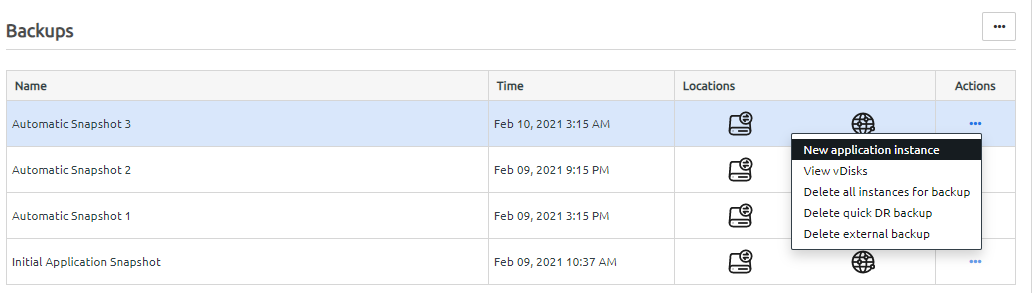 For more information about creating a new instance from a backup, see one of the following topics:
 - Expand Applications and click All Instances. On the Application Instances page, go to the row for the instance, and click the Actions menu (