
Allow share access for importing a VM

Infrastructure admin users can set up a share that can be used to import a VM. They can import a .VMDK/.VHD/.VHDx/.IMG/.OVA/.QCOW2/.QED/.RAW file via an NFS or CIFS share.

Note

Shares with special characters in the name are not supported.

Complete the following steps to grant access to a share that can be used to import a VM:

  1. Log in to the ThinkAgile CP Cloud Controller as an infrastructure admin user.
  2. In the ThinkAgile CP Cloud Controller left-side menu, click Hardware to display the Hardware Stack page.
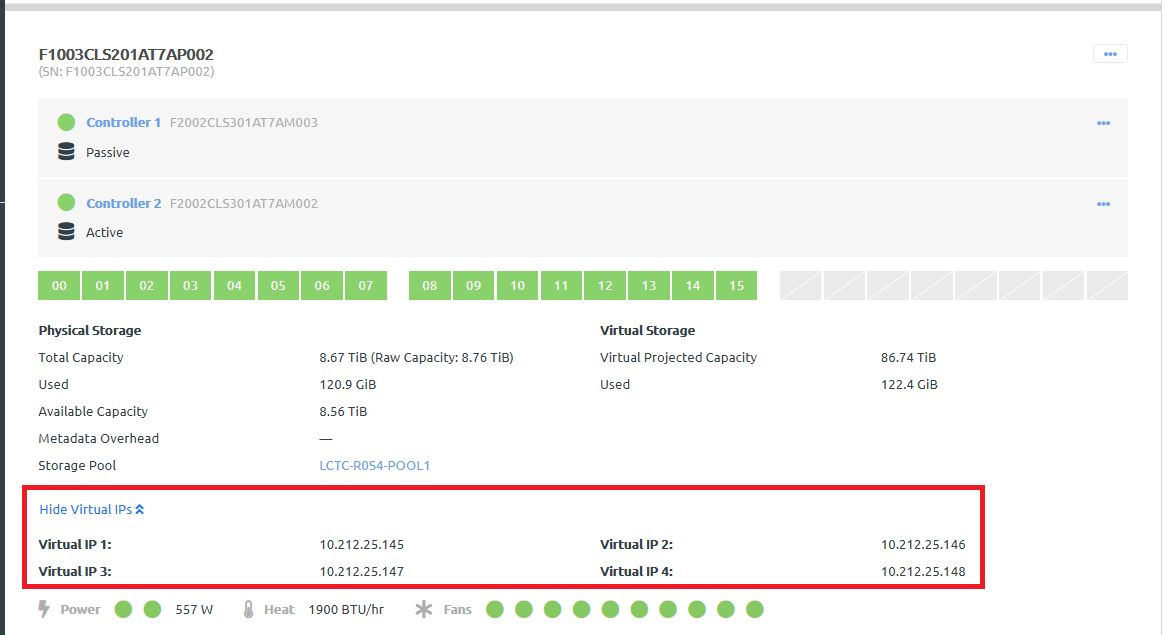
  3. Scroll down to the Storage Block and click lick Show Virtual IPs to view all virtual IP addresses for the storage block.
    Figure 1. Storage block virtual IP addresses
    Screen capture of storage block showing virtual IP addresses
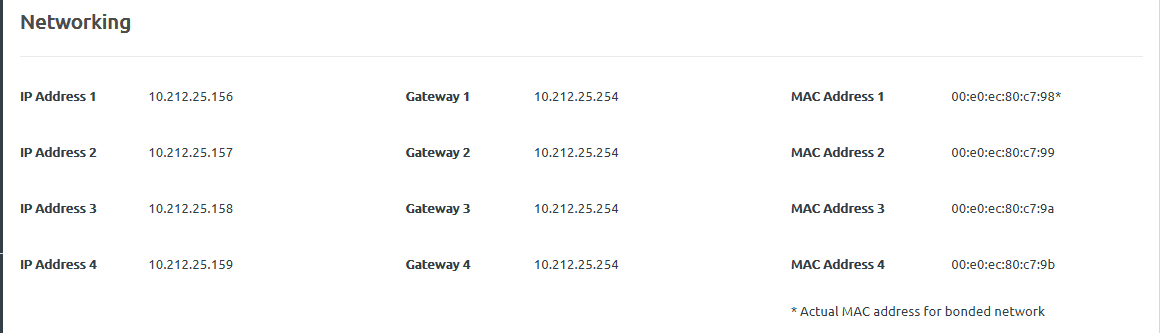
  4. Click each storage controller to view the details page for that controller. Scroll down to the Networking section and make a note of all IP addresses for the controller.
    Figure 2. Storage controller IP addresses
    Screen capture of storage block showing virtual IP addresses
  5. Make sure that the storage nodes have read/write access to the share. Make sure that the regular IP addresses for each storage controller and the virtual IP addresses for the storage block have access. The IP addresses for the storage node and the virtual IP addresses for the storage block are assigned via DHCP. Therefore, the addresses are subject to change. Because of this, you should grant the access by the entire subnet to the share.
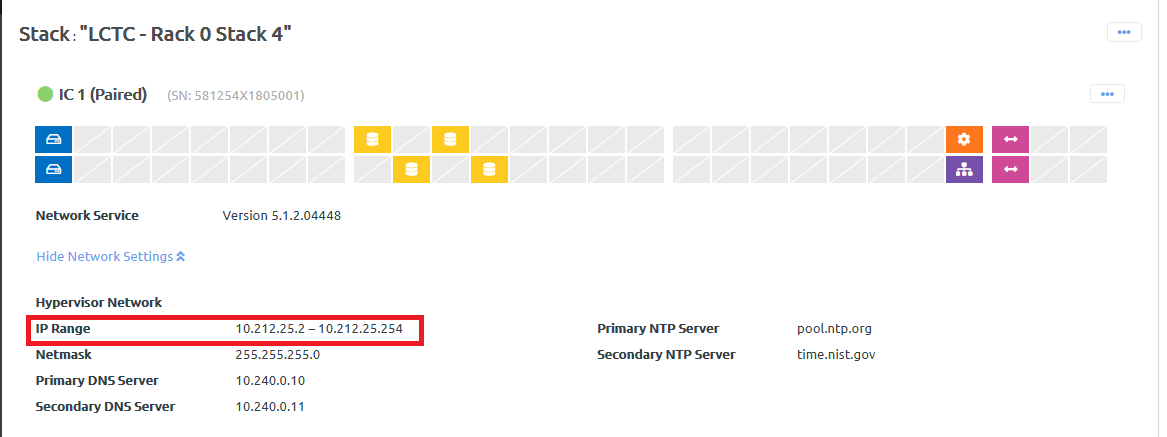
  6. On the Hardware Stack page, scroll to the interconnect switches section and click Show Network Settings. The IP address range under Hypervisor Network is the range of IPs that can be assigned to the storage nodes and the virtual IP.
    Figure 3. Interconnect switch IP addresses
    Screen capture of storage block showing virtual IP addresses
  7. Grant access to the share from this range to allow consistent access to the share from the ThinkAgile CP Cloud Controller.
  8. In the ThinkAgile CP Cloud Controller left-side menu, complete one of the following steps:
    • Click Applications > Organization Templates if you are logged in as an infrastructure admin to view a list of the application templates in your organization.

    • Select a virtual datacenter to which you have access, and click VDC Templates to view a list of templates available to the VDC.
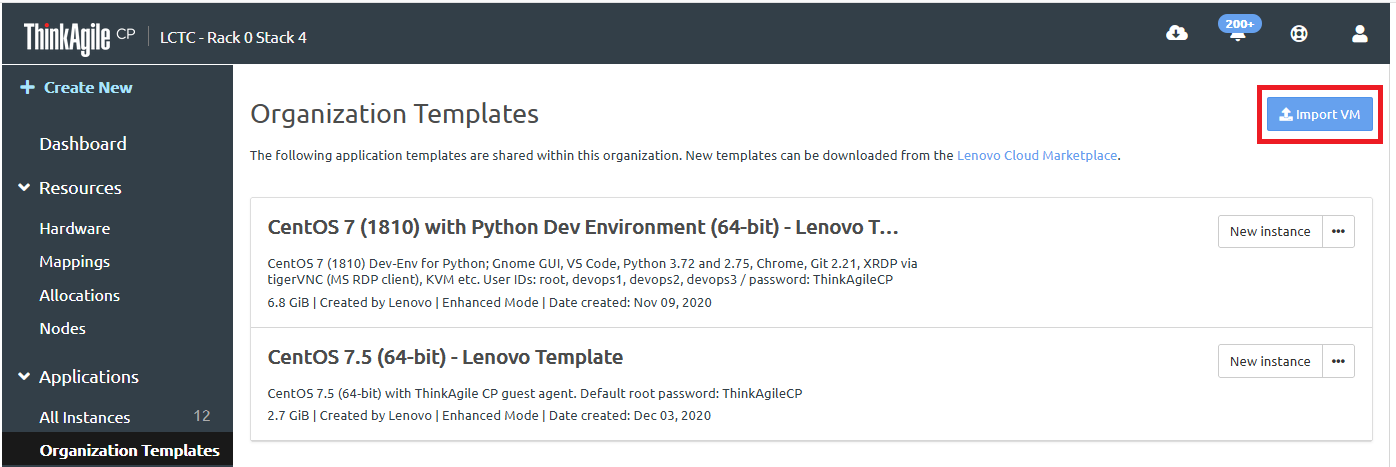
  9. From the templates page, click Import VM.
    Figure 4. Import VM option on Organization Templates
    Import VM option on Organization Templates page

    Fill in the details on the Import VM dialog:

    1. Specify the location (Organization Templates or VDC Templates) where the VM will be stored.
    2. Fill in the template name and, optionally, a description.
    3. Specify the operating system type and version.
    4. Click Select Virtual Disk Files.
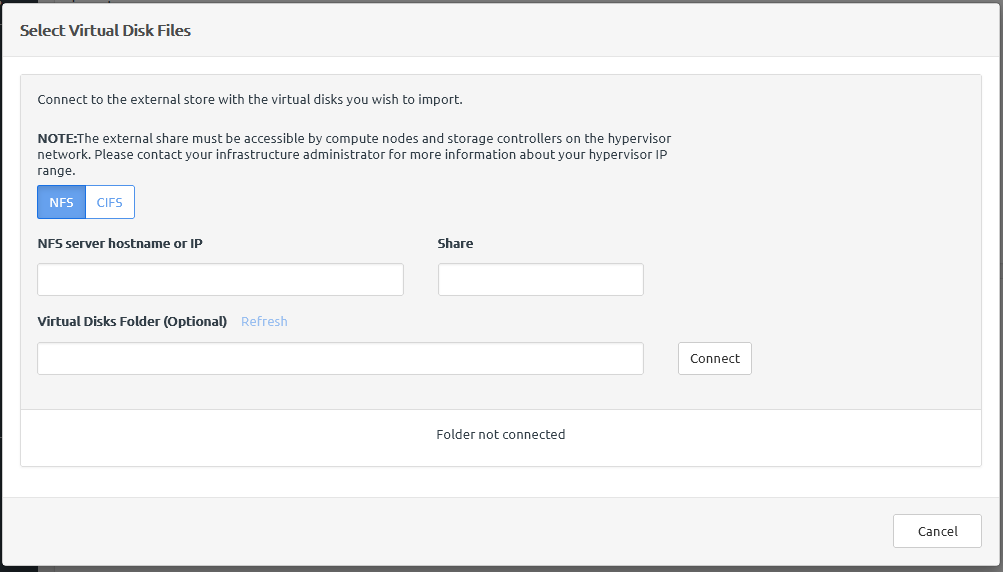
    5. In the Select Virtual Disk Files dialog, specify the share to be used.
      Figure 5. Select Virtual Disk Files dialog
      Import VM option on Organization Templates page
    6. Specify the VM settings (Virtio drivers and Sysprep). Then, click Save as Application Template.

The new template is added to the template store.