Infrastructure admin users and VDC manager users can use a pre-defined template to quickly create and deploy an application instance. These instances function as thin-provisioned clones that share a common base image, reducing storage usage across a virtual datacenter.
A number of pre-defined templates are offered in ThinkAgile CP Cloud Controller. You can use one of those templates to create a new application instance, or you can download more templates from the Lenovo Cloud Marketplace. For more information about the Lenovo Cloud Marketplace, see the following topic:
Complete the following steps to create an application instance from a template:
- Log in to the ThinkAgile CP Cloud Controller as an infrastructure admin or VDC manager user.
- Download a template from the Lenovo Cloud Marketplace to the Organization Templates or the VDC Templates page.
- In the ThinkAgile CP Cloud Controller left-side menu, perform one of the following steps, depending on where the template was downloaded:
- Expand Applications and click Organization Templates to view a list of the application templates in your organization. Then select the template you want, and click New Instance.
- Expand a virtual datacenter to which you have access. Click VDC Templates and select the template you want. Then click New Instance.
- In the New instance from Template dialog, enter the instance properties, virtual datacenter settings, and resource settings for deploying this application instance.
Figure 1. New instance from Template dialog 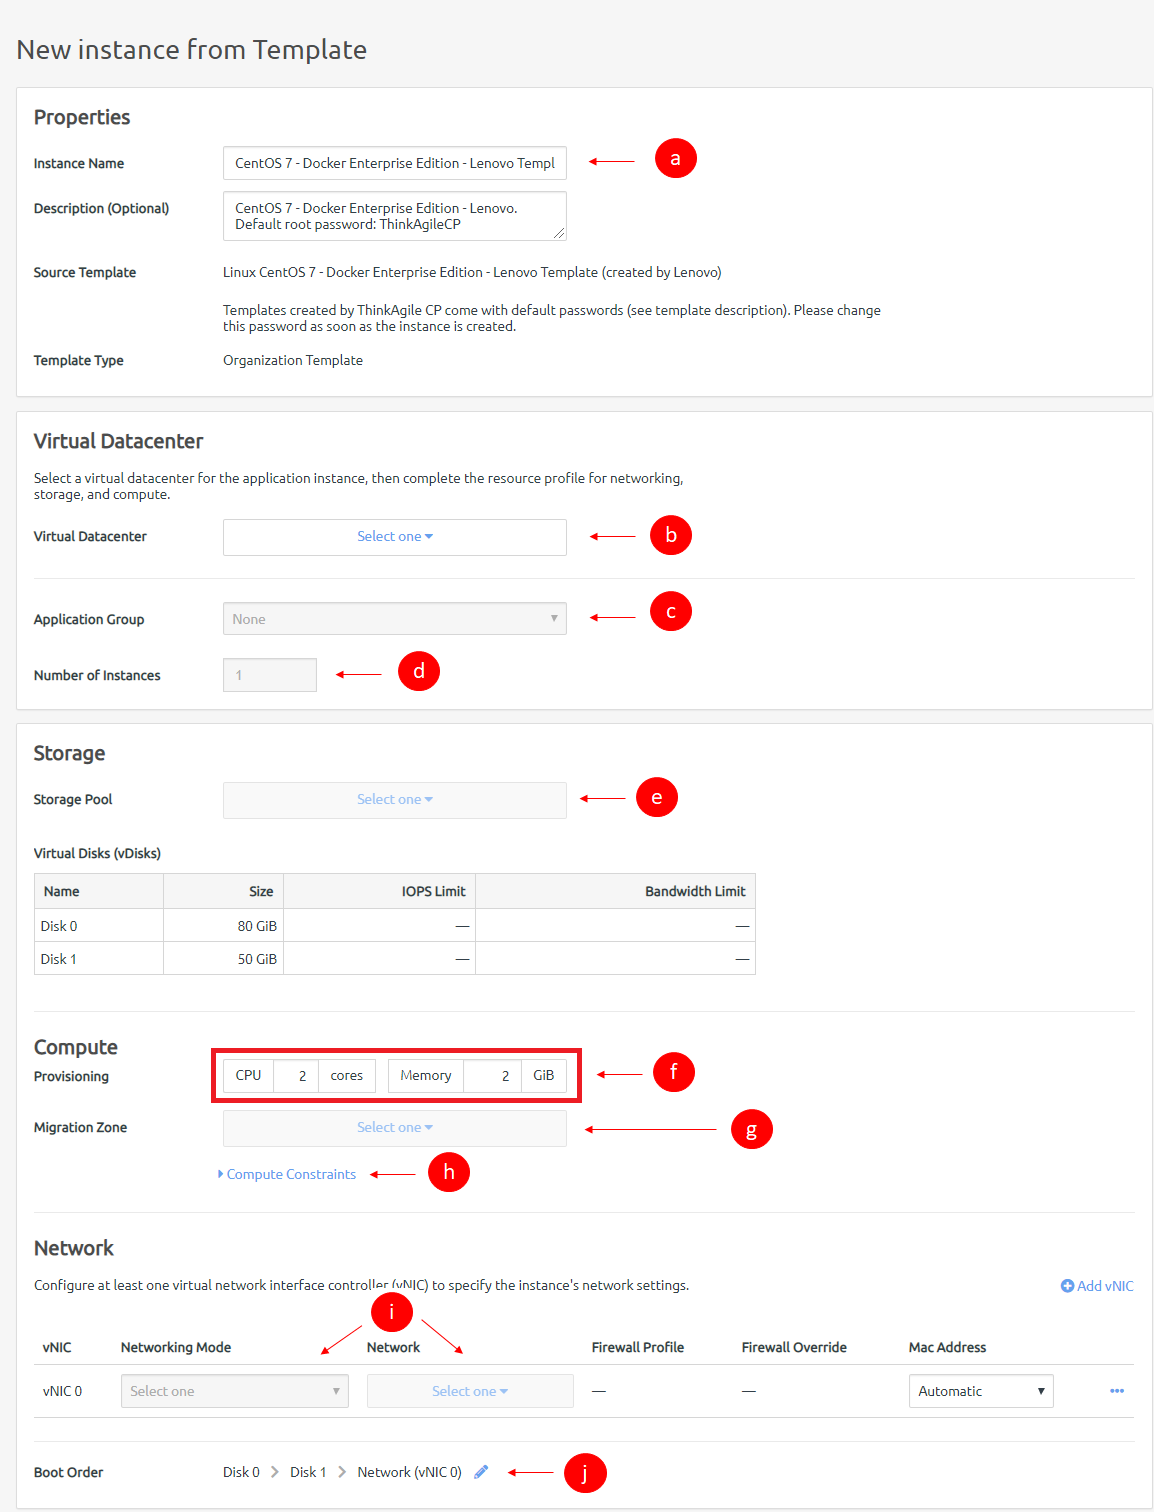
- Enter a name (required) and a description (optional) for the new application instance. The new name must be unique across all application instances in the associated virtual datacenter.
- Select the virtual datacenter where the instance should reside and get its resources. The virtual datacenter selection determines the migration zone and storage pool resources available for the application instance.
- You can select an application group (which are used to organize application instances in a virtual datacenter) and then specify the number of instantiations you want to include in this group.
- If you want to create more than one instance, enter the number of instances to be created.
- Select a storage pool for the application instance resources. (Note that virtual disk information as defined by the template is shown but cannot be modified during instance creation from a template. You may view IOPS and bandwidth limits from the instance vDisk, but you may not edit the values.)
- Select the VM provisioning for this instance by specifying the CPU (number of cores) and memory in GB.
- Select the migration zone from which the application instance will get its compute resources.
- If the instance requires a specific compute category or tag, expand compute constraints and add the category and tags.
- Select a networking mode for the instance as either VNET or VLAN for each vNIC and select a virtual network from the drop-down menu.
- Edit the boot order if needed. The application instance will attempt to boot in the sequence you define.
- In the Instance Settings section, configure the settings:
Figure 2. New Instance from Template - instance settings 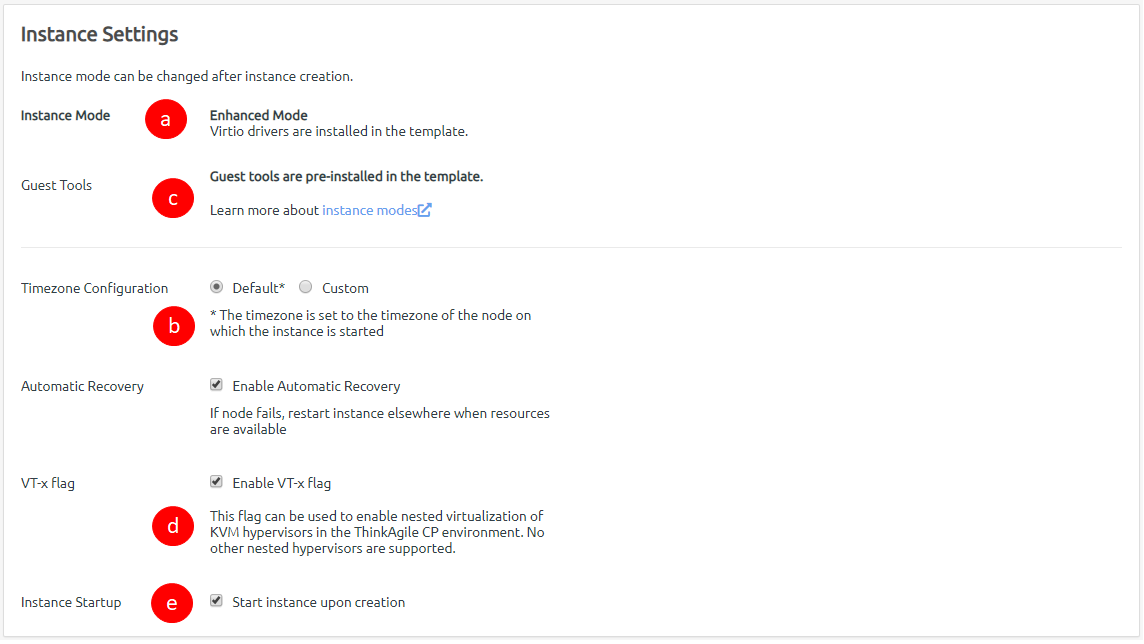
- Guest tools may be installed in some application instances, and you can define related settings here. Select one of the following modes.
Most users should select Compatibility mode. You should only select Enhanced mode if the template was created with VirtIO drivers installed. The instance mode is read-only for a new instance created from a ThinkAgile CP template. For more information about these modes, see the following topic:
Understand instance modes
Compatibility Mode - All instances can boot in this mode.
Enhanced Mode - Virtio drivers must be installed to boot in this mode.
- For Timezone Configuration, select one of the following.
Default - The time zone is set to the time zone of the node on which the instance starts.
Custom - You can set the time zone for the application instance by selecting the time zone area and location.
Linux instances should use Default or the UTC time zone, rather than a custom local time zone.
- Select the Enable Automatic Recovery checkbox to enable automatic recovery, which specifies to restart the instance where resources are available if the node fails.
- Select the Enable VT-x flag checkbox to enable nested virtualization of KVM hypervisors in your ThinkAgile CP environment.
- If you do not want the instance to start upon creation, clear the checkbox near the bottom of this page (Start instance upon creation is enabled by default).
- Click Create Instance.
- To view the application instance, expand your VDC in the left navigation and click VDC Instances. The instance will appear in the list.
Figure 3. VDC instances page 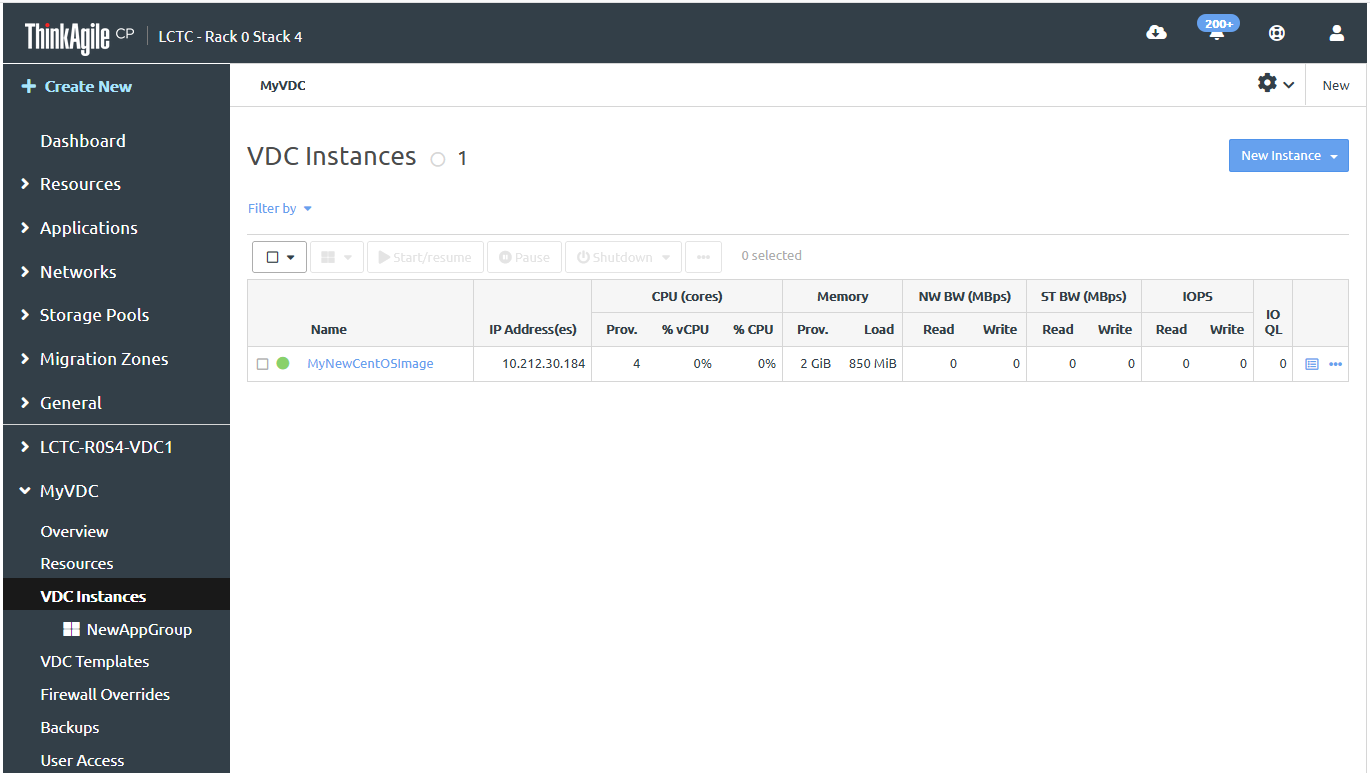
- Click the instance to display the details about the instance, such as the CPU and memory usage.
Figure 4. VDC instances page 
For more information about the application instance details page and the Activity tab, see the following topic:
View application instance details
Before
ThinkAgile CP, Release 5.1.4, some Microsoft Windows templates in the Lenovo Cloud Marketplace included drivers that could cause issues when migrating VMs that were created from those templates. If you create an instance from the Microsoft Windows 10 template (Pro or Enterprise), Microsoft Windows Server 2016 template, or Microsoft Windows Server 2019 template that was dated before September, 2020, you need to delete some drivers to avoid having issues during migration. For details about deleting the relevant drivers, see Issues when migrating Windows VMs.