Two types of LXCA updates are typically available. An LXCA Update Package is applied to a base VHD image to update to the latest major release (for example, from v3.0.0 to v3.1.0 or v3.2.0 or v3.3.0, etc.). An LXCA FixPack is applied to a major release to update LXCA to the latest minor release (for example, from v3.6.0 to v3.6.8). To apply an update to LXCA, follow these steps:
- Using the top menu of LXCA , navigate to .
- Click the Import icon (
 ) and then Select Files….
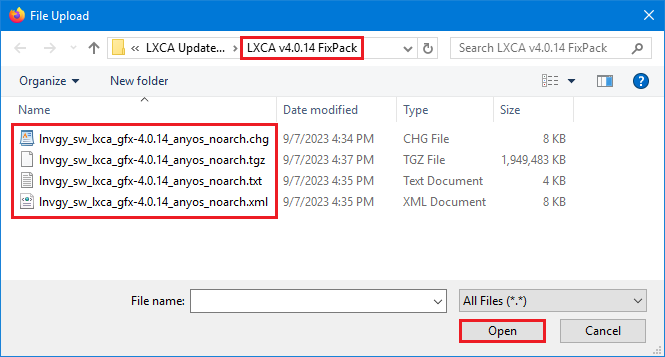
 - Navigate to the appropriate Update Package or FixPack directory inside D:\Lenovo\LXCA\LXCA Update Packages. For example, if updating LXCA base VHD v3.4.5 to v3.6.8, use the content of the “LXCA v3.6.0 Update” directory to update to v3.6.0 and then use the content of the “LXCA v3.6.8 FixPack” directory to update to v3.6.8. In our example below, we update LXCA v4.0.0 to v4.0.14, which does not require an LXCA Update Package, but does require an LXCA FixPack.
- Select all four files in the directory, and click Open.
Figure 1. Selecting LXCA FixPack files
- In the Import window, click Import. Progress displays until import and validation of the update content completes. The Import window will close when complete.
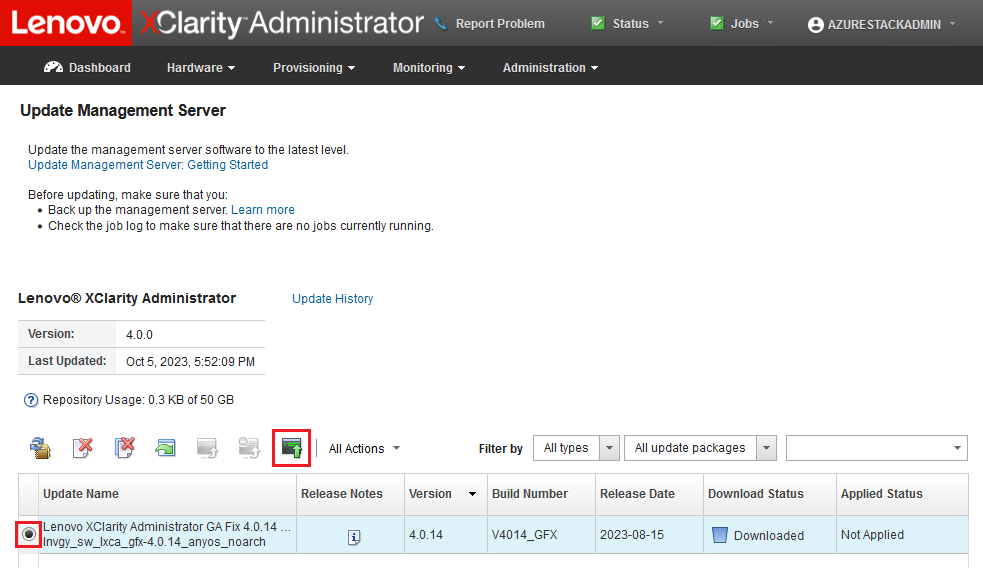
- In the Update Management Server page, select the Update Name for the update that was just imported, and then click the Perform Update (
 ) button.
Figure 2. Selecting the update package and performing update
- In the confirmation pop-up window, click Restart.
- Wait for the management server to restart, which can take several minutes. If necessary, refresh the browser to return to the LXCA sign-in page, then sign in using the primary supervisor account created earlier.
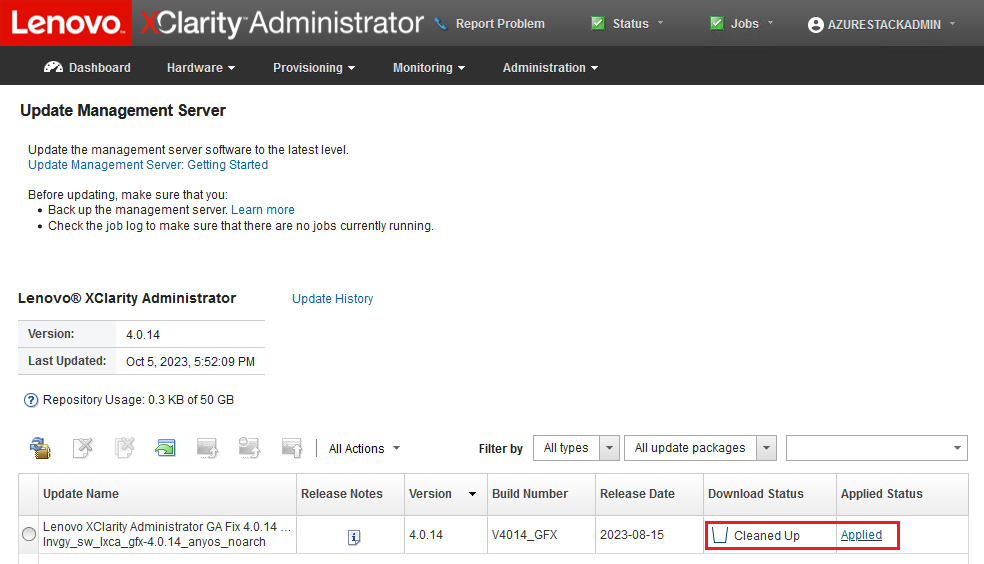
- Return to the Update Management Server page and wait for the download status to become “Cleaned Up” and applied status to become “Applied” before proceeding. You may need to refresh the page to get the final status to update.
Figure 3. Update package final statuses


