Configure LXCA static IP address
Perform this procedure to configure the LXCA static IP address for your ThinkAgile SXM Series solution.
- In the Virtual Machine Connection window, click the Start button (
 ) to start the LXCA virtual machine.
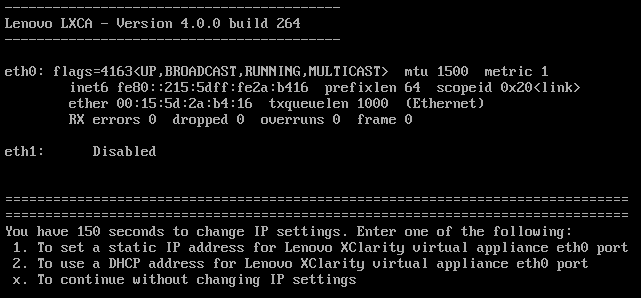
 - Watch the boot process until the following displays, then type “1” and press Enter.Figure 1. Virtual Machine Connection window
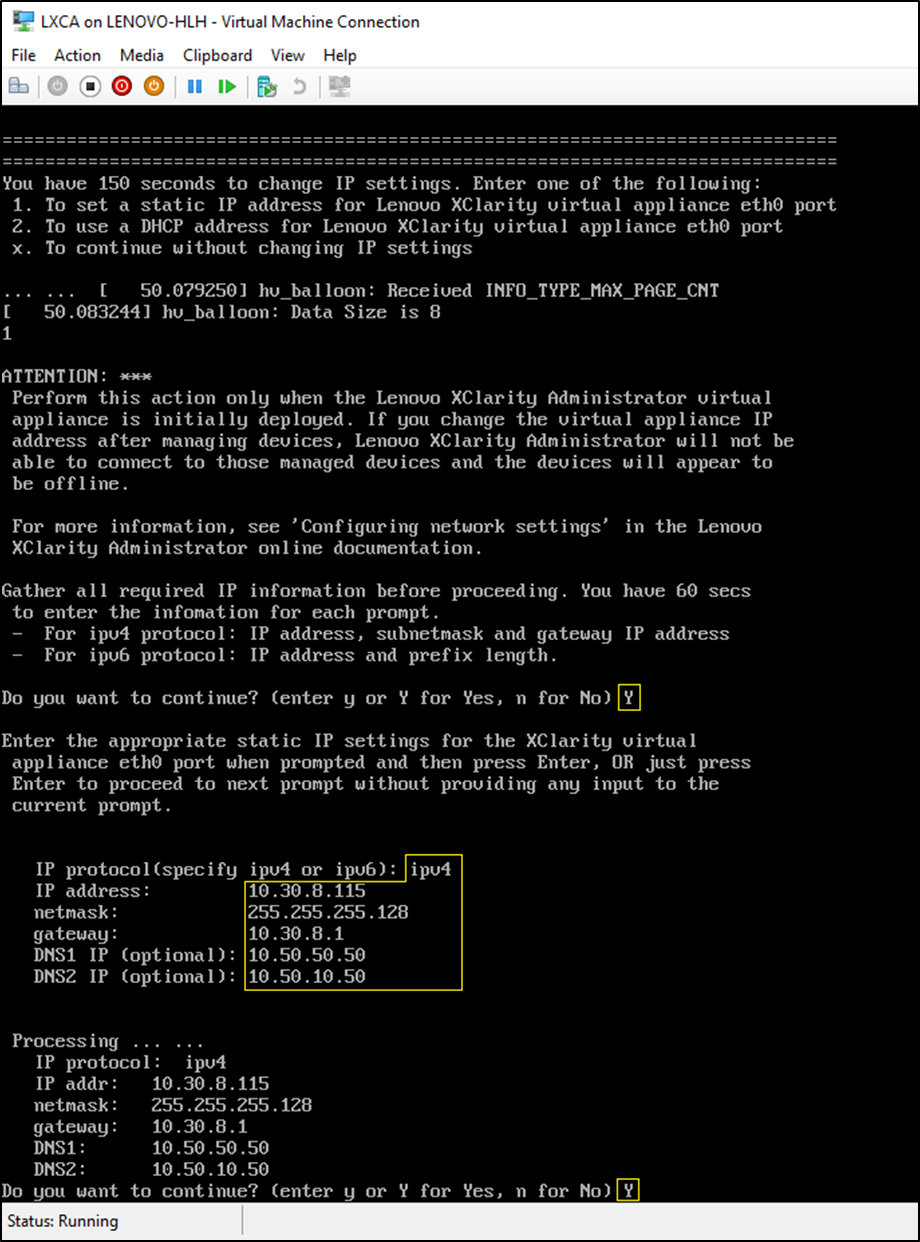
- Enter the requested parameters, as shown in the yellow boxes in the following illustration. Refer to the table that you completed in Retire the current LXCA installation.Figure 2. Virtual machine parameters
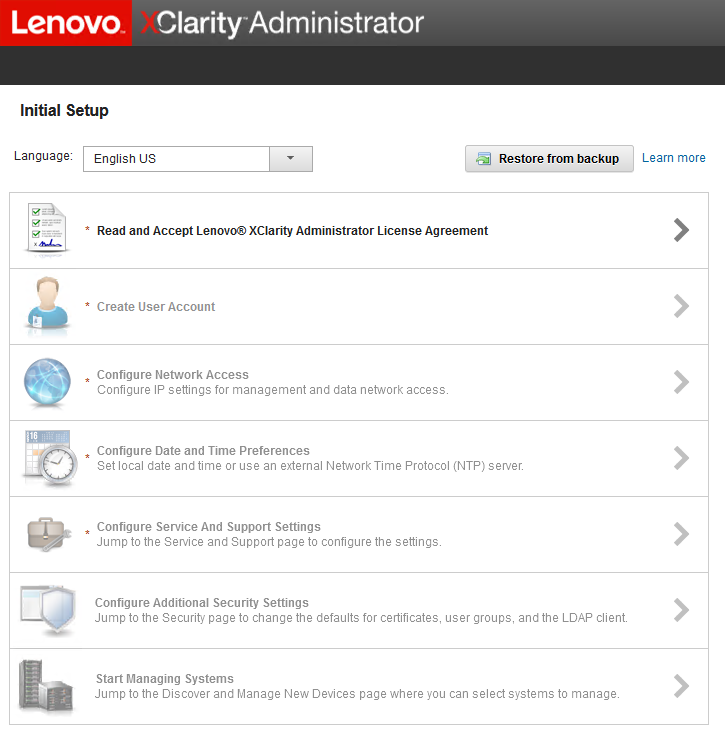
The Initial Setup page displays. When you access LXCA for the first time, you must complete several initial setup steps.
To execute the initial setup of LXCA, work through each of the seven tasks shown on the Initial Setup page and complete them as instructed in the following topics.
Figure 3. LXCA Initial Setup page
Give documentation feedback