
Deploy and configure LXCA

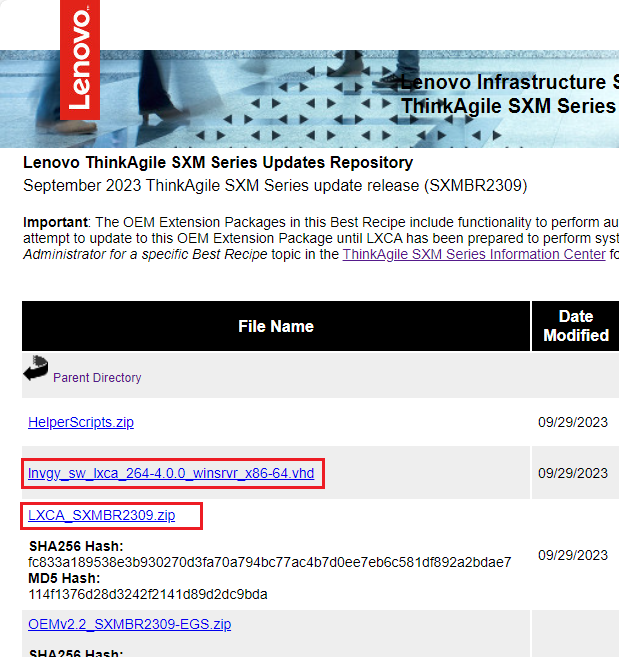
To prepare for a new deployment of LXCA, the appropriate files need to be downloaded from the . This includes the “LXCA_SXMBR<xxyy>.zip” archive file and the LXCA full VHD image file, which will have a file name in the format “lnvgy_sw_lxca_<version>_winsrvr_x86-64.vhd” and will be found in the current Best Recipe directory on the site.


Once all files have been downloaded from the ThinkAgile SXM Series Updates Repository and copied to a USB thumb drive, follow these steps:

  1. Expand the “LXCA_SXMBR<xxyy>.zip” archive onto the thumb drive.
  2. Copy the VHD file and expanded archive content (not the directory itself) to D:\LXCA on the hardware lifecycle host (HLH). Replace any files or directories with the same names that are already in the directory.
  3. Copy the LXCA VHD file from D:\Lenovo\LXCA to D:\Hyper-V\Virtual hard disks on the HLH, creating the specified directories if necessary. Make sure to copy, not move, the file so the original can serve as a backup in case LXCA must be reinstalled in the future.
  4. Open Hyper-V Manager, select Lenovo-HLH in the left navigation pane.
  5. In the Actions pane on the right, click New > Virtual Machine...
  6. On the Before You Begin page, click Next.
  7. On the Specify Name and Location page, enter a Name for the VM, such as “LXCA”, click to check the Store the virtual machine in a different location checkbox, enter “D:\Hyper-V\” as the Location, and then click Next.
  8. On the Specify Generation page, leave Generation 1 selected and click Next.
  9. On the Assign Memory page, enter “16384” for Startup memory and then click Next.
  10. On the Configure Networking page, use the Connection dropdown list to select “External” and then click Next.
  11. On the Connect Virtual Hard Disk page, click the option to Use an existing virtual hard disk, click Browse… and navigate to the LXCA VHD file located at D:\Hyper-V\Virtual hard disks on the HLH. Once the VHD file has been selected, click Next.
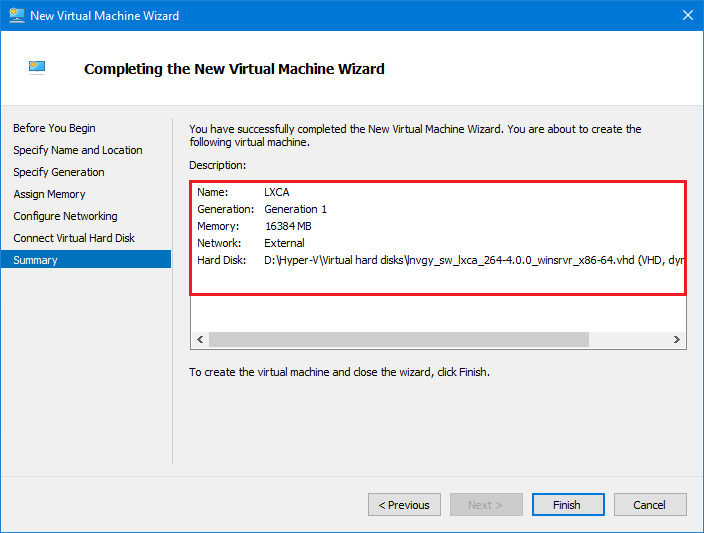
  12. On the Summary page, verify that all parameters are shown correctly before clicking Finish to create the virtual machine.


  13. Once the VM is created, it will appear in the Virtual Machines pane of Hyper-V Manager. Select the VM and then click Settings… in the right pane.
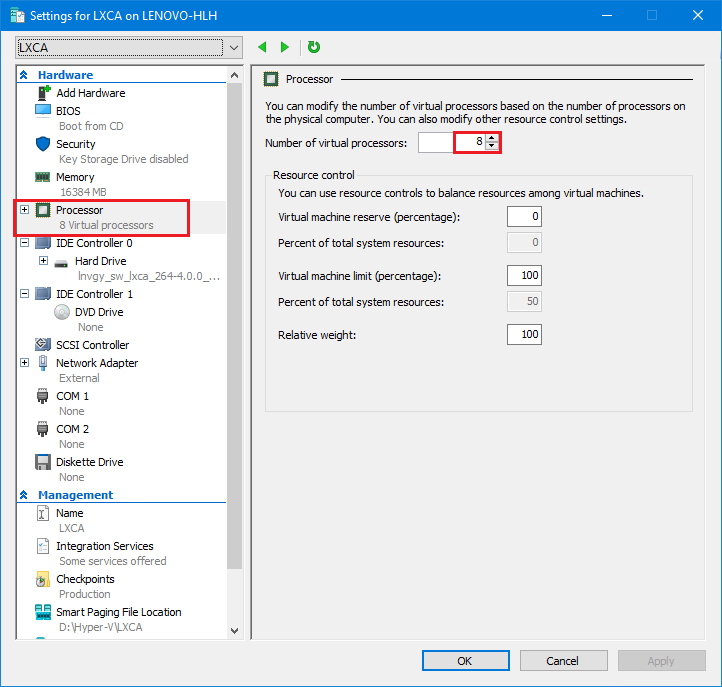
  14. In the page that opens, select Processor in the left pane, increase the Number of virtual processors to “8”, and then click OK.