Retire the current LXCA installation
If LXCA v2.x or later is deployed on the HLH, it is typically not necessary to retire LXCA. In this case, simply update LXCA to the version specified in the current Best Recipe. However, if LXCA v1.x is deployed on the HLH, perform the tasks shown here to retire the existing installation of LXCA. Then proceed to deploy LXCA from scratch in the next topics.
If LXCA v1.x is deployed on the HLH, perform these tasks to retire the existing installation of LXCA.
- To prepare for configuring a fresh deployment of LXCA later, record the IPv4 settings of the current LXCA environment using the highlighted parameters in the following illustration. If for some reason LXCA is not accessible, these parameters are available in the Customer Deployment Summary document left with the customer after initial solution deployment.Figure 1. LXCA IPv4 settings to record
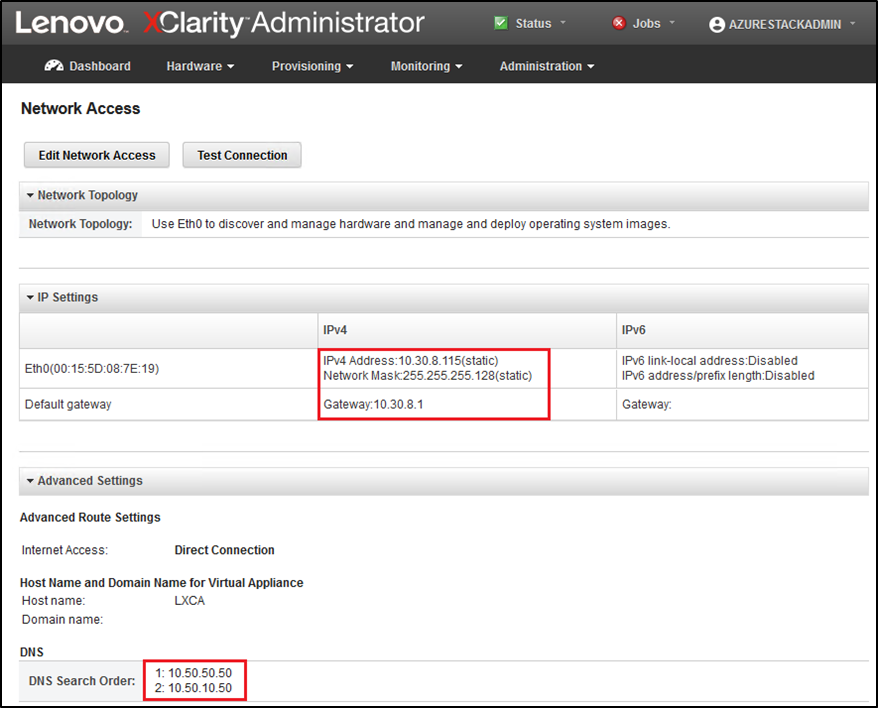
Record the settings in the following table:
Lenovo LXCA IPv4 Settings IPv4 Address Network Mask Gateway DNS Server 1 DNS Server 2 (optional) - Select all server profiles shown, and click the Deactivate Server Profiles icon (
 ).Figure 2. Selecting LXCA server profiles to deactivate
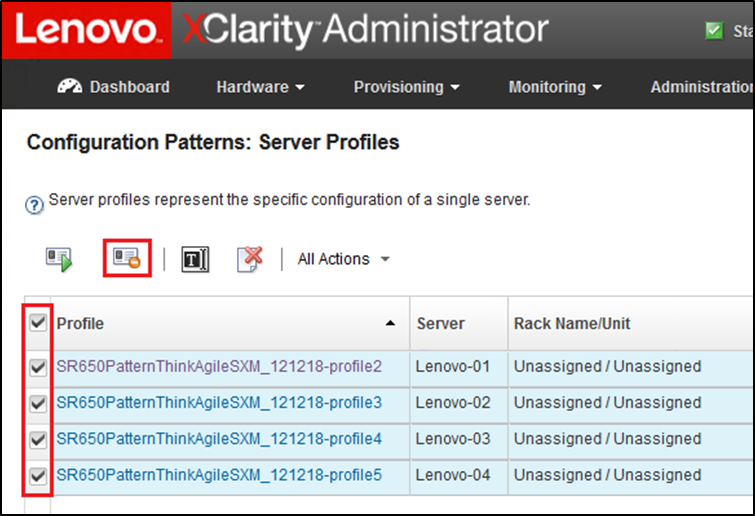
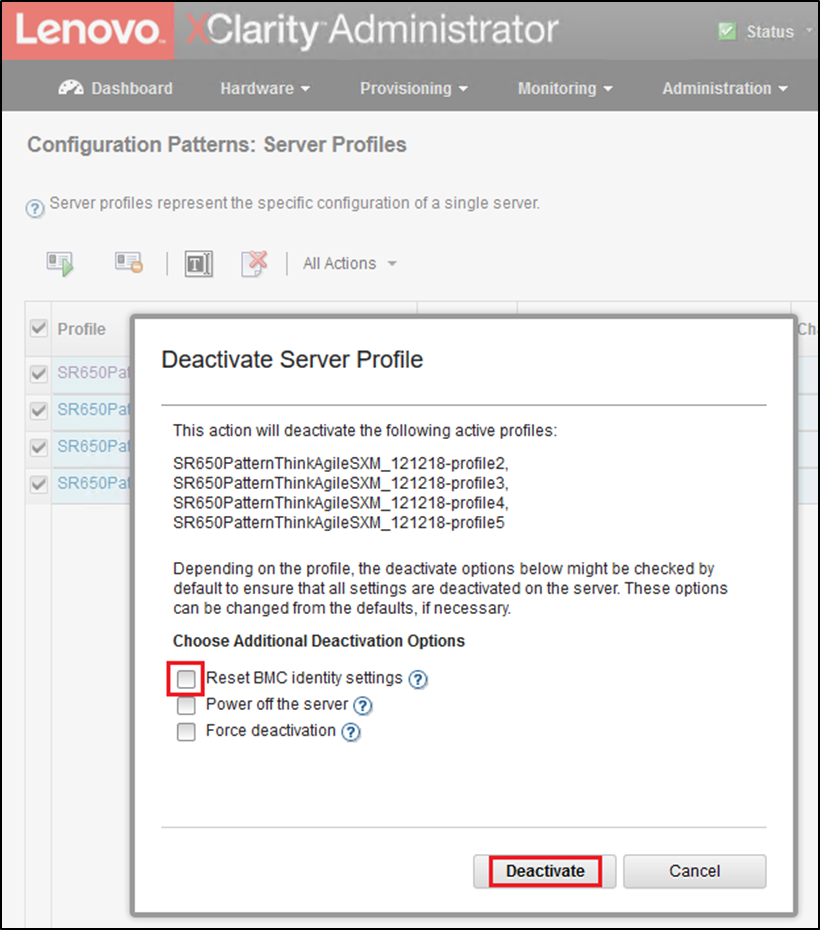
- In the window that is displayed, deselect (uncheck) the Reset BMC identity settings option if it is checked, and click Deactivate.Figure 3. Resetting BMC identity settings
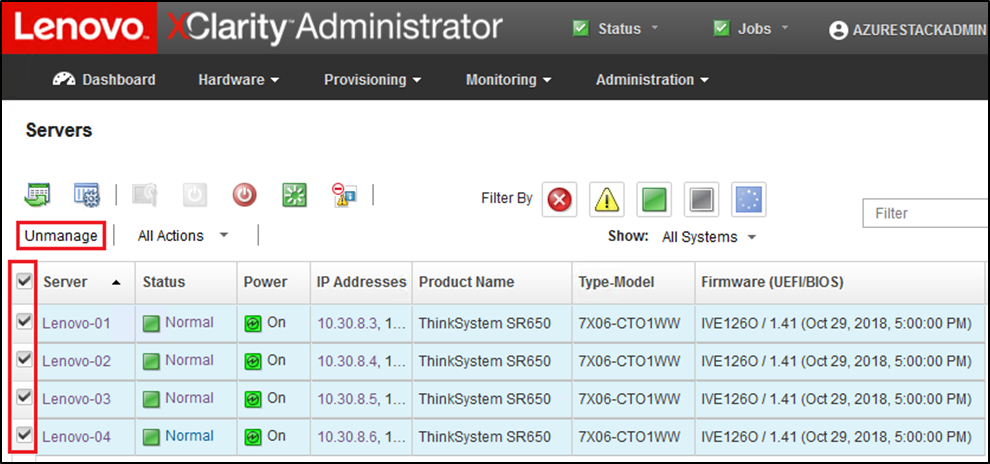
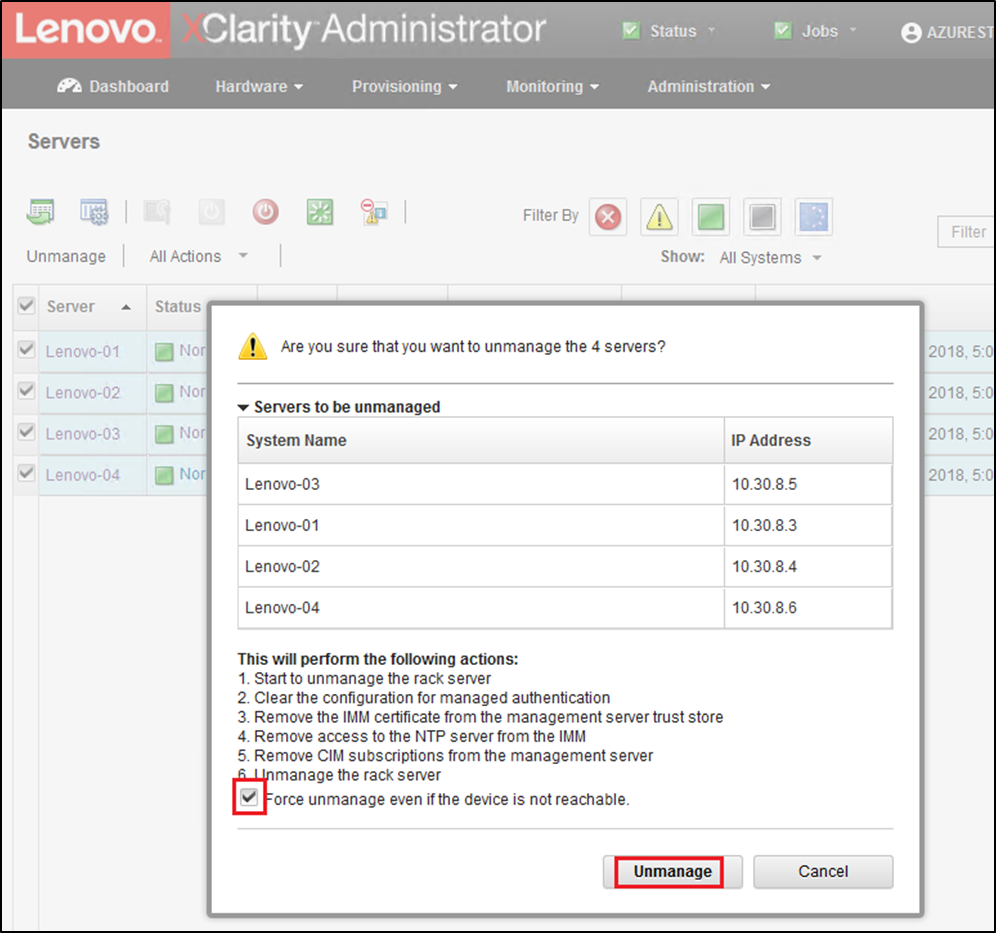
- Select all nodes and click Unmanage.Figure 4. Unmanaging the nodes
- In the window that opens, select Force unmanage even if the device is not reachable, and click Unmanage.Figure 5. Selecting option to force unmanage nodes
Once the LXCA virtual machine is powered off, work can begin to deploy and configure a new version of LXCA on the HLH.
Give documentation feedback