Configure Service and Support Settings task
Procedure for configuring service and support settings as part of LXCA initial setup.
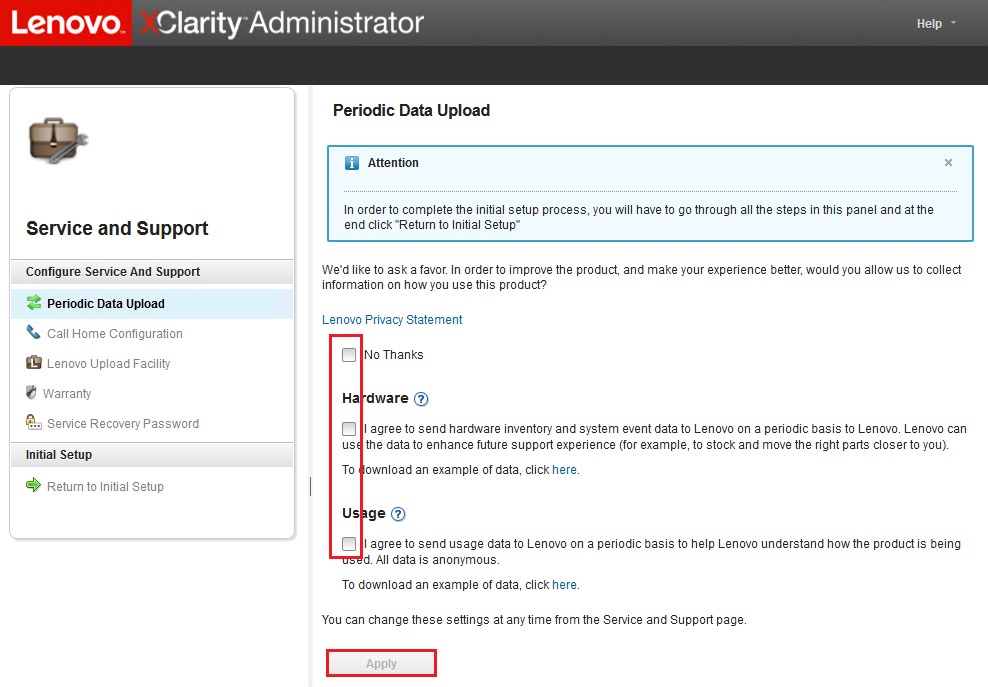
- On the Periodic Data Upload tab, select the options you prefer, and click Apply.Figure 1. Service and Support Periodic Data Upload tab
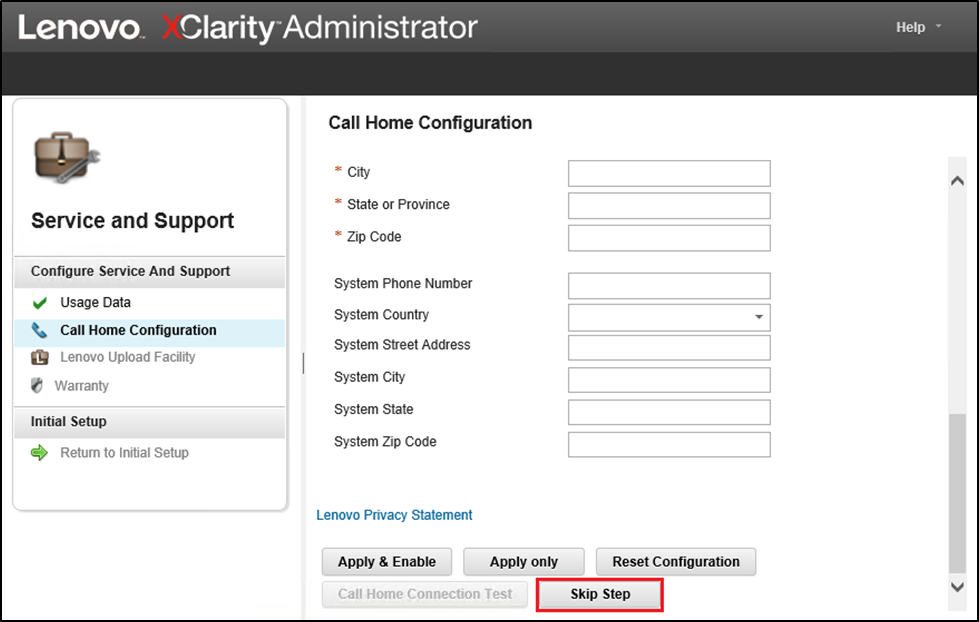
- On the Call Home Configuration tab, scroll to the bottom of the page if necessary and select Skip Step (the Call Home feature is not used for ThinkAgile SXM Series solutions).Figure 2. Service and Support Call Home Configuration tab
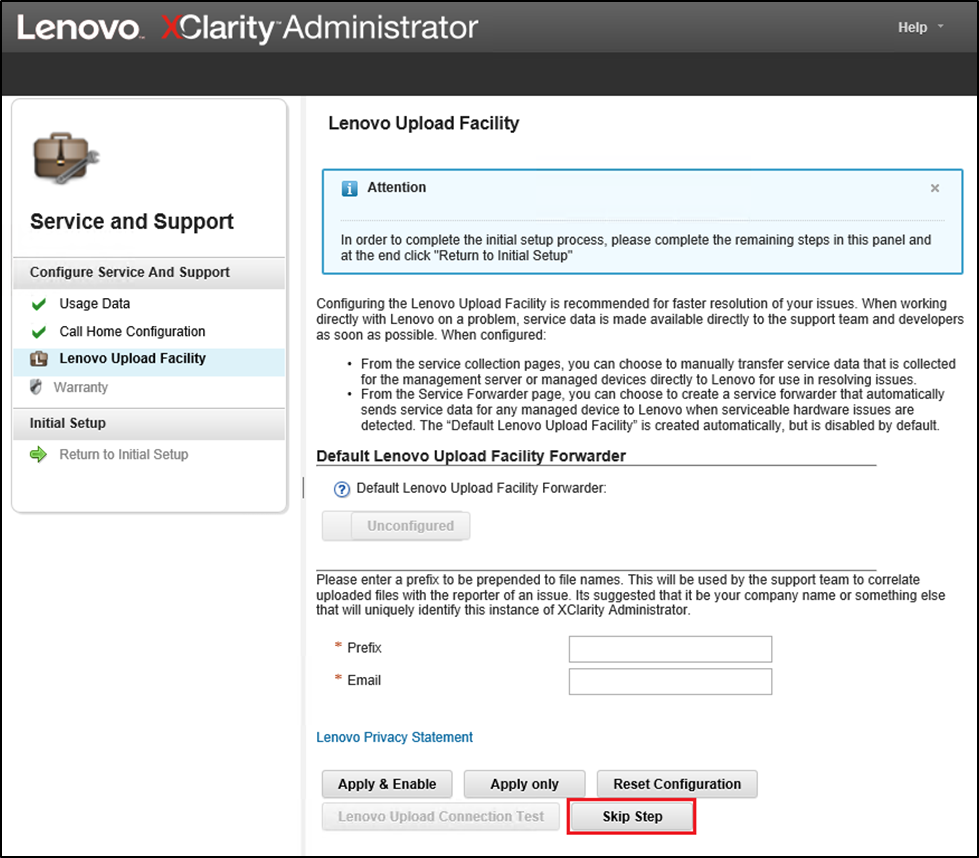
- On the Lenovo Upload Facility tab, scroll to the bottom of the page and click Skip Step.Figure 3. Service and Support Lenovo Upload Facility tab
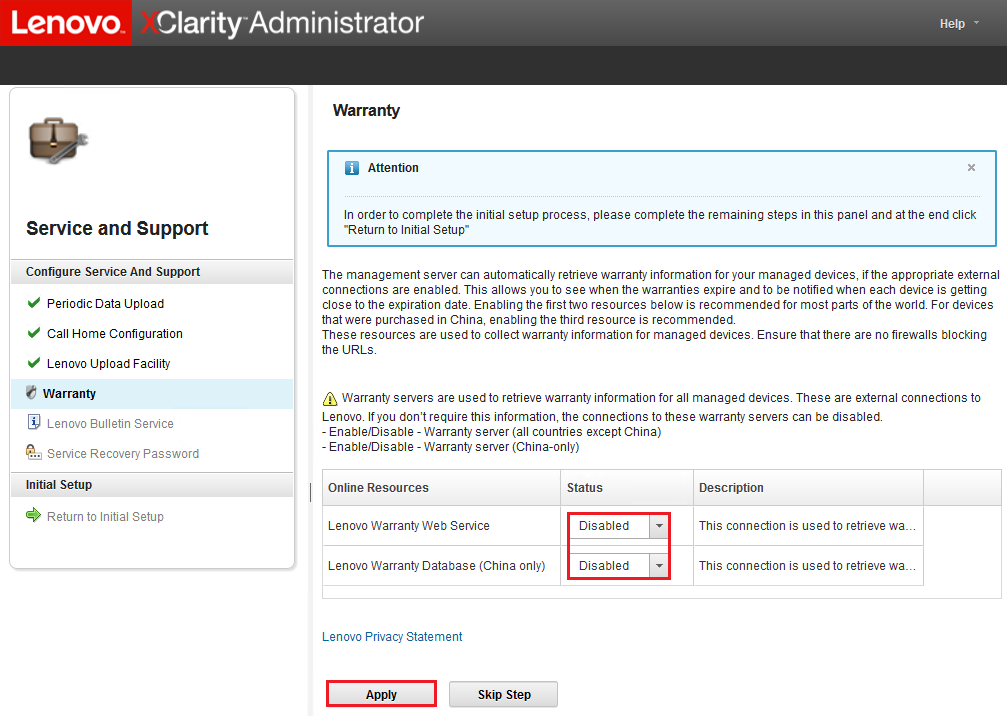
- On the Warranty tab, ensure that all drop-down lists are set to Disabled, and then click Apply. Since ThinkAgile SXM Series solution warranty entitlement is based on the rack serial number, this LXCA feature is not supported.Figure 4. Service and Support Warranty tab
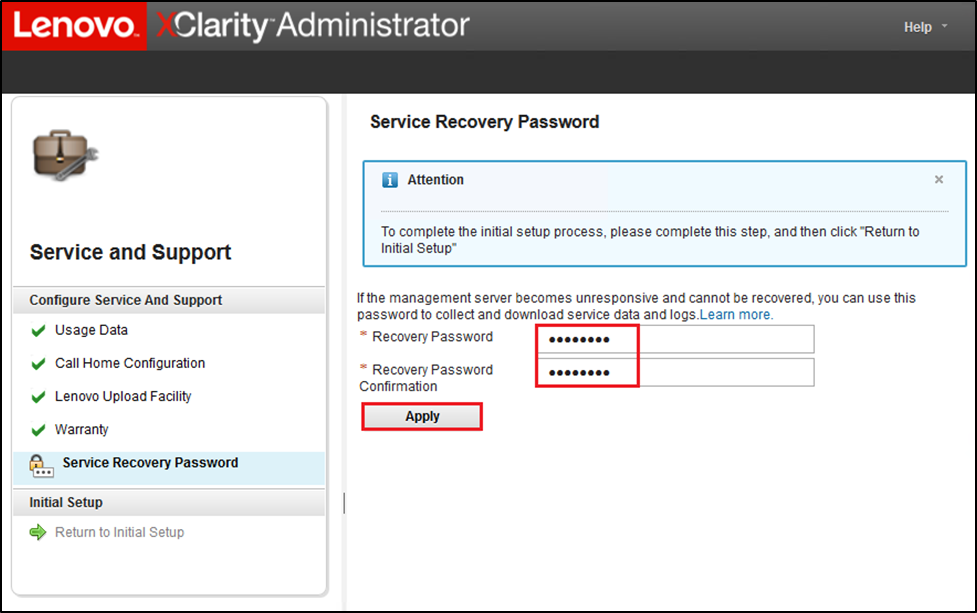
- On the Service Recovery Password tab, enter and confirm a password for LXCA recovery, and click Apply. Record this password for future reference.Figure 5. Service Recovery Password page
Proceed to the Configure Additional Security Settings task.
Give documentation feedback