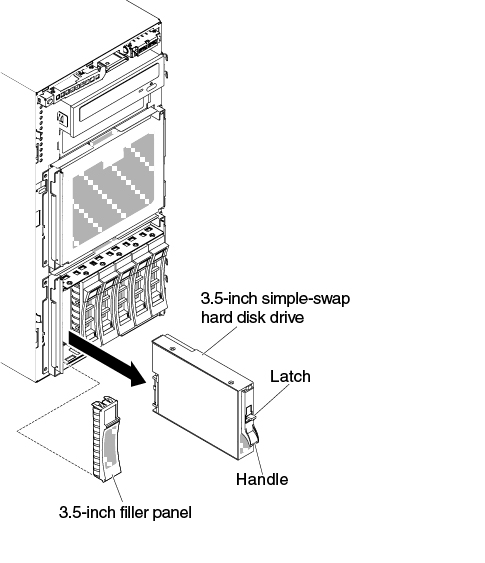
Removing a 3.5-inch simple-swap hard disk drive
Use this information to remove a 3.5-inch simple-swap hard disk drive.
Attention
To maintain proper system cooling, do not operate the server for more than 10 minutes without either a drive or a filler panel installed in each drive bay.
Read the safety information in Safety and Installation guidelines.
If you are replacing a server component in the server, you need to turn off the server and peripheral devices, and disconnect the power cords and all external cables.
To remove a 3.5-inch simple-swap hard disk drive, complete the following steps.
If you are instructed to return the server component or optional device, follow all packaging instructions, and use any packaging materials for shipping that are supplied to you.
Give documentation feedback
