Configuring service and support
You can configure service and support settings, including usage data, Lenovo Support (Call Home), Lenovo Upload Facility, and product warranty.
Procedure
Complete the following steps to configure security.
- From the Initial Setup page, click Configure Service and Support Settings. The Service and Support page is displayed.

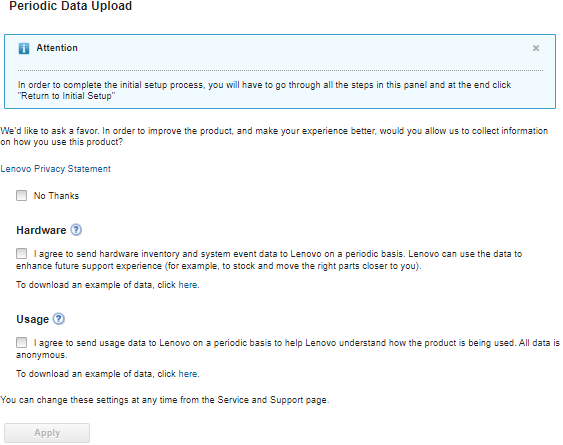
- Read and accept the Lenovo Privacy Statement.NoteYou cannot collect and send data to Lenovo without first accepting the
Lenovo Privacy Statement. If you choose to decline the privacy statement, you can review and accept the privacy statement at a later time from the Service and Support > Call Home Configuration page. - Optionally choose to allow Lenovo XClarity Administrator to collect usage and hardware information, and click Apply.
You can collect and send the following types of data to Lenovo.
Usage data
When you agree to send usage data to Lenovo, the following data is collected and sent on a weekly basis. This data is anonymous. No private data (including serial numbers, UUIDs, host names, IP addresses, and user names) is collected or sent to Lenovo.
Log of actions that were performed
List of events that were raised, and the timestamp when they were raised
List of audit events that raised, and the timestamp when they were raised
List of jobs that were run, and success or failure information for each job
XClarity Administrator metrics, including memory usage, processor usage, and disk space
Limited inventory data about all managed devices
Hardware data
When you agree to send hardware data to Lenovo, the following data is collected and sent on a periodic basis. This data is not anonymous. Hardware data includes attributes, such as UUIDs and serial numbers. It does not include IP addresses or hostnames.
Daily hardware data. The following data is included for each inventory change.
Inventory-change event (FQXHMDM0001I)
Changes to inventory data for the device that is associated with that event
Weekly hardware data. Inventory data is included for all managed devices.
When usage and hardware data is sent to Lenovo, an event is recorded in the audit log.
You can change this setting at any time and download the last archive that was collected and sent to Lenovo using the links on the clicking Administration > Service and Support, and then clicking the Periodic Data Upload tab.
- Optionally click Call Home Configuration to setup automatic problem notification to Lenovo Support (Call Home). Then, click Apply & Enable to create the Default Call Home service forwarder, or click Apply only to save the contact information.
For more information about setting up automatic problem notification to Lenovo Support, see Setting up automatic problem notification to Lenovo Support (Call Home).
- Optionally click Lenovo Upload Facility to setup automatic problem notification to the Lenovo Upload Facility. Then, click Apply & Enable to create the Default Lenovo Upload Facility service forwarder, or click Apply only to save the settings information.
For more information about setting up automatic problem notification to the Lenovo Upload Facility, see Setting up automatic problem notification to the Lenovo Upload Facility.
- Optionally click Warranty to enable external connections that are needed to collect warranty information for your managed devices.
For more information about viewing the warranty status (including extended warranties) of the managed devices, see Viewing warranty information.
- Optionally click Lenovo Bulletin Service to allow Lenovo to send service bulletins to XClarity Administrator, and click Apply
For more information about the types of service bulletins that Lenovo sends, see Getting bulletins from Lenovo.
- Specify the service-recovery password that you can use to collect and download service data and logs If XClarity Administrator becomes unresponsive and cannot be recovered.
For more information about the service-recovery password, see Changing the service-recovery password.
- Click Return to Initial Setup.