Install an M.2 drive
Follow instructions in this section to install an M.2 drive to the system board.
About this task
S002

CAUTION
The power-control button on the device and the power switch on the power supply do not turn off the electrical current supplied to the device. The device also might have more than one power cord. To remove all electrical current from the device, ensure that all power cords are disconnected from the power source.
Attention
Read Installation Guidelines and Safety inspection checklist to ensure that you work safely.
Touch the static-protective package that contains the component to any unpainted metal surface on the server; then, remove it from the package and place it on a static-protective surface.
Procedure
- Make preparation for this task.
- Locate the slot to install the M.2 drive.ImportantIf there is only one M.2 drive to be installed, it is recommended to install an M.2 SATA/NVMe 2280 boot drive in slot 1.Figure 1. M.2 drive slot numbering
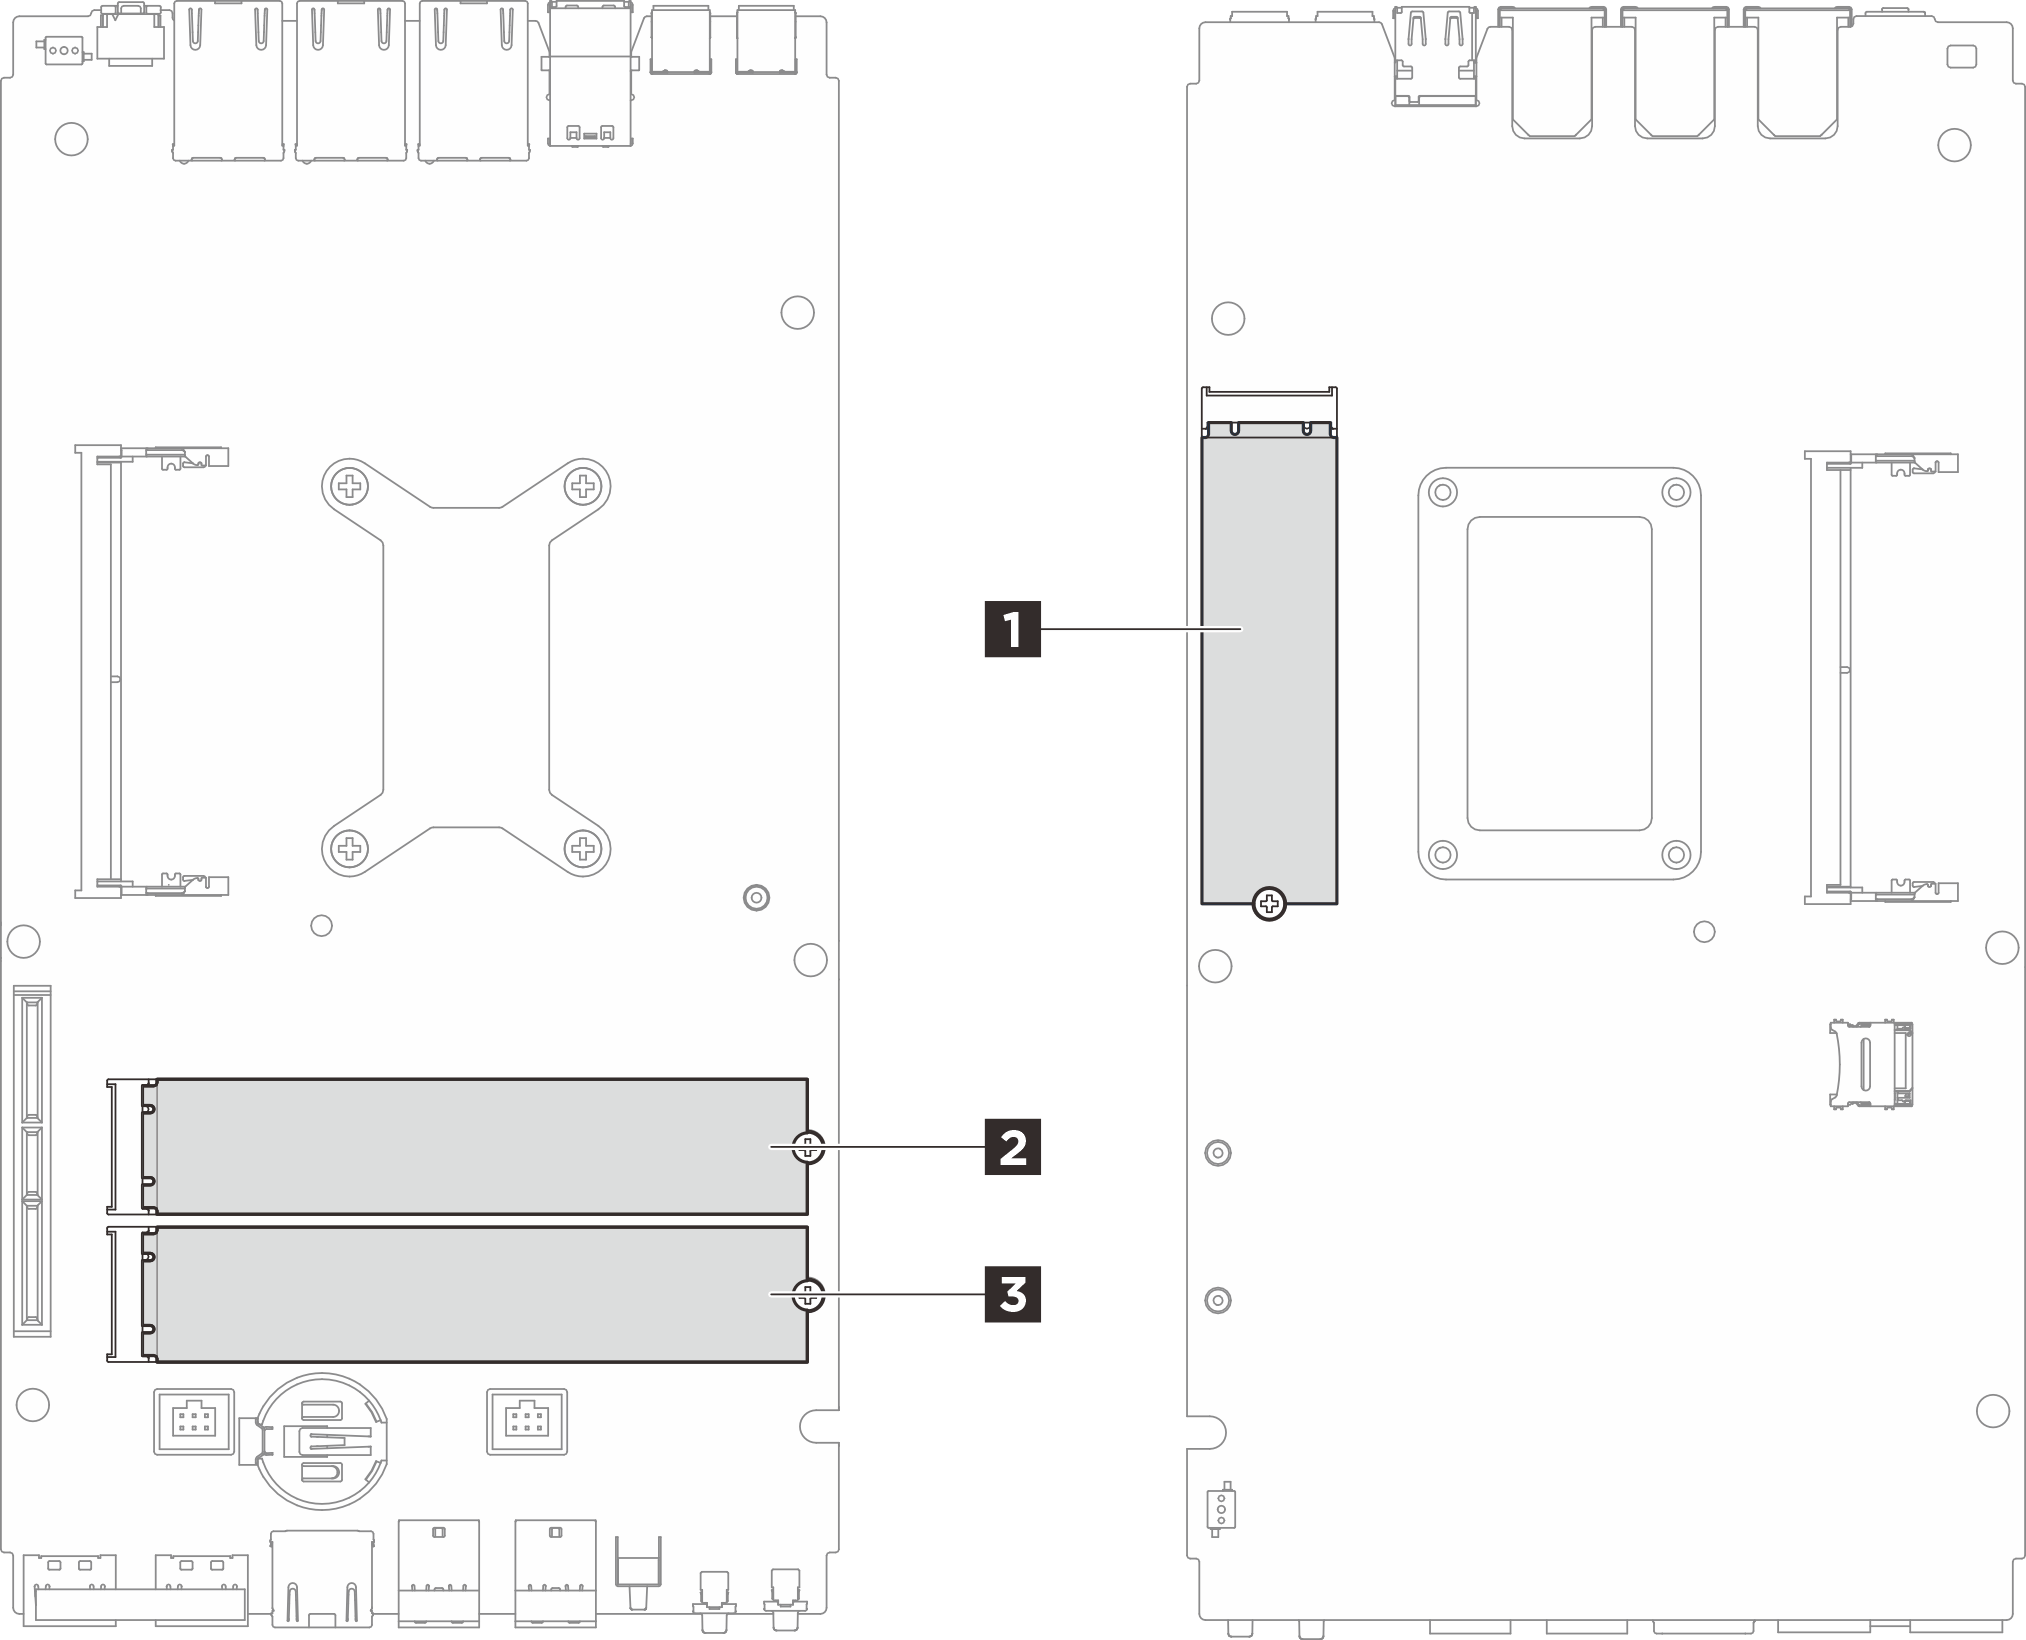
Slot / numbering M.2 drive Location 1 Slot 1 / M.2 drive 0 M.2 boot drive, 2280 form factor, SATA/NVMe Bottom side of system board 2 Slot 2 / M.2 drive 1 M.2 storage drive, 2280/22110 form factor, NVMe Top side of system board 3 Slot 3 / M.2 drive 2
- Locate the slot to install the M.2 drive.
Install the M.2 boot drive to slot 1
Procedure
- Make preparation for this task.
- If a thermal pad is in any of the following conditions, replace the thermal pad with a new one. See Thermal pad installation guidelines to identify the required thermal pad kit and follow the thermal pad instructions.
- The thermal pad is damaged or detached from the surface.
- The new part to be installed is of different brand or form factor from the replaced one; the new part might cause thermal pads to be deformed or damaged.
Figure 2. M.2 drive slot 1 thermal pads (Bottom cover & system board side)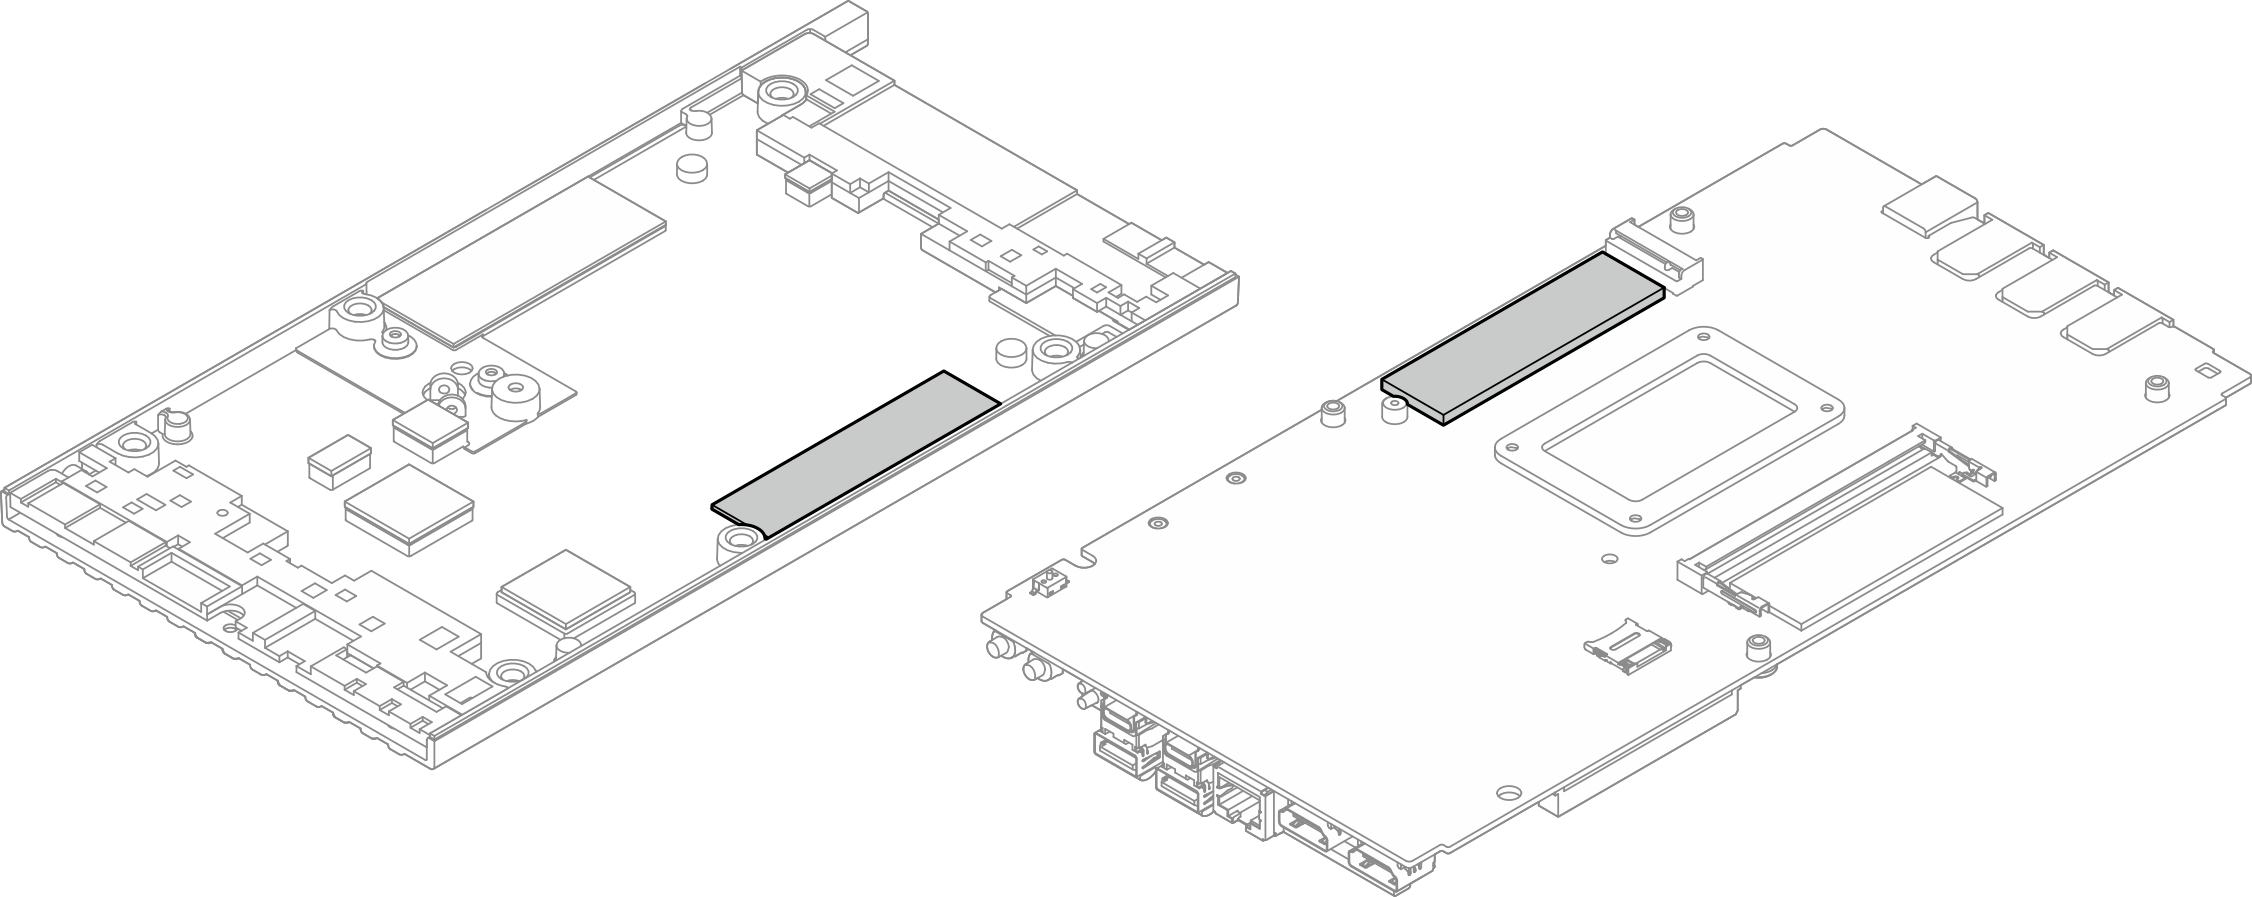
- If a thermal pad is in any of the following conditions, replace the thermal pad with a new one. See Thermal pad installation guidelines to identify the required thermal pad kit and follow the thermal pad instructions.
- Install the M.2 drive.
 Hold the M.2 drive at an angle, and insert the drive into the M.2 slot.
 Lower the rear side of the M.2 drive down to the system board.
 Secure the M.2 drive with one screw.Figure 3. Installing the M.2 drive
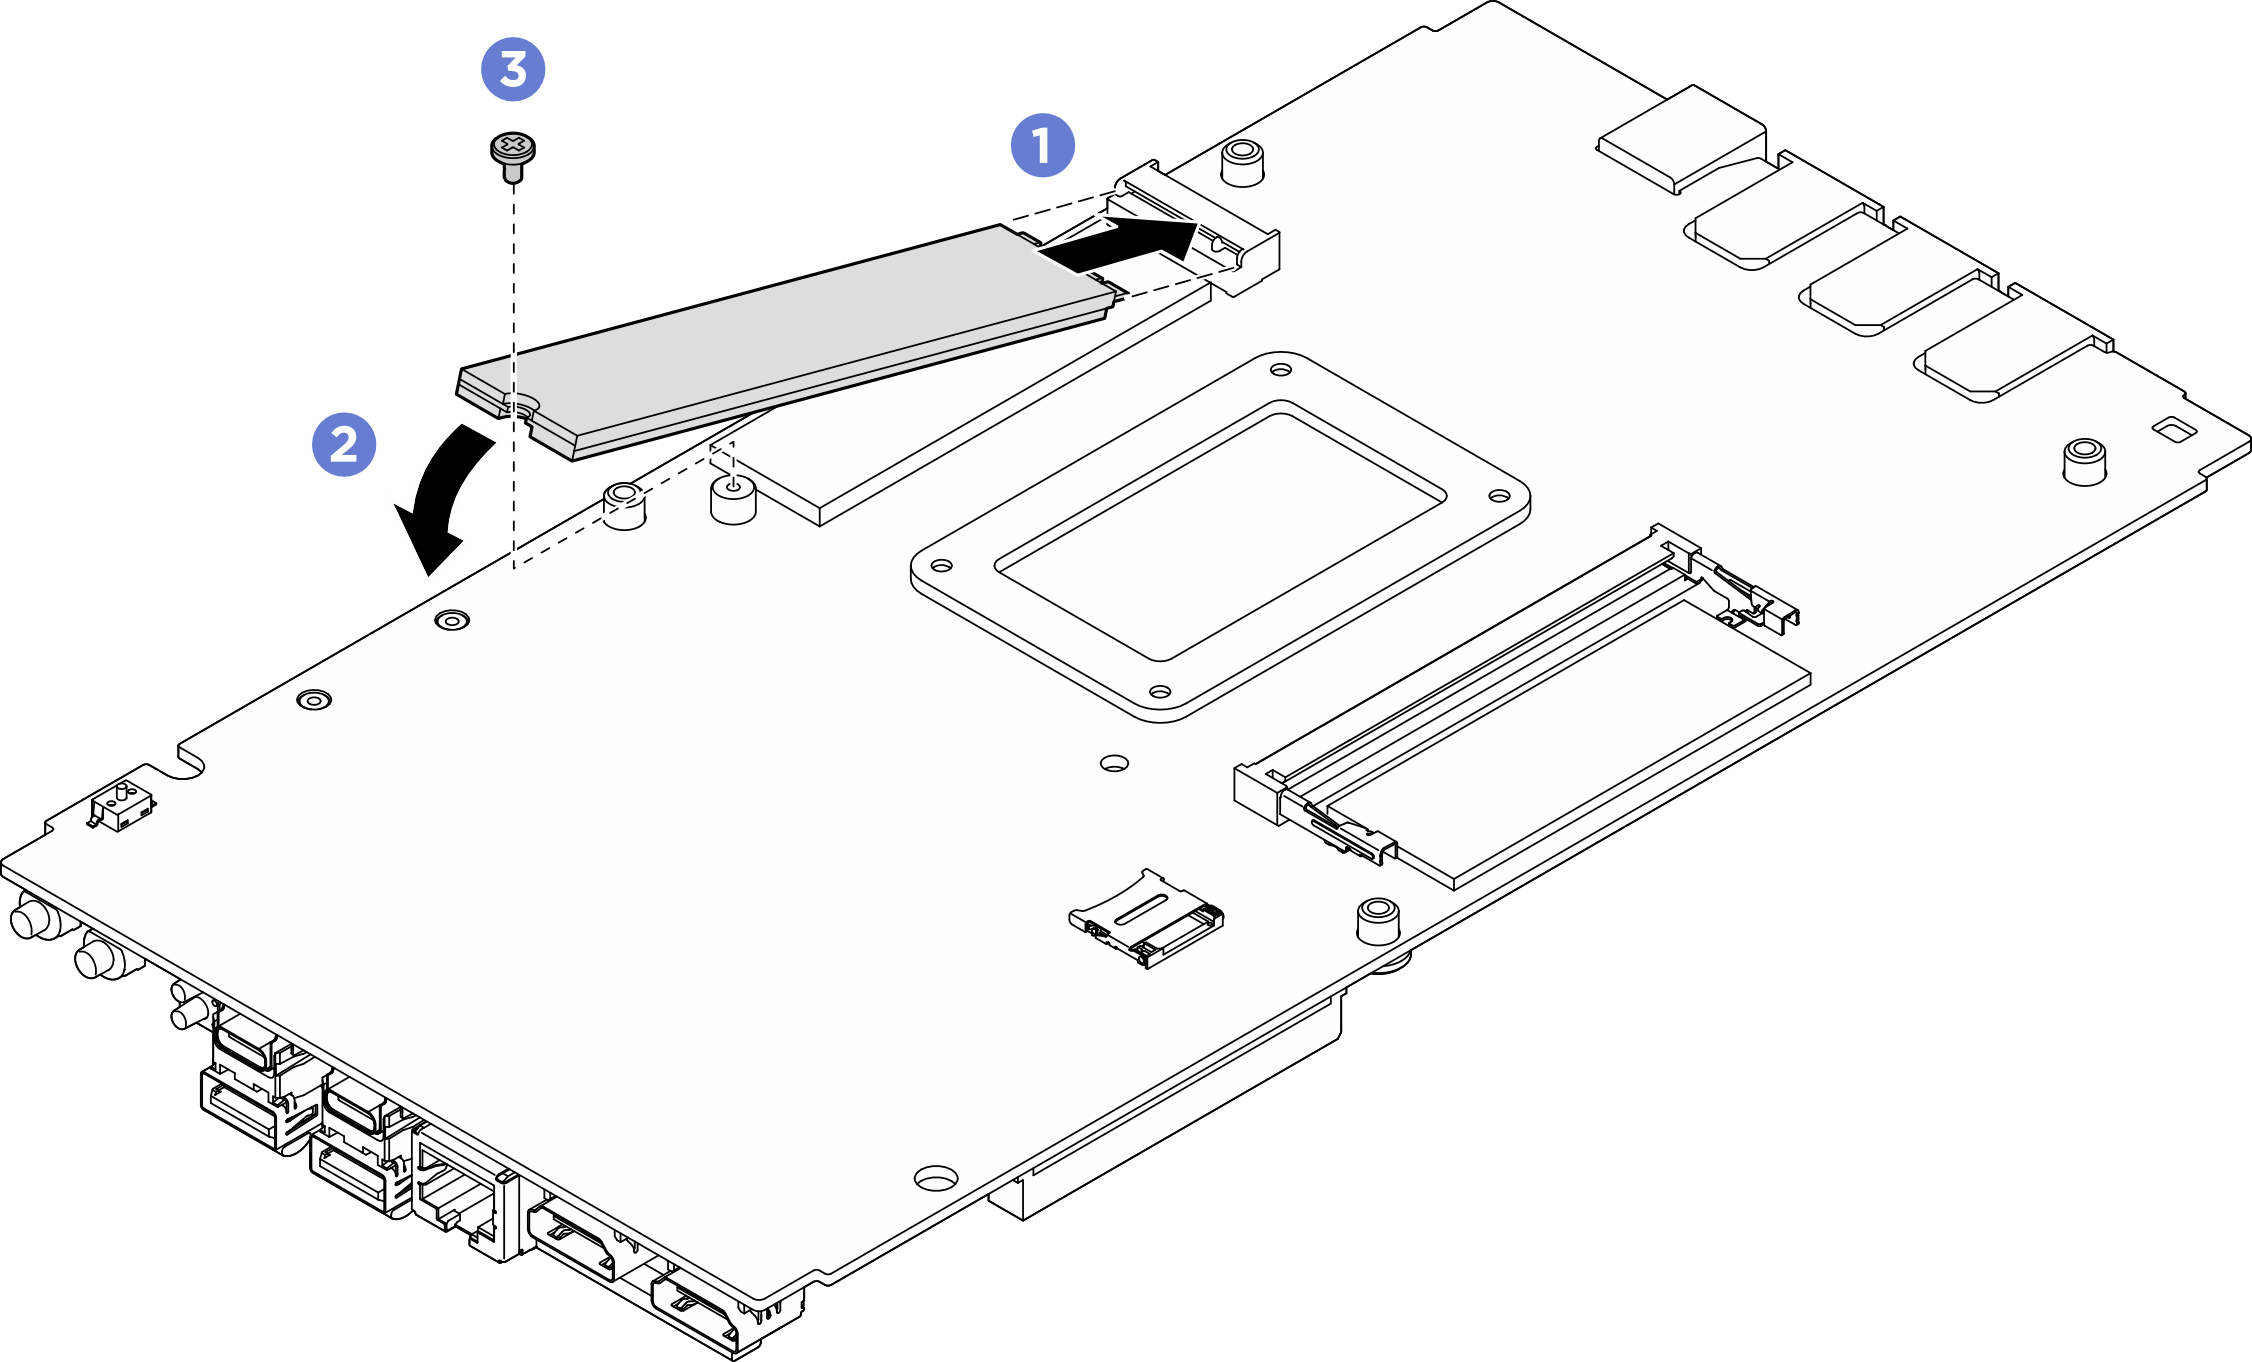
After you finish
- Install the bottom cover. See Install the bottom cover.
- If applicable, install the expansion kit. See Install the expansion kit.
- If applicable, install the expansion filler. See Install the expansion filler.
- Install the fan shroud. See Install the fan shroud.
- Complete the parts replacement. See Complete the parts replacement.
Install an M.2 storage drive to slot 2 or slot 3
Procedure
- Make preparation for this task.
- If a thermal pad is in any of the following conditions, replace the thermal pad with a new one. See Thermal pad installation guidelines to identify the required thermal pad kit and follow the thermal pad instructions.
- The thermal pad is damaged or detached from the surface.
- The new part to be installed is of different brand or form factor from the replaced one; the new part might cause thermal pads to be deformed or damaged.
Figure 4. M.2 drive slot 2 & slot 3 thermal pads (Top cover & system board side)
- If a thermal pad is in any of the following conditions, replace the thermal pad with a new one. See Thermal pad installation guidelines to identify the required thermal pad kit and follow the thermal pad instructions.
Install an M.2 22110 drive
- If applicable, remove the M.2 holder.
- Remove the two screws that secure the M.2 holder.
- Lift the M.2 holder from the system board.
Figure 5. Removing the M.2 holder
- Install the M.2 drive.
- Hold the M.2 drive at an angle, and insert the drive into the M.2 slot.
- Lower the rear side of the M.2 drive down to the system board.
- Press and hold the middle of the M.2 drive in place; then, secure the M.2 drive with one screw.
Figure 6. Installing an M.2 22110 drive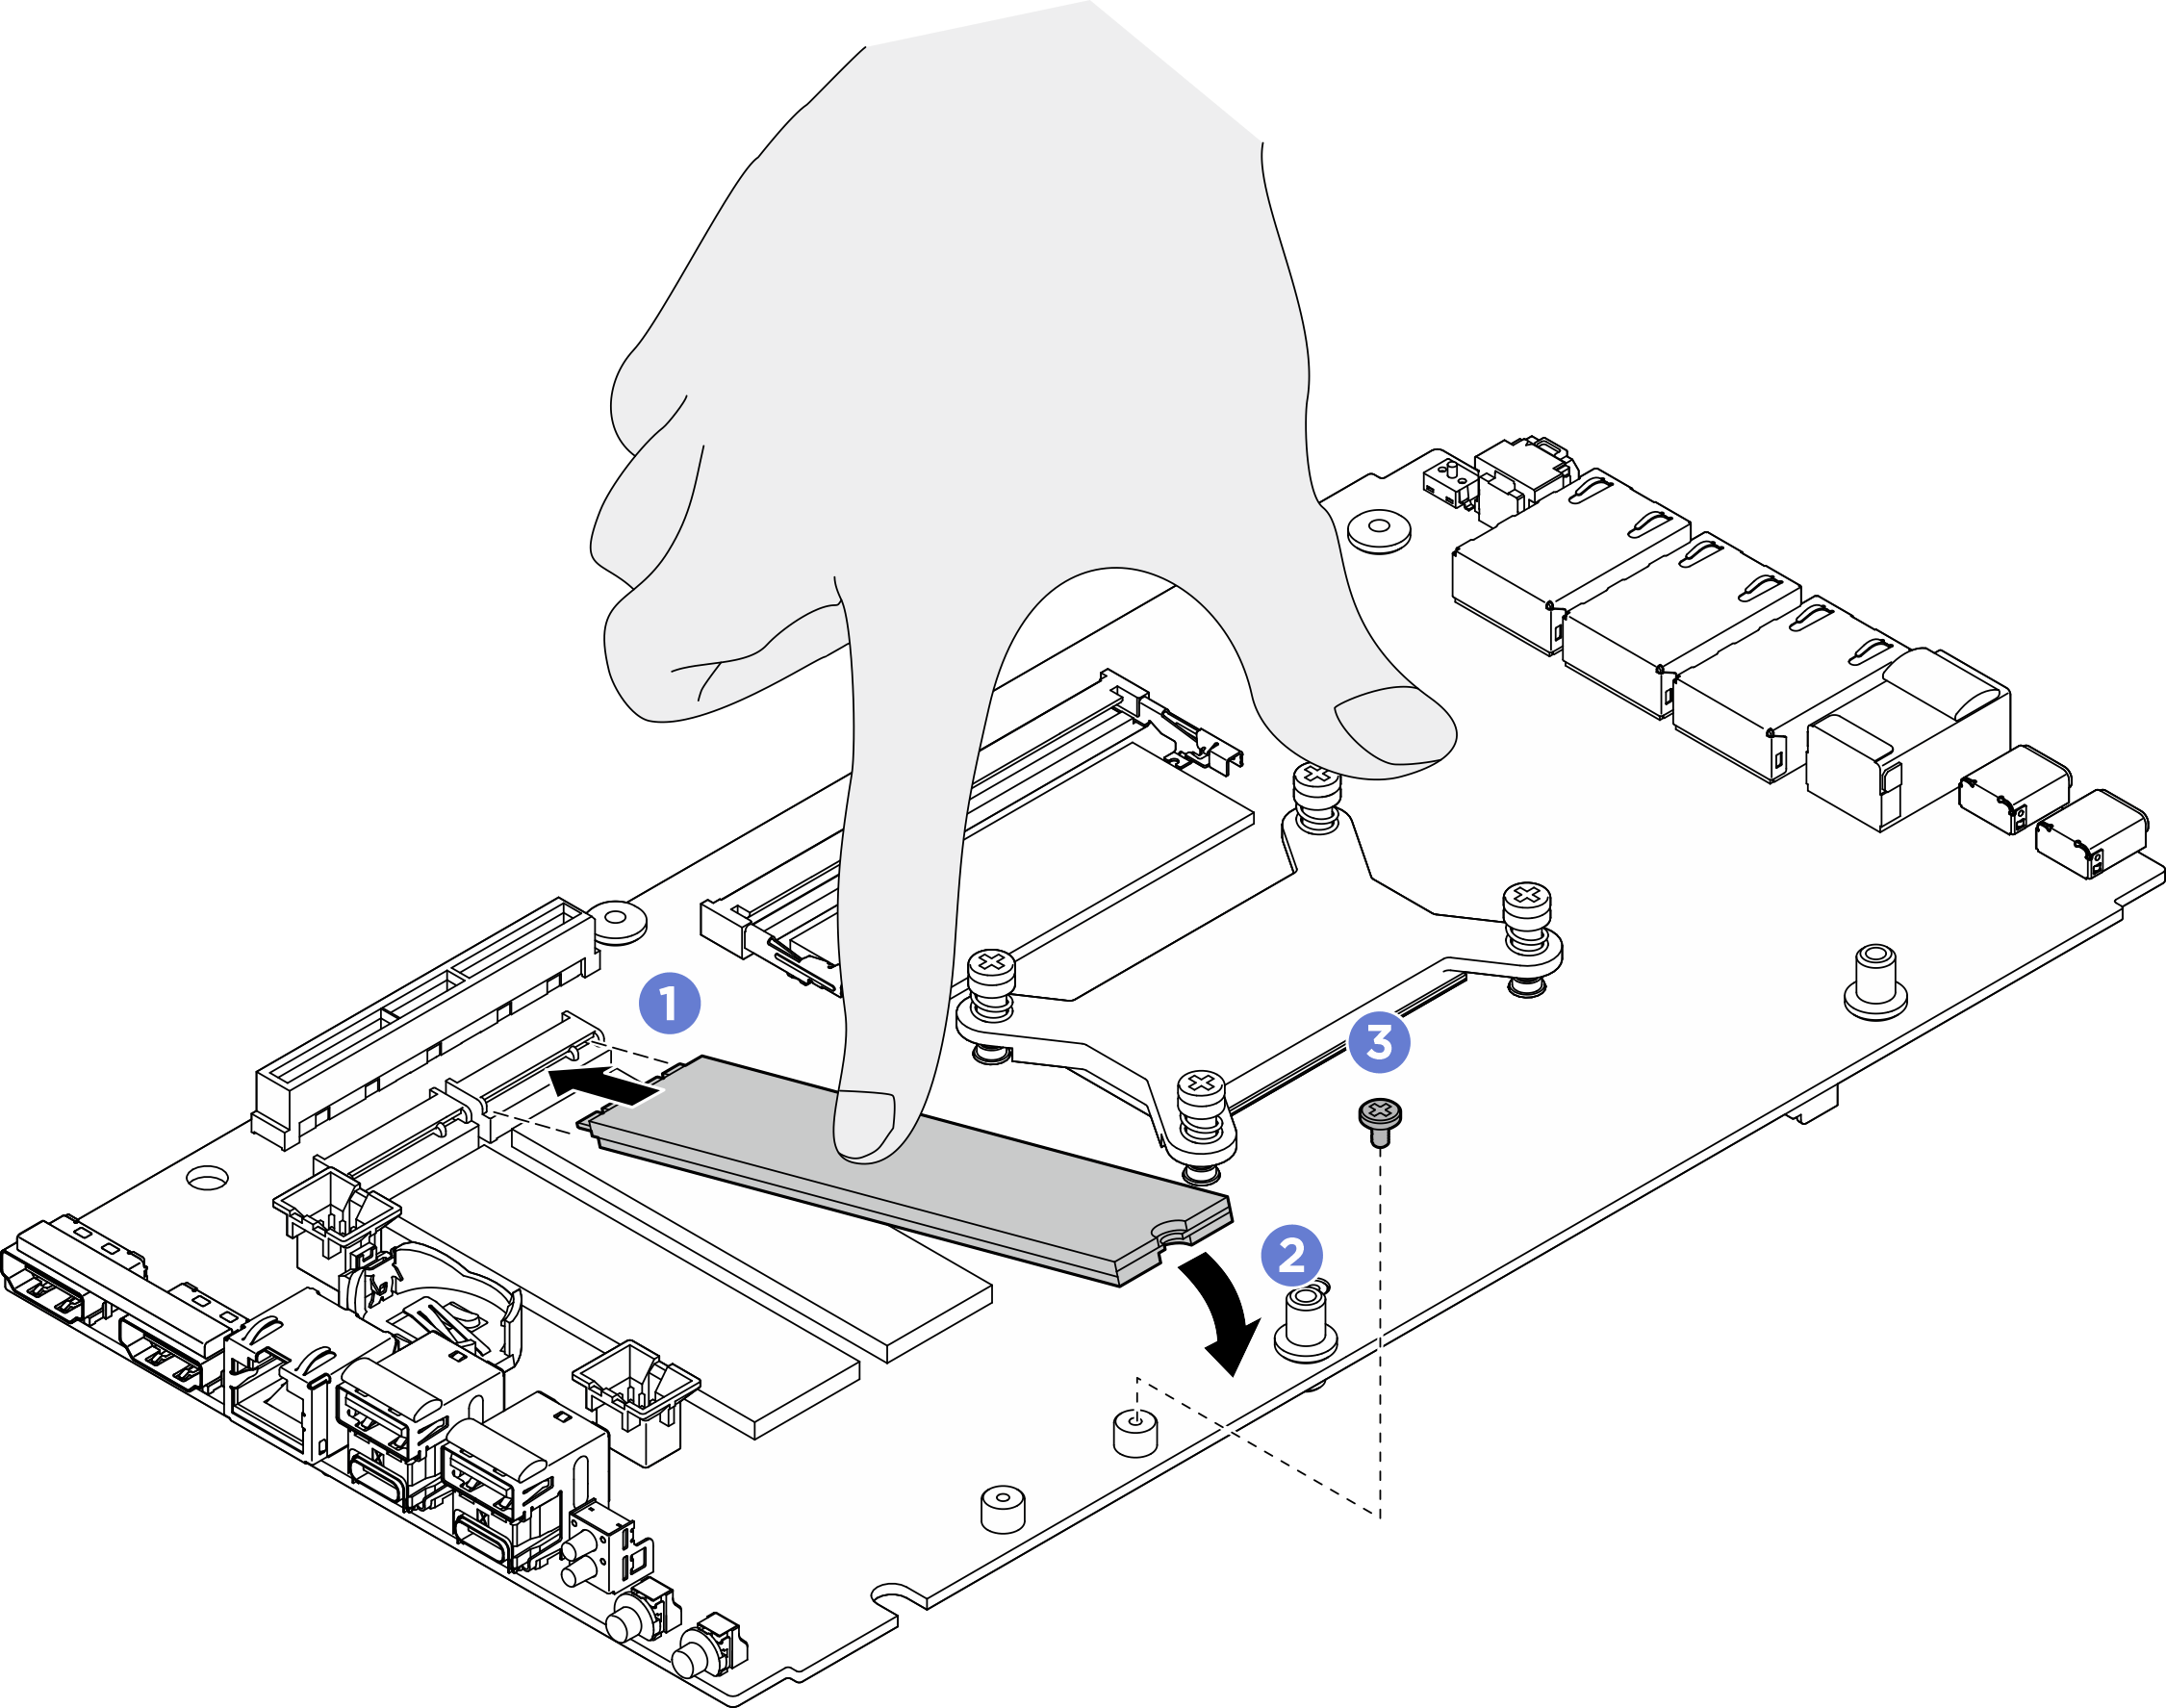
Install an M.2 2280 drive
- Make sure the M.2 holder is properly installed.
- Align the M.2 holder with the guide pins; then place the M.2 holder on the system board.
- Secure the M.2 holder with two screws.
Figure 7. Installing the M.2 holder - Install the M.2 drive.
- Hold the M.2 drive at an angle, and insert the drive into the M.2 slot.
- Lower the rear side of the M.2 drive down to the system board.
- Secure the M.2 drive with one screw.
Figure 8. Installing an M.2 2280 drive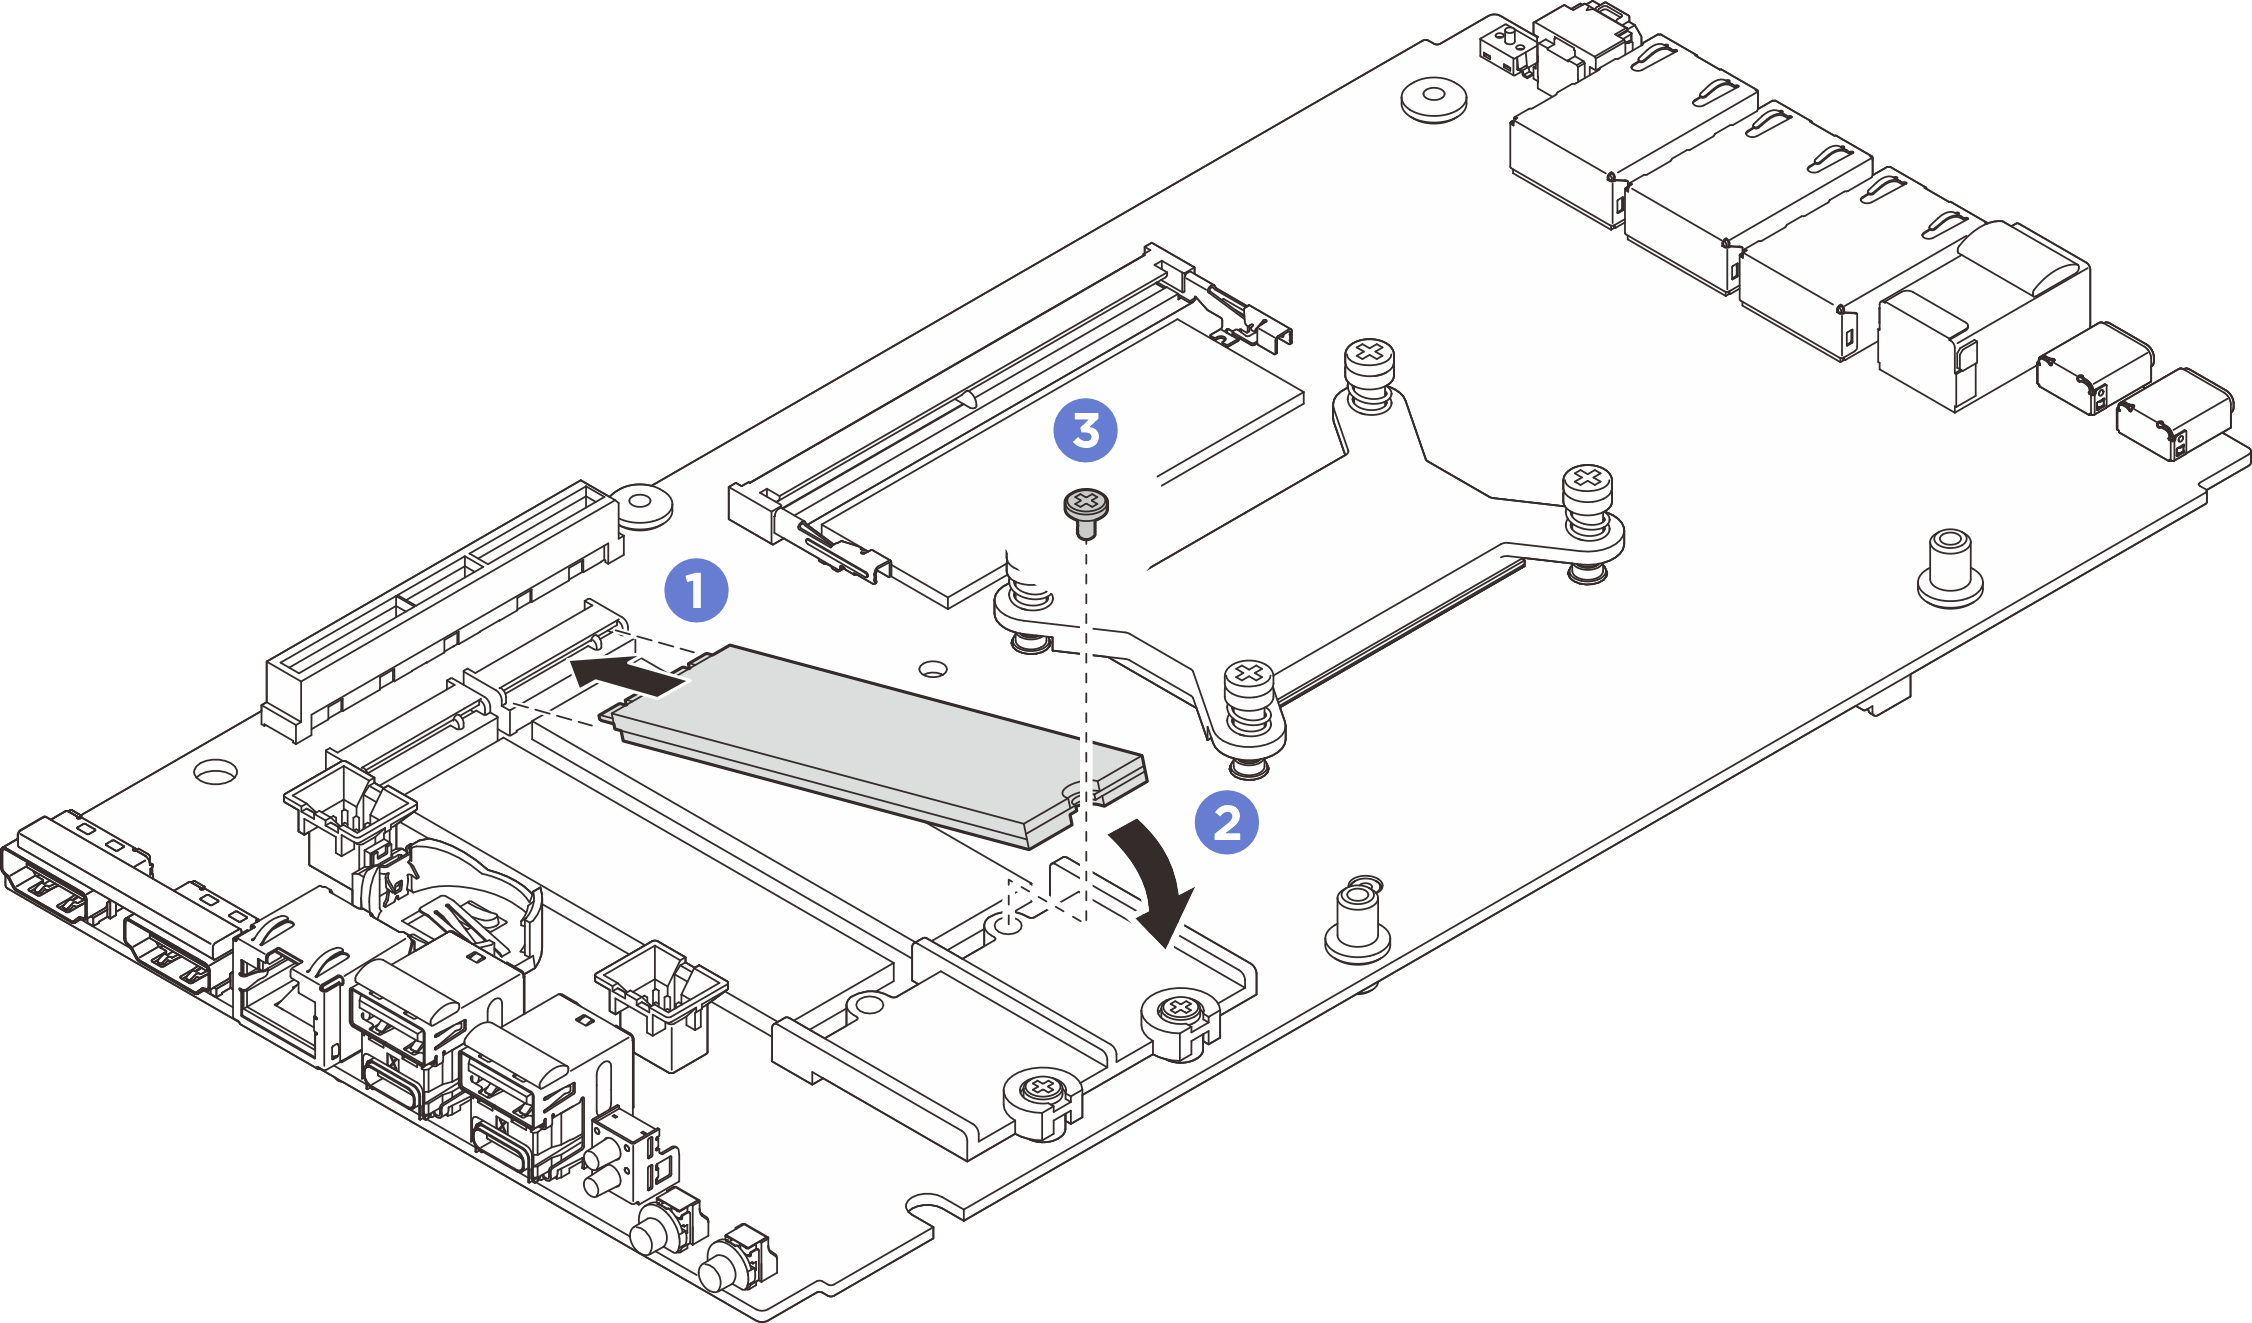
After you finish
- Install the top cover. See Install the top cover.
- Install the expansion kit or the expansion filler. See Install the expansion kit or Install the expansion filler.
- Install the fan shroud. See Install the fan shroud.
- Complete the parts replacement. See Complete the parts replacement.
Demo video
Give documentation feedback