Install a PCIe adapter in slot 10 to 15
PCIe adapters in slot 10 to 15 are in an I/O tray riser that is accessed from the rear of the server. With the riser removed from the I/O tray, open the retention latch and insert the adapter in the riser; then, close the retention latch.


If you are installing an optional LOM adapter in slot 9, install it before installing other adapters in the riser for slot 10 to 15 (riser 2). See Install a LOM adapter in slot 9.
Before you install an optional adapter in slot 10 to 15:
If the I/O tray is installed in the server, remove it. See Remove the I/O tray.
ImportantYou must remove the riser from the I/O tray before installing an adapter. If you are installing a network adapter (with an RJ45 connector), make sure that there is sufficient clearance to disconnect the Ethernet cable from the adapter after it is installed.Remove the riser for slot 10 to 15 (riser 2). See Remove the riser for slot 10 to 15 (riser 2).
Make sure that there is no filler installed in the slot where you are installing the adapter.
Complete the following steps to install an adapter in slot 10 to 15.
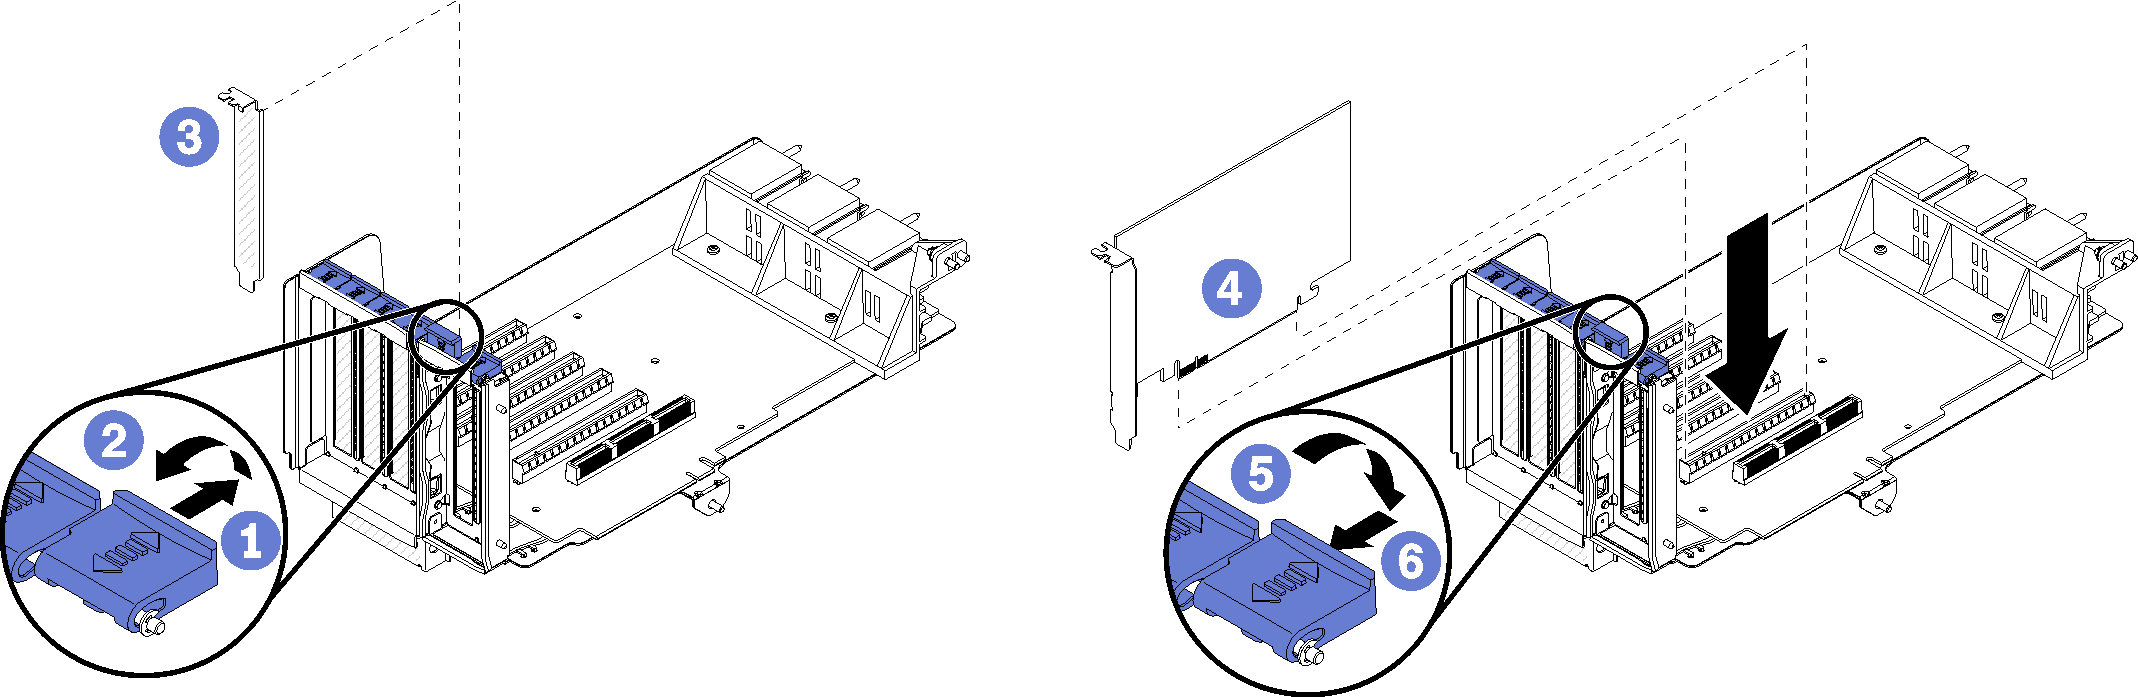
- Open the retention latch.
- Align the adapter with the riser slot and insert it; then, press the adapter into the riser until the connector is fully seated.
- Close and lock the retention latch.
If you have no additional adapters to install in the riser after installing an optional adapter in slot 10 to 15:
If any of the adapters in the riser have internal cables, make sure that they are connected before installing the riser in the I/O tray.
Install the riser in the I/O tray. See Install the riser for slot 10 to 15 (riser 2).
If you have no additional options to install in the I/O tray, install it. See Install the I/O tray.
Demo video