Removing the operating temperature enhancement kit
Use this information to remove the operating temperature enhancement kit
To remove the operating temperature enhancement kit on the 4U server model with non-hot-swap power supplies, complete the following steps. For 5U server models with hot-swap power supplies, please see the next sub-section.
- Read the safety information in Safety and Installation guidelines.
- Turn off the server and all attached devices; then, disconnect all power cords and external cables.
- Remove the bezel (see Removing the bezel).
- Carefully turn the server on its side so that it is lying flat, with the cover facing up.AttentionDo not allow the server to fall over.
- Remove the side cover (see Removing the side cover).
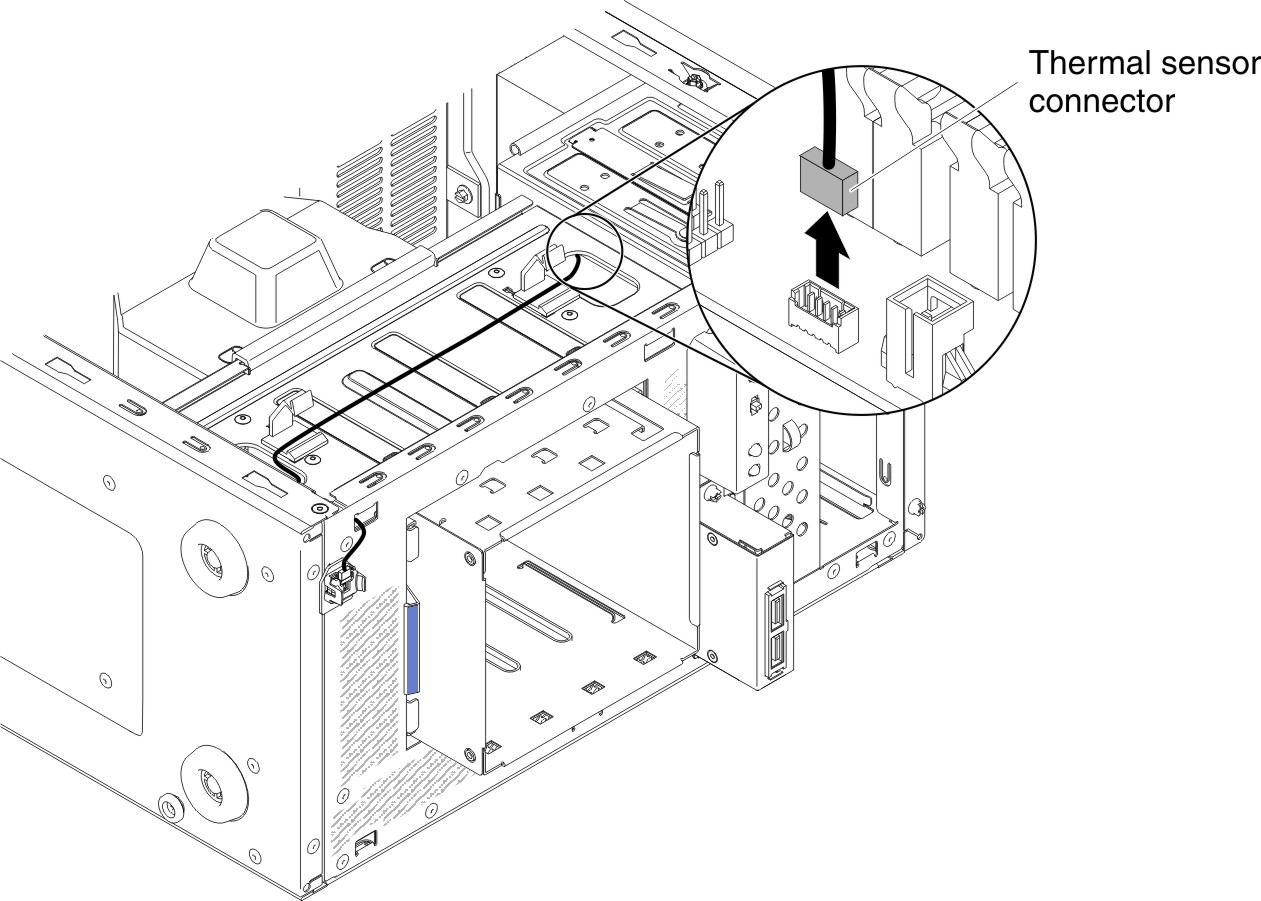
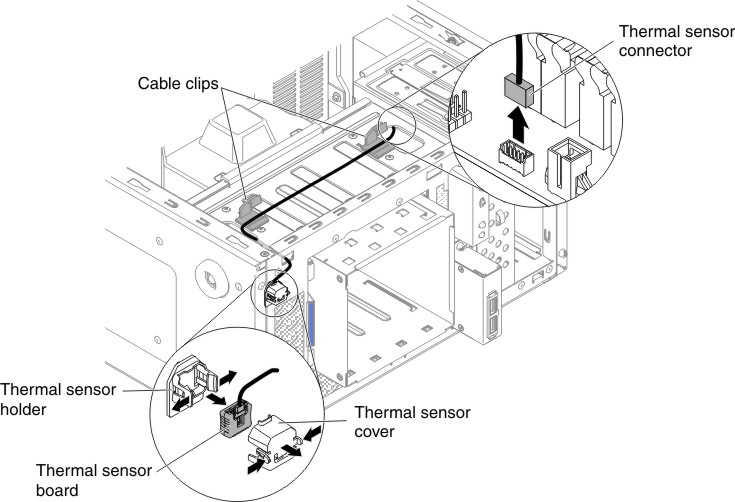
- Disconnect the thermal sensor connector from the system board and open the cable clips.Figure 1. Thermal sensor connector removal from system board for 4U server model with non-hot-swap power supplies

- Remove the thermal sensor board by pulling apart the securing clips of the thermal sensor board holder.Figure 2. Thermal sensor board removal for 4U server model with non-hot-swap power supplies

- If you are instructed to return the thermal solution fan kit, follow all packaging instructions, and use any packaging materials for shipping that are supplied to you.
To remove the operating temperature enhancement kit on the 5U server model with hot-swap power supplies, complete the following steps. For 4U server models with non-hot-swap power supplies, please see the above sub-section.
- Read the safety information in Safety and Installation guidelines.
- Turn off the server and all attached devices; then, disconnect all power cords and external cables.
- Unlock and remove the side cover (see Removing the side cover).
- Remove the lower bezel (see Removing the lower bezel).
- Remove the upper bezel (see Removing the upper bezel).
- Carefully turn the server on its side so that it is lying flat, with the cover facing up.AttentionDo not allow the server to fall over.
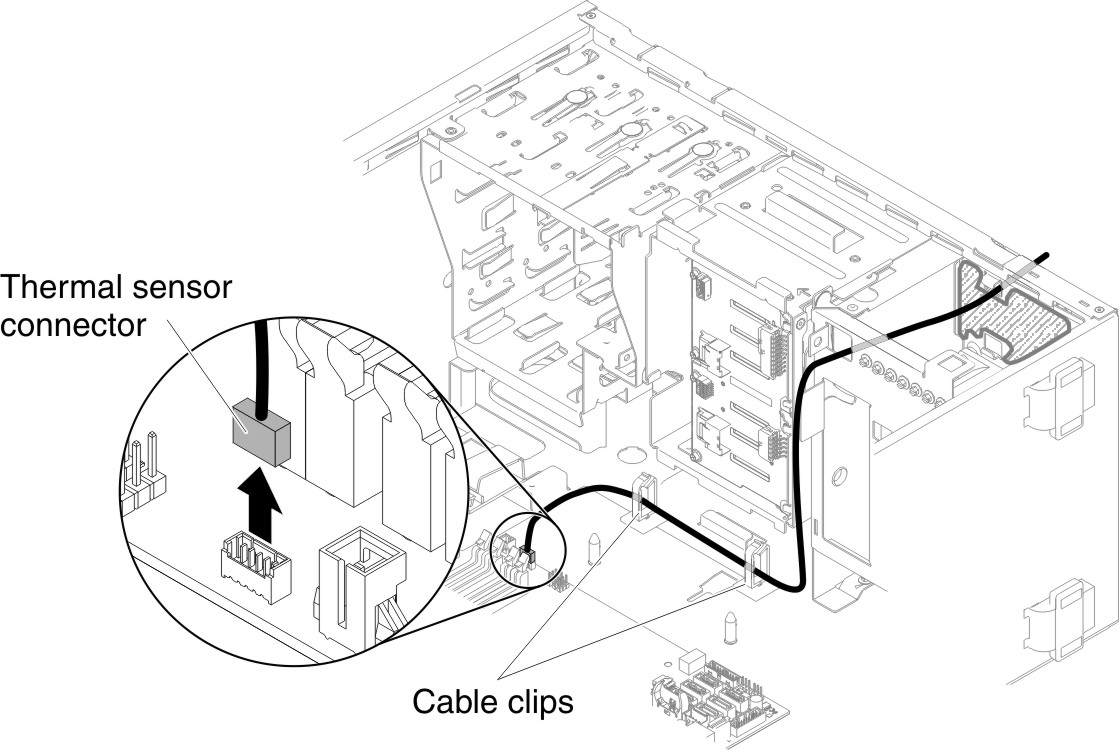
- Disconnect the thermal sensor connector from the system board and open the cable clips.Figure 3. Thermal sensor connector removal from system board for 5U server model with hot-swap power supplies

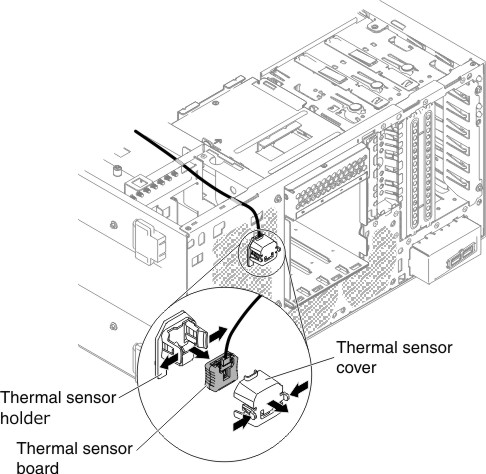
- Remove the thermal sensor board by pulling apart the securing clips of the thermal sensor board holder.Figure 4. Thermal sensor board removal for 5U server model with hot-swap power supplies

- If you are instructed to return the thermal solution fan kit, follow all packaging instructions, and use any packaging materials for shipping that are supplied to you.
Give documentation feedback