Replacing the rear 2.5-inch hot-swap-drive kit
Use this information to replace the rear 2.5-inch hot-swap-drive kit.
To replace the rear 2.5-inch hot-swap-drive kit, complete the following steps:
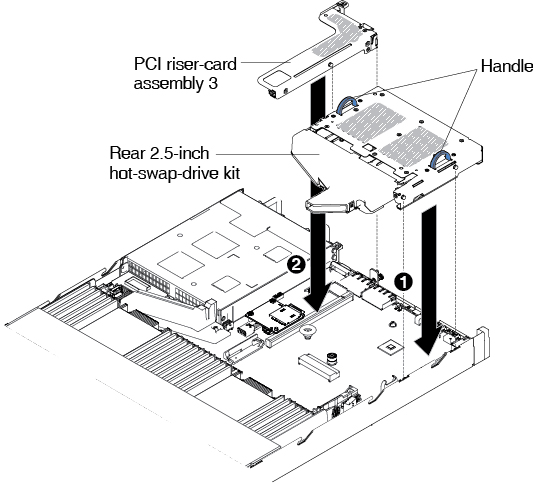
- If PCI riser-card assembly 3 needs to be installed (see Replacing a PCI riser-card assembly), remember to first install the rear 2.5-inch hot-swap-drive kit. Install the kit by grasping the two handles located on the sides of the kit, and slowly lower it into the chassis. Make sure that the two alignment pins securely engage the two holes on the side of the chassis.AttentionAlways follow the installation sequence in this step. Failure to do so, may result in damage to the rear 2.5-inch hot-swap-drive kit.Figure 1. Rear 2.5-inch hot-swap-drive kit installation
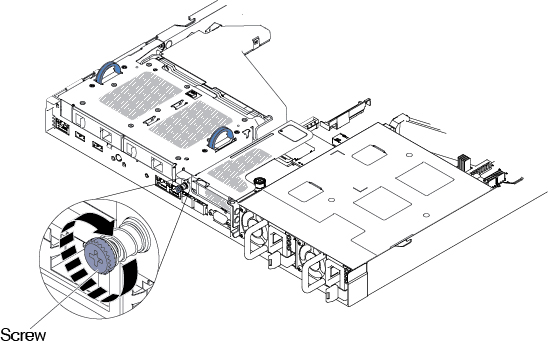
- Tighten the screw to secure the rear hard disk drive kit to the chassis.Figure 2. Screw location
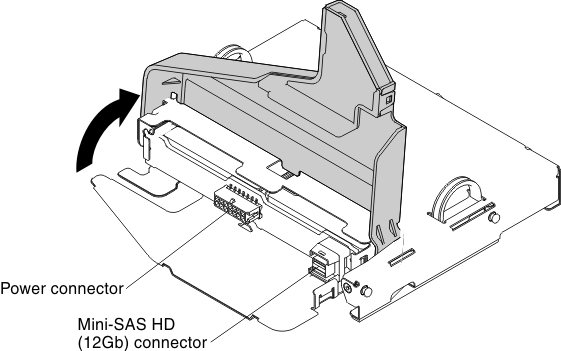
- Lift the air duct and connect the Mini-SAS HD (12Gb) and power cables to the rear hot-swap backplane.Figure 3. Mini-SAS HD (12Gb) and power cable connector location on the rear backplane
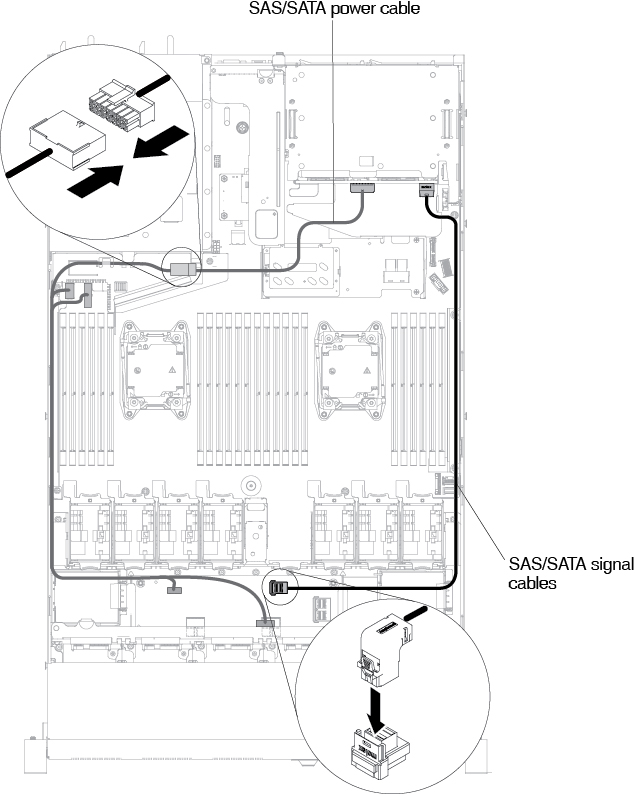
- Connect the other end of the Mini-SAS HD (12Gb) and power cables to the rear 2.5-inch hot-swap-drive backplane and power connector.Figure 4. Mini-SAS HD (12Gb) and power cable routing
Give documentation feedback