Replacing a ServeRAID SAS/SATA controller
Use this information to replace a ServeRAID SAS/SATA controller.
The ServeRAID SAS/SATA controller can be installed in the dedicated connector on the system board or PCI riser-card slots (see System-board internal connectors for the location of the connectors). To install a SAS/SATA adapter, complete the following steps:
You can replace the ServeRAID controller with another supported ServeRAID controller. For a list of supported ServeRAID controllers, see the Lenovo ServerProven website.
For brevity, in this documentation the ServeRAID SAS/SATA controller is often referred to as the SAS/SATA adapter or the ServeRAID adapter.
If possible, back up or record your RAID configuration information before replacing the adapter. See the documentation for your RAID adapter for information and instructions. Documentation for ServeRAID adapters can be downloaded from the Lenovo Support Portal.
- Insert the SAS/SATA adapter in the dedicated connector on the system board or the PCI riser-card assembly slot.Attention
- Incomplete insertion might cause damage to the server or the adapter.
- Note the order and position of the cables to the RAID card prior to service. Misconnecting the hard disk drive cables may result in a lost RAID array.
Steps for inserting a SAS/SATA adapter in the dedicated connector on the system board
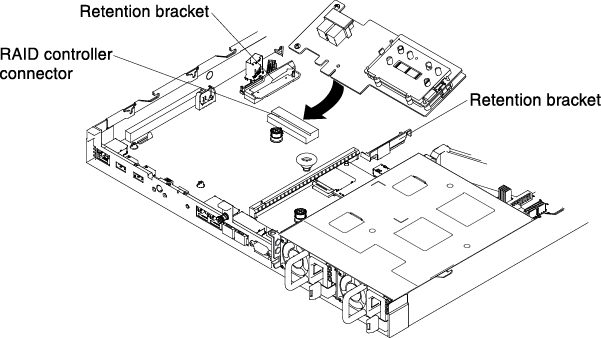
- Insert the SAS/SATA adapter into the RAID connector on the system board until it is firmly seated. The retention brackets secure the SAS/SATA adapter in place when the adapter is firmly seated into the connector. Figure 1. ServeRAID adapter installation
 NoteRemove the PCI bracket that comes with either the ServeRAID M5210, ServeRAID M1215, or ServeRAID N2215 adapter before installing it in the dedicated connector on the system board.
Steps for inserting a SAS/SATA adapter in the dedicated connector on the PCI riser-card assembly slot
- Remove the PCI riser-card assembly that you wish to install the SAS/SATA adapter into (see Removing a PCI riser-card assembly).
- Insert the SAS/SATA adapter into the PCI riser card assembly (see Replacing an adapter).
- Insert the PCI riser card assembly into the system board (see Replacing a PCI riser-card assembly).
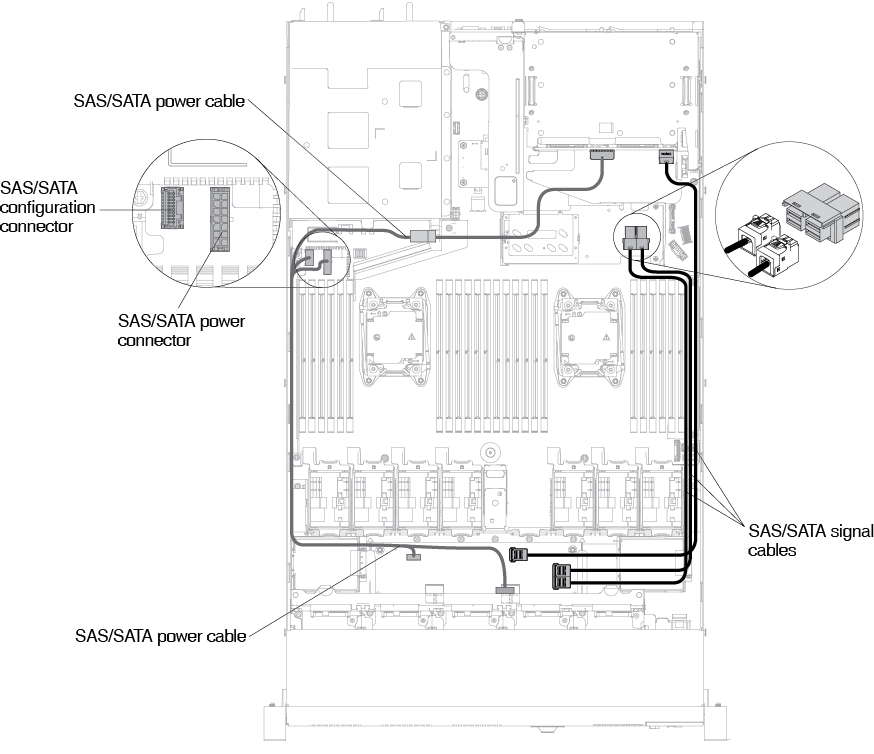
- Route the backplane signal cables. The following illustrations apply to SAS/SATA adapters that are inserted into the dedicated connector on the system board.Figure 2. ServeRAID adapter cable routing for four 3.5-inch hot-swap hard disk drive configuration
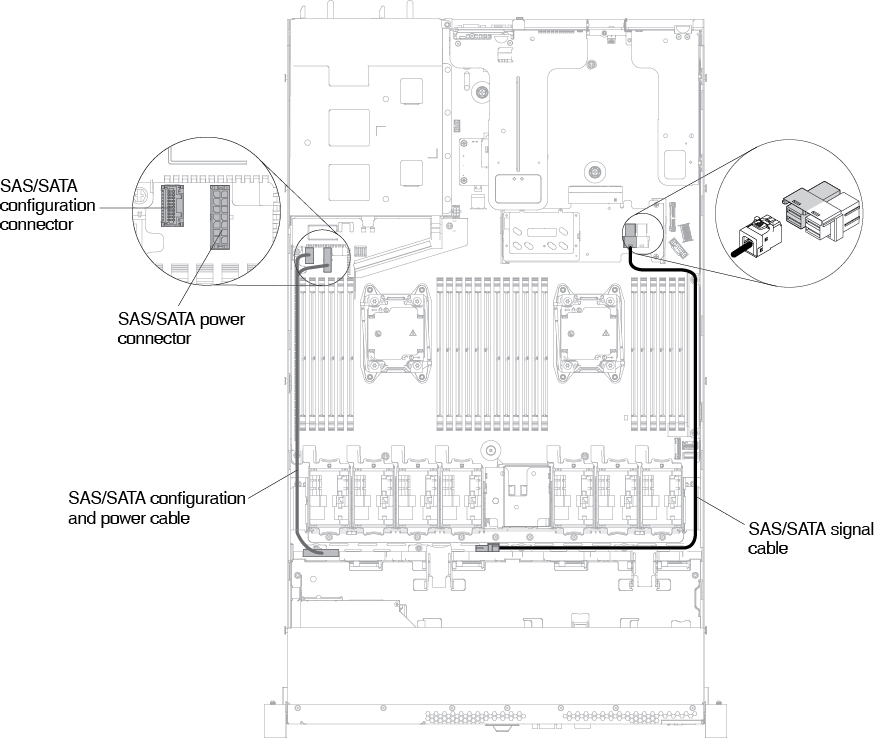 Figure 3. ServeRAID adapter cable routing for eight 2.5-inch hot-swap hard disk drive configuration
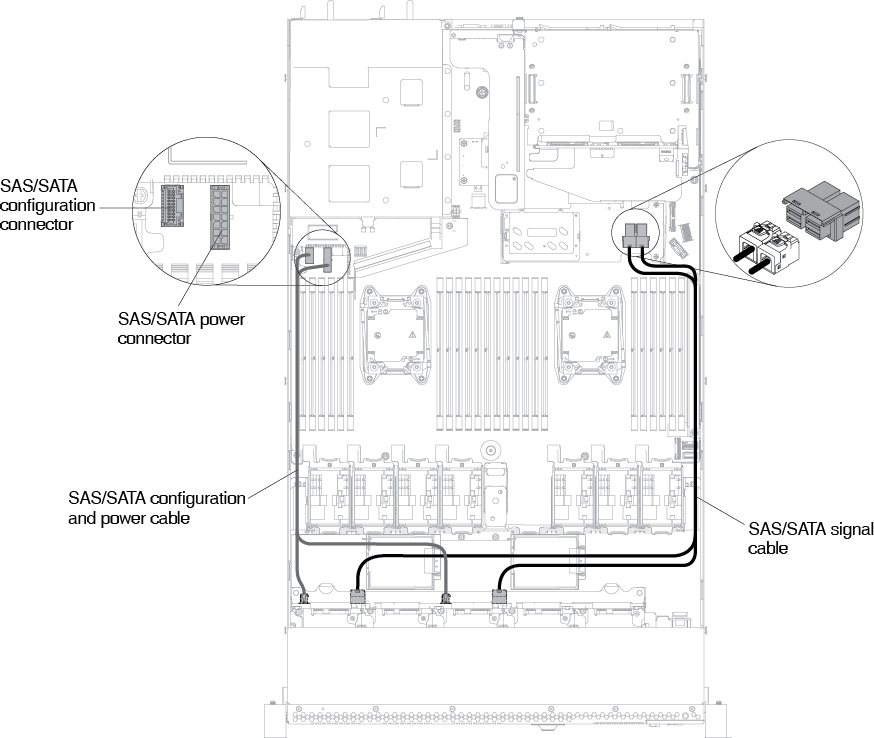 Figure 4. ServeRAID adapter cable routing for ten 2.5-inch hot-swap hard disk drive configuration
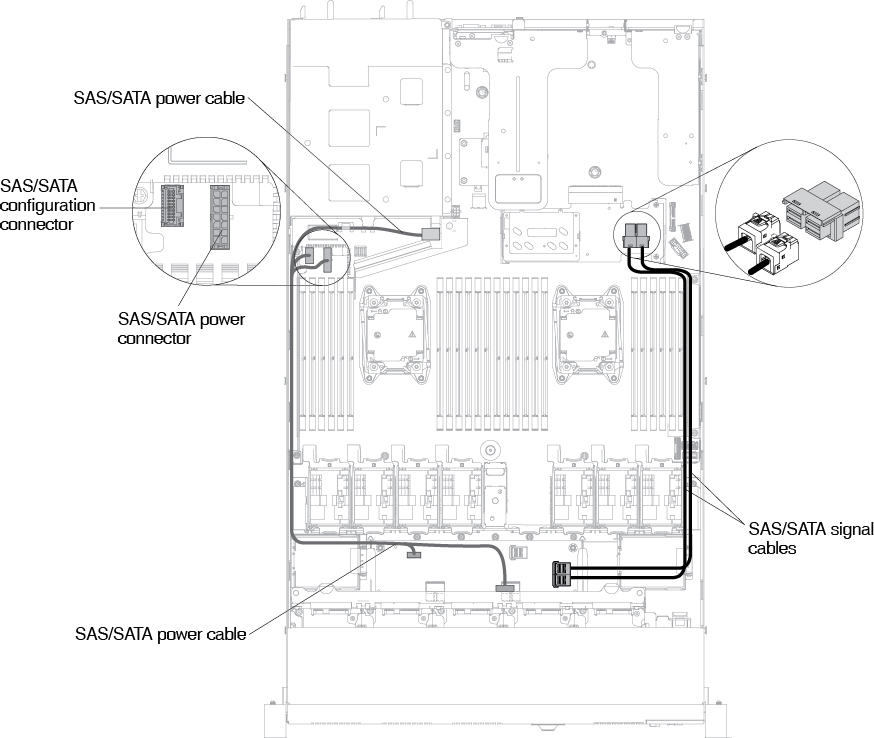 Figure 5. ServeRAID adapter cable routing for twelve 2.5-inch hot-swap hard disk drive configuration