Replacing a PCI riser-card assembly
The server provides two PCI riser-card slots on the system board.
The following information indicates the riser-card slots:
- Standard models of the server come with one PCI Express riser-card assembly installed. If you want to replace them with PCI-X riser-card assemblies, you must order the PCI-X riser-card assembly option, which includes the bracket.
- A PCI Express riser-card assembly has a black connector and supports PCI Express adapters, and a PCI-X riser-card assembly has a white (light in color) connector and supports PCI-X adapters.
- PCI riser slot 1 is the farthest slot from the power supply. You must install a PCI riser-card assembly in slot 1 with microprocessor 1.
- PCI riser slot 2 is the closest slot to the power supply. You must install a PCI riser-card assembly in slot 2 with microprocessor 2.
- PCI riser-card brackets must be installed even if you do not install an adapter.
To install a PCI riser-card assembly, complete the following steps:
- Read the safety information that begins on Safety and Installation guidelines.
- Turn off the server and peripheral devices and disconnect all power cords.
- Remove the cover (see Removing the cover).
- Reinstall any adapters and reconnect any internal cables you might have removed in other procedures (see Replacing an adapter and Internal cable routing and connectors).
- Align the PCI riser-card assembly with the selected PCI connector on the system board:
- PCI connector 1: Carefully fit the two alignment slots on the side of the assembly onto the two alignment brackets in the side of the chassis.Figure 1. PCI riser-card assembly installation
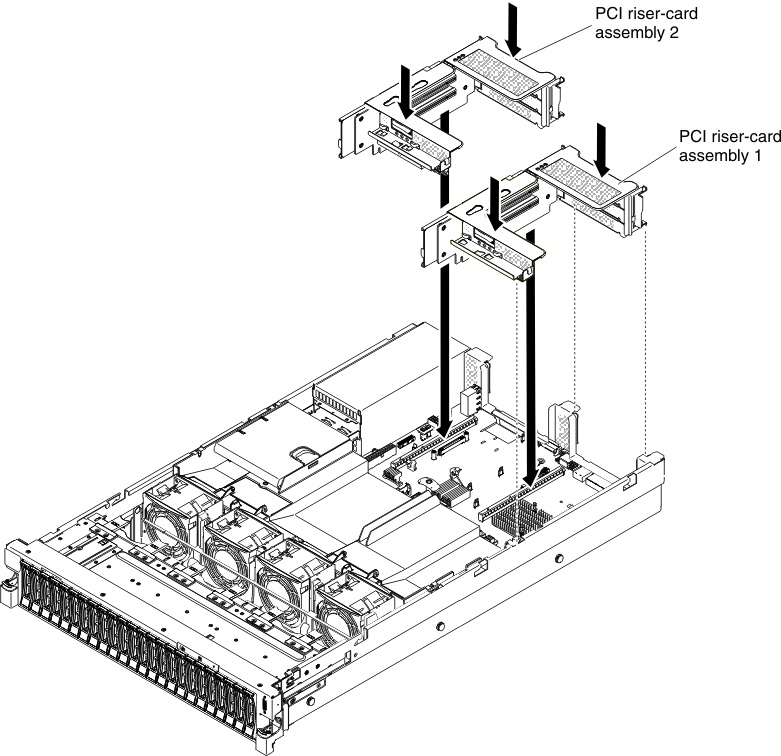
- PCI connector 1: Carefully fit the two alignment slots on the side of the assembly onto the two alignment brackets in the side of the chassis.
- Press down on the assembly. Make sure that the riser-card assembly is fully seated in the riser-card connector on the system board.
- Replace the cover (see Replacing the cover).
- Slide the server into the rack.
- Reconnect the power cords and any cables that you removed.
- Turn on the peripheral devices and the server.
Give documentation feedback