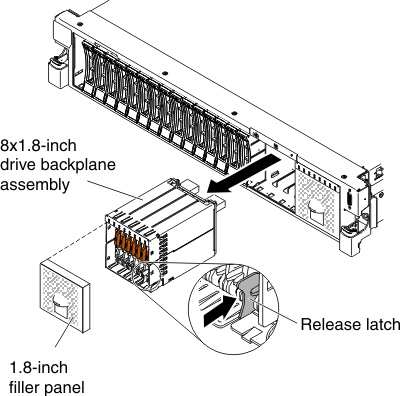
Removing the 8x1.8-inch SSD backplane assembly
Use this information to remove the 8x1.8-inch SSD backplane assembly.
Attention
- Before removing any components or disconnecting any cables, keep note of their respective locations and how they are connected to the system board.
To remove the 8x1.8-inch hot-swap SSD backplane assembly, complete the following steps:
- Lift up the spring release latch slightly while pushing the assembly from the back and slide the backplane assembly out the front of the server.Figure 1. Backplane assembly removal
If you are instructed to return the drive backplane, follow all packaging instructions, and use any packaging materials for shipping that are supplied to you.
Give documentation feedback