Remove the interposer card
Use this information to remove the interposer card.
About this task
Read Installation Guidelines and Safety inspection checklist to ensure that you work safely.
Follow the following steps to shut down the solution if needed.
Retrieve the existing universally unique identifier (UUID) information from the enclosure interposer card that you are removing.
Log into the SMM3 web interface and go to , and record UUID
- Enclosure is not operating:
- Obtain the enclosure serial number and the machine type model from one of the enclosure labels.
- Record the enclosure serial number, the machine type model, and the UUID before you proceed.
Shut down the operating system and turn off any compute nodes in the enclosure. See the documentation that comes with the compute node for detailed instructions.
Disconnect all external cables from the enclosure.
Use extra force to disconnect QSFP cables if they are connected to the solution.
- A video of this procedure is available at YouTube.
Procedure
- Remove the interposer card.
 Disconnect the drip sensor rope from the interposer card.
 Remove fourteen (x14) screws from the interposer card.
 Lift the interposer card from the mid-plate.
Figure 1. Removing the interposer card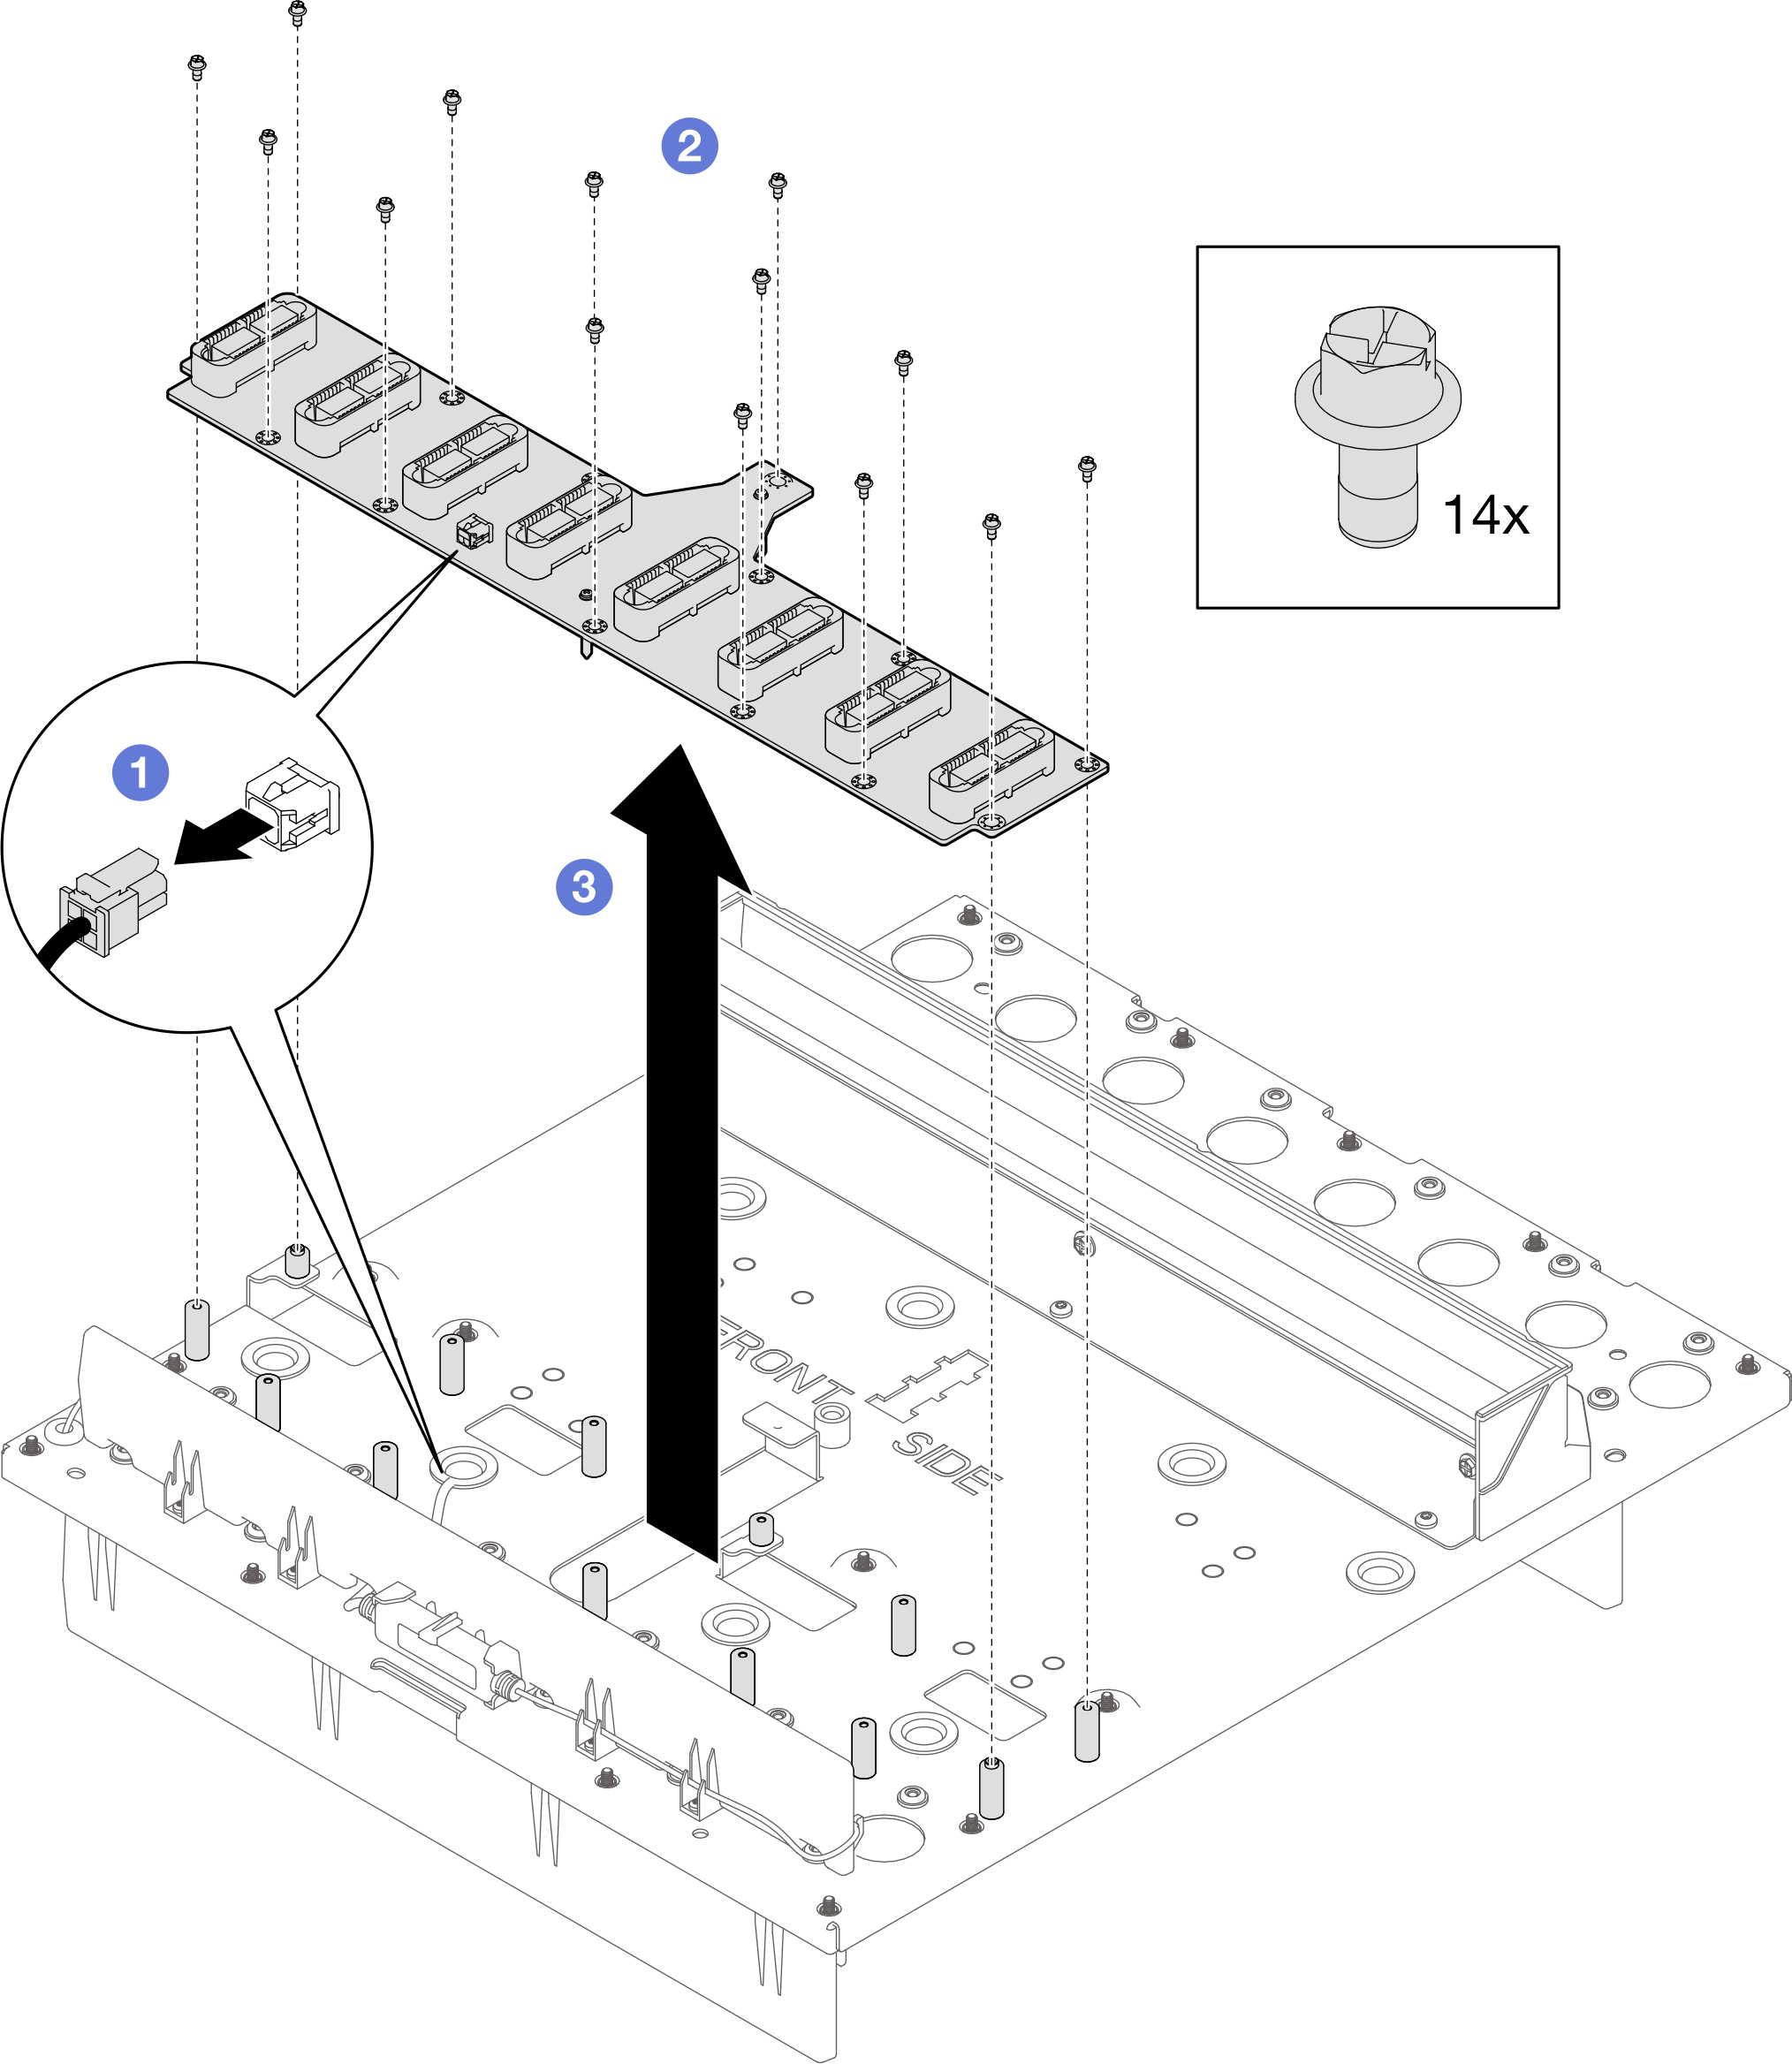
After you finish
If you are instructed to return the component or optional device, follow all packaging instructions, and use any packaging materials for shipping that are supplied to you.