Network problems
Use this information to resolve issues related to networking.
Cannot wake server using Wake on LAN
Complete the following steps until the problem is resolved:
Check the system event log and resolve any related problems. To view the system event log, go to Setup Utility and select .
Change the Wake on LAN setting. Go to Setup Utility and select . The default setting is automatic. Change it to primary.
Depending on the method of using Wake on LAN, remove and reinstall the I/O module board or the network adapter.
Turn off the server and disconnect it from the power source; then, wait 10 seconds before restarting the server.
If the problem recurs, depending on the method of using Wake on LAN, replace the I/O module board or the network adapter.
Could not log in using LDAP account with SSL enabled
Make sure that the license key is valid.
Generate a new license key and log in again.
General WLAN problems
The following information provides useful tips to solve general WLAN problems.
WLAN connection is unstable
The WLAN signal strength might be obstructed when the server is placed at the “corner of a building/department” or in a “WLAN noisy” environment.
- Adjust the direction of x86 WLAN antennas.Figure 1. Locations of WLAN antennas
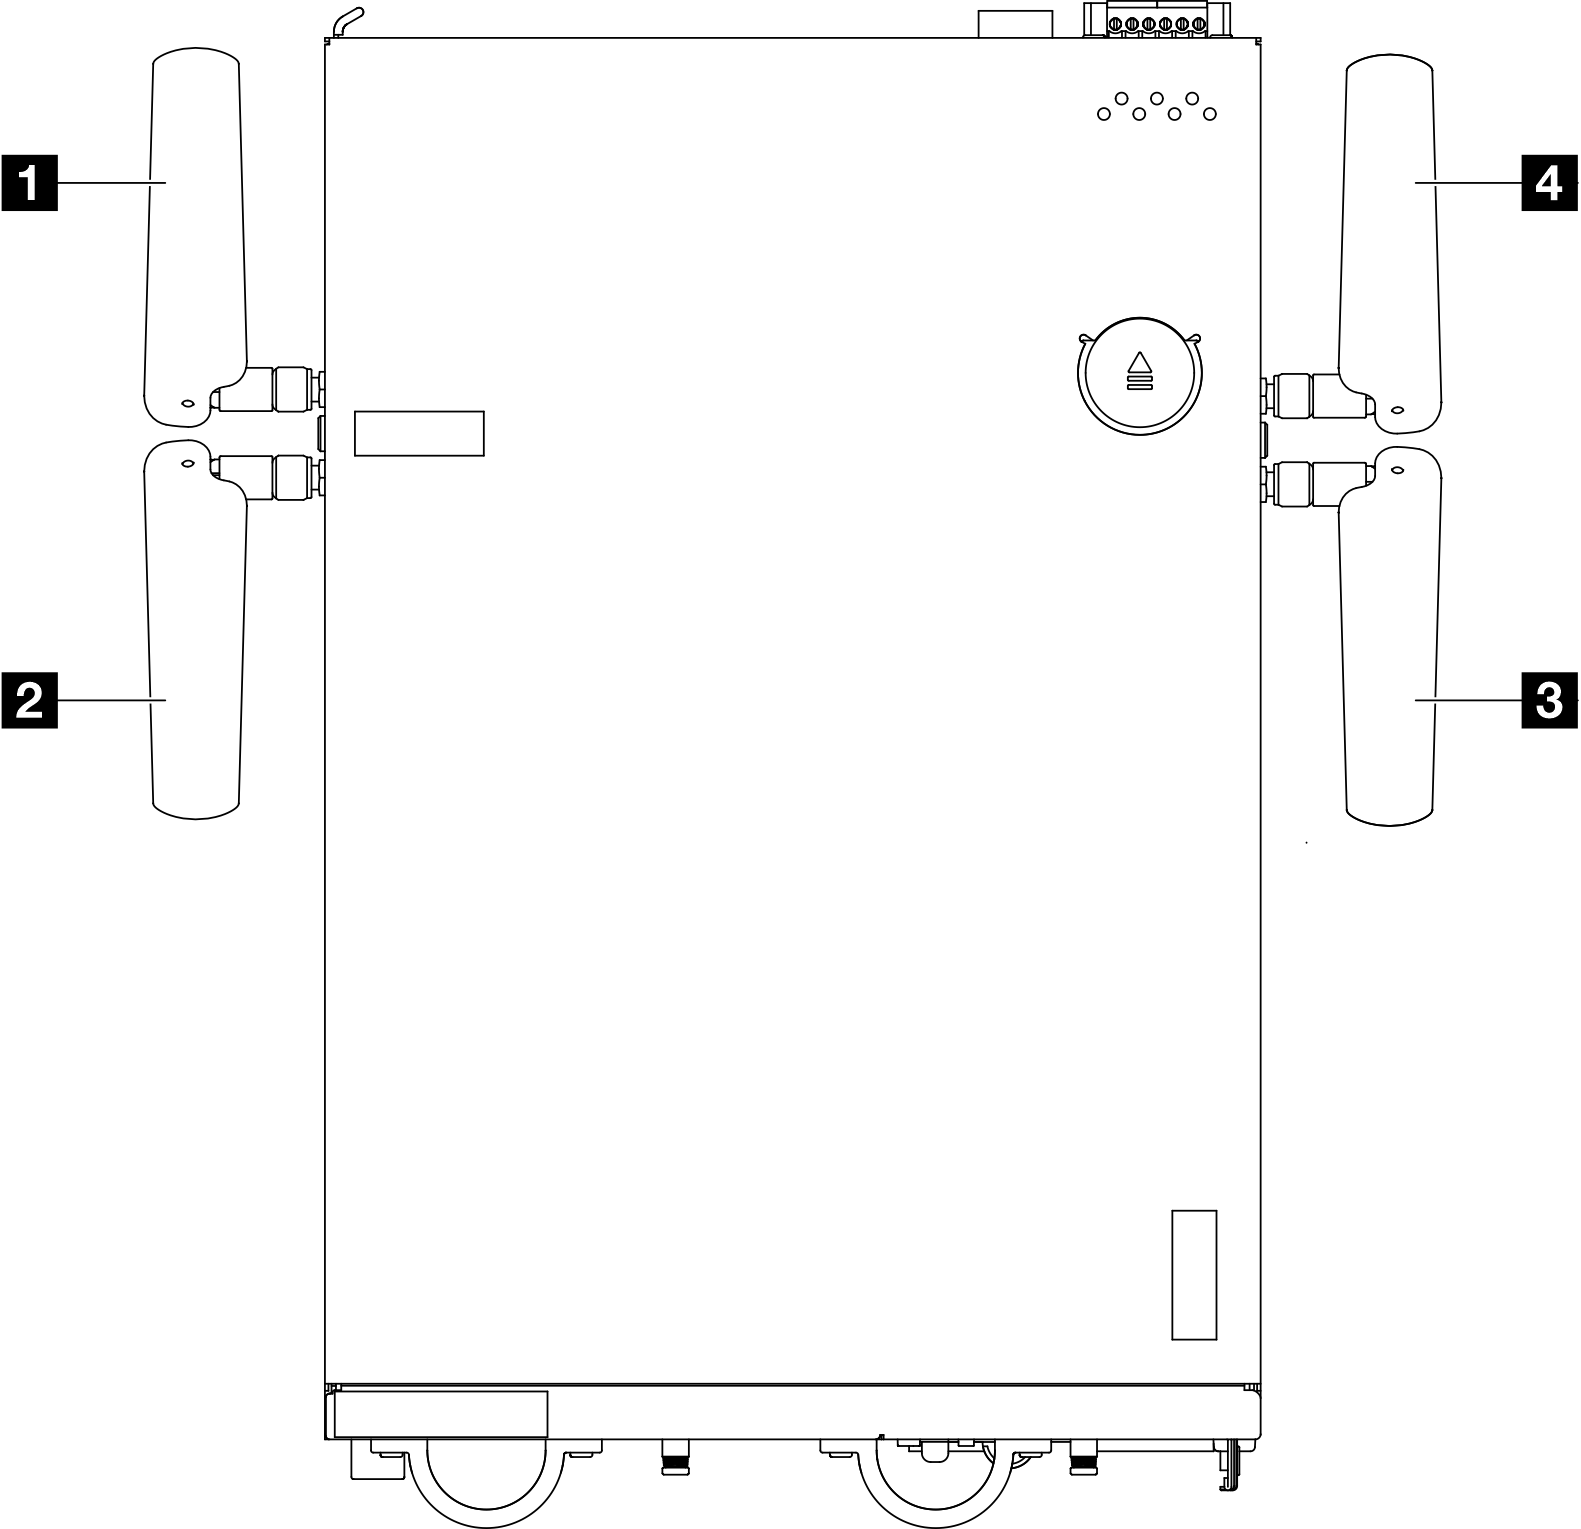 Adjust the angle of the antennas according to the operating environment for better performance.
1 Antenna 1 (XCC WLAN) 4 Antenna 4 (x86 WLAN) 2 Antenna 2 (XCC WLAN) 3 Antenna 3 (x86 WLAN) Minimal requirement Recommended angle 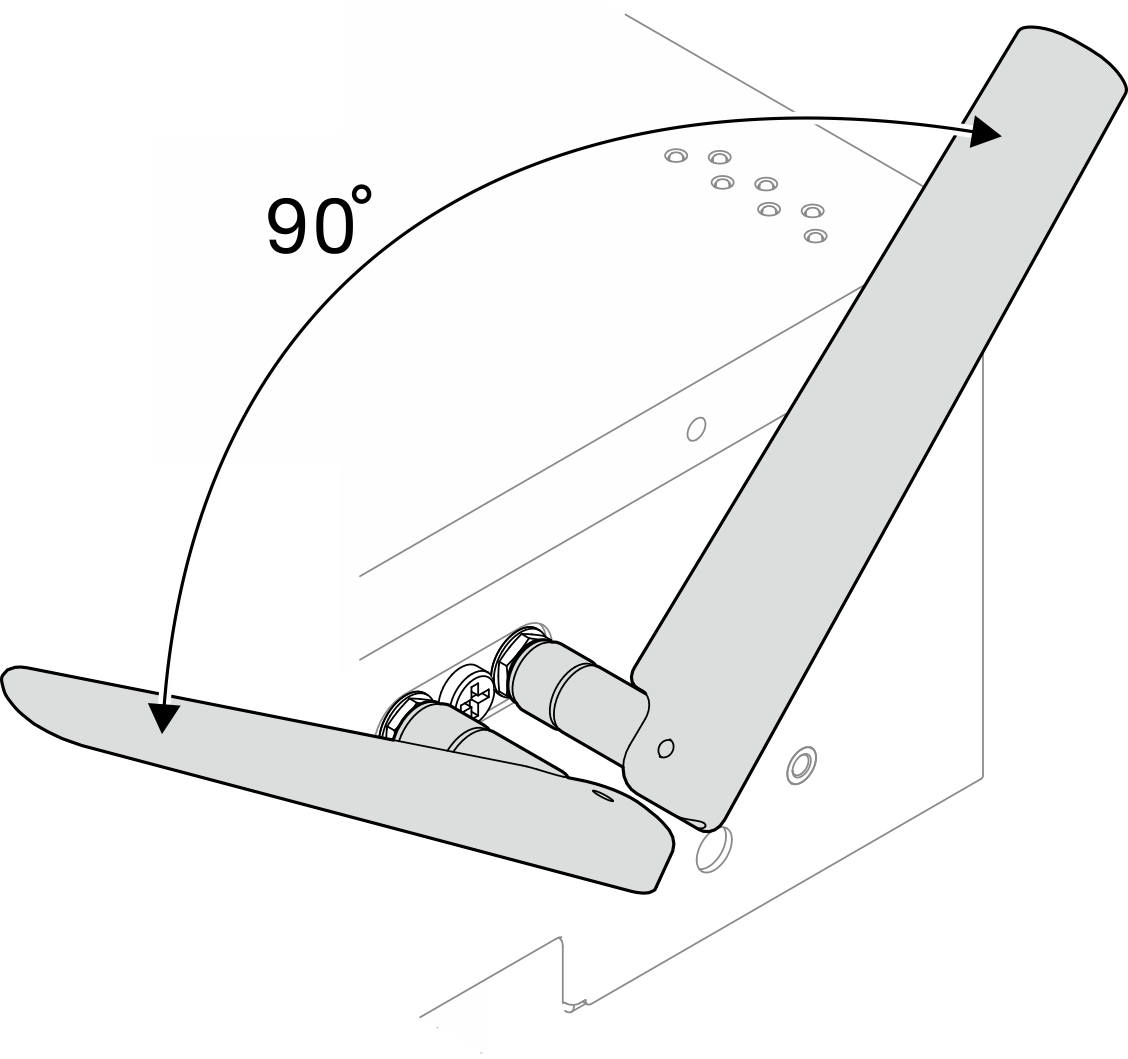
Keep two WLAN antennas away from each other at an angle not less than 90° to avoid signal interference.

For better performance, adjust the antennas away from the chassis at a 45° angle.
Move the server to an area with less RF noise or a location without shields (metal parts).
Move the server closer to the WLAN AP router.
Adjust the WLAN router’s frequency to a channel with less RF noise.
Adjust the direction of the router’s antennas with some positioned vertically and some positioned horizontally.
WLAN networking performance will be affected when multiple devices are connected to the same channel at the same time. Change the frequency and channel of the WLAN router, use a WLAN extender to help spread out the signal, or use a router with a more powerful signal.
If x86 WLAN is not stable, check the status of the x86 WLAN module (Intel AX210).
NoteThe x86 WLAN module (Intel AX210) officially supports Microsoft Windows Server operating system.
Some non-Windows operating systems with corresponding inbox driver might be able to support the x86 WLAN module (Intel AX210). For a list of operating systems supporting Intel AX210, see ThinkEdge SE360 V2 Product Guide on Lenovo Press website.
- Use one of the following method to open Device Manager:
- Search for from the search bar.
- Go to .
- Go to and locate Intel AX210.
- Go to tag and check the driver version which is displayed. If the driver version is not the latest, update the driver. See Update the driver.
To check the status of x86 WLAN, implement the following commands in Command Prompt:
For Linux:
ipconfig //**check if WLAN is ready**//ping -I wlan0 8.8.8.8 //**check if WLAN connection is functioning **//
For Microsoft Windows:
ping -S [x86_WLAN IP address] [destination IP address] //**For example, ping -S 192.168.7.7 8.8.8.8**//
x86 WLAN does not work
Complete the following steps until the problem is solved.
Check the status of the x86 WLAN module (Intel AX210).
NoteThe x86 WLAN module (Intel AX210) officially supports Microsoft Windows Server operating system.
Some non-Windows operating systems with corresponding inbox driver might be able to support the x86 WLAN module (Intel AX210). For a list of operating systems supporting Intel AX210, see ThinkEdge SE360 V2 Product Guide on Lenovo Press website.
- Use one of the following method to open Device Manager:
- Search for from the search bar.
- Go to .
- Go to and locate Intel AX210. If Intel AX210 is not shown in , install the driver for Intel AX210. See Install the driver.
- Go to tag and check the driver version which is displayed. If the driver version is not the latest, update the driver. See Update the driver.
- If Intel AX210 is still not shown in Device Manager after installing the driver, reseat the following components, one at a time, in the order shown. Restart the server after reseating each component.
- Wireless adapter
- x86 WLAN module (Intel AX210)
- If the problem remains, replace the following components, one at a time, in the order shown. Restart the server after replacing each component.
- Wireless adapter
- x86 WLAN module (Intel AX210)
XCC WLAN does not work
Complete the following steps until the problem is solved.
Check the status of the wireless AP.
Make sure that the wireless AP is active and working properly.
Check if other devices can access to the wireless AP.
Check the status of XCC WLAN feature.
Check if XCC WLAN feature is enabled.
Before connecting XCC to WLAN, set the network connection for XCC to access and enable XCC WLAN feature. See Set the network connection for the Lenovo XClarity Controller.
To enable XCC WLAN feature, see XCC WLAN configuration.
Check if XCC WLAN connects to WLAN successfully. If not, check if the required information for WLAN connection is correct.
If WLAN connection is successfully established, but the problem remains, check the WLAN connection status to find the possible problem and resolve it. Go to for WLAN connection status.
Check if the IP assignment from DHCP is successful.
Check the network settings, like IPv4, netmask, gateway, DNS.
Check if an IP address conflict happens.
If the problem remains but the hardware appears to be working, the network administrator must investigate other possible causes of the problem.