Remove a heat sink
Follow instructions in this section to remove a heat sink. This task requires a Torx T20 driver. The procedure must be executed by a trained technician.
About this task
Read Installation Guidelines and Safety inspection checklist to ensure that you work safely.
If applicable, remove the security bezel. See Remove the security bezel.
Power off the server and peripheral devices and disconnect the power cords and all external cables. See Power off the server.
If the server is installed in a rack, remove the server from the rack. See Remove the server from the rack.
Procedure
- Remove the heat sink.Note
- Do not touch the contacts on the bottom of the processor.
- Keep the processor socket clean from any object to prevent possible damages.
 Fully loosen all the screws on the heat sink in the removal sequence shown on the heat-sink label.
 Carefully lift the heat sink from the processor socket.Figure 1. 1U heat sink removal
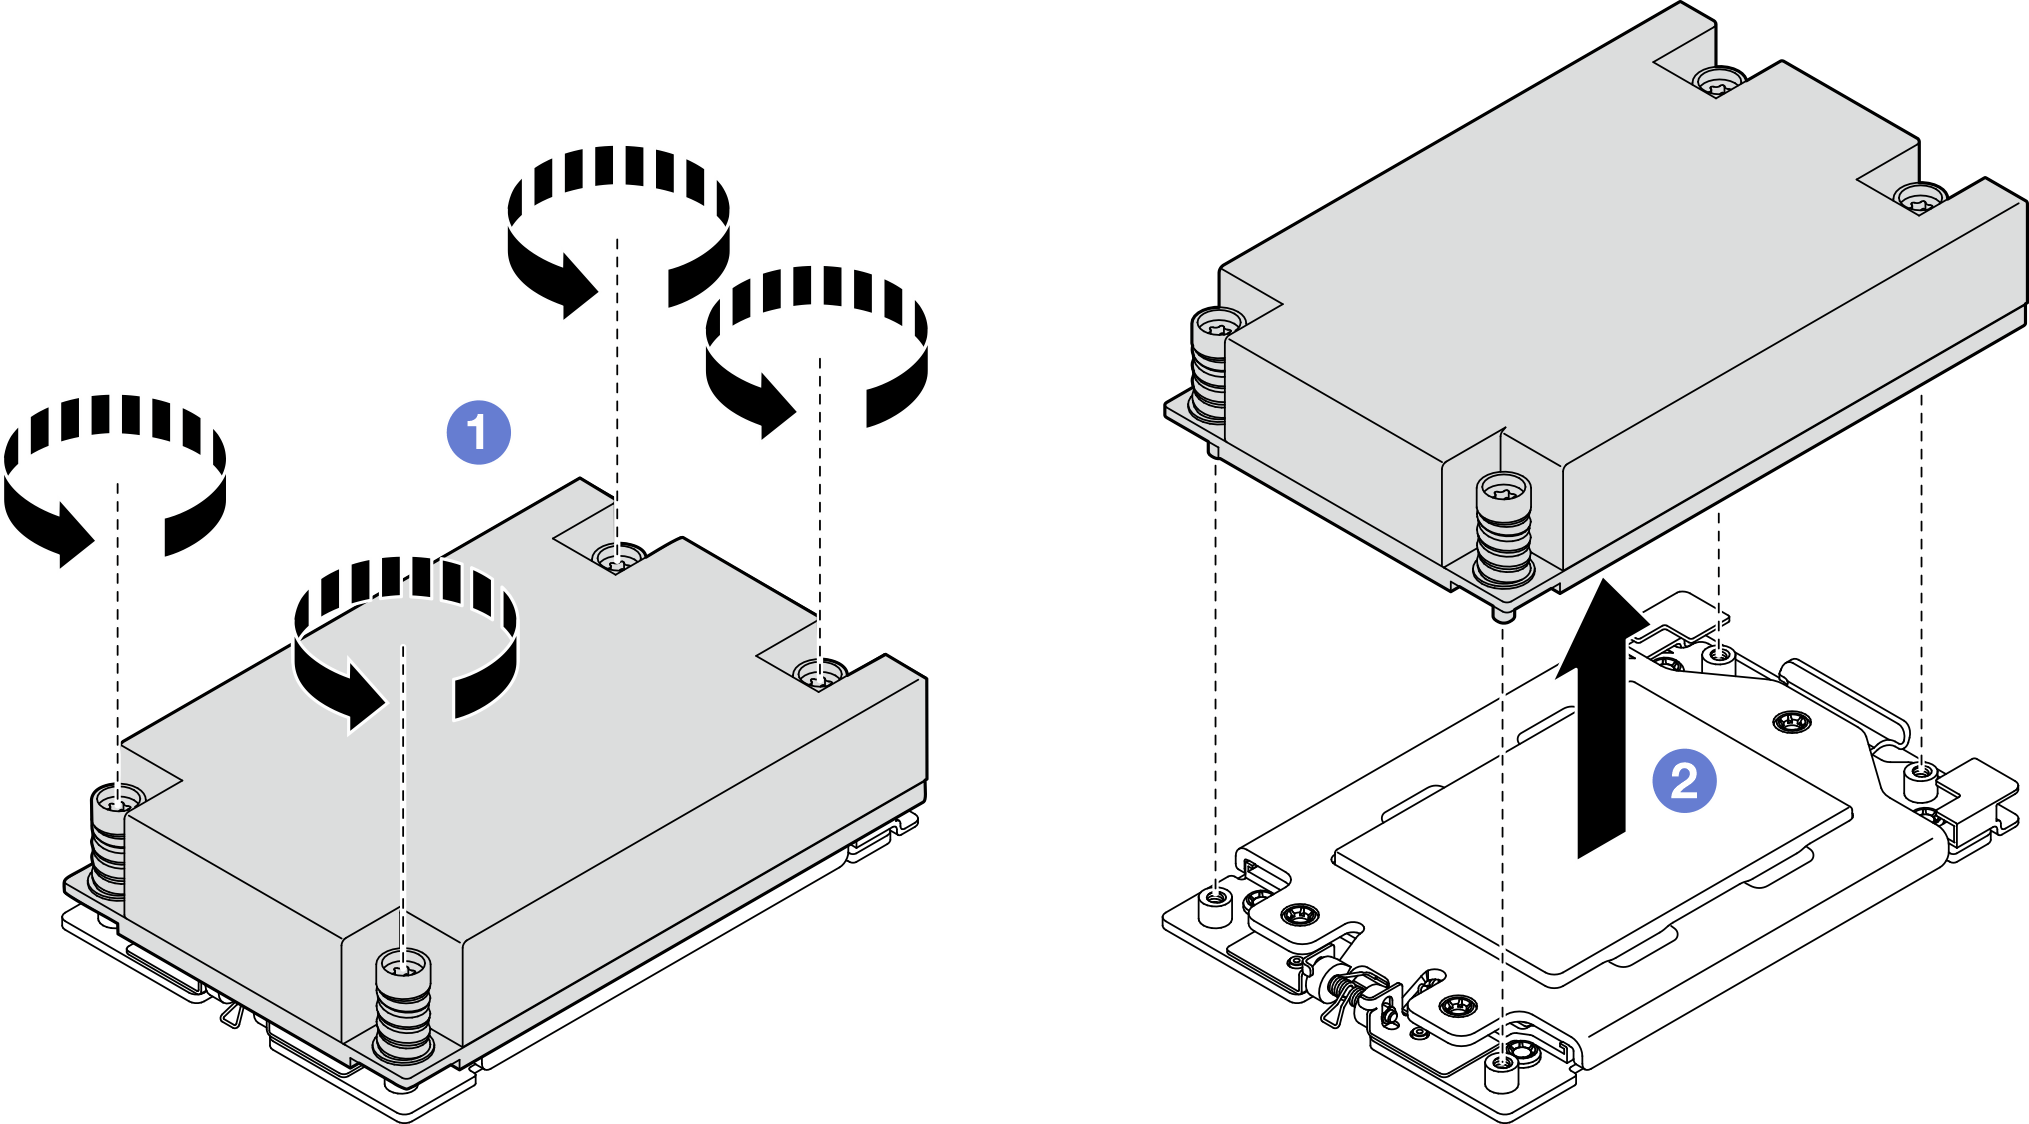 Figure 2. 2U heat sink removal
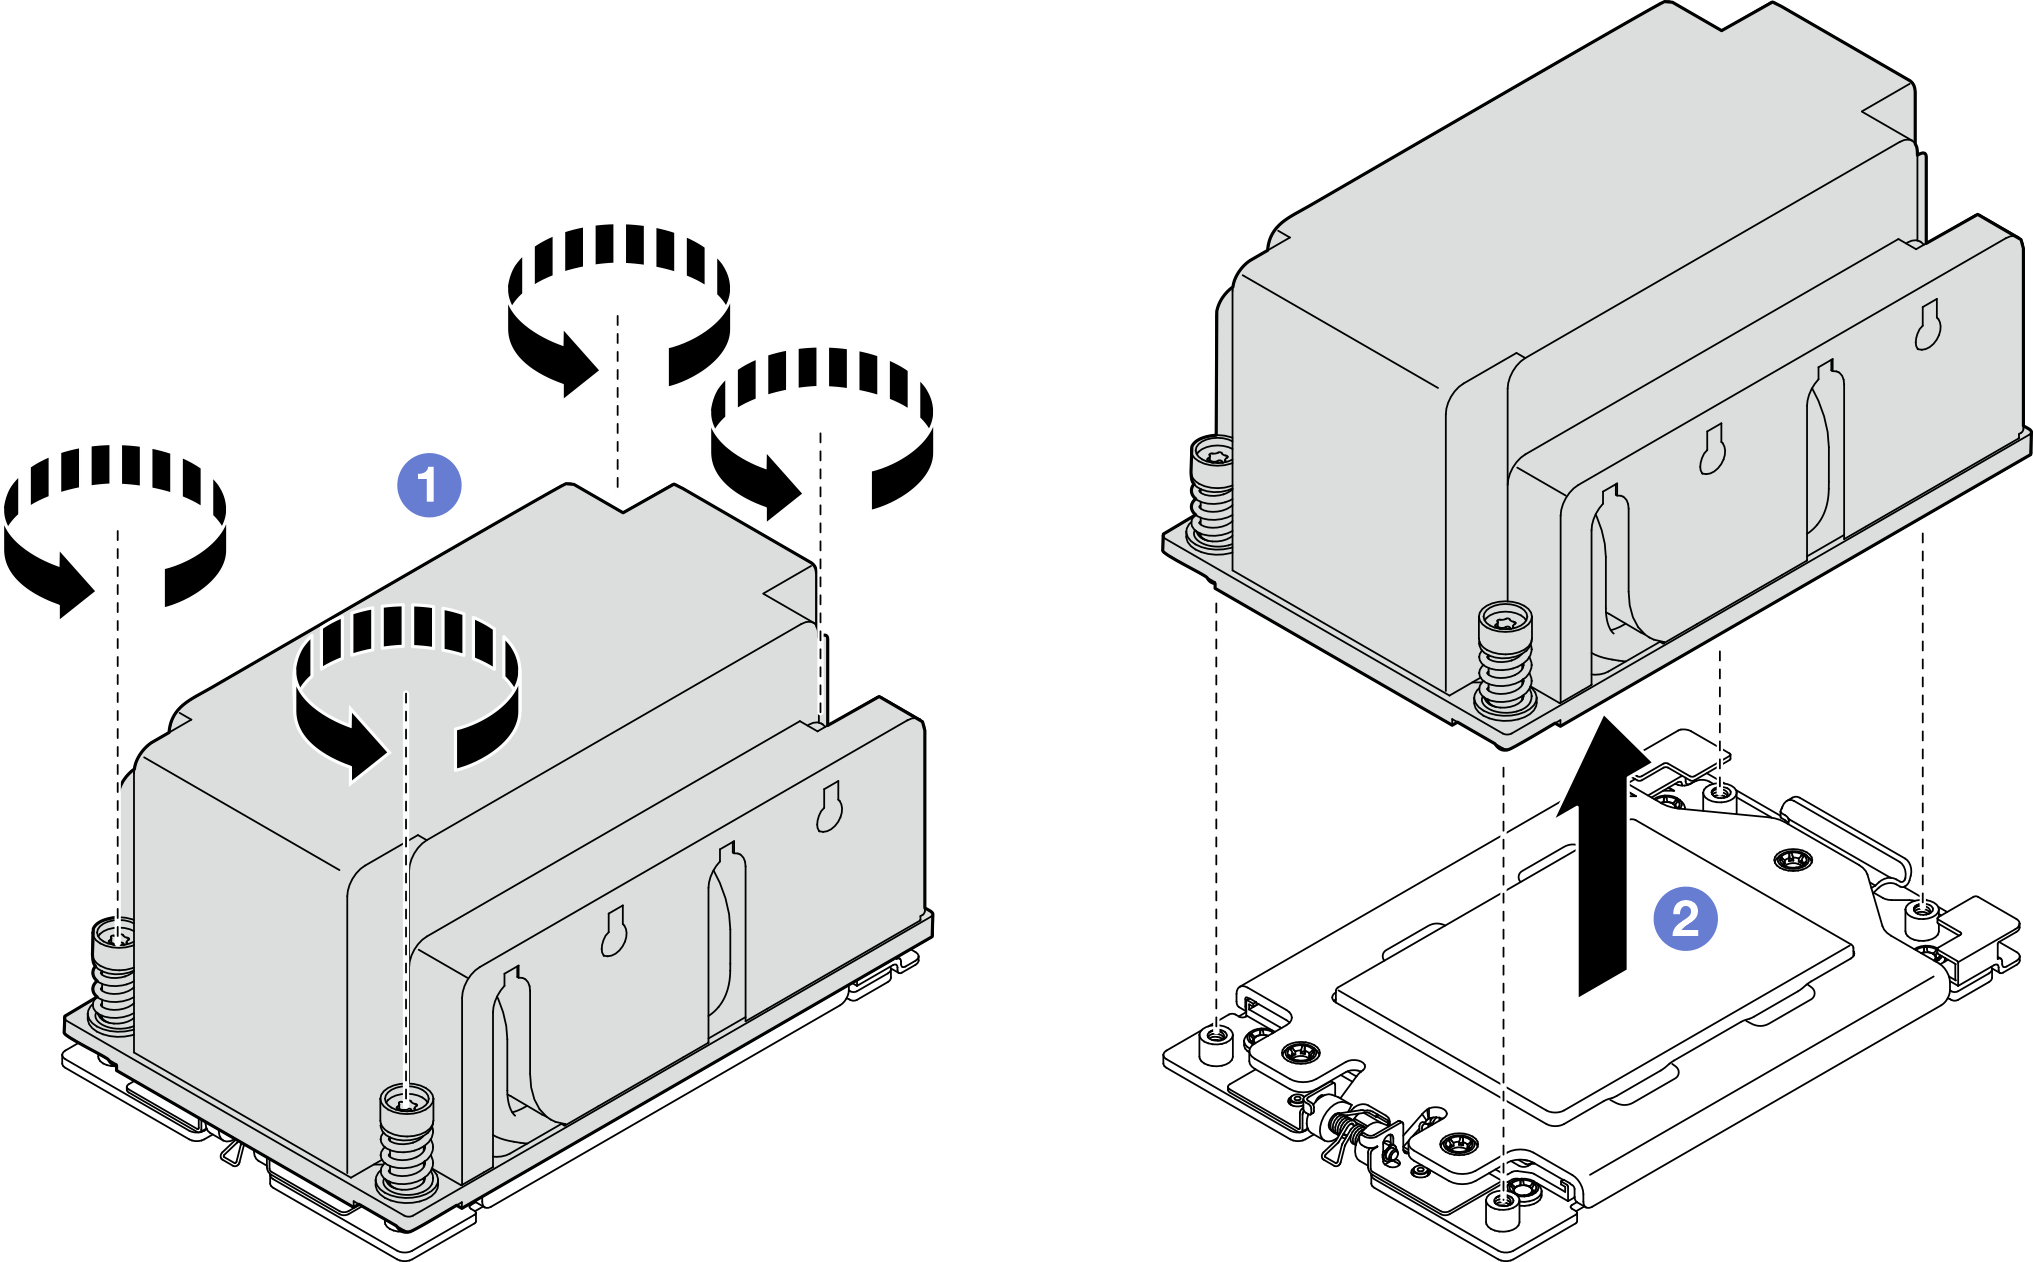
After this task is completed
If you are replacing a heat sink, install a new heat sink. See Install a heat sink.
If you are replacing a processor, remove the processor. See Remove a processor.
If you are instructed to return the component or optional device, follow all packaging instructions, and use any packaging materials for shipping that are supplied to you.
Demo Video