Install the rear 3.5-inch drive cage
Use this information to install the rear 3.5-inch drive cage.


The rear drive cage is supported on some server models at certain conditions. For detailed information, see Drive bay configurations and requirements.
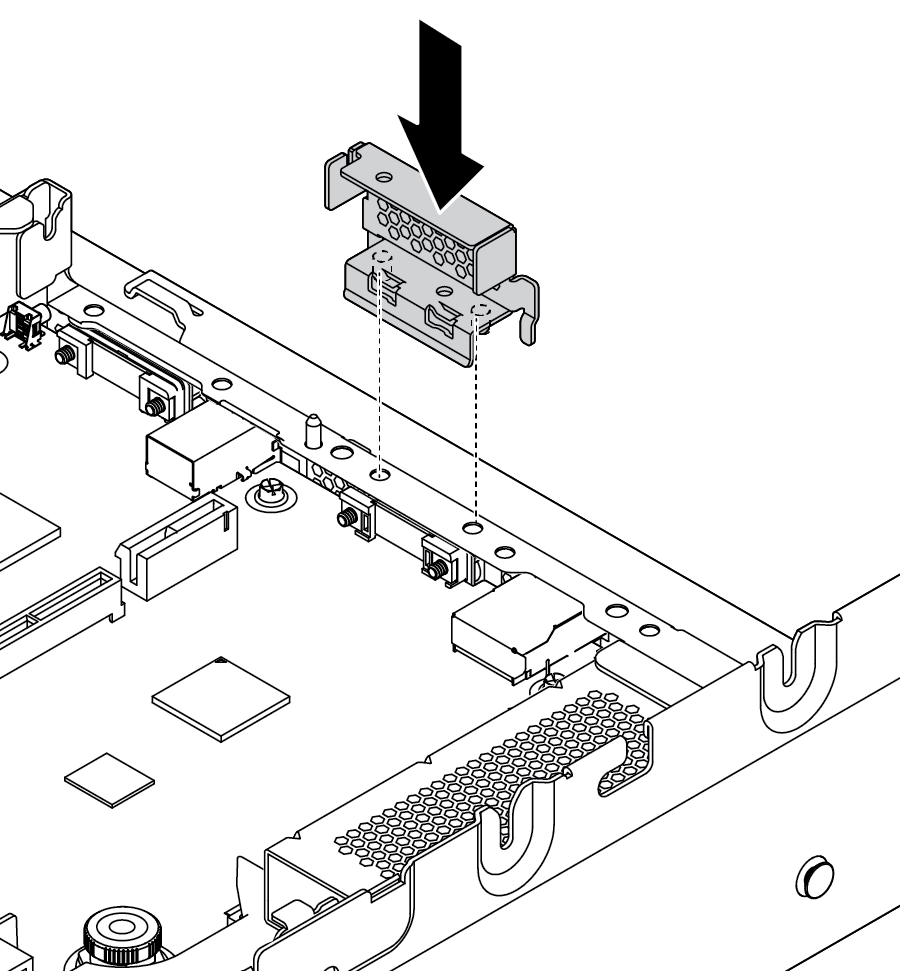
- Install the rear wall bracket.Figure 1. Installing rear wall bracket for the rear 3.5-inch drive cage
Install the required riser bracket. See Riser card replacement.
Install the performance system fans. See System fan replacement.
Install the backplane on the drive cage. See Install the middle or rear 3.5-inch-drive backplane.
To install the rear drive cage, complete the following steps:
Watch the procedure. A video of the installation and removal process is available at YouTube
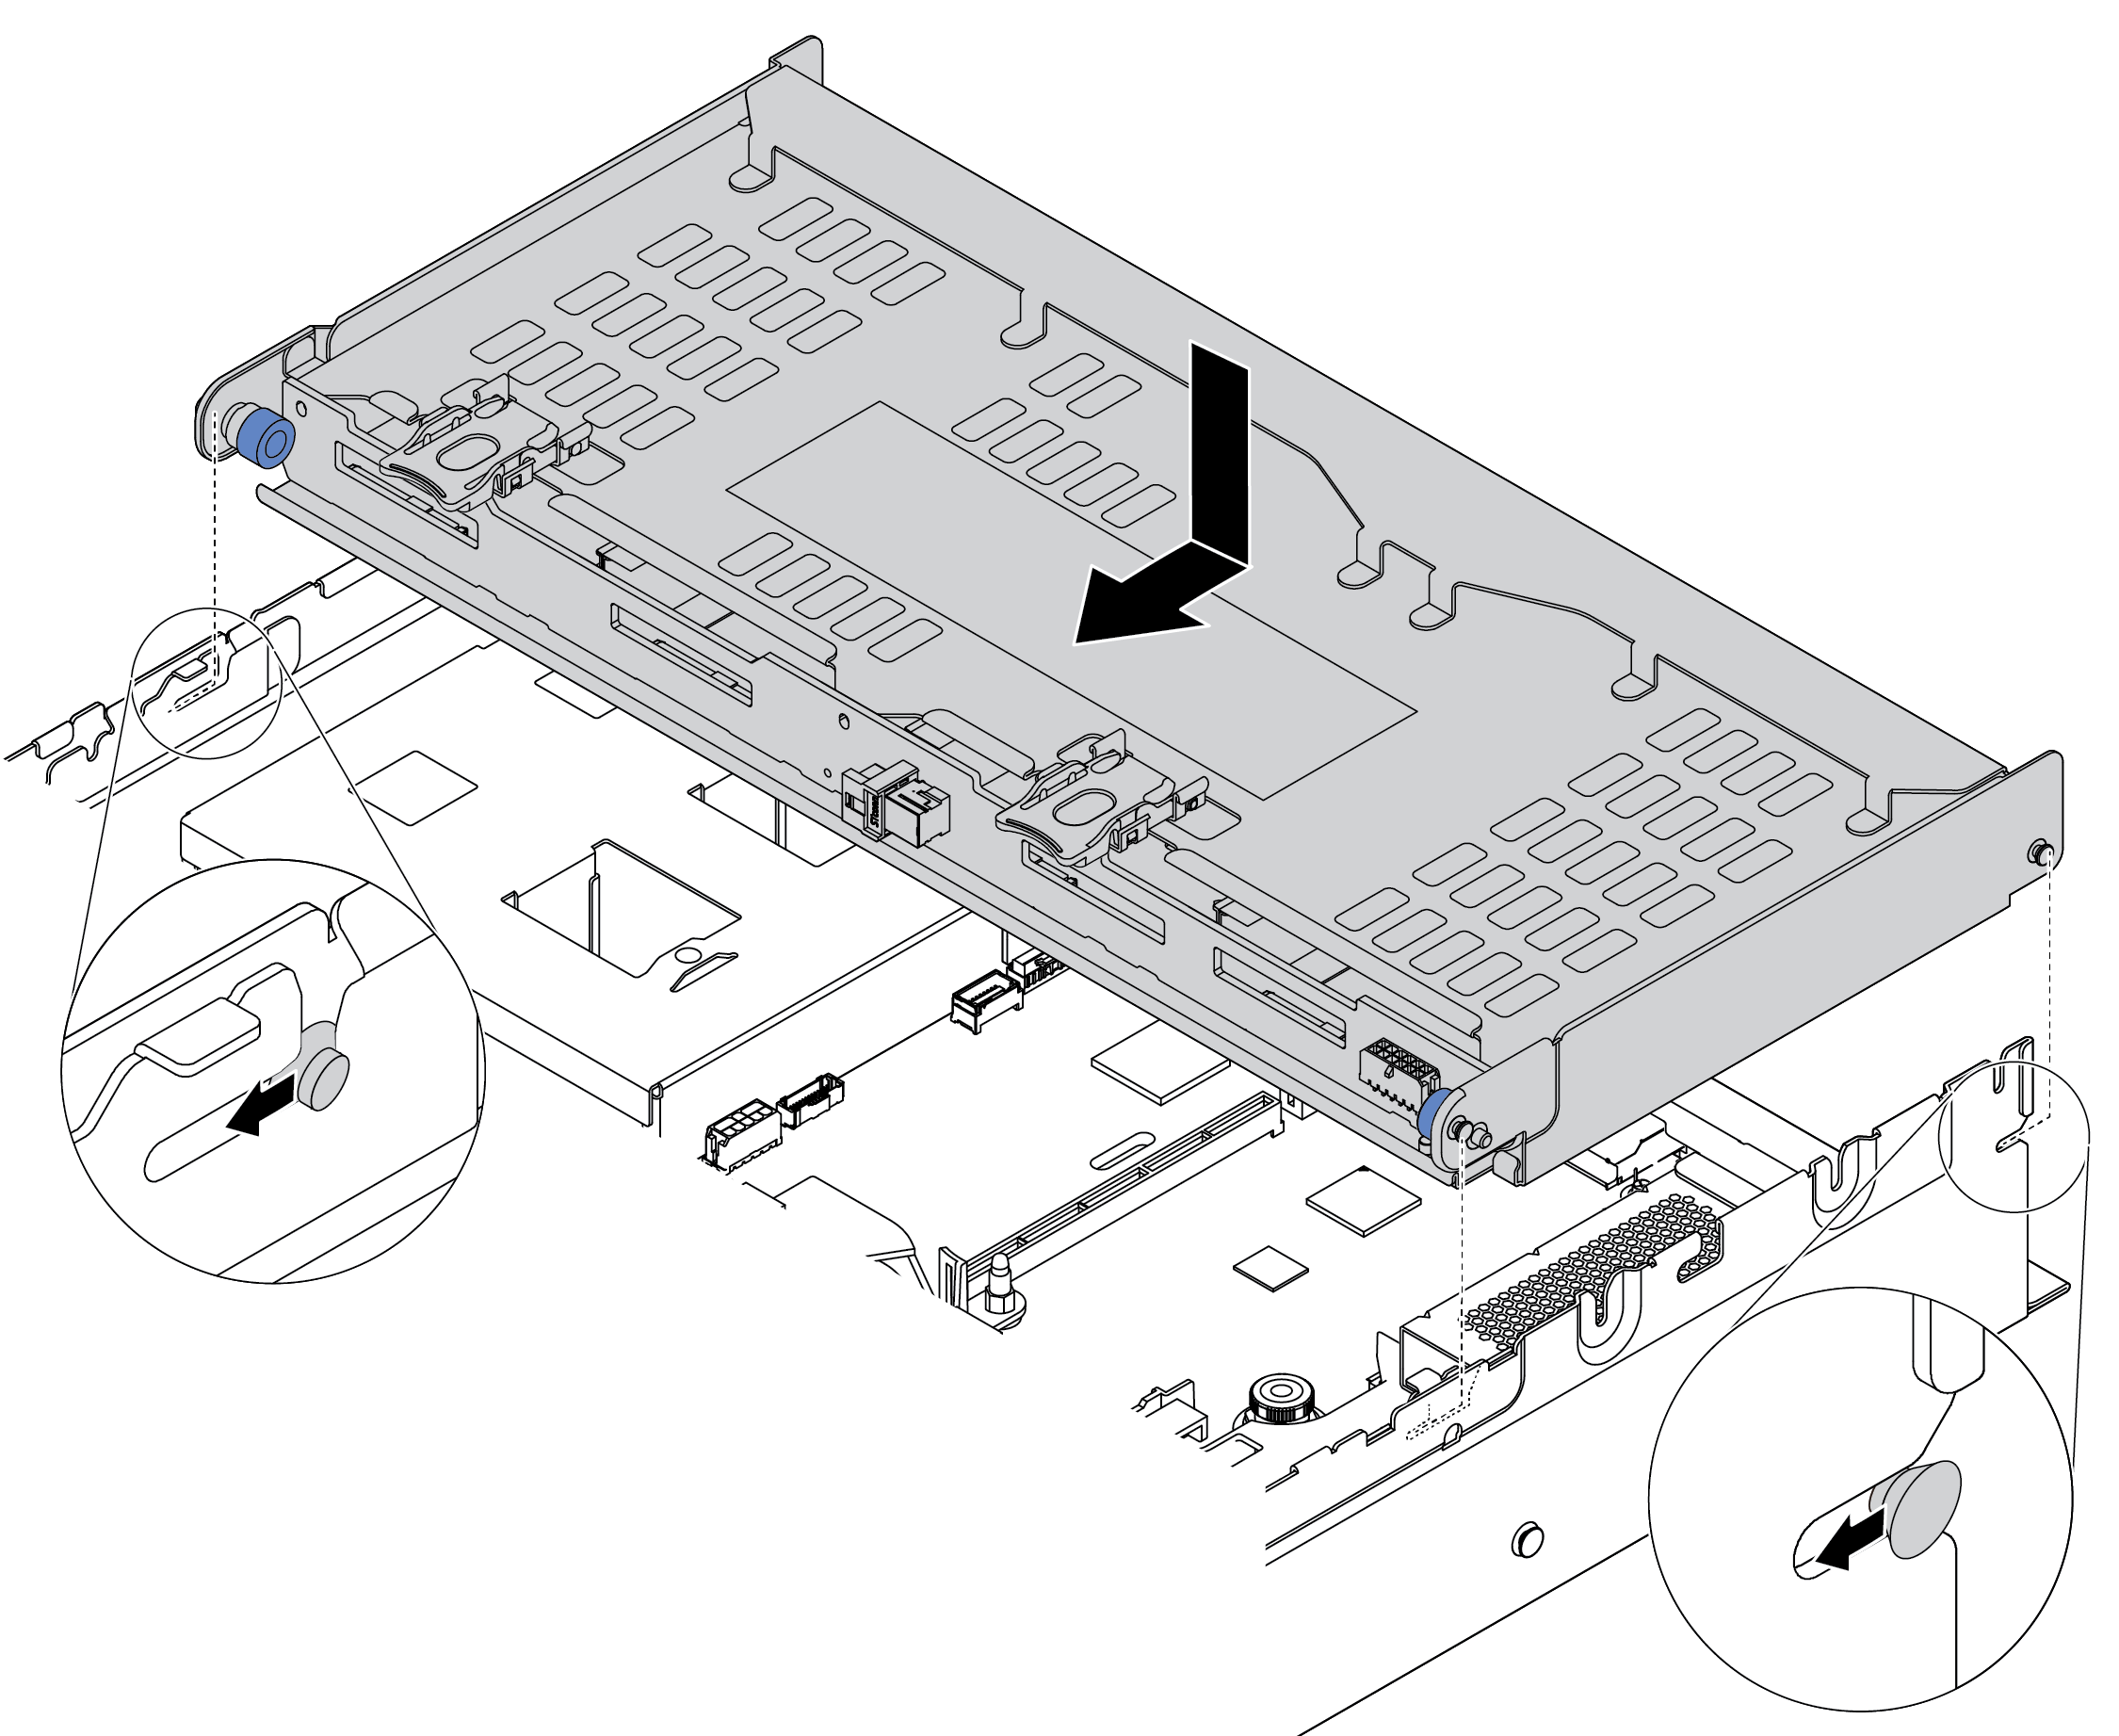
- Align the rear drive cage with the chassis, and lower the drive cage into the chassis.
- Move the rear drive cage forward until it clicks into position.
- Check and ensure that the blue plungers are latched into place to secure the rear drive cage.
Reinstall the drives or drive fillers into the rear drive cage. See Install a hot-swap drive.
Connect cables to the rear drive cage. See Backplanes.
Complete the parts replacement. See Complete the parts replacement.
Demo video