
Install a hard disk drive backplane (lower tray)

Hard disk drive backplanes in the lower compute tray are accessed from the front of the server. There are several types of hard disk drive backplane. Steps that are backplane specific are noted in each procedure.

S002
disconnect all power
CAUTION
The power-control button on the device and the power switch on the power supply do not turn off the electrical current supplied to the device. The device also might have more than one power cord. To remove all electrical current from the device, ensure that all power cords are disconnected from the power source.
CAUTION
Make sure that all server power cords are disconnected from their power sources before performing this procedure.

Complete the following steps to install a hard disk drive backplane in the lower compute tray.

  1. Connect the power and data cables to the hard disk drive backplane. See Cable routing for drives.
    1. Connect the power cable to the backplane. If this cable is connected to the storage interposer, you might find it easier to disconnect it from the storage interposer and then reconnect it to the storage interposer after the backplane is installed.
    2. Connect the data cables to the backplane. (SAS backplanes have only one data cable. NVMe backplanes have two data cables.)
  2. Install the hard disk drive backplane.
    Note
    Existing cables might need to be removed from their retaining clips or moved to the side to install the backplane.
    Figure 1. Hard disk drive backplane (lower) installation
    Lower hard disk drive backplane installation

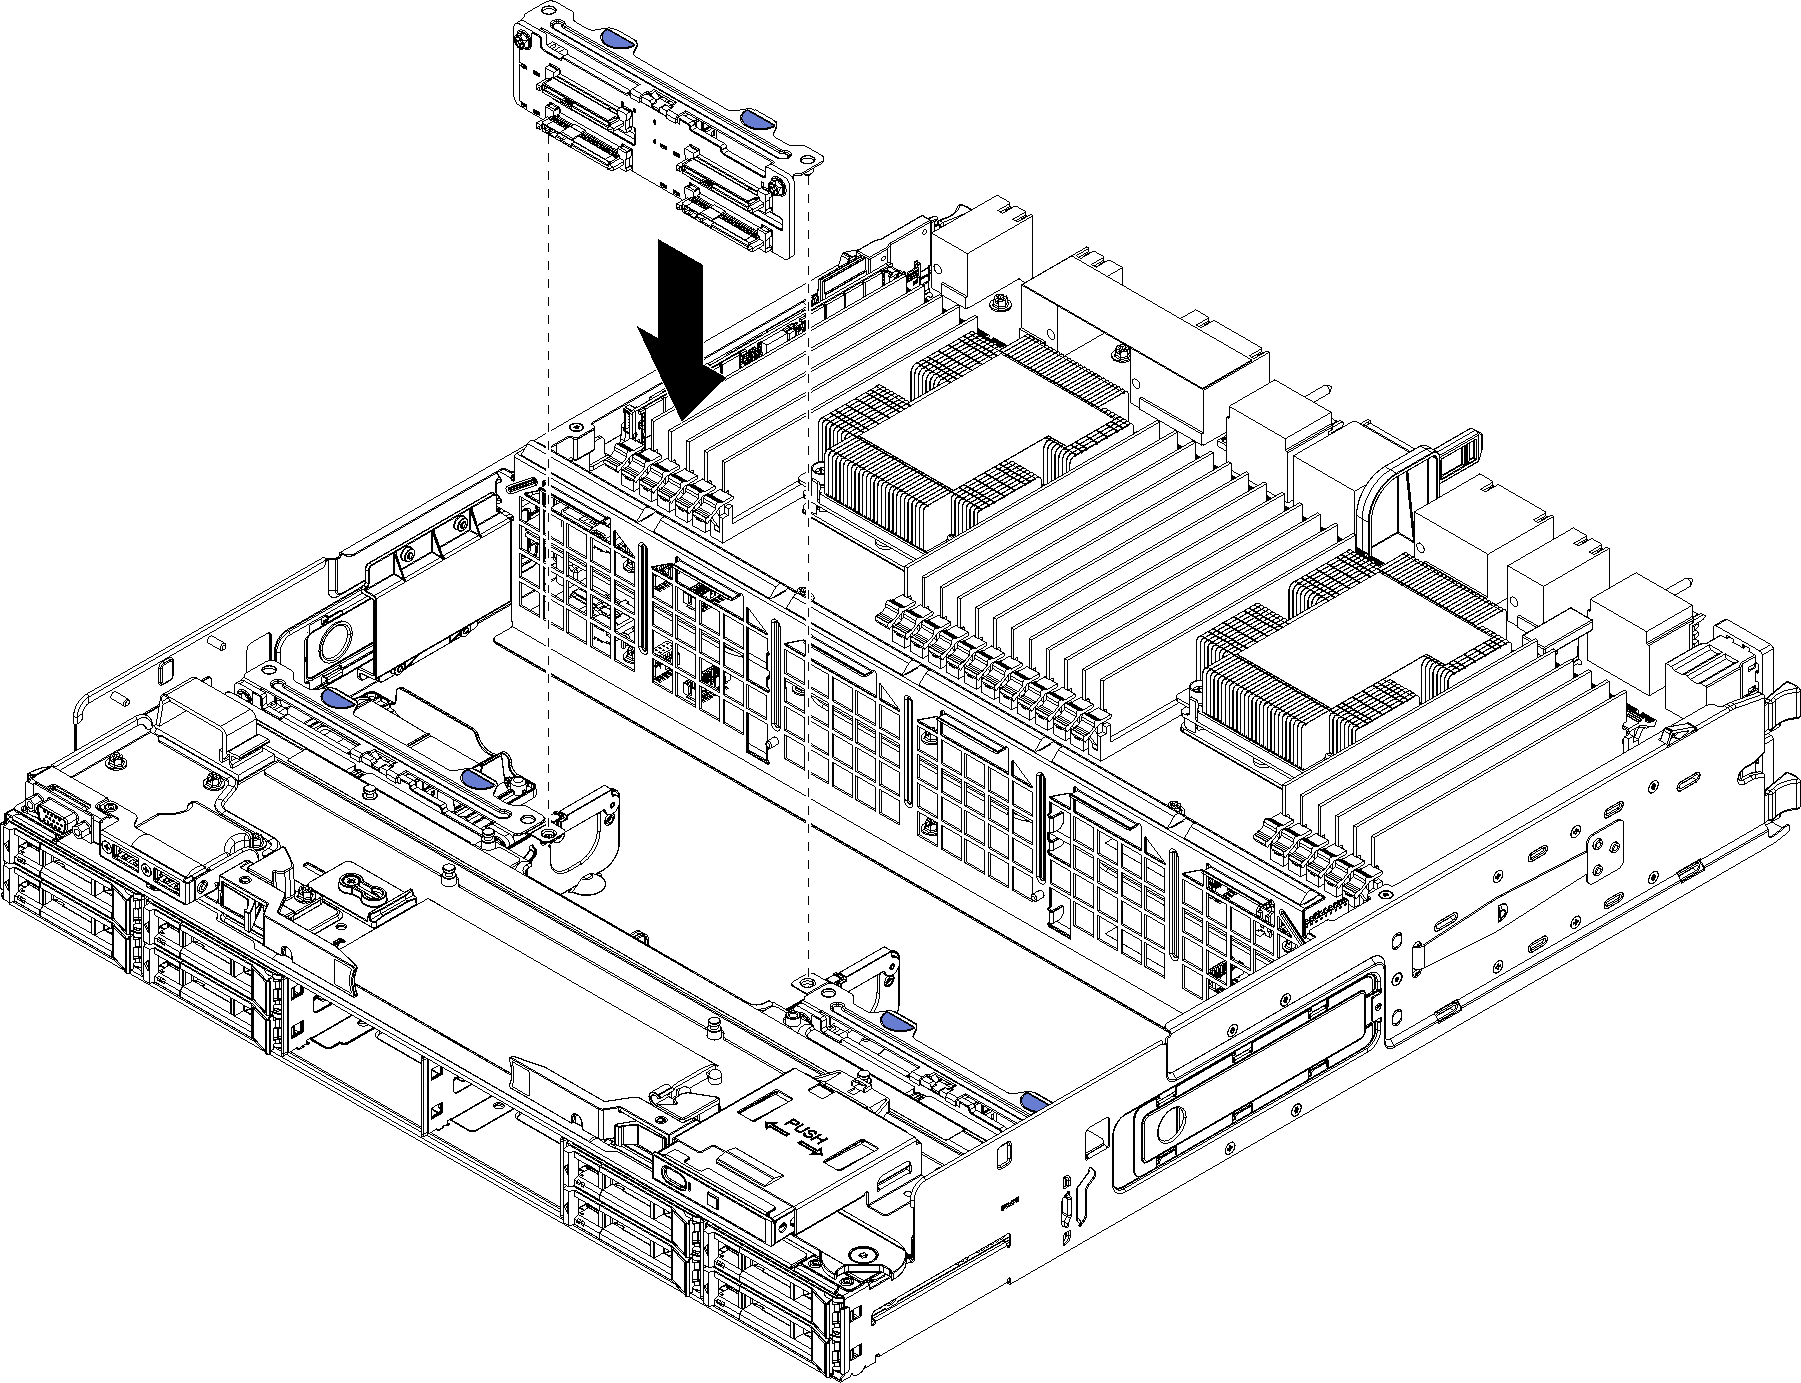
    Align the backplane with its location in the server; then, insert the backplane and push it down until it is fully seated.

  3. Repeat 1 and 2 for each hard disk drive backplane being installed in the lower compute tray.
  4. Route and connect the data cables. See Cable routing for drives.
    • Route each SAS data cable to its connector on the RAID adapter; then, connect the SAS cable.

    • Route each NVMe data cable to its connector on the compute system board; then, connect the NVMe cable.

  5. Make sure that all power cables are connected to the storage interposer.
  6. Route any cables that were moved to access the backplanes and connectors.

After you install a hard disk drive backplane:

  1. Install the storage interposer and connect all cables. See Install a storage interposer (lower tray).

  2. Make sure that all of the cables are correctly routed after they have been connected.

  3. Install the fan cage. See Install a fan cage (lower tray).

  4. Install the lower compute tray. See Install a compute tray.

  5. Install any hard disk drives that you removed from the lower compute tray. Each drive should be installed in its original location. See Install a hard disk drive.

  6. Install the front cover. See Install the front cover.

Demo video

Watch the procedure on YouTube