Install the M.2 boot adapter

Use this information to install the M.2 boot adapter.

About this task

S002
disconnect all power
CAUTION
The power-control button on the device and the power switch on the power supply do not turn off the electrical current supplied to the device. The device also might have more than one power cord. To remove all electrical current from the device, ensure that all power cords are disconnected from the power source.
Attention
  • Read Installation guidelines to ensure that you work safely.

  • Power off the server and disconnect all power cords for this task.

  • Prevent exposure to static electricity, which might lead to system halt and loss of data, by keeping static-sensitive components in their static-protective packages until installation, and handling these devices with an electrostatic-discharge wrist strap or other grounding system.

Procedure

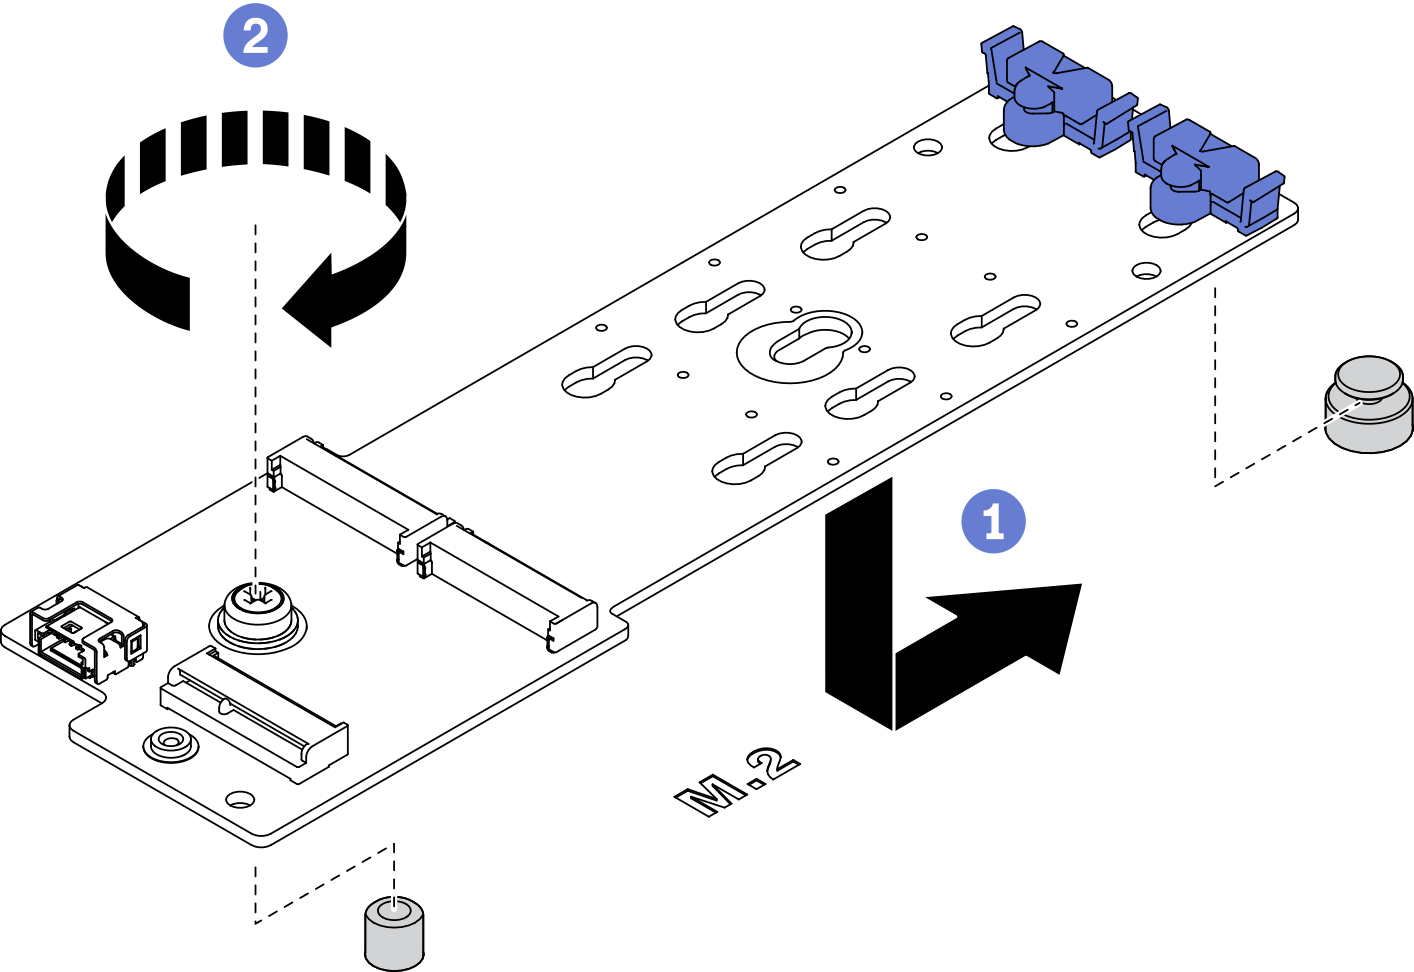
  1. Install the M.2 boot adapter.
    Figure 1. M.2 boot adapter installation
    M.2 boot adapter installation
    1. Insert the M.2 boot adapter into the chassis as shown.
    2. Tighten the screw to secure the M.2 boot adapter to the chassis.
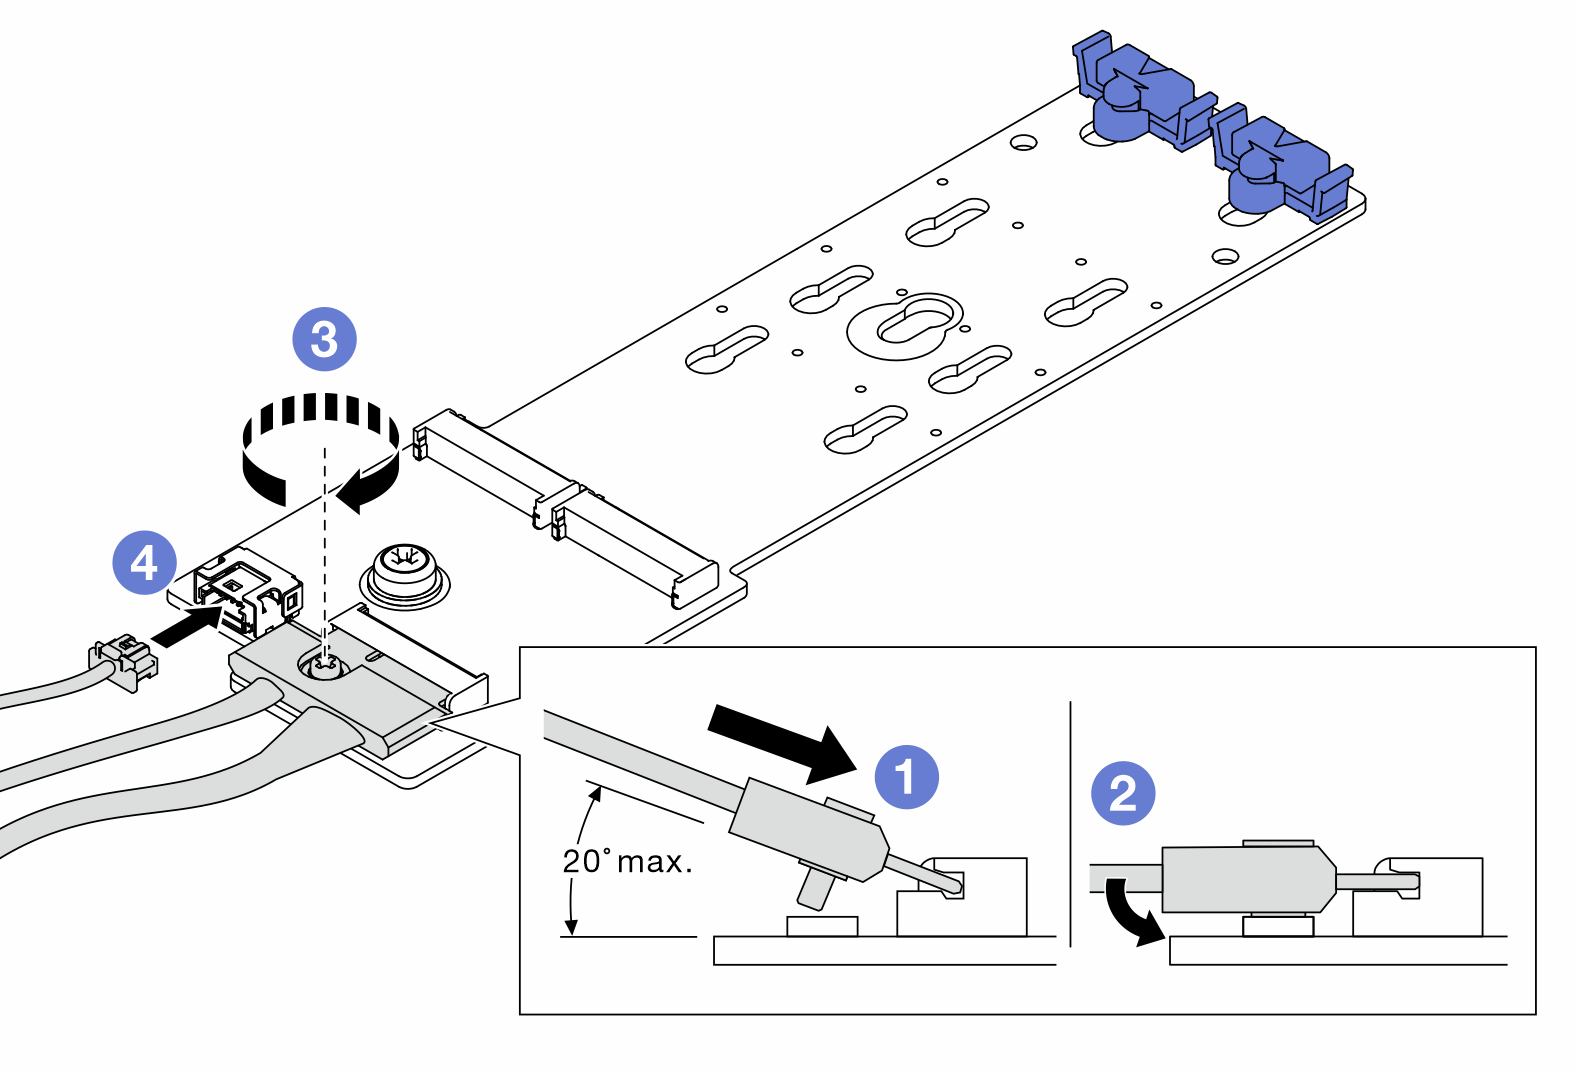
  2. Connect the cables to the M.2 boot adapter.
    Figure 2. Connecting M.2 cables
    Connecting M.2 cables
    1. Tilt the connector at an angle of 20 degrees or lower, and insert it until its bottom surface reaches the ramp.
    2. Press the connector down flat.
    3. Tighten the screw on the signal cable.
    4. Connect the power cable.
  3. Connect the power cable and the signal cable to the system board. See M.2 boot adapter cable routing.

After you finish

  1. Reinstall the M.2 drives to the M.2 boot adapter. See Install an M.2 drive.

  2. Reinstall the fan cage. See Install the fan cage assembly.

  3. Reinstall all the fans. See Install a hot-swap fan.

  4. Reinstall all the full-length GPU adapters. See Install a full-length GPU adapter.

  5. Reinstall the air baffle. See Install the air baffle.

  6. Reinstall all the flash power modules. See Install a flash power module.

  7. Reinstall the server cover. See Install the server cover.

  8. Complete the parts replacement. See Complete the parts replacement.

Demo video
Watch the procedure on YouTube