Install an M.2 boot adapter
Follow the instructions in this section to install an M.2 boot adapter.
About this task
Read Installation Guidelines and Safety inspection checklist to ensure that you work safely.
Power off the server and disconnect all power cords for this task. See Power off the server.
Prevent exposure to static electricity, which might lead to system halt and loss of data, by keeping static-sensitive components in their static-protective packages until installation, and handling these devices with an electrostatic-discharge wrist strap or other grounding system.
When the ThinkSystem M.2 SATA/NVMe 2-Bay Enablement Kit is installed, the M.2 drives are managed by Intel VROC/VMD/SATA RAID and do not support hot-swap or LED features.
Procedure
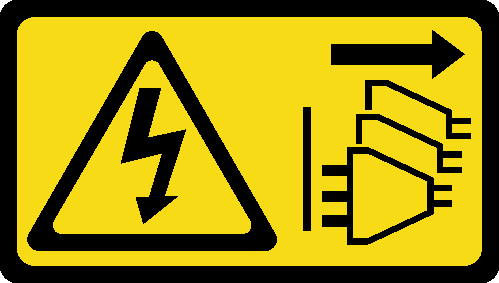
- Install the M.2 boot adapter.
 Insert the M.2 boot adapter towards the rear pin.
 Tighten the screw that secures the M.2 boot adapter to the chassis.Figure 1. Installation of an M.2 boot adapter
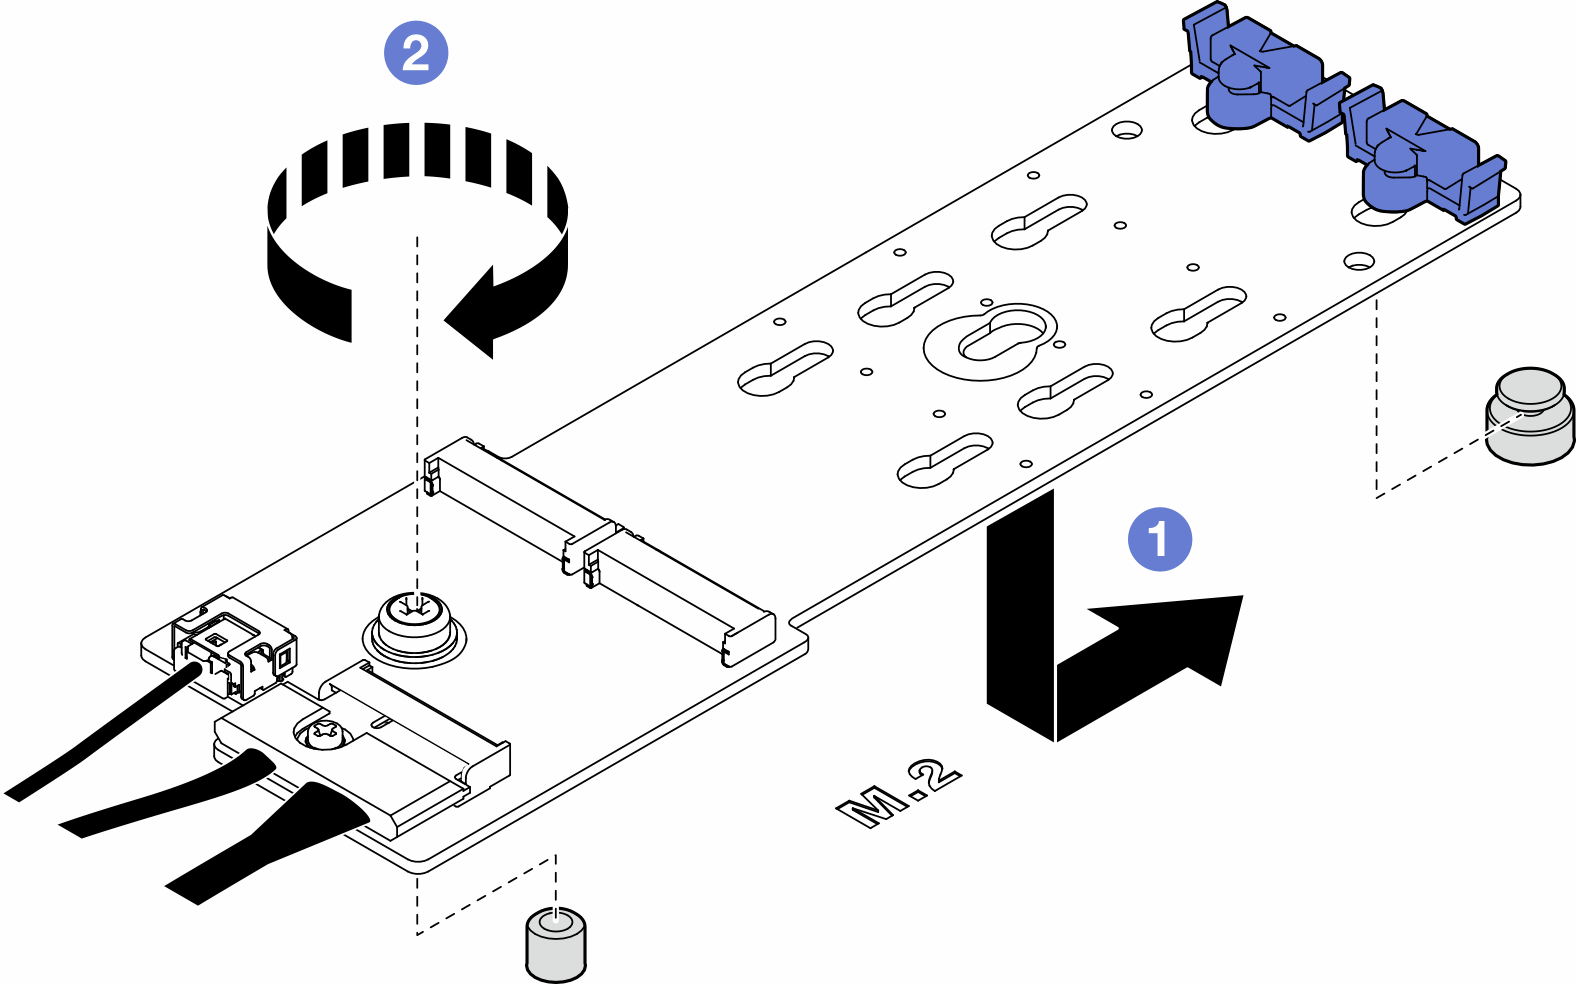
- Connect the cables to the M.2 boot adapter.
- Tilt the connector at an angle of 20 degrees or lower, and insert it until its bottom surface reaches the ramp.
- Press the connector down flat.
- Tighten the screw on the signal cable.
- Connect the power cable.Figure 2. Connecting M.2 cables to ThinkSystem M.2 SATA/NVMe 2-Bay Enablement Kit or ThinkSystem M.2 NVMe 2-Bay RAID Enablement Kit
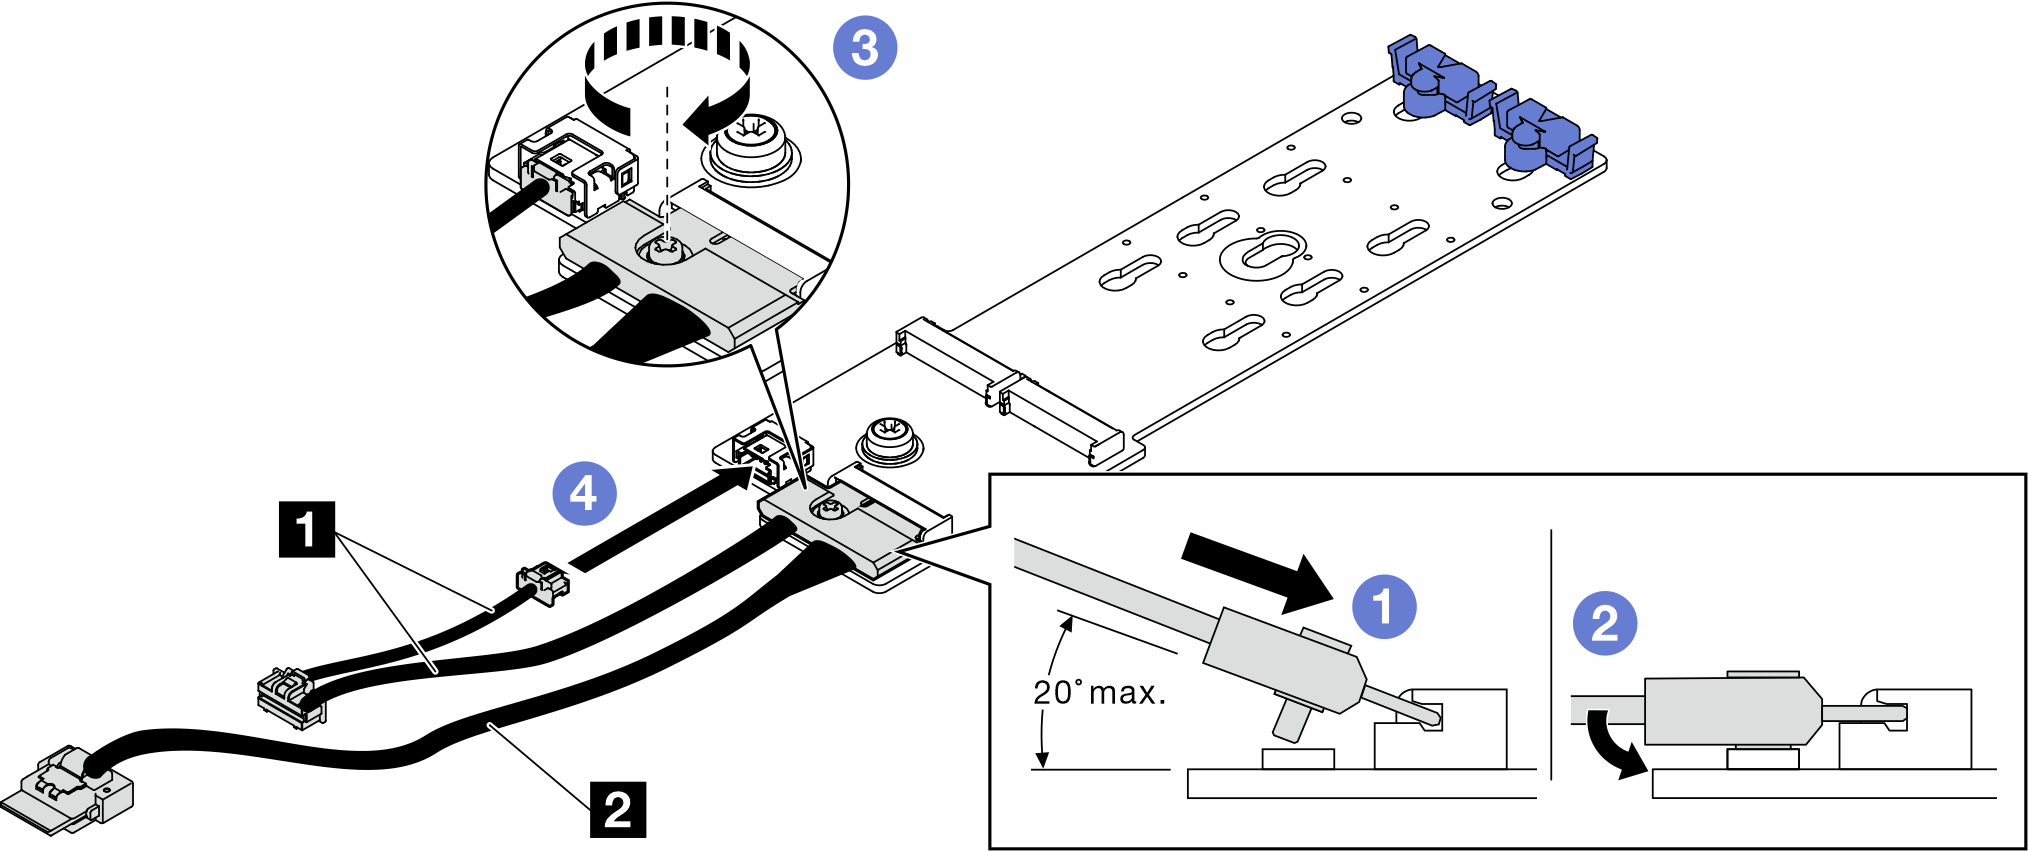
Figure 3. Connecting M.2 cables to ThinkSystem M.2 RAID B540i-2i SATA/NVMe Enablement Kit
- Connect the M.2 cable to the M.2 boot adapter.
- Rotate the latch on the cable as illustrated, and press the latch down until it clicks into place.
After this task is completed
Reinstall the server cover. See Install a server cover.
Complete the parts replacement. See Complete the parts replacement.
Demo video