Install an M.2 drive
Follow the instructions in this section to install an M.2 drive onto an M.2 boot adapter.
About this task
S002
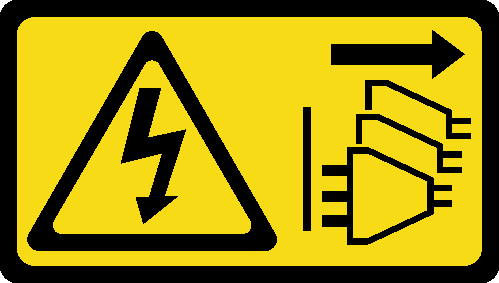
CAUTION
The power-control button on the device and the power switch on the power supply do not turn off the electrical current supplied to the device. The device also might have more than one power cord. To remove all electrical current from the device, ensure that all power cords are disconnected from the power source.
Attention
Read Installation Guidelines and Safety inspection checklist to ensure that you work safely.
Power off the server and disconnect all power cords for this task. See Power off the server.
Prevent exposure to static electricity, which might lead to system halt and loss of data, by keeping static-sensitive components in their static-protective packages until installation, and handling these devices with an electrostatic-discharge wrist strap or other grounding system.
Locate the M.2 drive slot on the M.2 boot adapter.
Note
Some M.2 adapters support two identical M.2 drives. Install the M.2 drive in slot 0 first.
Figure 1. M.2 drive slots on an M.2 adapter
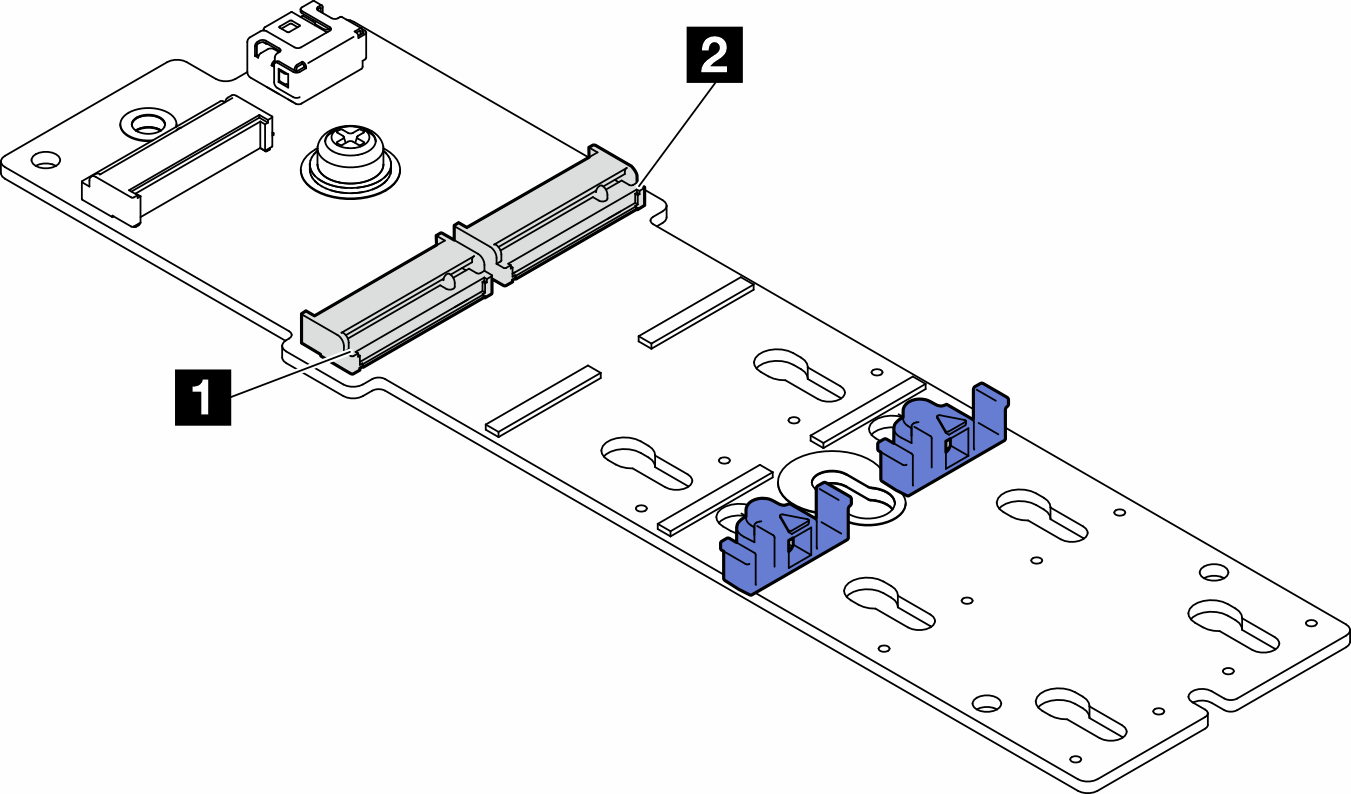
| 1 M.2 boot adapter slot 0 | 2 M.2 boot adapter slot 1 |
Procedure
- Make preparations for this task.
- Adjust the retainers on the M.2 boot adapter to accommodate the M.2 drive to be stalled. See Adjust the retainer on an M.2 boot adapter.
- Install an M.2 drive.
 Insert the M.2 drive into the slot at an angle of approximately 30 degrees .
 Pivot the M.2 drive down until the notch at the end of the M.2 drive catches on the lip of the retainer.
 Slide the retainer towards the M.2 drive to secure.NoteThe M.2 drive
might look different from the illustrations in this section Figure 2. Installation of an M.2 drive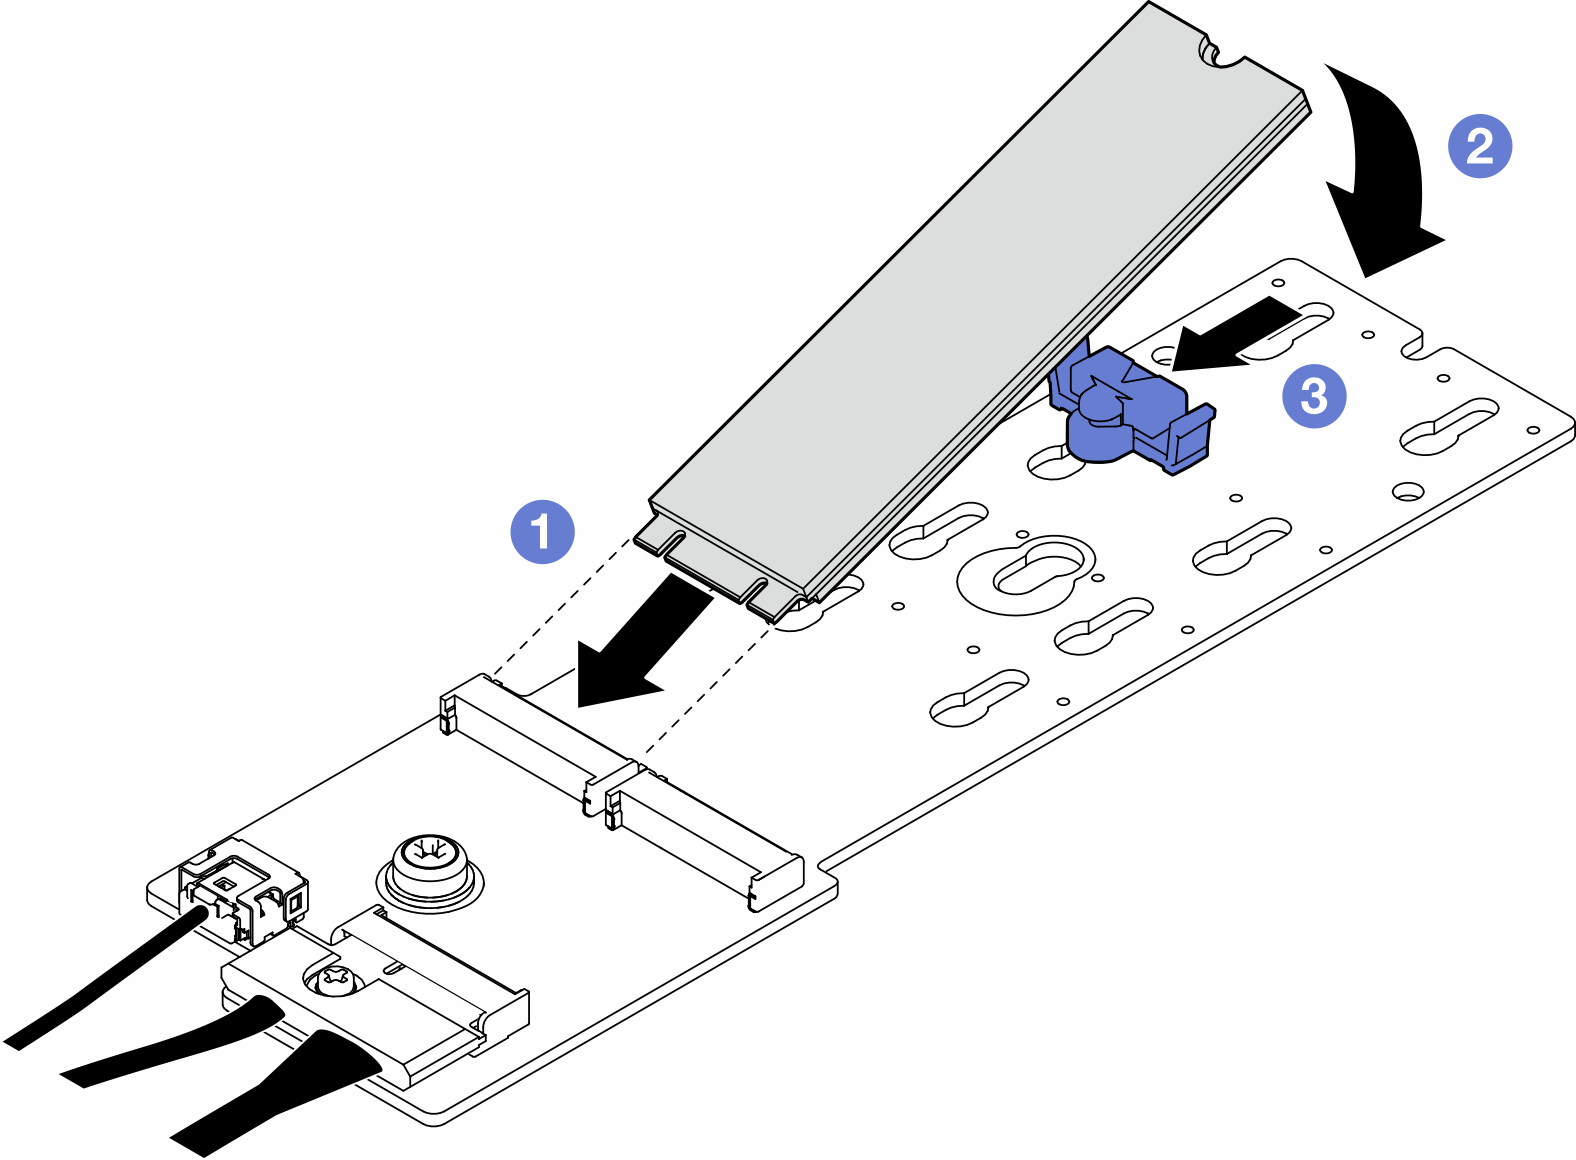
After this task is completed
Reinstall the server cover. See Install a server cover.
Complete the parts replacement. See Complete the parts replacement.
Demo video
Give documentation feedback