
Create an instance from a local backup

ThinkAgile CP allows you to easily create an instance from an existing local backup (created either automatically or manually). The state of the new instance is the same as the state of the original instance when the backup was created.

Complete the following steps to create a new instance from an existing local backup:

  1. Log in to the ThinkAgile CP Cloud Controller as an infrastructure admin or VDC manager user.
  2. Navigate to the details page for your application instance, and click the Backups tab.
  3. Click the action menu (Backups page action menu) for the local backup for which you want to create an instance. Then click New application instance.
    Figure 1. New application instance option on the backup Actions menu
    Screen capture showing New application instance being selected for a backup.
  4. If either a quick DR backup or an external backup exists for this instance, you are prompted to choose the backup to be used when creating a new instance. Choose the local backup and click Create.
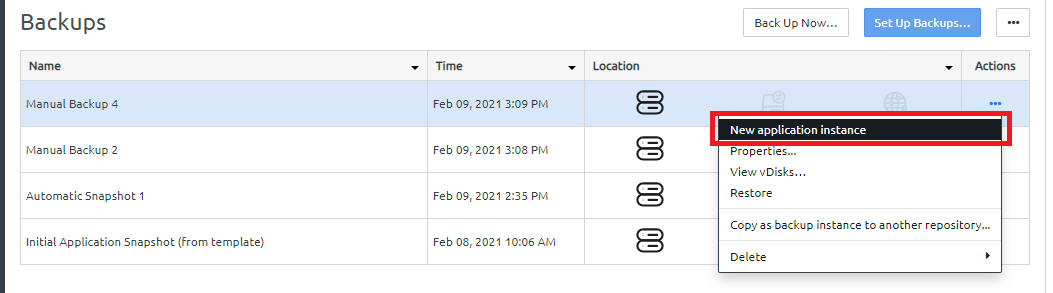
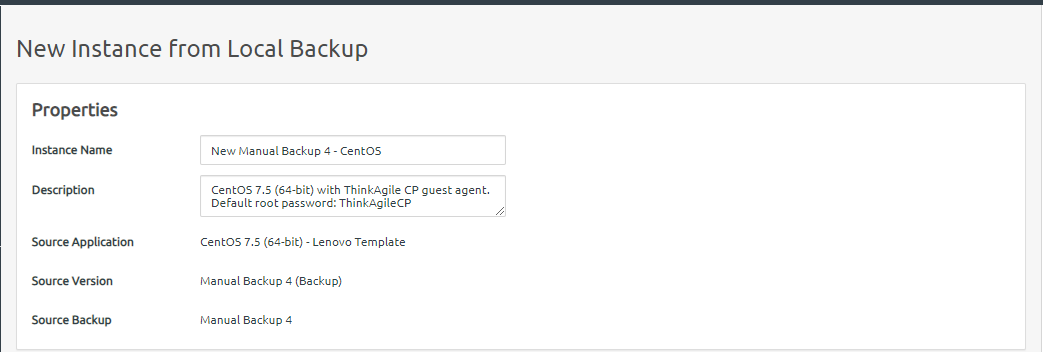
  5. The New Instance from Local Backup page is displayed. In the Properties section of the page, enter a name (required) and a description (optional) for the new application instance. The new name must be unique across all application instances in the associated virtual datacenter.
    Figure 2. New Instance from Local Backup dialog
    Screen capture showing Properties section of the new instance from local backup dialog.
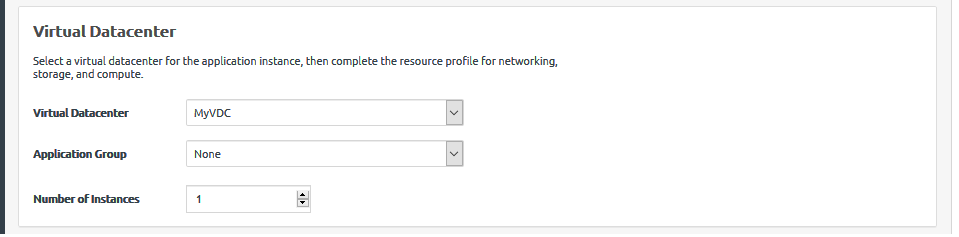
  6. In the Virtual Datacenter section, complete the following:
    Figure 3. New instance from local backup - Virtual Datacenter
    Screen capture showing the Virtual Datacenter section of the new instance from local backup dialog.
    1. Select the virtual datacenter where the instance should reside and get resources. The virtual datacenter selection determines the migration zone and storage pool resources available for the application instance.
    2. Optionally, select an application group (which are used to organize application instances in a virtual datacenter) and then specify the number of instantiations you want to include in this group.

      For more information about application groups, see the following topic:

      Managing application groups

    3. If you want to create more than one instance, enter the number of instances in the box provided (for example, if you were creating multiple Splunk indexers).
  7. Configure the settings for the compute and networking resources.
    Note

    The new instance will be created in the same storage pool where the local backup is located.

    Figure 4. New instance from local backup - Resources
    Screen capture showing the storage, compute, and networking section of the new instance from local backup dialog
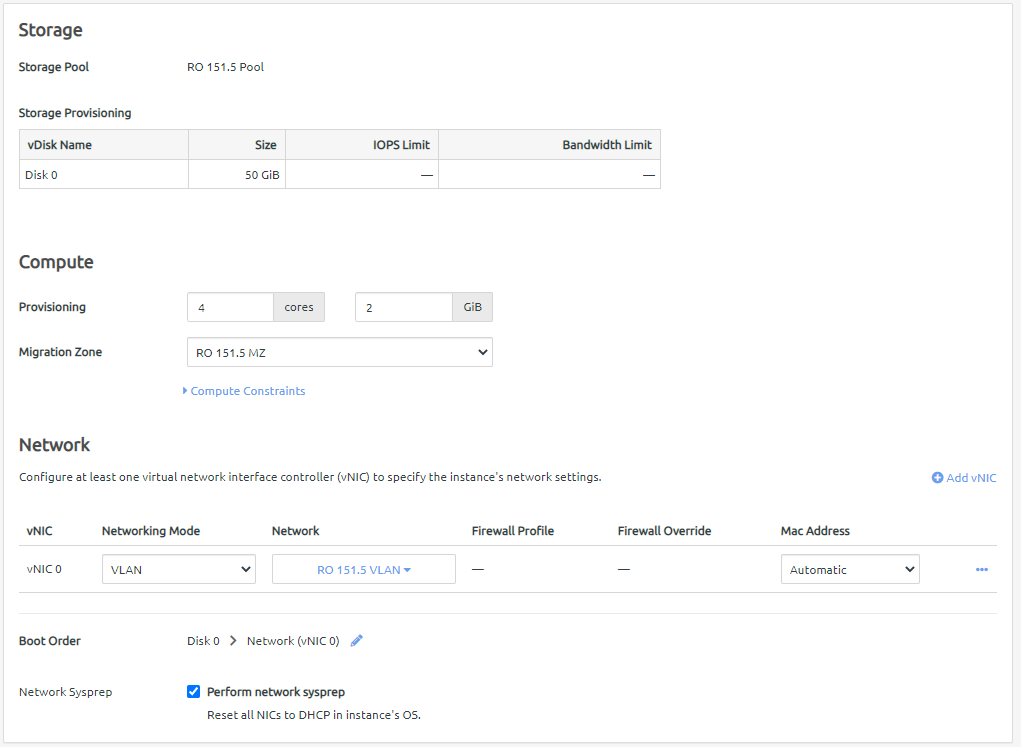
    1. Define the VM provisioning for this instance by specifying the CPU (number of cores) and memory (in GB).
    2. Select the migration zone from which the application instance will get its compute resources.
    3. If the instance requires a specific compute category or tag, expand Compute Constraints and add the category and tags.
    4. Select a networking mode for the instance and select a virtual network from the drop-down menu.
    5. Edit the Boot Order if needed. The application instance will attempt to boot in the sequence you define.
    6. Click Perform network sysprep if needed to reset all NICs to DHCP in the instance operating system.
  8. Configure the settings for the new instance.
    Figure 5. New instance from local backup - Instance Settings

    1. Choose the instance mode.
      Note

      The instance mode defaults to the source instance when creating an instance from a backup. For more information about these modes, see the following topic:

      Understand instance modes

      1. Compatibility Mode. All instances can boot in this mode.
      2. Enhanced Mode. Virtio drivers must be installed to boot in this mode.
    2. Click Insert guest tools in CD-ROM to insert guest tools.

      For more information about guest tools, see the following topic:

      Install guest agent tools

    3. Determine the time zone to be used for the instance.
      1. Default. The time zone is set to the time zone of the node on which the instance starts.
      2. Custom. You can set the time zone for the application instance by selecting the time zone area and location.
      Note

      Linux instances should use Default or the UTC time zone, rather than a custom local time zone.

    4. Make sure that Enable Automatic Recovery is selected to enable automatic recovery, which specifies to restart the instance where resources are available if the node fails.
    5. Make sure that Enable VT-x flag is selected to enable nested virtualization of KVM hypervisors in your ThinkAgile CP environment.
    6. Make sure that Start instance upon creation is selected to have the instance started when it is created.
  9. Click Create Instance.

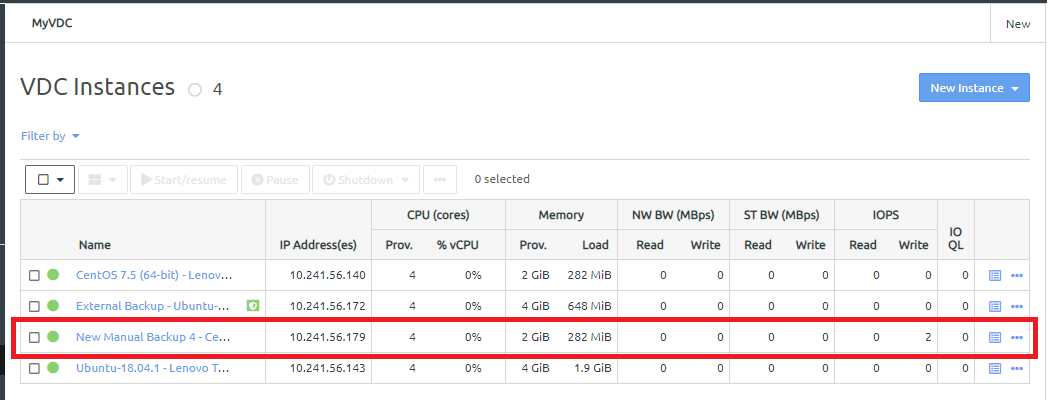
The new instance is listed on the VDC Instance page for your VDC:

Figure 6. VDC Instances page