Replacing a RAID adapter remote battery or flash power module in the server
Use this information to replace a RAID adapter remote battery or flash power module in the server.
When you replace any RAID adapter that comes with batteries, it is sometimes necessary to install the batteries in another location in the server to prevent the batteries from overheating.
To replace a RAID adapter remote battery in the server, complete the following steps:
- Read the safety information that begins in Safety and Installation guidelines.
- Turn off the server (see Turning off the server) and all attached peripheral devices. Disconnect all power cords; then, disconnect all external cables from the server.
- Carefully turn the server on its side so that it is lying flat, with the cover facing up.AttentionDo not allow the server to fall over.
- Unlock and remove the left-side cover (see Removing the left-side cover).
- Remove the air baffle (see Removing the air baffle).
- Remove the fan assembly (see Removing the fan assembly).
- Remove the existing RAID adaptor remote battery (see Removing a RAID adapter remote battery or flash power module from the server).
- See the documentation that comes with the adapter for any cabling instructions and information about jumper or switch settings. It might be easier for you to route cables before you install the adapter.
- Touch the static-protective package that contains the RAID adaptor remote battery; then, remove the RAID adaptor remote battery from the package.
- Install the ServeRAID adapter on the system board (see Installing an adapter).
- Connect one end of the battery cable to the RAID adapter battery connector.
- Route the remote battery cable as shown in the following illustration.
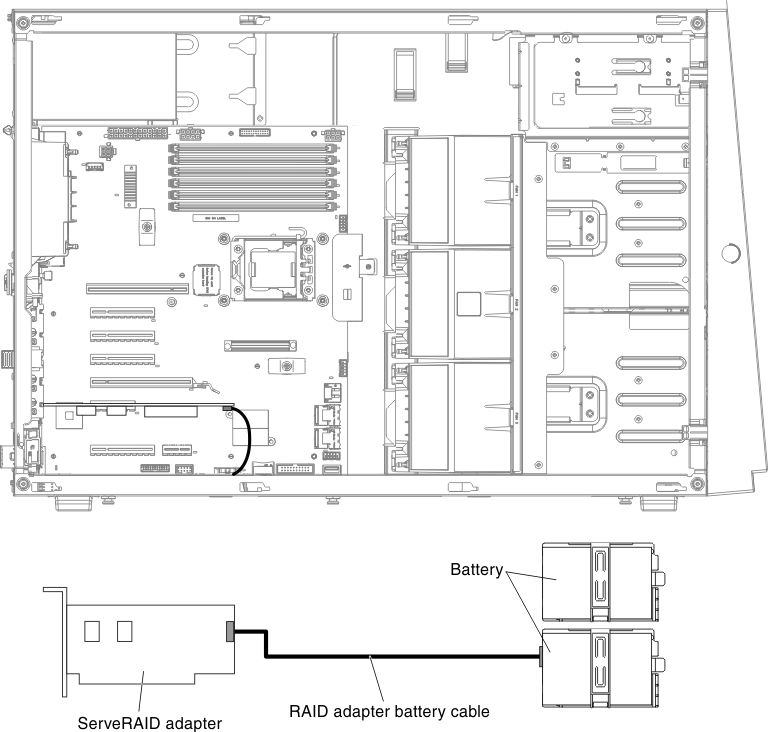 AttentionMake sure that the cable is not pinched and does not cover any connectors or obstruct any components on the system board.
 - Install the battery:
- Align the battery cable connector with the slot on the battery holder. Place the battery into the battery holder and make sure that the battery holder engages the battery securely.
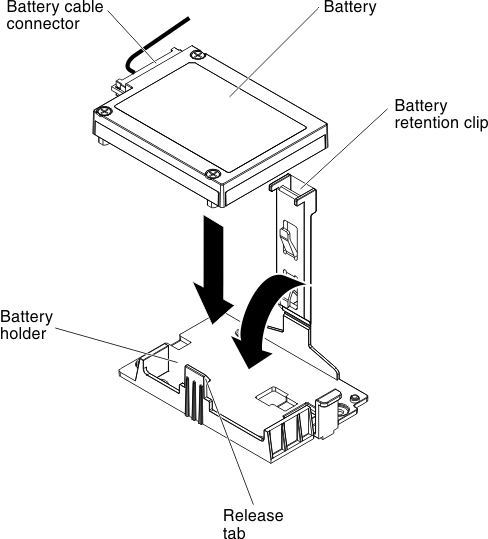 NoteThe positioning of the remote battery depends on the type of the remote batteries that you install.
 - Connect the other end of the battery cable to the battery cable connector on the battery.
- Lower and press down on the retention clip until it snaps in place to hold the battery firmly in place.
- Align the battery cable connector with the slot on the battery holder. Place the battery into the battery holder and make sure that the battery holder engages the battery securely.
If you have other devices to install or remove, do so now. Otherwise, go to Completing the installation.
Give documentation feedback