Replacing a PCI-X riser-card assembly
Use this information to replace a PCI-X riser-card assembly.
To replace a PCI-X riser-card assembly, complete the following steps:
- Read the safety information that begins in Safety and Installation guidelines.
- Turn off the server (see Turning off the server) and all attached peripheral devices. Disconnect all power cords; then, disconnect all external cables from the server.
- Carefully turn the server on its side so that it is lying flat, with the cover facing up.AttentionDo not allow the server to fall over.
- Unlock and remove the left-side cover (see Removing the left-side cover).
- Remove the air baffle (see Removing the air baffle).
- Remove the fan assembly (see Removing the fan assembly).
- Touch the static-protective package that contains the PCI-X riser-card assembly; then, remove the PCI-X riser-card assembly from the package.
- Locate PCI slot 1 which you will install the PCI-X riser-card assembly. Remove the exiting PCI-X riser-card assembly if necessary (see Removing a PCI-X riser-card assembly).
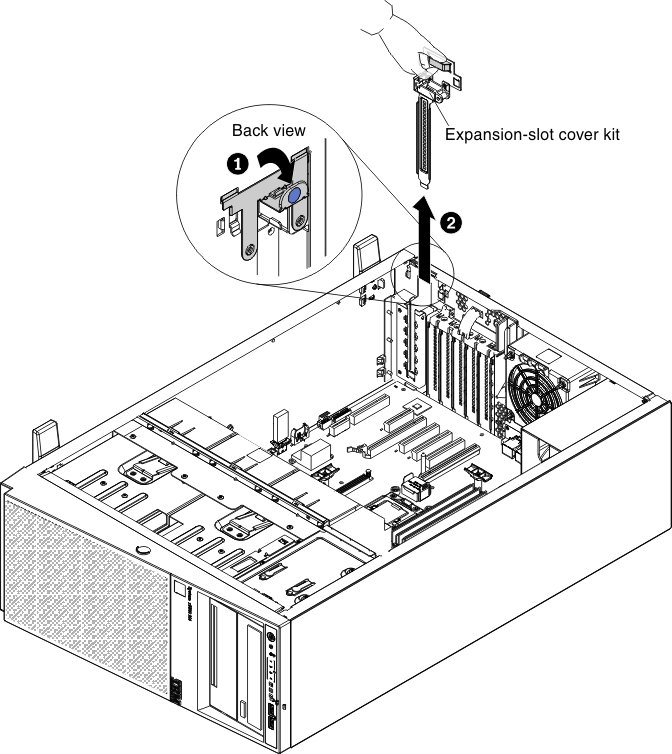
- Press the latch of the expansion-slot cover kit from the rear side of the server (see step 1 in the following illustration).
- Remove the expansion-slot cover kit located in PCI slot 1 and save it for future use. (see step 2 in the following illustration).
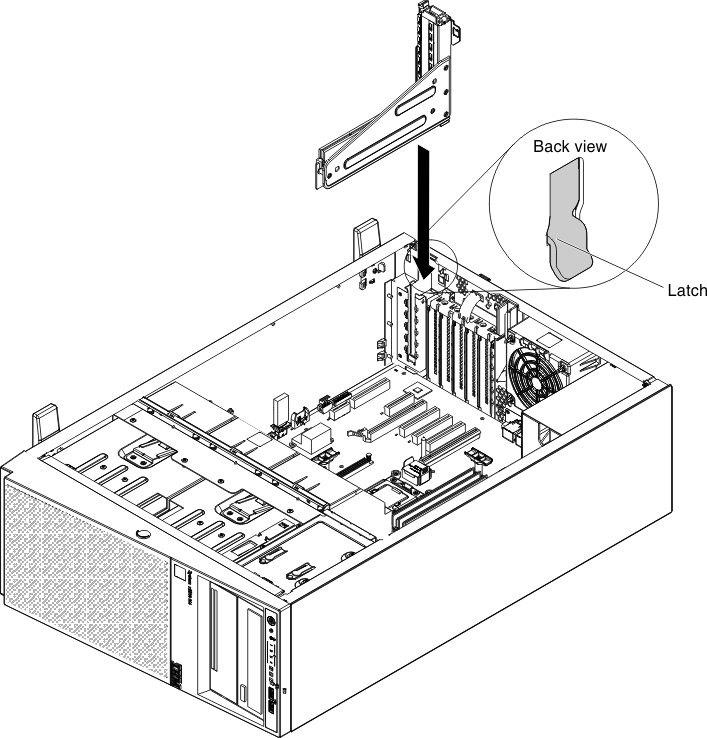
- Press PCI-X riser-card assembly firmly into PCI slot 1.AttentionIncomplete insertion might cause damage to the system board or the adapter.
- Make sure the latch on the rear side of the PCI-X riser-card assembly is secured to the rear of the server chassis.
If you have other devices to install or remove, do so now. Otherwise, go to Completing the installation.
Give documentation feedback