
Replacing the front USB connector and operator information panel assembly

Use this information to replace the front USB connector and operator information panel assembly.

To replace the front USB connector and operator information panel assembly, complete the following steps:

  1. Read the safety information that begins in Safety and Installation guidelines.
  2. Turn off the server (see Turning off the server) and all attached peripheral devices. Disconnect all power cords; then, disconnect all external cables as necessary to replace the device.
  3. Disconnect all external cables and power cords.
  4. Carefully turn the server on its side so that it is lying flat, with the cover facing up.
    Attention
    Do not allow the server to fall over.
  5. Remove the left-side cover (see Removing the left-side cover).
  6. Remove the air baffle (see Removing the air baffle).
  7. Remove the fan assembly (see Removing the fan assembly).
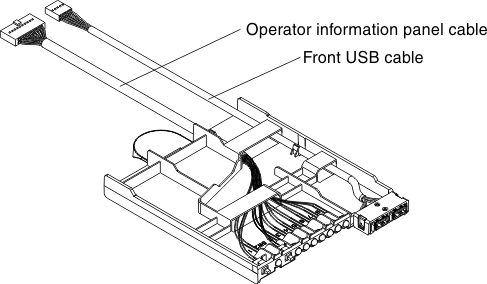
  8. The USB connector and operator information panel assembly shown as the illustration.


  9. Removing the USB connector and operator information panel assembly out from the server if there is one present. See Removing the front USB connector and operator information panel assembly.
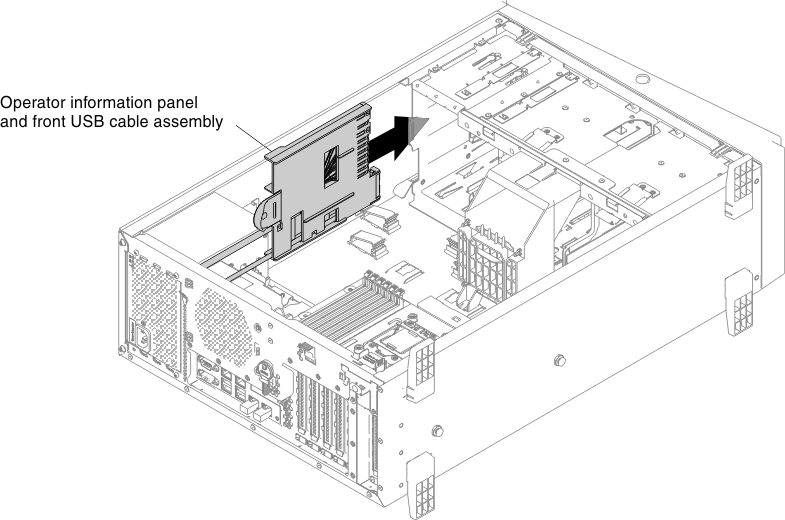
  10. Slide the USB connector and operator information assembly into the right position shown as the illustration.


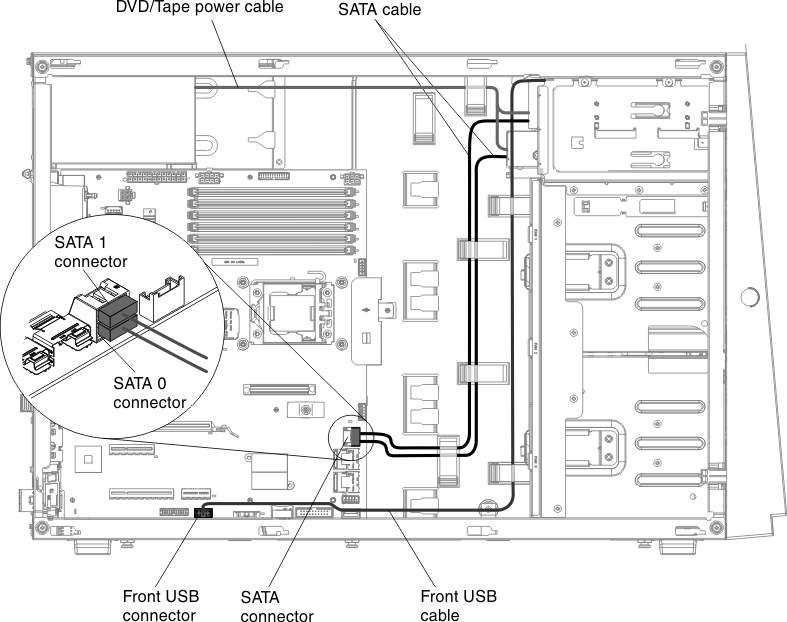
  11. Connect the USB cable to the front USB connector on the system board. Route the USB cable as shown in the following illustration.


  12. Secure the cable with any cable clips in the server.

If you have other devices to install or remove, do so now. Otherwise, go to Completing the installation.